Shadow of the Tomb Raider - Hidden City Challenges
Updated: 9/24/21(†)
Paititi is a HUGE level, and you must revisit it several times in order to access all areas and find every item. This guide focuses on revisiting the level after completing it. If you are playing through for the first time, you may want to follow the main walkthrough instead to avoid possible spoilers. For help finding documents, relics, murals, etc., check out the other Quick Collectibles Guides.
High Diving · Changing The Weather · Dropping Decimals · Keep Calm and Carrion· Dunkin' Bones · Speak of the Dead · Como Te Llama (Achievement/Trophy)
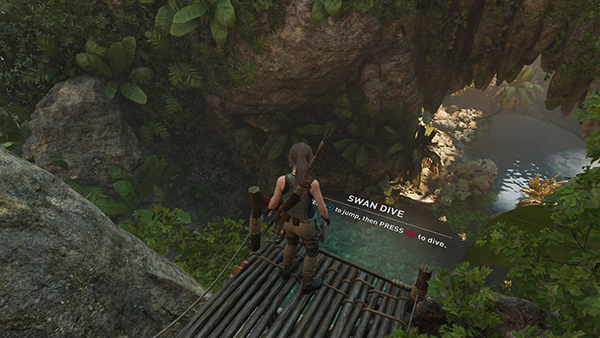
Challenge: High Diving
There are 6 diving platforms in and around the city. You only need to dive off 4 of them to complete this challenge. You may have already done the first high dive from the platform where you enter Paititi from the Trial of the Eagle (shown here). If not, no worries. There are several more opportunities. The platforms are marked with red dots on the annotated level map and mentioned in the relevant sections of the walkthrough. Follow this link for a roundup with screenshots, as well as tips for executing the swan dive maneuver.
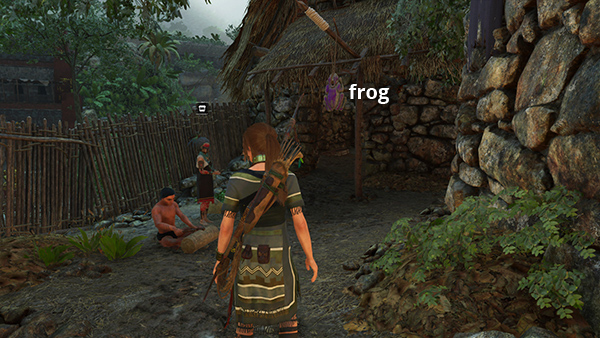
Challenge: Changing the Weather
There are 5 purple frog totems hanging around the southwest part of the city. Lara normally can't use weapons here, but you can target the rope coils holding up the totems to pull them down in order to complete this challenge. For the locations of all 5 frogs, look for the purple dots on the annotated map and check out this page with screenshots.
Challenge: Dropping Decimals
As you explore the west side of the city, keep an eye out for hanging quipus, similar to the ones you used to swing across the canyon when you first entered the Hidden City from the Trial of the Eagle area. Grapple-swing on these 3 quipus to pull them down for this challenge. To find any you missed, look for the orange dots on the map and follow these screenshots.

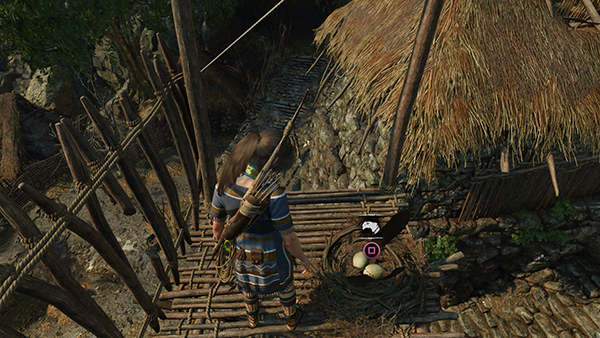
Challenge: Keep Calm and Carrion
As you explore the city, you'll come across a number of condor's nests. Loot 3 of them to complete this challenge. Condor nests look a lot like regular birds' nests, but they are marked with a special condor head icon. The feathers are also more rare and so more valuable. Even after completing the challenge, you can collect more feathers to sell and use for crafting. I have not included a separate page for this challenge, but several nests are noted in the list of collectibles in the lower Paititi walkthrough, and marked with blue dots on the annotated level map.
Challenge: Dunkin' Bones
This challenge involves knocking down 3 dangling skeletons in the gorge east of the city. They're marked with pink dots on the annotated level map. You'll pass all of them on the way to Unuratu's prison cell during the 'Rebellion Lives' story chapter. If you haven't completed that section yet, follow the main walkthrough. If you missed any of the skeletons and need to return later in the game, fast travel to the Temple of Kukulkan Base Camp, which appears after the Porvenir Oil Fields level. Then follow this guide for revisiting the gorge to dunk bones.
Challenge: Speak of the Dead
There are 5 crypts in and around the city. Explore 4 of them (i.e., locate and open the sarcophagi) to complete this challenge. You can explore the crypts in any order. This sequence follows the main walkthrough. All crypts are marked on the annotated level map. (Note that MANKO'S CRYPT, which you visit during the Side Mission, Hearts and Minds: Retrieve the Savior's Amulet, does not count toward this challenge.)
CHUKI, THE WEAVER
This crypt is located near the Abandoned Village northwest of the city. If you discovered the Abandoned Village Base Camp, you can fast travel there. Otherwise follow the main walkthrough to reach the village. Then follow the crypt guide to reach the crypt entrance, locate the sarcophagus, and get back out. (Click screenshot to enlarge.)
UTURUNKU, THE FERRYMAN
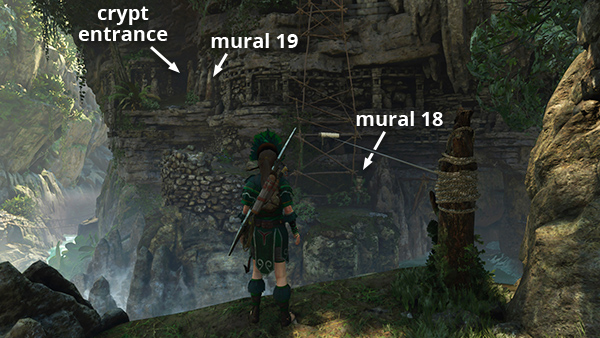
This crypt is on the far side of the gorge east of the city, near the prison where Unuratu is being held during the 'Rebellion Lives' chapter. If you haven't played this part of the story yet, follow the main walkthrough. To get back to this area later in the game, fast travel to the Temple of Kukulkan Base Camp, which appears once you've finished the Porvenir Oil Fields. Then follow this shortcut to the crypt. (Click screenshot to enlarge.)
QISPI, THE MERCHANT
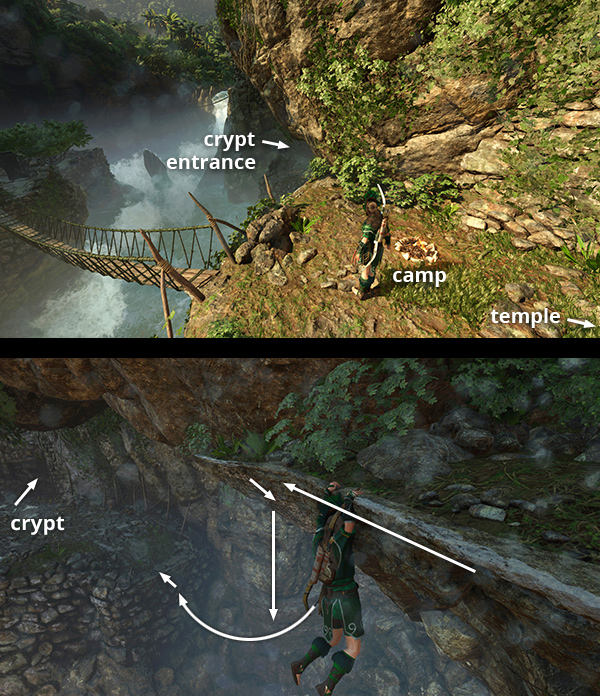
The entrance to this crypt is also in the gorge east of Paititi. Again, follow the main walkthrough to find it during the 'Rebellion Lives' chapter. Later in the game, fast travel to the Temple of Kukulkan Base Camp. Then climb down the cliff wall below the campsite to reach the crypt. The crypt walkthrough has details and additional screenshots. (Click screenshot to enlarge.)
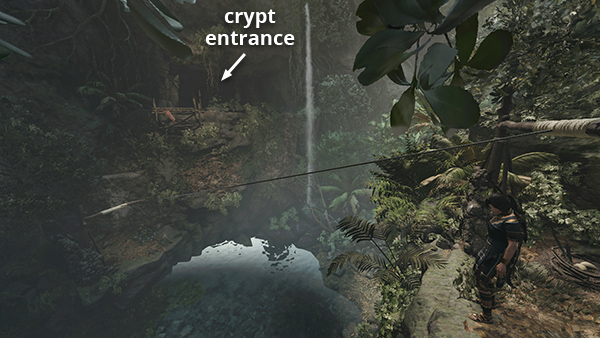
OLLANTA, THE POTTER
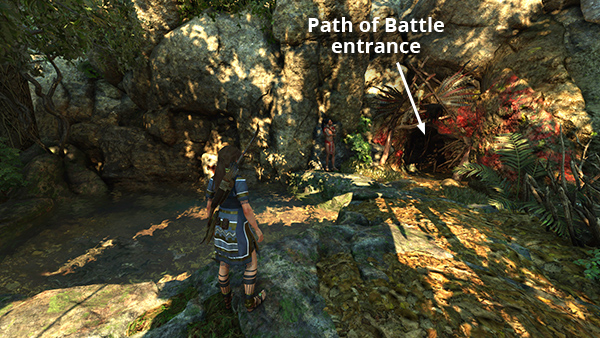
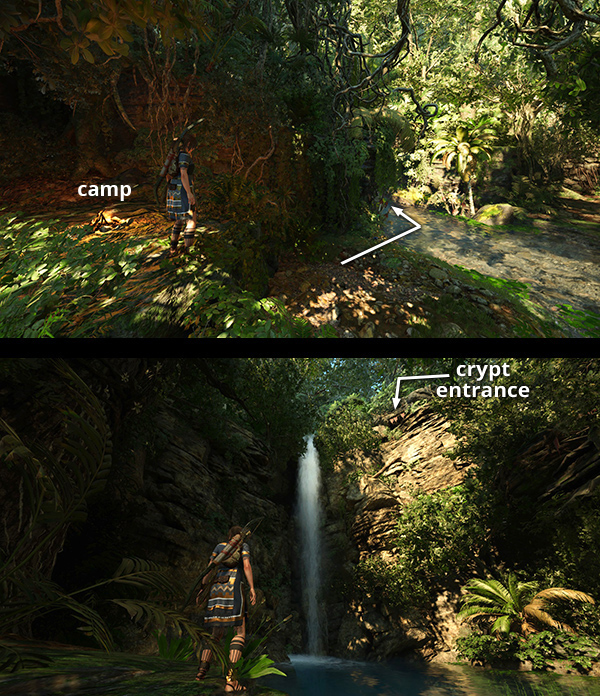
This crypt is located in the jungle west of the city. It's covered in the final Paititi section of the main walkthrough, along with the Path of Battle Challenge Tomb and Hearts and Minds/Champion's Bow Side Mission. If you explored that area but missed the crypt, either enter the Path of Battle area through the tunnel in the lower city (shown in the first screenshot and marked 'Path of Battle Entrance' on the annotated map) or fast travel to the Wild Jungle Base Camp. Follow the stream south to the crypt entrance, which is at the top of the waterfall. Check the crypt walkthrough for details and additional screenshots. (Click screenshot to enlarge.)
Achievement/Trophy: Como te Llama
This is not technically a challenge but an achievement or trophy. I mention it here because the mechanics are similar to the challenges, and it's fun to do. It involves petting 5 llamas . There are at least 8 candidates for petting in lower Paititi, indicated by yellow dots on the annotated map and mentioned at various points in the main walkthrough. You'll also encounter a few later on in the Mission of San Juan level.

Walkthroughs: First Visit · Second Visit (after Cenote)· Third Visit (after San Juan) | Collectibles Guides | Main SOTTR Page
†UPDATE HISTORY: 9/8/21 - Page first posted online.
9/24/21 - Added note about additional llamas in the Mission of San Juan.
WAS THIS WALKTHROUGH HELPFUL? If not, I apologize and invite you to contact me with any questions. If you need help right away, I recommend the r/TombRaider subreddit. Other fan-run forums are listed at tombraiders.net/stella/community.html. If this site was useful, please consider supporting it financially or in other ways. For details, visit tombraiders.net/stella/support.html. As always, I welcome your corrections/suggestions. Thank you!
Copyright © Stellalune (). All rights reserved. Feel free to copy or print this walkthrough for personal use. By all means, share it with friends, but please include this credit line so people can send me their feedback. No part of this walkthrough may be reproduced on another site without permission. Follow this link for details about this site's advertising and privacy policy.
Stella's Tomb Raider Site: tombraiders.net.