The Hidden City – Revisiting the Gorge for the
Dunkin' Bones Challenge
IMPORTANT: This guide shows how to complete the challenge later in the game. If you're still in the 'Rebellion Lives' chapter of the main story, follow the main walkthrough instead.
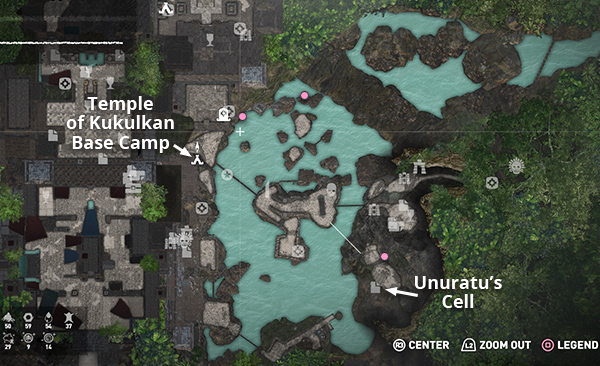
To revisit this area later, fast travel to the Temple of Kukulkan Base Camp on the east side of Paititi. This camp is not available until you've completed the Porvenir Oil Fields. The map detail above shows the locations of the base camp and Unuratu's cell. The 3 skeletons you must knock down for the challenge are indicated by pink dots, just as they are on the full annotated level map.
If you found the first two skeletons (on the north side of the gorge) and only need the third skeleton (on the east side, near Unuratu's prison cell), you can skip most of the climbing and instead pick up the walkthrough below.
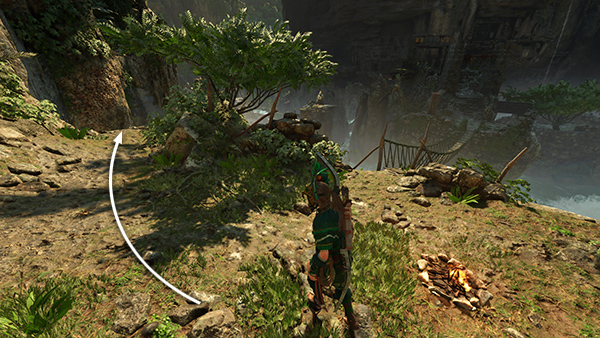
If you still need all 3 skeletons, or either of the skeletons on the north side, begin by moving to the north end of the ledge (i.e., left when facing the rope bridge).
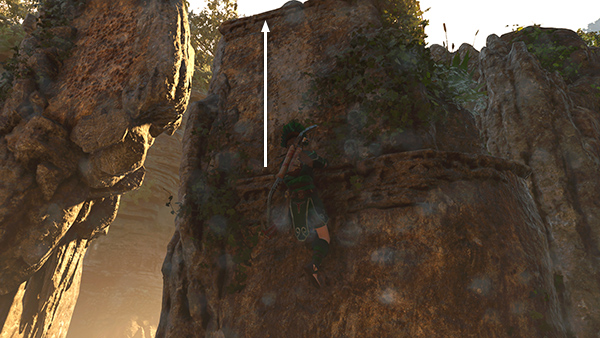
The entrance to the ANCIENT AQUEDUCT CHALLENGE TOMB is below. (See the separate tomb walkthrough for details.) To proceed with the challenge, jump over to the climbable cliff wall. Climb up and around to the right...
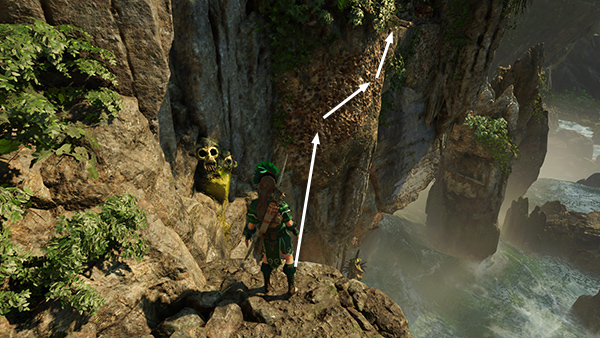
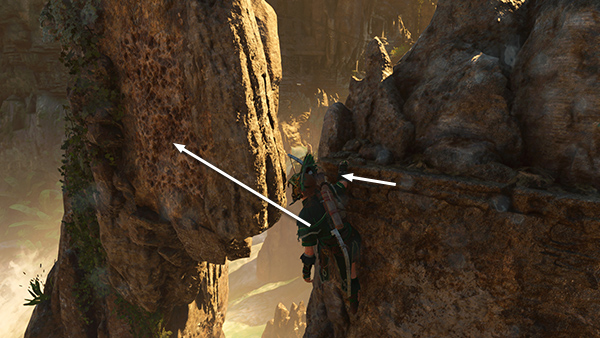
...until you reach a narrow handhold. Climb to the right until Lara is hanging in front of another climbable area. Axe-climb down as far as you can.
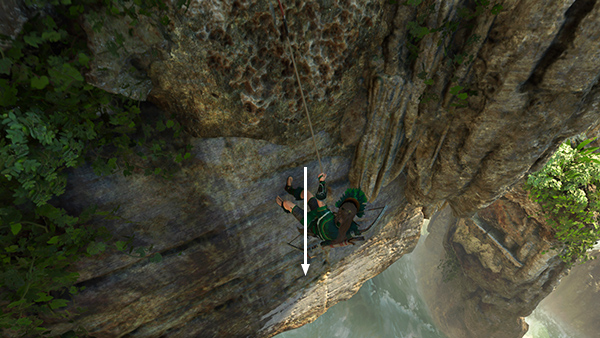
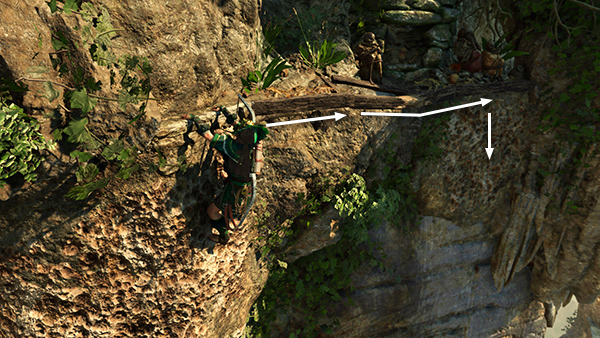
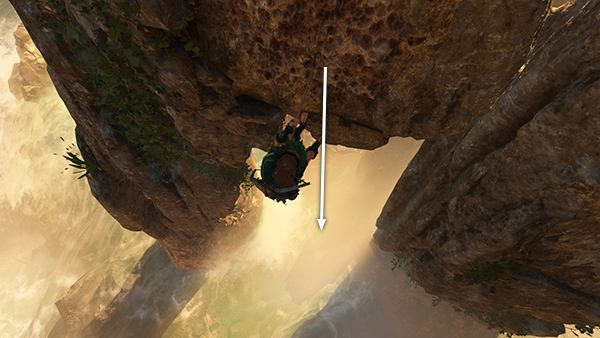
Then rappel down to the wall-running area below.

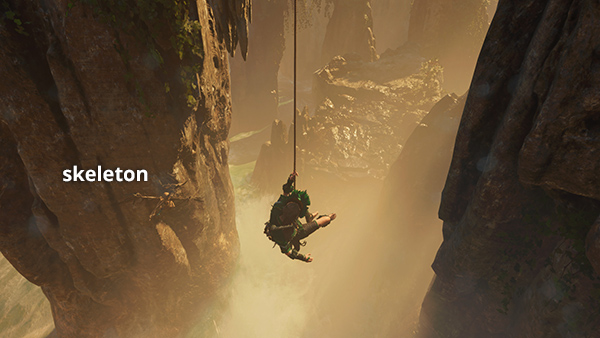
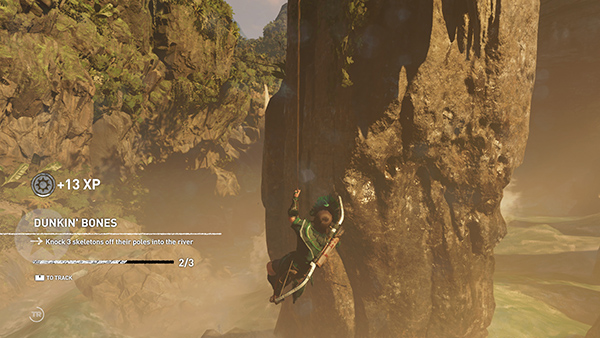
Position Lara just above the white painted area on the wall, so she's roughly level with the skeleton (1/3) hanging from the cliffside to your left. Wall run back and forth to knock down the skeleton.
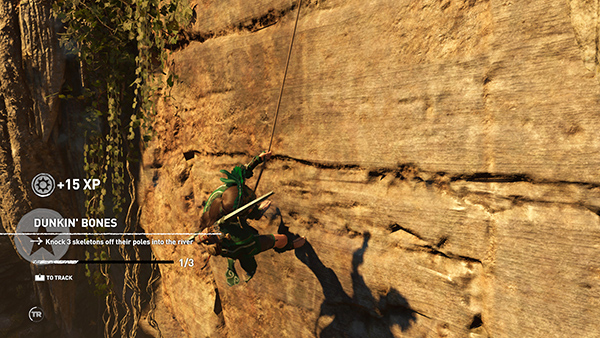
If this is the first skeleton you've knocked down, it will initiate the Dunkin' Bones Challenge.
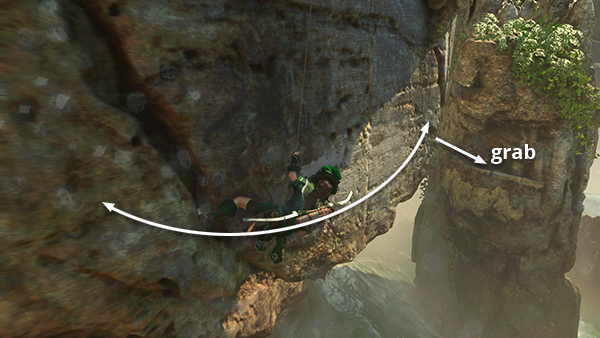
Now rappel down a little farther, wall run back and forth to build momentum, and jump to grab the ledge on the rock formation to the right. (There was a climbing wall here earlier, but Lara destroyed it as she passed.)
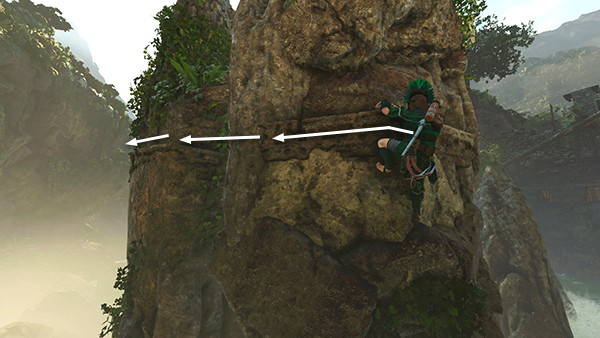
Climb around to the left, jump across the gap between the rocks, and grab the ledge beyond. Then continue climbing around to the left.
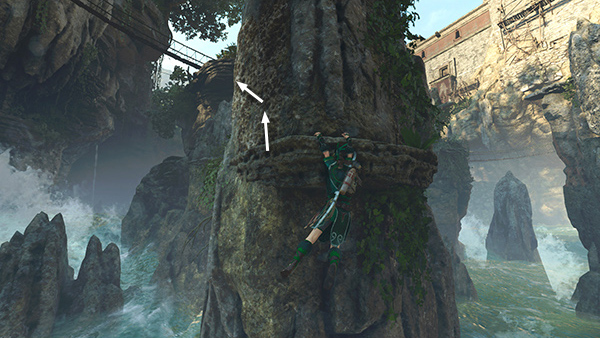
Scramble up the wall to grab the ledge at the top of the column.
Climb then jump to the left and latch onto the climbable surface on the next column.
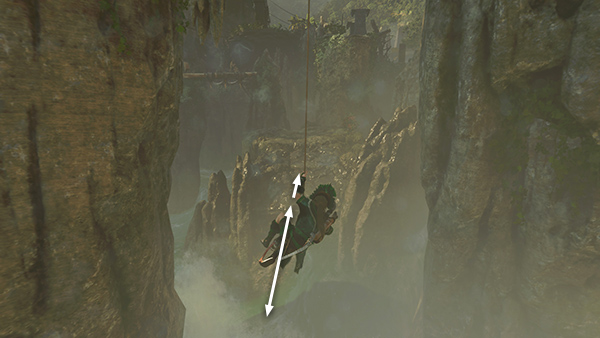
Rappel down into the gap between the two columns, so Lara is dangling above the rushing river.
The next skeleton (2/3) for the challenge is hanging from the column on the left.
 Use the mouse or right stick to move the camera so it's pointing at the skeleton, rather than the path ahead.
Then swing back and forth to knock the skeleton down.
Move the camera back around so it's pointing between the two columns. Swing back and forth to build momentum, then jump onto the rocky island ahead.
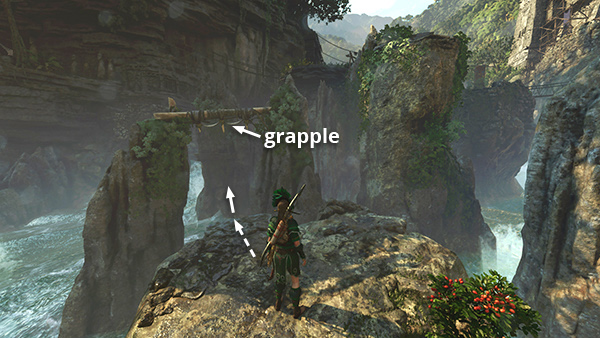
There used to be climbable areas on the tall rock pillar ahead, but Lara destroyed them on her way to Unuratu's cell earlier. Instead, there's a new grapple point off to the left. Take a running jump off the edge, grapple-swing across the water...
...and grab the ledge on the rock formation ahead. (Lara should be able to swing, jump, and grab the ledge, but if you're having trouble, try grappling the ledge instead.)
Climb up and around to the left as far as possible.
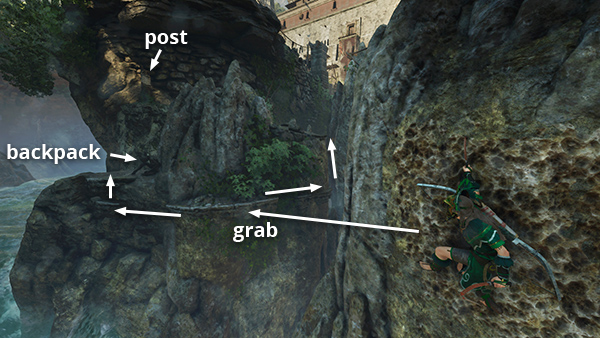
Then jump across the water to grab a ledge on the side of the next rocky island. Either climb around to the right and upward to reach the ledge with the rope-wrapped post, or climb around to the left and upward to the ledge with the corpse and explorer backpack (5/6). (Maybe you found it earlier.) From there, you can scramble up onto the ledge with the post.
Skip the next 5 screenshots, which show how to reach the rope-wrapped post directly from the base camp, and pick up the walkthrough on the next page.
If you only need the third skeleton for the challenge, cross the rope bridge connecting the Temple of Kukulkan Base Camp to the island in the middle of the gorge.

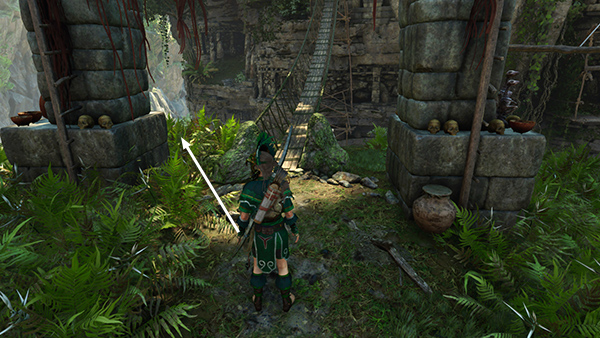
Climb the stone steps near monolith #7.
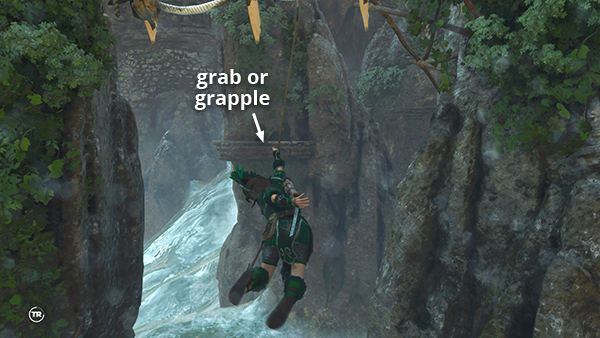
Then, instead of crossing the second bridge, move into the bushes just to the left of where the bridge is anchored
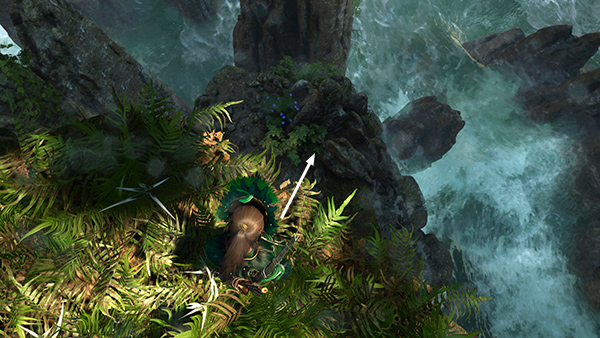
Look over the edge to spot a ledge with blue flowers growing on it. Carefully jump down onto that ledge.
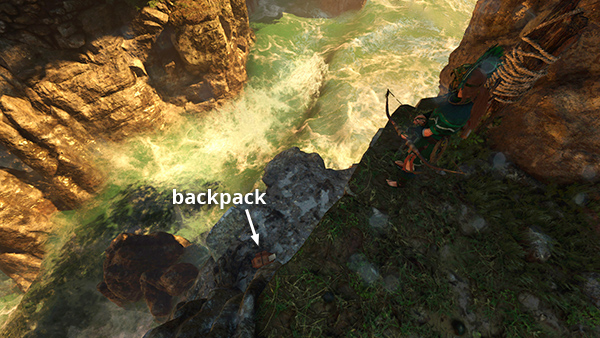
If you have not yet collected the explorer backpack (5/6) on the ledge below the rope-wrapped post, drop down and examine it now. Then climb back up to the post.
[Next | Hidden City Challenges | Quick Collectibles Guide]
Copyright © - Stellalune ( ). All rights reserved. Feel free to copy or print this walkthrough for personal use. By all means, share it with friends, but please include this credit line so people can send me their feedback. No part of this walkthrough may be reproduced on another site without permission. Follow this link for details about this site's advertising and privacy policy.