The Hidden City – Revisiting the Gorge for the
Dunkin' Bones Challenge (part 2)

After making your way to the ledge with the rope-wrapped post in the middle of the gorge (as described in part 1), use a rope arrow to run a line from the post to the ledge to the east. Climb across and drop down on the ledge near the mural (18/23).
NOTE: This guide covers the Dunkin' Bones Challenge specifically, but if you missed any other collectibles in or around the Crypt of Uturunku, the Ferryman, you may want to refer to the other Quick Collectibles Guides to retrieve them now. The crypt entrance is above on the left. Unuratu's prison cell is above on the right.
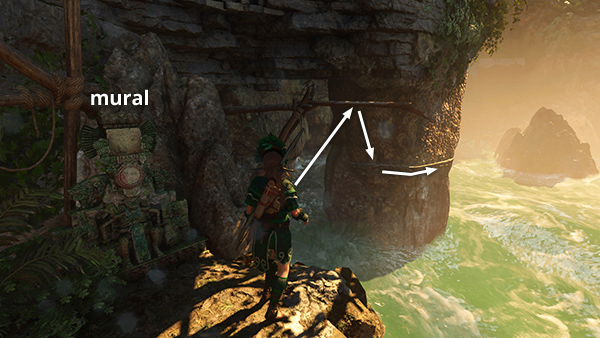
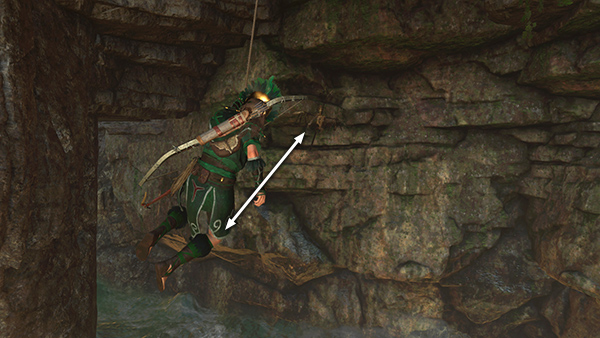
From the ledge with mural #18, jump and grab the horizontal bar off to the right; swing and jump to grab the narrow handhold running around the broad stone column. Climb around to the right.
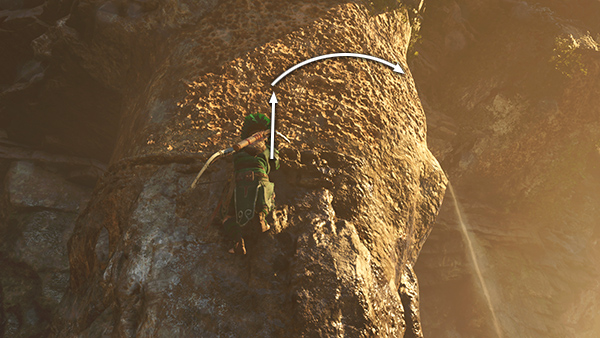
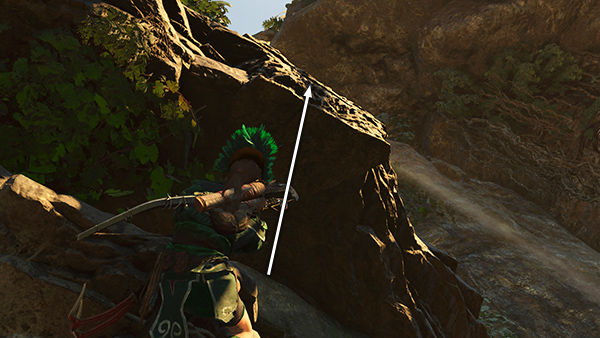
Jump up and latch onto the craggy wall. Then continue climbing upward and around to the right.
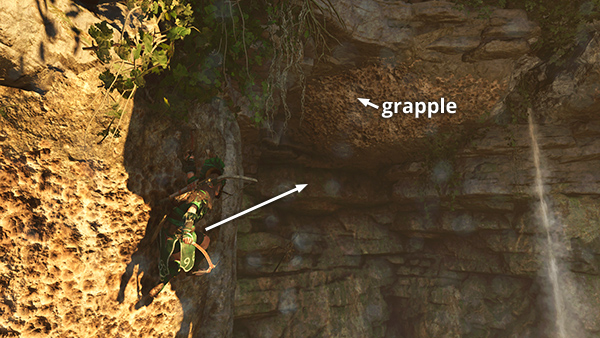
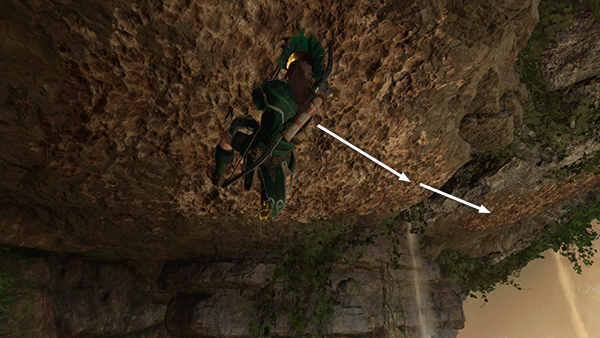
When you run out of climbable wall, jump forward/right and grapple the rough stone overhang.
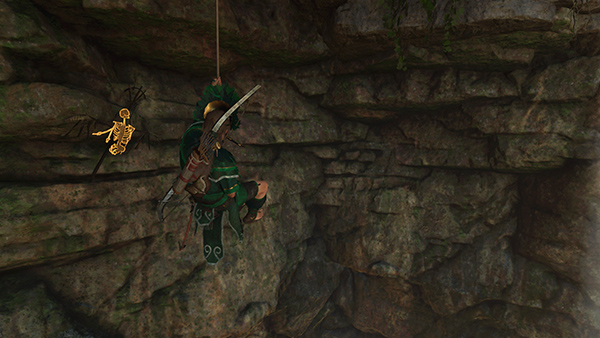
Rappel down a bit and look to the left to spot the skeleton (3/3). If you've unlocked the Seeker skill Owl's Wisdom, challenge items like this one will glow when you activate Survival Instinct.
Point the camera toward the skeleton. Then swing back and forth to knock it off the wall. This one is a little tricky. You may need to adjust Lara's angle and the length of the cable slightly in order to hit the skeleton. If you've already knocked down the other two, this will complete the Dunkin' Bones Challenge.
Now climb all the way up the cable and latch onto the ceiling. Climb to the right as far as you can, then jump past the gap in the rocks and latch onto the next section of climbable ceiling.
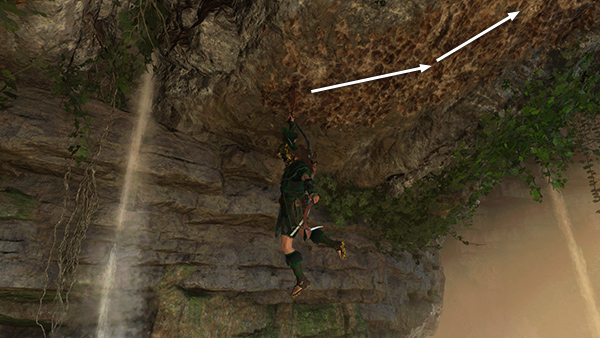
When Lara regains her foothold, continue climbing to the right and upward.
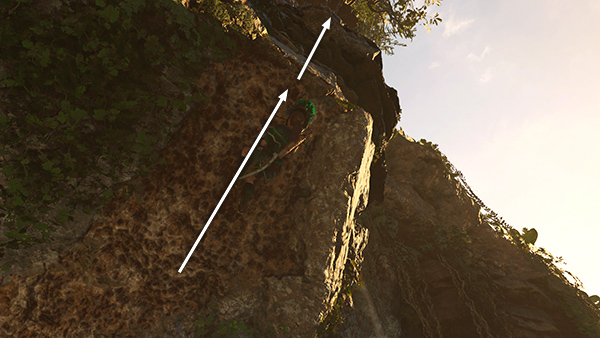
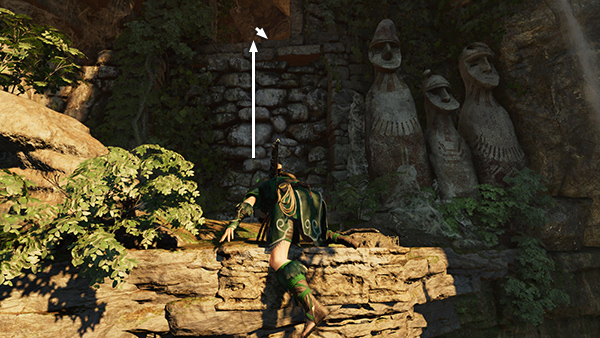
When you reach the top of the climbable wall, scramble up to grab the ledge above.

Traverse around the corner to the right.
Then jump straight up again to grab the overhanging ledge.
Pull up onto the ledge. Then, finally, climb into the high window of Unuratu's prison cell.
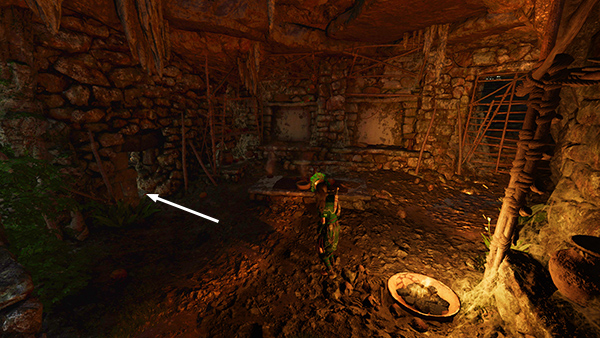
Exit the cell through the narrow opening in the wall to the left.
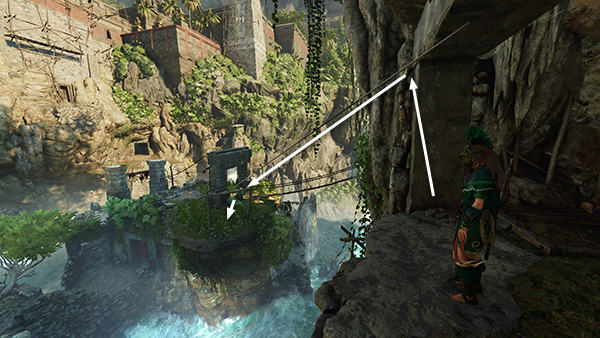
Slide down the zip line onto the island in the middle of the gorge.

Then head down the stairs and across the western rope bridge to get back to the Temple of Kukulkan Base Camp. From there, you can fast travel or re-enter the upper city through the temple.
NOTE: If you missed any collectibles in or around the Crypt of Qispi, the Merchant, or the Ancient Aqueduct Challenge Tomb, you may want to refer to the other Quick Collectibles Guides to retrieve them now. The crypt entrance is below and south of the base camp. The tomb entrance is below to the north.
[Previous | Hidden City Challenges | Quick Collectibles Guide]
Copyright © - Stellalune ( ). All rights reserved. Feel free to copy or print this walkthrough for personal use. By all means, share it with friends, but please include this credit line so people can send me their feedback. No part of this walkthrough may be reproduced on another site without permission. Follow this link for details about this site's advertising and privacy policy.