Shadow of the Tomb Raider - Mission of San Juan Treasure Chest and Relics
Updated: 10/31/21(†)
This guide focuses on revisiting the level after completing it. If you are playing through for the first time, you may want to follow the main walkthrough instead to avoid possible spoilers. Collectibles are numbered in the order they appear in the main walkthrough and on the annotated level map.
Follow this link for a List of All Artifacts by Story/Dialect.
Treasure Chest · Relics · Documents · Murals · Monolith · Survival Caches · Explorer Backpacks · Archivist Maps · Artifacts & Photos · Challenge
TREASURE CHEST
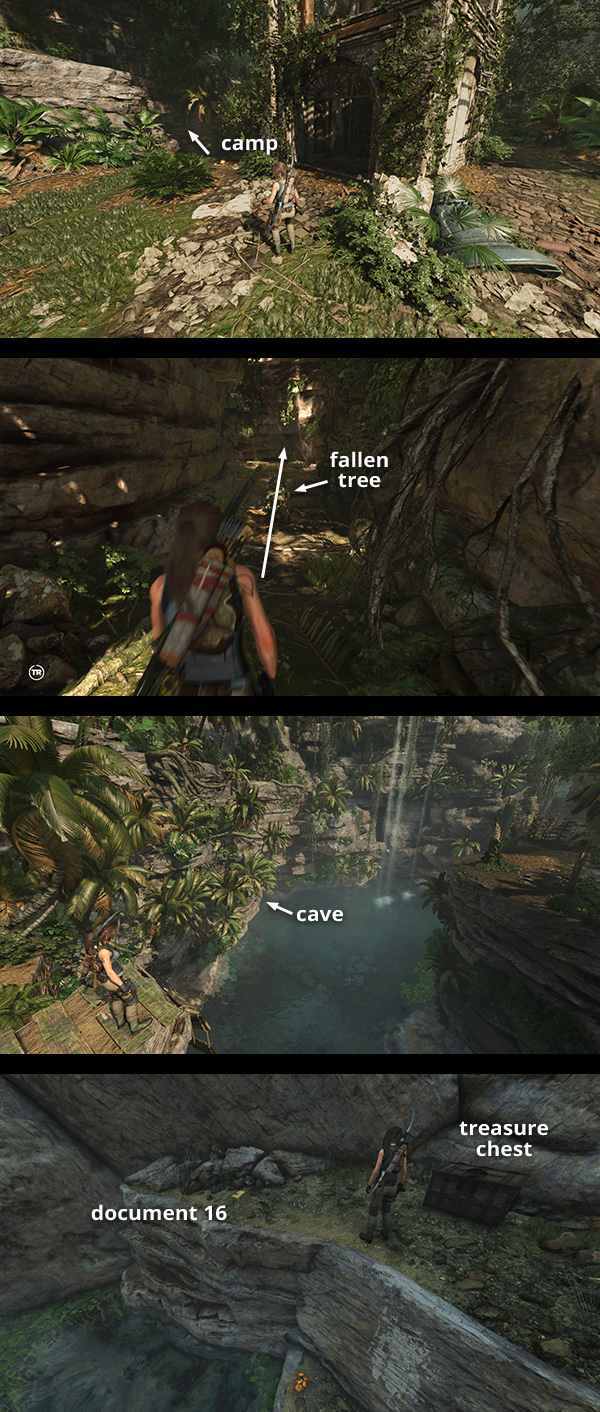
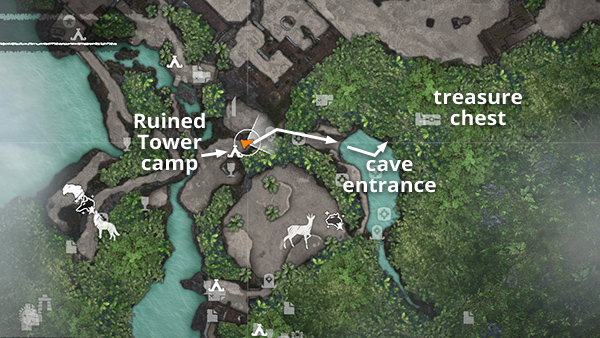
All treasure chests require the lock pick to open. Once you have acquired this tool, fast travel to the Ruined Tower Base Camp. You're headed for the large pool to the east, shown in this map detail. You can approach from either direction, but we'll head northeast, past the campfire, through the cave, and across the fallen log, to emerge on a ledge overlooking the pool. Dive in and swim to the northeast side. There's a partially submerged cave opening here. Swim through and climb up to the ledge with the treasure chest and document #16. The chest contains an Artifact, a Warrior Pendant from the Cult of Kukulkan Story.
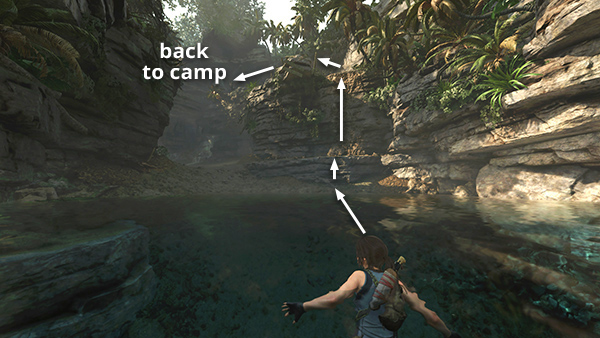
To get back to camp, swim across to the northwest side of the pool, scale the climbable wall, and return through the cave and across the fallen log the way you came. You can then use the base camp to fast travel out to wherever you left off. (Click images for more and larger screenshots.)
RELIC 1 - Slave Collar (Conquerors)
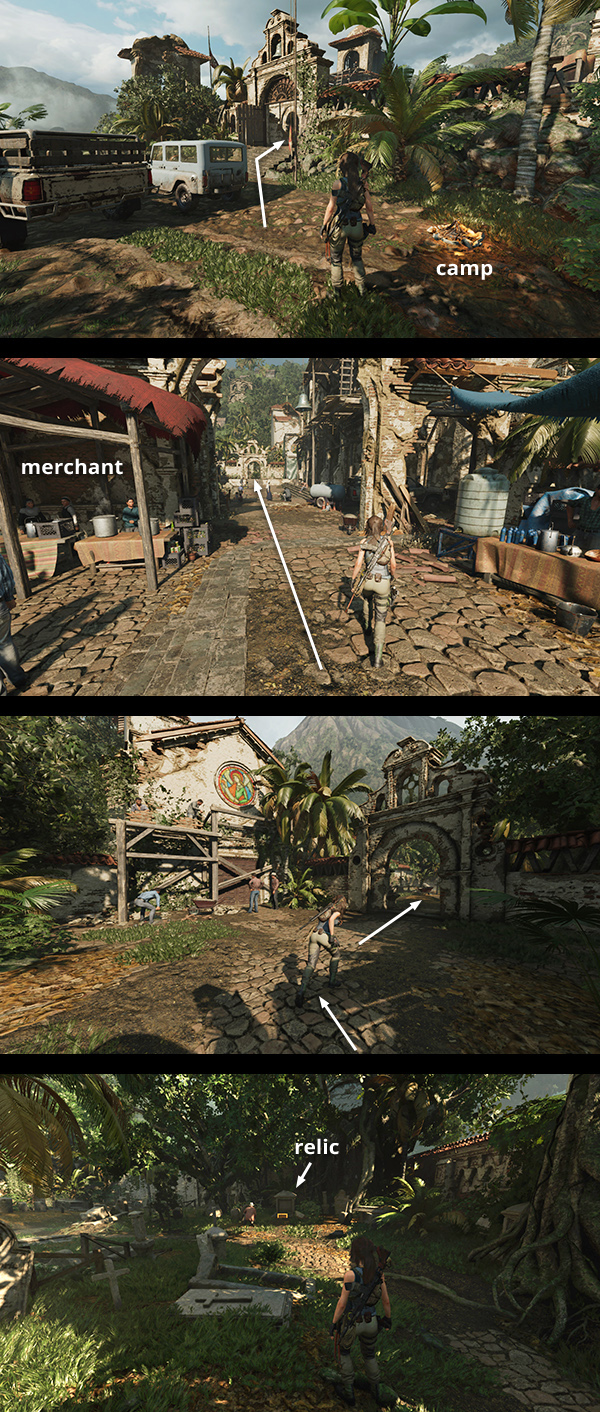
This relic is in the graveyard northeast of the main courtyard. If you missed it while playing through the story, fast travel to the Mission Gate Base Camp. Go up the steps into the courtyard and proceed northeast to the white archway. Pass under this archway, turn right (southeast), and continue through the next archway into the cemetery. The box with the relic is sitting near a gravestone in the far right (south) corner. (Click image for more and larger screenshots. The Star Crossed Side Mission guide includes additional details.)
RELIC 2 - Faded Writing (The Missionary)
This relic is on the way to the wolf den and crypt entrance south of the mission. Start at the Mission Gate Base Camp and follow the road across the bridge to the southeast. Just beyond the carved stone heads and metal cross, turn right (south). Head down the slope and you'll find the relic on an altar on the left, just before the gap in the cliffside. (Click image for more and larger screenshots.)
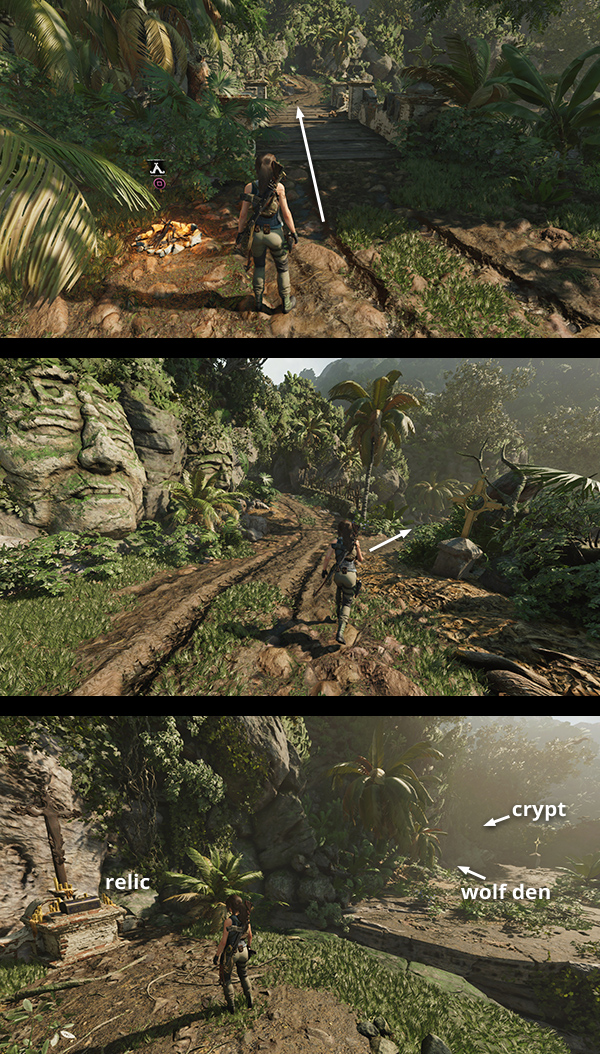
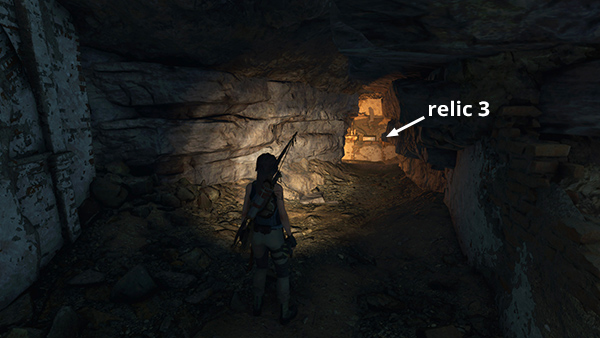
RELIC 3 - Wheel-Lock Pistol (Angel de la Cruz)
This relic is in a small side passage inside the Crypt of Huascar, the Syncretist. The crypt can only be accessed during or after completing the Star-Crossed Side Mission. If you completed the mission but missed the relic, start at the Mission Gate Base Camp and follow the directions for relic #2, above, to get back to the crypt entrance. If you just need the relic and/or document #11, take this shortcut. If you're missing several items in this area, I recommend following the walkthrough instead. (Click screenshot to enlarge.)
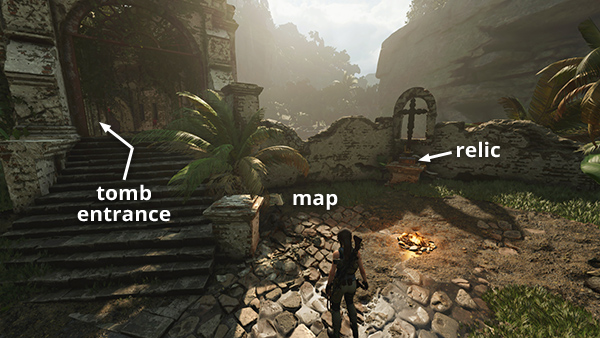
RELIC 4 - Decorated Crucifix (The Missionary)
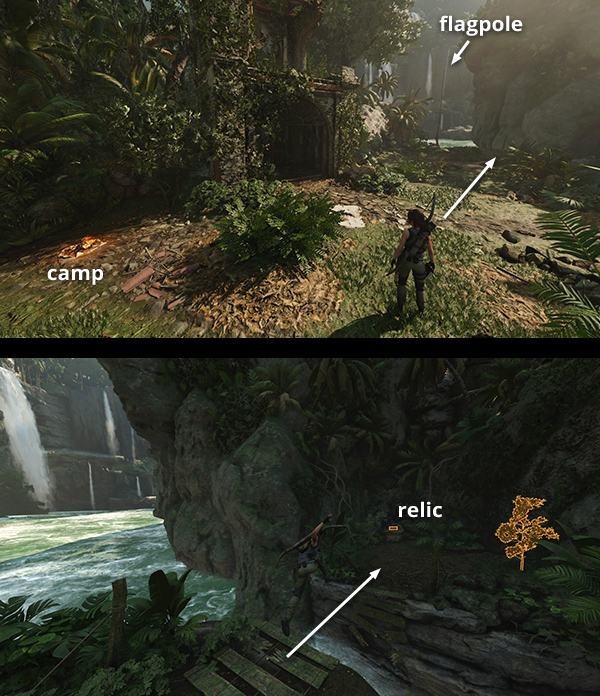
This relic is near the crumbling bell tower south of the mission. If you missed it, fast travel to the Ruined Tower Base Camp. Then head southwest toward the river. Near the flagpole is a broken wooden bridge. Jump across the water here and you'll find the relic on the other side. (Click image for more and larger screenshots.)
RELIC 5 - Old Tome (The Missionary)
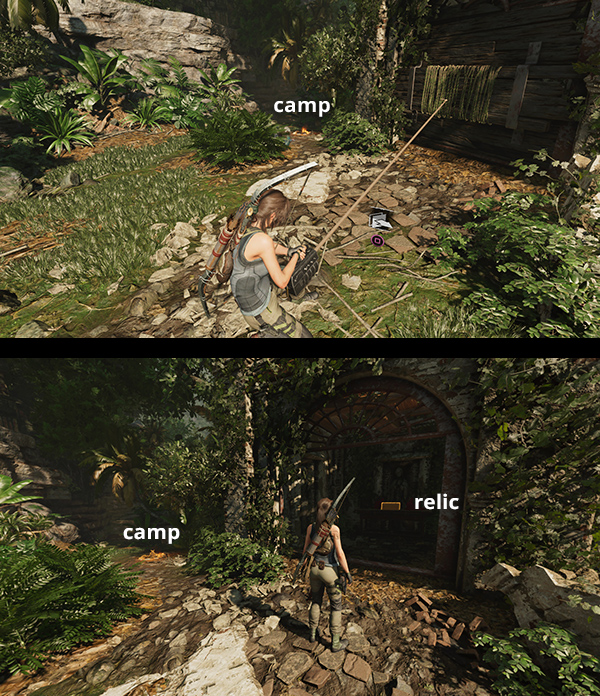
This relic is inside the crumbling bell tower south of the mission. You'll need the rope ascender to get it. Fast travel to the Ruined Tower Base Camp. Face the front of the tower and fire a rope arrow into the wire-wrapped barrier. Then hold Interact to use the rope ascender to pull the door out of its frame. The relic is inside. (Click image for more and larger screenshots.)
RELIC 6 - Mission San Juan (Miracle Mission)
This relic is sitting on a small altar next to the Deserted Cloister Base Camp. That's the camp near the entrance to the Tree of Life Challenge Tomb. If you haven't discovered this camp yet, start at the Ruined Tower Base Camp and follow the main walkthrough. You'll also find archivist map #4 in this area. (Click screenshot to enlarge.)
RELICS 7 and 8 - Primitive Dolls (Handmade Dolls)
The next two relics, identical handmade dolls, are found in the Tree of Life Challenge Tomb. If you haven't explored the tomb yet, fast travel to the Deserted Cloister or Ruined Tower Base Camp. Then follow the main walkthrough.
If you completed this area but missed either relic (or any other collectibles in the tomb), fast travel to the Mountain Catacombs Base Camp. Then retrace the route you took on your first pass through the caverns in order to find the items, reach the tomb stele, then get back to the base camp. You won't need to solve the puzzles again, but there will be a few stray Yaaxil trying to impede your progress. This guide with screenshots details the route.
Relic #7 is in the area with the two circular platforms. Relic #8 is in the area with the red stone ledge and the curving path leading up to the stele. (Click screenshots to enlarge.)
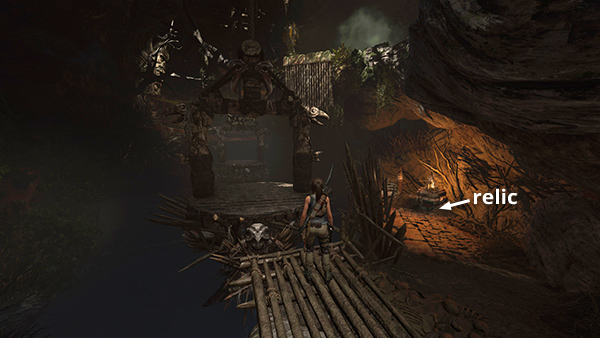
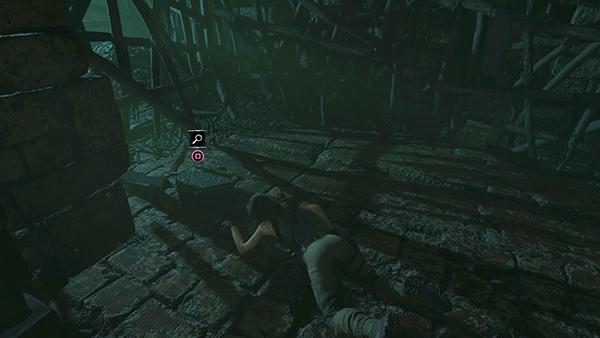
RELIC 9 - Primitive Doll (Handmade Dolls)
This relic is in the Thirsty Gods Challenge Tomb. If you haven't explored the tomb yet, fast travel to the Deserted Cloister or Ruined Tower Base Camp. Then follow the main walkthrough.
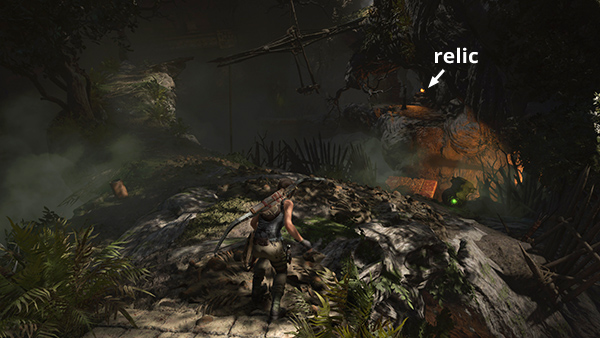
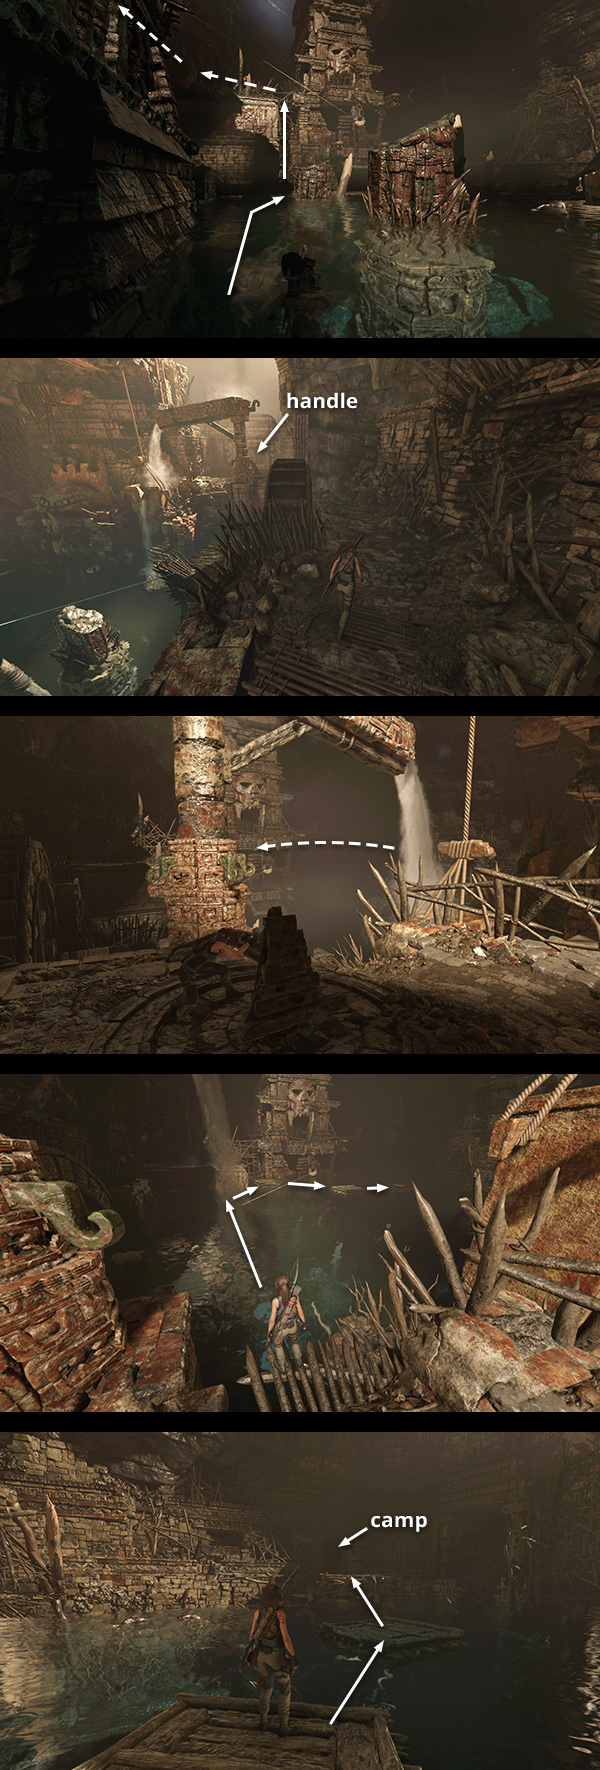
If you raided the tomb but missed the relic, fast travel to the Flood Basin Base Camp. Go through the doorway to the west at ground level (or, if you didn't pull down the wooden barrier earlier, climb the ladder) to reach the water wheel cavern. Then hop across the floating platforms to the north side of the pool, in order to avoid the piranhas. Swim along close to the west wall (the piranhas avoid this area) and into the submerged doorway below the waterwheel. The relic is inside the flooded room on the left. (Click first and second screenshots for visuals.)
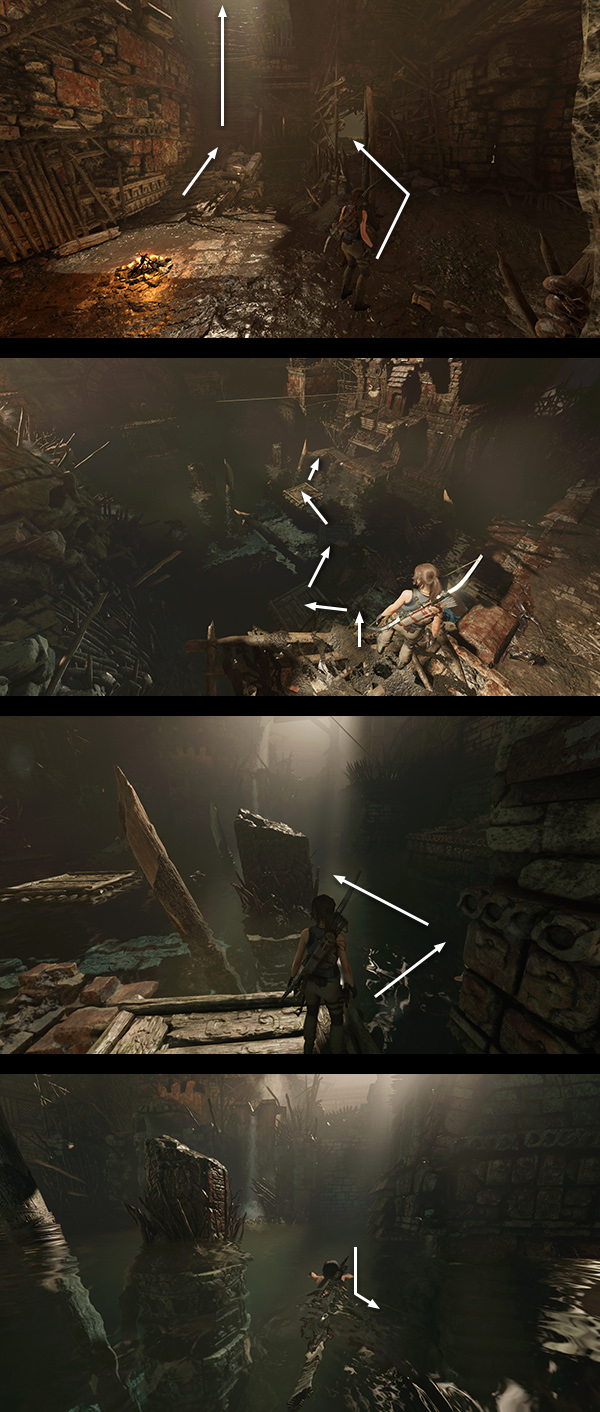
To get back to the base camp, you'll need to raise the water level if you haven't already done so. Swim back to the floating platform on the north side of the pool. Climb the wall on the left and make your way along the ledge to the rotating handle in the southwest corner. Turn the handle counterclockwise and the pool should begin to fill. Then swim back along the west wall to the floating platform on the north side of the pool. Hop across the platforms to the southeast corner and go through the doorway. (Use a rope arrow to pull down the barrier if necessary.) The base camp is just ahead. From here, you can fast travel to wherever you need to go next. (Click third screenshot for details.)
Other Artifacts
Certain artifacts and photos are added to Lara's collection automatically as you play through the game. These are covered at the relevant points in the main walkthrough and on the page with All Artifacts Listed by Story/Dialect.
Artifact: Silver Box of Ix Chel (Path of the Stars) - story progression
Photo: Andres Lopez (Lara's Notebook) - story progression
Artifact: Warrior Pendant (Cult of Kukulkan) - inside the treasure chest
Artifact: Skull (Metamorphosis) - reward for completing the Star-Crossed Side Mission
Artifact: Seven Steps Closer to God (Miracle Mission) - story progression
†UPDATE HISTORY: 10/31/21 - Page first posted online.
WAS THIS WALKTHROUGH HELPFUL? If not, I apologize and invite you to contact me with any questions. If you need help right away, I recommend the r/TombRaider subreddit. Other fan-run forums are listed at tombraiders.net/stella/community.html. If this site was useful, please consider supporting it financially or in other ways. For details, visit tombraiders.net/stella/support.html. As always, I welcome your corrections/suggestions. Thank you!
Copyright © Stellalune (). All rights reserved. Feel free to copy or print this walkthrough for personal use. By all means, share it with friends, but please include this credit line so people can send me their feedback. No part of this walkthrough may be reproduced on another site without permission. Follow this link for details about this site's advertising and privacy policy.
Stella's Tomb Raider Site: tombraiders.net.