TOMB RAIDER 2013 Quick Guide to All Challenges (Part 2)
Updated: 8/13/13(†)
Collectibles Intro | Documents | Relics | GPS Caches | Treasure Maps
WARNING: This page contains spoilers. No major plot points are revealed, but you will learn more about the various levels and Yamatai's backstory if you read ahead.
This is the second page of a 2-page section on Challenges. Part 1 includes an introduction and covers the Coastal Forest through Shantytown.
Geothermal Caverns
The challenge in this level is called "Firestarter." The object: find 6 tattered sacks suspended from the ceiling and burn them using fire arrows. These sacks can be especially difficult to spot in the dark caves, so don't hesitate to use Survival Instinct. [Level Map]
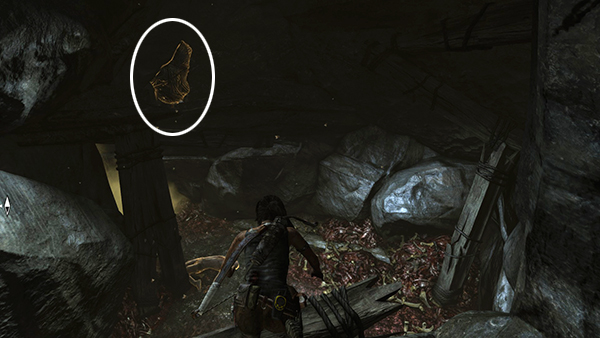
Firestarter Sack 1
The first sack is in the area called "The Pit," where the prisoners are kept. It's hanging on the southeast side of the cave. See here for details. (Click screenshot to enlarge.)

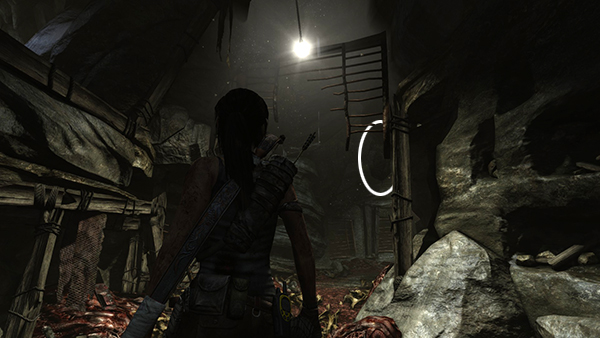
Firestarter Sack 2
You'll find the 1st GPS cache in one of the side tunnels off "The Pit." Before hopping down from the ledge where you find the 1st GPS cache, look for the sack hanging above the tunnel opening. See here for details. (Click screenshot to enlarge.)
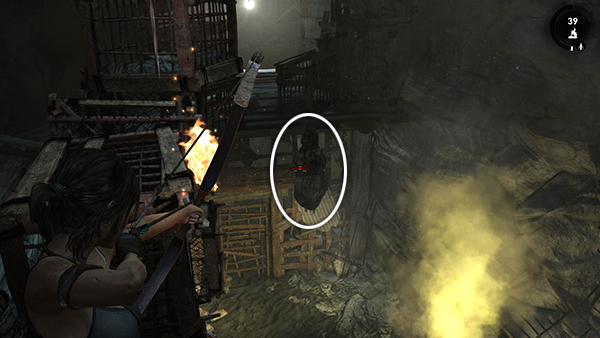
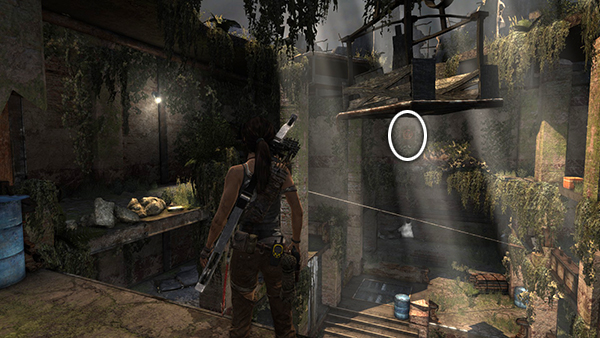
Firestarter Sack 3
Also in the Pit area, there's another side tunnel lined with prisoner cages. The third sack is hanging from the ceiling of this passageway, just beyond the 2nd GPS cache and the dangling lightbulb. See here for details. (Click screenshot to enlarge.)
Firestarter Sack 4
Both the 4th and 5th sacks are located in the cave beyond the Catacombs Base Camp. After defeating the enemies below, drop down from the ledge with the crates and cages. You'll find the 4th sack at the south end of the cave, near the barred door. See here for details. (Click screenshot to enlarge.)
Firestarter Sack 5
After burning the 4th sack (above) move to the north end of the cave to find the 5th sack hanging high up on the right, above the 4th GPS cache. See here for details. (Click screenshot to enlarge.)
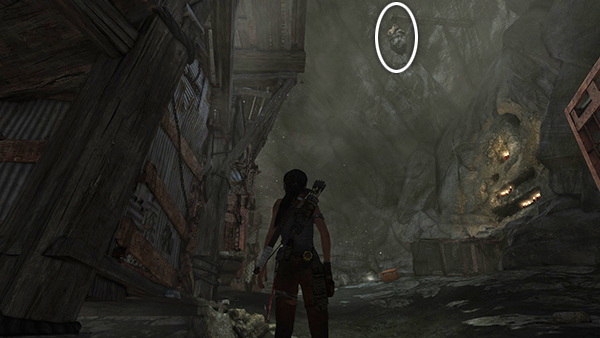

Firestarter Sack 6
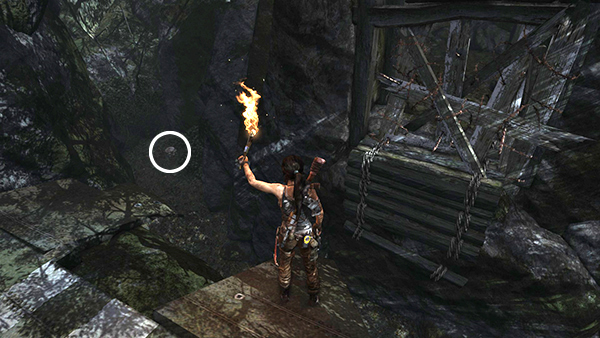
The last sack is in the passageway leading to the ritual chamber. Once you've taken out the sentry with a headshot or stealth kill, look above where he was standing to spot the sack. See here for details. (Click screenshot to enlarge.)
Summit Forest
In this level's challenge you must find and pick 10 mushrooms. They don't seem to be actual red caps, which are poisonous in any case, but "Red Cap Roundup" does have a nice ring to it. ;) Again, the darkness makes it difficult to spot some of the mushrooms. I've lightened the screenshots quite a bit, but you'll probably need to use Survival Instinct to locate the fungi as you search. [Level Map]
Red Cap Mushroom 1
The first two mushrooms are located in the clearing with the crashed helicopter. #1 is just to the left when you emerge into the clearing after following the path down from the Summit Marsh Day Camp. See here for details. (Click screenshot to enlarge.)
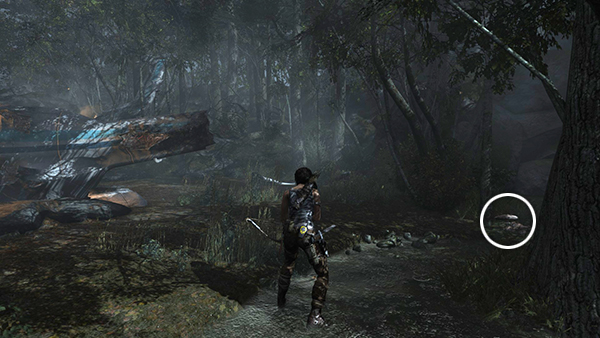
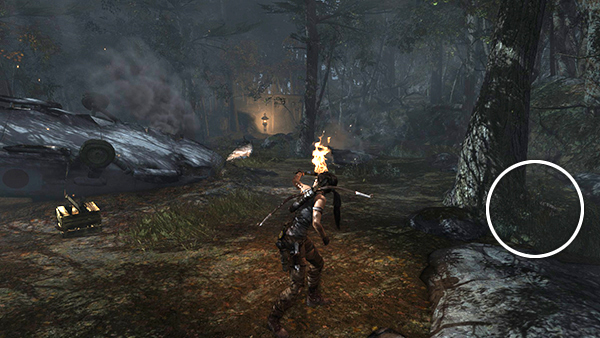
Red Cap Mushroom 2
The second mushroom is on the southeast edge of the clearing, at the base of the hollow tree near the wrecked helicopter. See here for details. (Click screenshot to enlarge.)
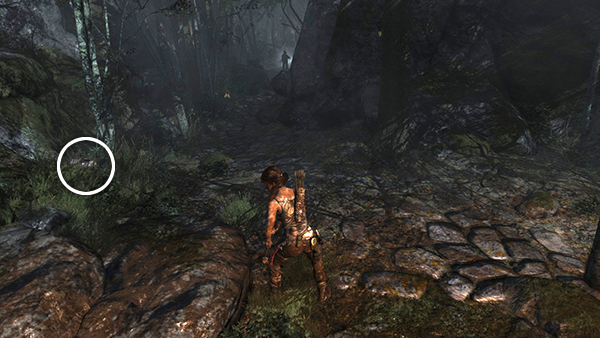
Red Cap Mushroom 3
The next mushroom is on the left side of the path leading down from the crash site to where you first encounter the patrolling enemies. See here for details. (Click screenshot to enlarge.)
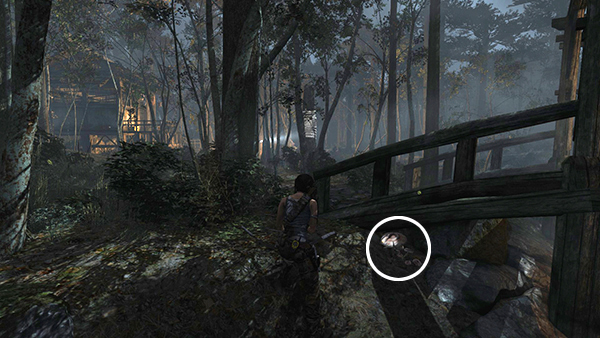
Red Cap Mushroom 4
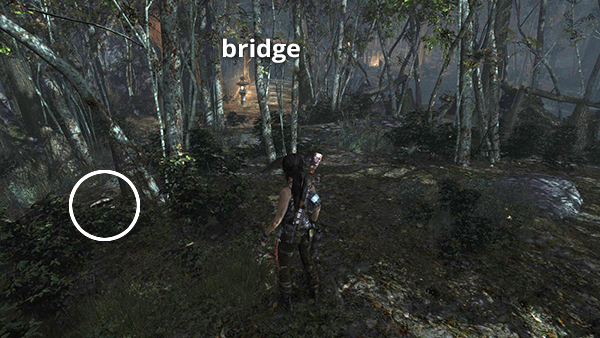
As with the other challenge items, the order in which you pick the mushrooms may not match mine. I pass by the 5th mushroom on the way to the 4th in order to concentrate on eliminating enemies before they spot Lara. So my 4th mushroom is the one growing on the side of the wooden bridge. See here for details. (Click screenshot to enlarge.)
Red Cap Mushroom 5
This mushroom is at the north end of the forest, on the left if you're standing in the area where you encountered the first group of enemies and facing the wooden bridge. The walkthrough shows how to find it if you're coming from the wooden bridge. (Click screenshot to enlarge.)
Red Cap Mushroom 6
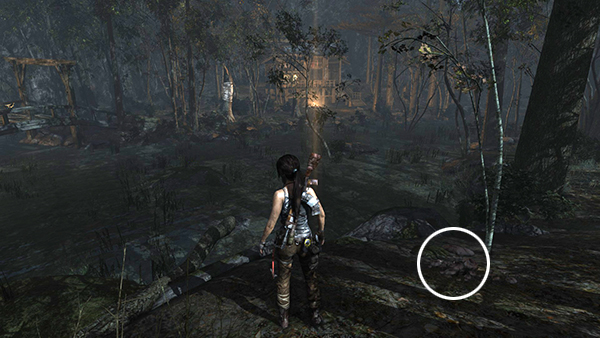
This mushroom is growing on the western bank of the stream, a little way south of the wooden bridge. The rope-wrapped tree on the opposite side of the stream serves as a convenient landmark. Once you spot this tree, stay on the other side of the stream from it and use Survival Instinct to locate the mushroom. See here for details. (Click screenshot to enlarge.)
Red Cap Mushroom 7
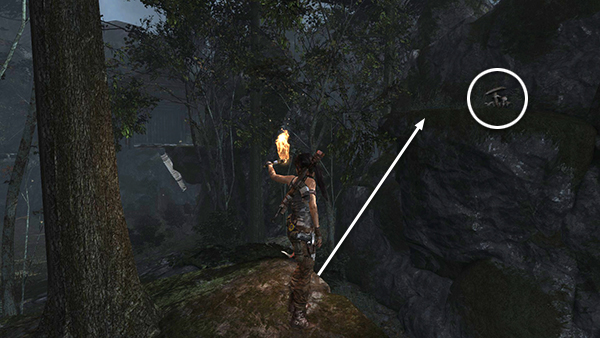
This mushroom is growing on a high ledge about halfway along the western boundary wall. To reach it, you'll need to climb onto the rock formation below the ledge, jump and grab the edge of the ledge and then pull up. Check the walkthrough for details. (Click screenshot to enlarge.)
Red Cap Mushroom 8
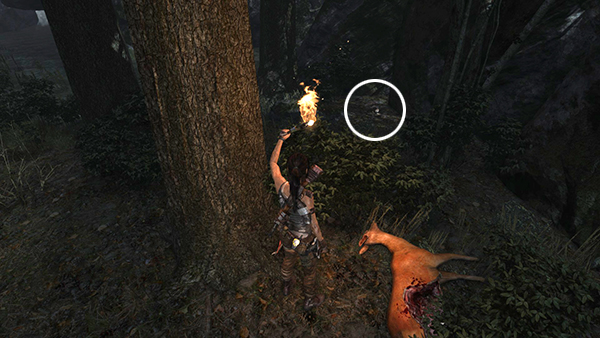
At the southern end of the forest, just beyond the wooden hut with the rope-wrapped beam supporting it, is an overgrown area with a deer carcass lying on the ground. Just beyond the carcass is the 8th mushroom. See here for details. (Click screenshot to enlarge.)
Red Cap Mushroom 9
This mushroom is growing in a little hollow near the airplane wreckage in the southeast corner of the forest. If you climb up onto the plane and face the boarded-up opening, the mushroom is just below on the left. See here for details. (Click screenshot to enlarge.)
Red Cap Mushroom 10
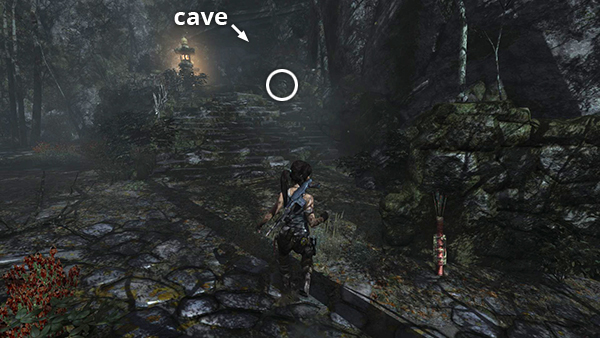
The last mushroom is growing at the top of the steps leading to the cave with the wolf cages. These steps are on the northeast side of the forest. You'll pass right by the mushroom on the way to the level exit. See here for details. (Click screenshot to enlarge.)
Shipwreck Beach
There are two separate challenges in this level: "Cairn Raider" involves locating and dismantling 5 little cairns (piles of stones with old metal helmets balanced on top). "Mine Sweeper" involves exploding 10 World War II-era naval mines. All of the challenge items are accessible on the first visit to Shipwreck Beach, but if you missed anything and need to return via fast travel, this guide should help.
Note that the in-game map does not show challenge items, but they are noted on my maps. Mines are marked with a star and the numbers "MS1, MS2," etc. Cairns have a star and "CR1, CR2," etc. [Level Map]
Cairn Raider 1
The first cairn is near where you enter the beach from the Gondola Transport level. Just below and to the west is a small pool. Maneuver the rope-wrapped float and use it to reach the climbing wall. Then climb on top of the rock column, approach the cairn, and press Interact to dismantle it. See here for details. (Click screenshot to enlarge.)

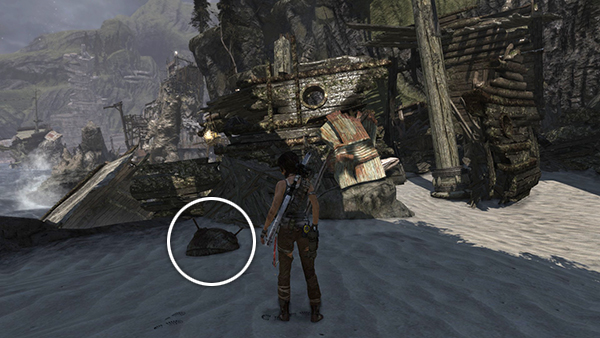
Cairn Raider 2
This cairn is sitting on a rock below the path leading down from the level entrance to the beach. It's just to the right (northwest) of the junked truck. See here for details. (Click screenshot to enlarge.)
Cairn Raider 3
This cairn is on a high ledge atop the craggy rock formation northeast of the Survivors' Camp. To reach it, head up the path on the right side of the rocks and climb around from the back. Check the walkthrough for details. (Click screenshot to enlarge.)
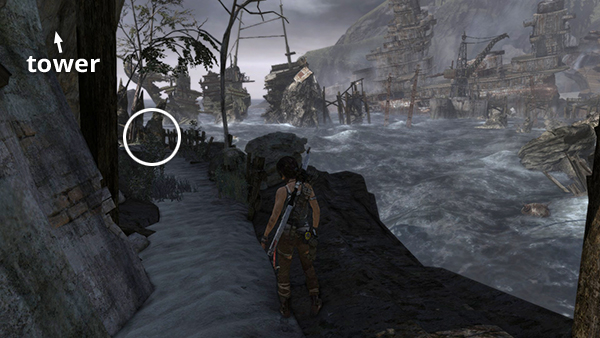
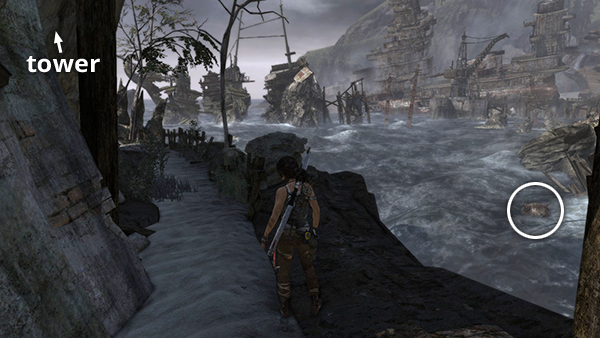
Cairn Raider 4
This cairn is sits on the path behind the tower you must climb to reach the Flooded Vault Challenge Tomb entrance. If you go around the right side of the tower, the cairn is at the back corner. See here for details. (Click screenshot to enlarge.)
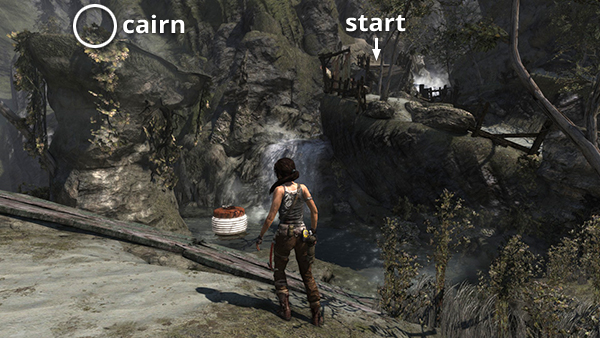
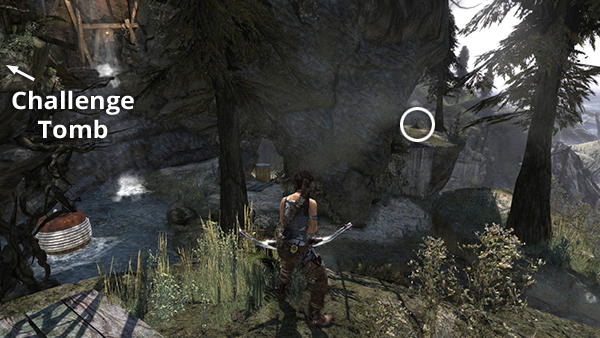
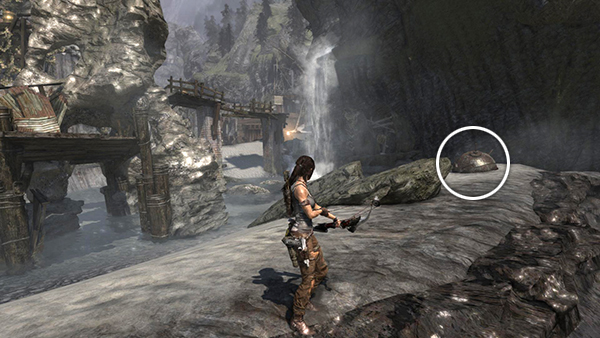
Cairn Raider 5
The final cairn is off to the right (south) of the entrance to the Flooded Vault Challenge Tomb. Drop down into the area with the little pool and the rope-wrapped float. Then climb onto the ledge overlooking the sea to find the cairn. See here for details. (Click screenshot to enlarge.)
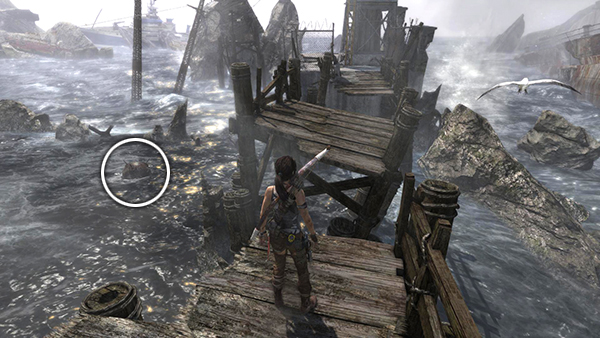
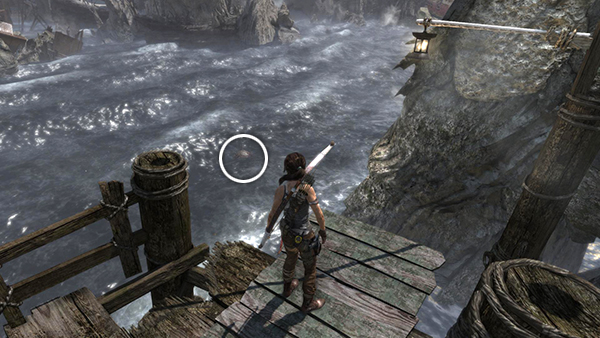
Mine Sweeper 1
The first three mines are found on the way out to the galleon to obtain the block and tackle. Look for the first one off to the left as you jump across the broken, wooden pier between the dock and the cement structure with the crane. Shoot it until it explodes to unlock the challenge. Check the walkthrough and level map for details. (Click screenshot to enlarge.)
Mine Sweeper 2
The next mine is floating in the sea beyond the cement piling with the crane. Go around behind the crane and look off to the south. If you're having trouble spotting the mine, use use Survival Instinct to make it glow. See here for details. (Click screenshot to enlarge.)
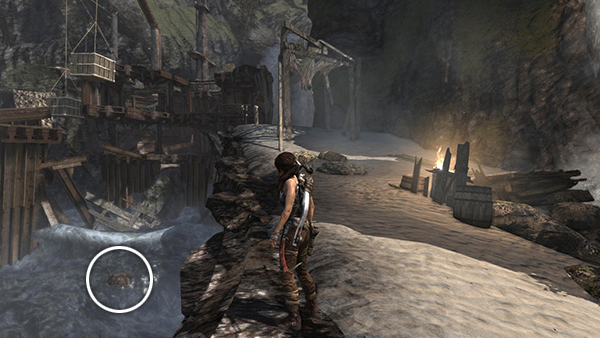
Mine Sweeper 3
On the way out to the galleon, after sliding down the zip line from the crane and just before jumping to the horizontal pole and climbing wall, look down on the left to spot the mine. Again, see here for details. (Click screenshot to enlarge.)
Mine Sweeper 4
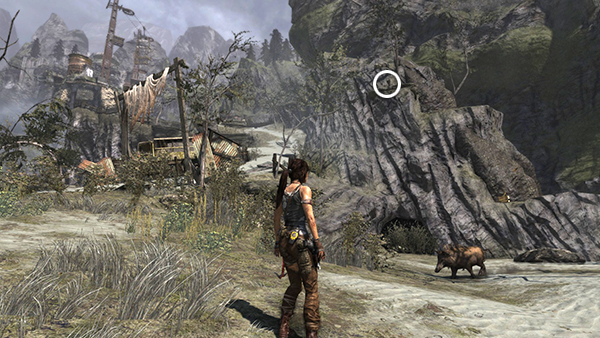
This mine is sitting in plain sight on the beach below and to the east of the Survivors' Camp. You can shoot it on the way back from the galleon or wait until you head for the Endurance wreck a bit later on. See here for details. (Click screenshot to enlarge.)
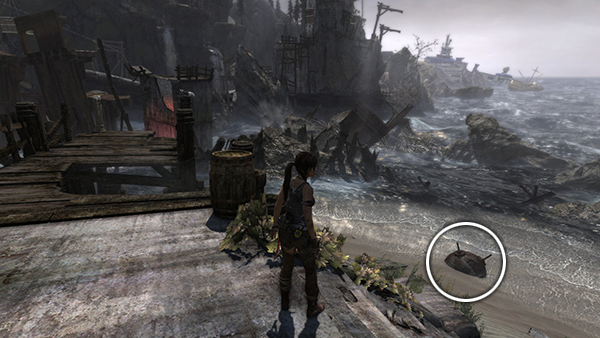
Mine Sweeper 5
This mine is partially buried in the sand east of the entrance to the Temple of the Handmaidens Challenge Tomb. If you don't find it sooner, you'll probably spot this mine when you head toward the Endurance wreck. Check the walkthrough for more info. (Click screenshot to enlarge.)
Mines 6 through 10 are located in the area to the southeast of the Survivors' Camp. If you're returning here after completing the level, you'll need to retrace the route you took when setting out from the Survivors' Camp toward the Endurance wreck. Check the walkthrough for if you need a refresher.
Mine Sweeper 6
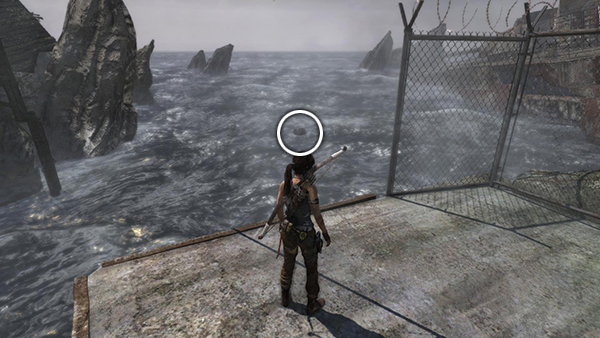
This mine is floating in the sea near the tower leading up to the Flooded Vault Challenge Tomb entrance. After sliding down the zip line from the multi-level shipwreck to the beach, turn around and look back toward the wreck to spot the mine. See here for details. (Click screenshot to enlarge.)
Mine Sweeper 7
This mine is floating in the sea just a little way southwest of mine #6. If you go around the right side of the tower, just before you come to the 4th cairn for the Cairn Raider challenge, look over the edge on the right to spot the mine. See here for details. (Click screenshot to enlarge.)
Mine Sweeper 8
The 8th and 9th mines are in the area with the little tide pool southeast of the tower leading up to the Flooded Vault Challenge Tomb entrance. Move carefully to the edge overlooking the sea and look to the southwest to spot the 8th mine. See here for details. (Click screenshot to enlarge.)

Mine Sweeper 9
After shooting the 8th mine, turn around to find the 9th sitting on the beach in plain sight. Again, check the walkthrough if necessary. (Click screenshot to enlarge.)
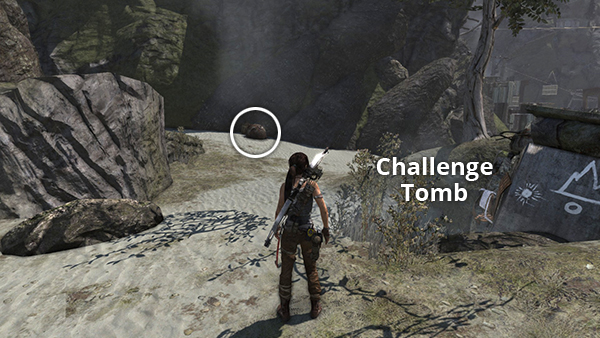
Mine Sweeper 10
From the area with the tall tower and the tide pool, where you found the 8th and 9th mines, follow the path along the cliff to the southeast as far as you can go. When you reach a dead end, turn around and you'll see the mine embedded in the sand. See here for details. (Click screenshot to enlarge.)
Cliffside Bunker
There are four flags with a stylized sun symbol hanging in this level. Use your torch or fire arrows to burn them all in order to beat the "Previous Inhabitants" challenge. Unlike the other challenge items, these flags don't glow in Survival Instinct view, so you'll have to look carefully to spot them. [Level Map]
NOTE: If you missed any of the flags the first time through and need to revisit this level, there's no way to get here via fast travel. You'll have to return to the Survivors' Camp on Shipwreck Beach and then make your way to the bunker on foot. The walkthrough includes directions.
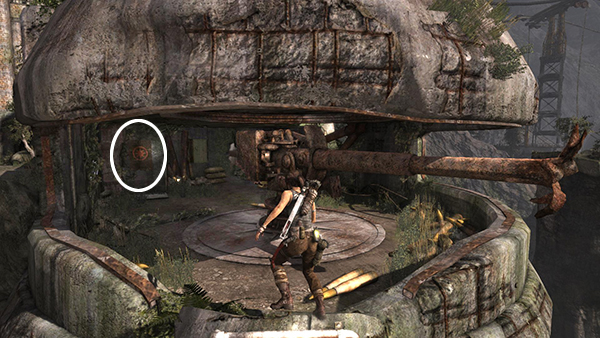
Previous Inhabitants Flag 1
The first flag is just inside the bunker, behind and to the left of the huge gun turret. See here for details. (Click screenshot to enlarge.)
Previous Inhabitants Flag 2
The second flag is on the upper level of the building where you fight the large group of Solarii. It's hanging on the south wall and is partly covered by vines. See here for details. (Click screenshot to enlarge.)
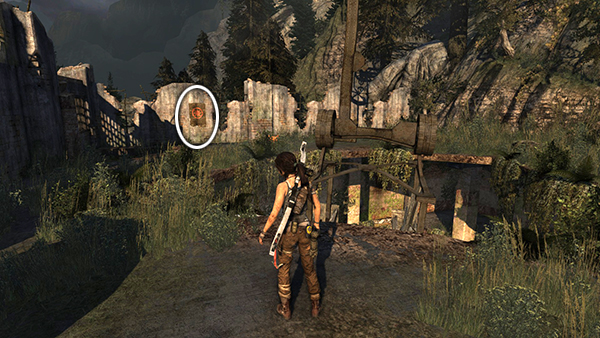
Previous Inhabitants Flag 3
As soon as you climb up onto the roof of the bunker, turn around and you'll spot the third flag hanging on the broken cement wall ahead. You can burn it with a fire arrow or use your torch. See here for details. (Click screenshot to enlarge.)

Previous Inhabitants Flag 4
The last flag is probably the trickiest to find. While standing on the roof, above the Endurance Overlook Day Camp, look up to the east. The flag is hanging on the side of the tall, metal tower. Equip the bow and zoom in to see it more clearly. Then destroy it with a fire arrow. See here for details. (Click screenshot to enlarge.)
Research Base
This level's challenge, called "Sun Killer," involves shooting 5 hanging totems, similar to the ones in the Coastal Forest level. [Level Map]
Sun Killer Totem 1
Just before dropping down from the entrance tunnel into the room with the lockers and Oriental rug, look for the first totem in the upper left corner of the room. Or, if you have fast traveled back to the Research Lab Base Camp, go through the room with the Oriental rug, climb onto the ledge and turn around to spot the totem. See the walkthrough for details. (Click screenshot to enlarge.)
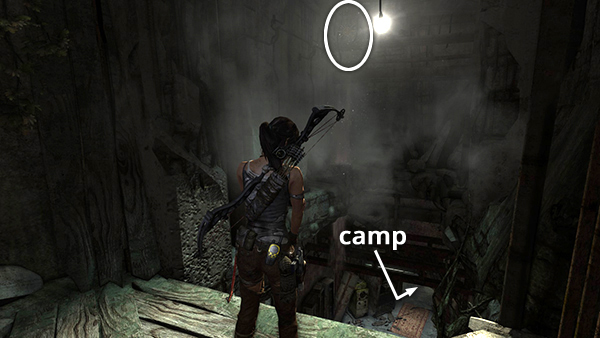
Sun Killer Totem 2
Use your axe to pry open the metal door in the southwest corner of the room with the Research Lab Base Camp. Stand in the doorway and look up to the left to spot the second totem. See here for details. (Click screenshot to enlarge.)
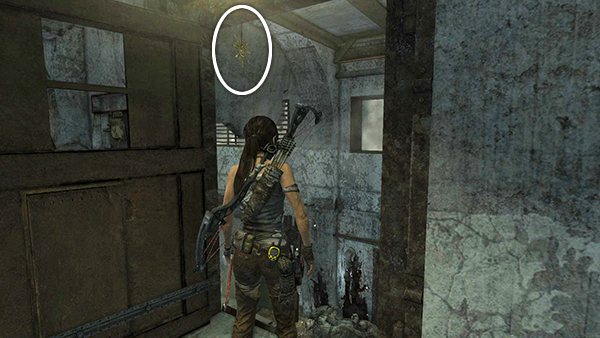
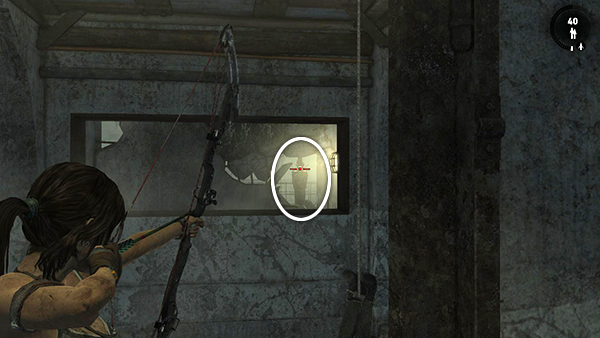
Sun Killer Totem 3
While standing in the same doorway where you shot the second totem, look straight ahead through the rectangular window into the next room. The third totem is hanging on the right, in front of a dangling corpse. See here for details. (Click screenshot to enlarge.)
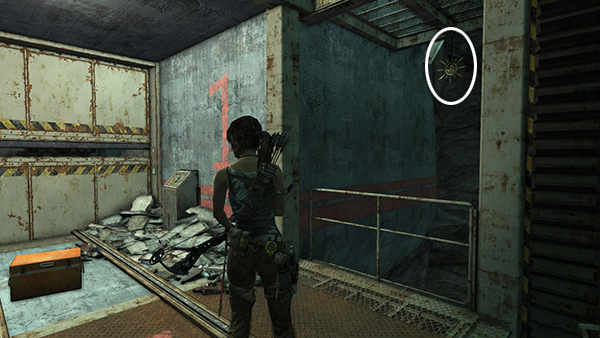
Sun Killer Totem 4
After you solve the elevator puzzle and drop down to the 1st level of the elevator shaft, look to the right to spot this totem. It's beyond the railing, hanging from the underside of the walkway above. See here for details. (Click screenshot to enlarge.)
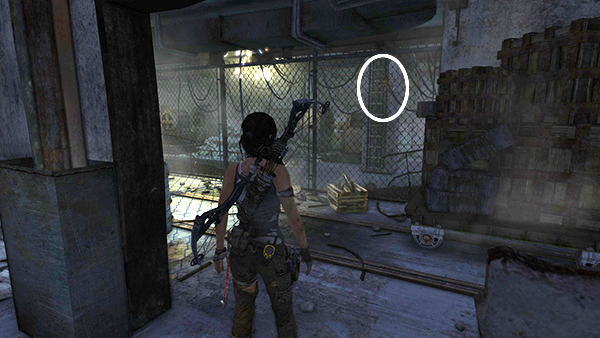
Sun Killer Totem 5
The last totem is in the hallway with the metal tracks beyond the elevator shaft. After shooting the 2 Solarii here, stand near the east end of the hallway and look through the chain-link fence to spot the totem. You can shoot it through the fence. See here for details. (Click screenshot to enlarge.)
Challenges Part 1 | Collectibles Intro | TOMB RAIDER Walkthrough | Main Page
†UPDATE HISTORY: 8/13/13 - Page first posted online.
WAS THIS WALKTHROUGH HELPFUL? If not, I apologize and invite you to contact me with any questions. If you need help right away, I recommend the r/TombRaider subreddit. Other fan-run forums are listed at tombraiders.net/stella/community.html. If this site was useful, please consider supporting it financially or in other ways. For details, visit tombraiders.net/stella/support.html. As always, I welcome your corrections/suggestions. Thank you!
Copyright © 2013- Stellalune (). All rights reserved. The screenshots and videos included here were made using Fraps. Feel free to copy or print this walkthrough for personal use. By all means, share it with friends, but please include this credit line so people can send me their feedback. No part of this walkthrough may be reproduced on another site without permission. Follow this link for details about this site's advertising and privacy policy.
Stella's Tomb Raider Site: tombraiders.net.