Rise of the Tomb Raider - Geothermal Valley Monoliths & Coin Caches
Updated: 6/11/16(†)
This guide, along with the annotated level maps linked below, should help find any coin caches you missed. If you are playing through this level for the first time, you may want to follow the main walkthrough instead. Unlike Survival Caches, coin caches cannot be unearthed until they are revealed on your map. So before you do any digging, you'll need to locate and decipher the monoliths that show where the coins are buried. Then you can use your in-game map to set a local waypoint/player beacon on each cache, which will help you locate it.
There are 3 monoliths in the Geothermal Valley. All require various levels of Greek language proficiency. If you've been picking up all collectibles, you should be able to decipher two of them the first time you pass them. The third will have to wait. The caches are numbered in the order they are obtained in the walkthrough, not the order in which they are revealed.
Weapons, Equipment, and Outfits are covered elsewhere. Other collectibles are detailed on separate pages:
Relics · Documents · Murals · Survival Caches · Strongboxes · Archivist Maps · Explorer Satchels · Codices · Crypt Treasures · Challenges · Missions
MONOLITH 1
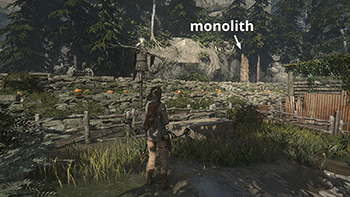
The first monolith is north of the Valley Farmstead Base Camp. If you head into the village and follow the tiered pumpkin patch to the far end, you'll find the monolith there. Read it to reveal the locations of coin caches 1, 2, and 3, below. (Click screenshot to enlarge.)
MONOLITH 2
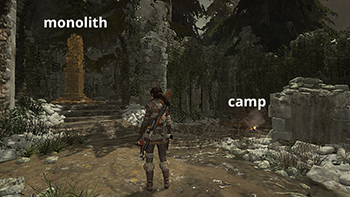
This monolith is near the Aqueduct Ruins Base Camp Examining it reveals the locations of coin caches 4, 6, and 8, shown below. You'll pass the monolith during your first visit to the valley, but since the coin caches are not nearby, they are covered later, in the Geothermal Valley Second Visit walkthrough. (Click screenshot to enlarge.)
MONOLITH 3
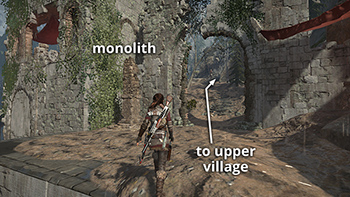
The third monolith is just up the hill to the east of the Ruins Encampment Base Camp, near the building with relic #5. You'll probably pass it before you have the level 7 Greek required to read it. This is why I've labeled it the third instead of the second. Once you're able to decipher it, it reveals the locations of caches 5, 7, and 9, below. (Click screenshot to enlarge.)
COIN CACHE 1
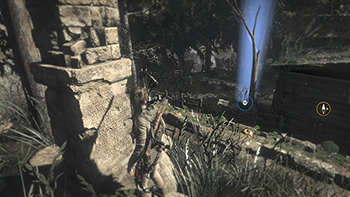
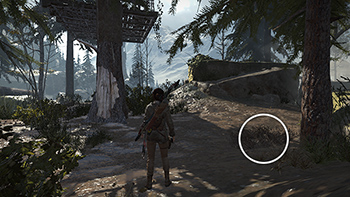
The first cache is buried a little to the east of monolith #1, behind one of the village cabins. Check the in-game map or annotated level map if you need help locating it. (Click screenshot to enlarge.)
COIN CACHE 2
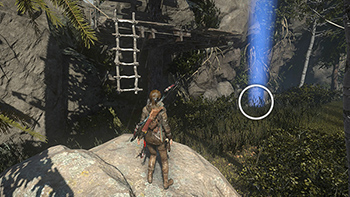
The second cache is in the lower valley, between the cave with document #7 and the elevated wooden structure with document #7. Check the map and walkthrough for details. (Click screenshot to enlarge.)
COIN CACHE 3
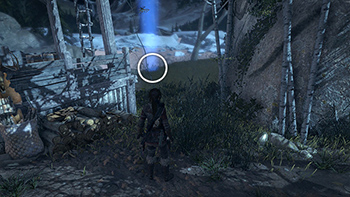
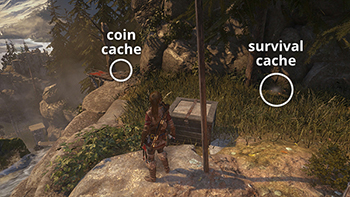
The next cache is at the southwest end of the lower valley, buried near the cliff wall about halfway between the elevated wooden platform and the bramble-covered entrance to the lynx's cave. See the map and walkthrough for details. (Click screenshot to enlarge.)
COIN CACHE 4
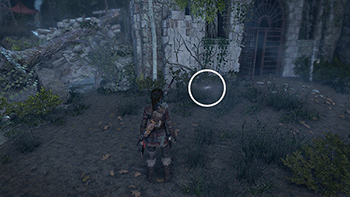
This cache is revealed on your map when you decipher monolith #2, above. The cache is buried a little way south of monolith #3, on the path to the Physician's Crypt. Again, check the map and walkthrough for details. (Click screenshot to enlarge.)
COIN CACHE 5
This cache is revealed when you decipher monolith #3. It is buried by the lakeshore just south of the Remnant hunter's cabin, near the second guard tower from the Defensive Strategy mission. Watch out for the lynx that lives in this area. map/walkthrough (Click screenshot to enlarge.)
COIN CACHE 6
This cache is revealed when you read #2. It is buried just to the left of the entrance to the House of the Afflicted Challenge Tomb. To get there, either start from the Valley Farmstead Base Camp and make your way over to the tomb as you did the first time, or fast travel to the Infirmary Base Camp and follow the passageway to the southeast until you emerge from the tomb. map/walkthrough (Click screenshot to enlarge.)
COIN CACHE 7
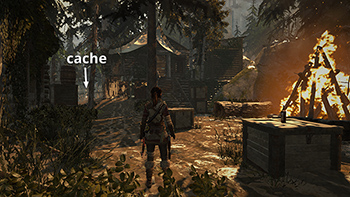
This cache is also revealed by examining monolith #3. It's buried next to the cabin with document #21, near the bonfire at the south end of the upper village. The walkthrough and map show how to find it first time through. If you're returning later, you can start from the Ruins Encampment, Cathedral Courtyard, or Cliffside Lookout camp, since they're all about equally far from the cache. (Click screenshot to enlarge.)
COIN CACHE 8
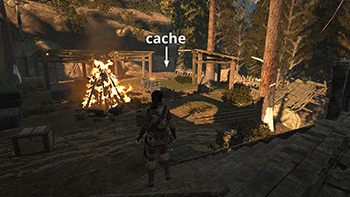
This cache is also revealed when you decipher monolith #2. It can be found in the upper village, in the area where you fought the Trinity soldiers before climbing up to the cathedral. If you're backtracking for it, return to the Cathedral Courtyard Base Camp and drop down into the clearing with the bonfire to the south. (screenshot) The cache is on the southeast side of the clearing. (Click screenshot to enlarge.)
COIN CACHE 9
The final cache is buried near the Ridgeline Base Camp on the northwest side of the valley. This camp is not accessible until you've completed the FLOODED ARCHIVES level. See the walkthrough and map for details. (Click screenshot to enlarge.)
Top of Page | Collectible Guides | Main ROTTR Page
†UPDATE HISTORY: 6/11/16 - Page first posted online.
WAS THIS WALKTHROUGH HELPFUL? If not, I apologize and invite you to contact me with any questions. If you need help right away, I recommend the r/TombRaider subreddit. Other fan-run forums are listed at tombraiders.net/stella/community.html. If this site was useful, please consider supporting it financially or in other ways. For details, visit tombraiders.net/stella/support.html. As always, I welcome your corrections/suggestions. Thank you!
Copyright © 2015 - Stellalune (). All rights reserved. Feel free to copy or print this walkthrough for personal use. By all means, share it with friends, but please include this credit line so people can send me their feedback. No part of this walkthrough may be reproduced on another site without permission. Follow this link for details about this site's advertising and privacy policy.
Stella's Tomb Raider Site: tombraiders.net.
