STELLA'S LARA CROFT GO WALKTHROUGH - Android, iOS, PS4 and Vita, Steam, and Windows Phone/PC/Tablet
THE CAVE OF FIRE - PART 1: A NEW ADVENTURE
Updated: 3/19/17(†)
Relic Fragments: 1
Gems: 1
Follow this link for my video walkthrough.
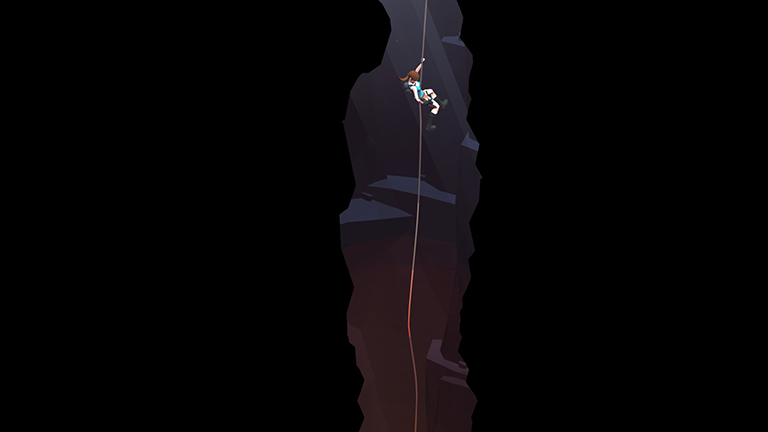
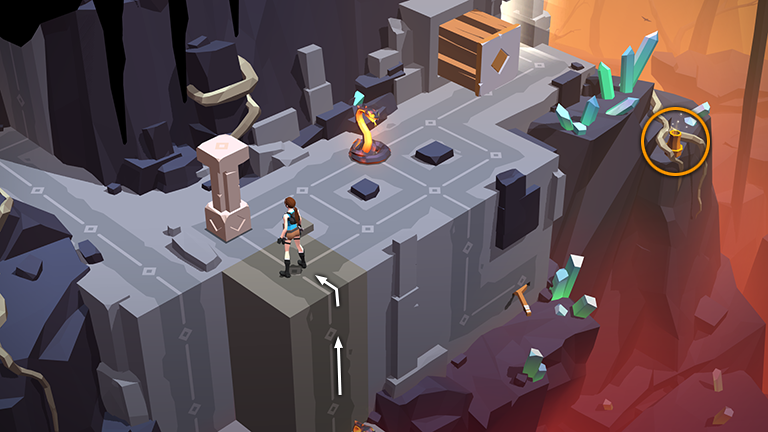
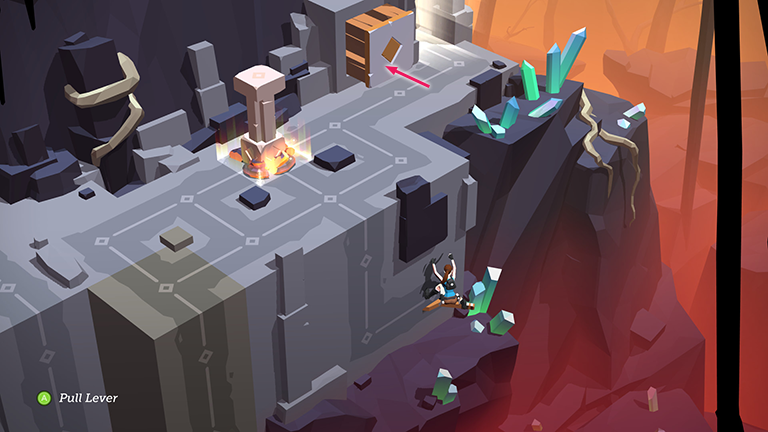
This new area begins with Lara abseiling into a dark, rocky shaft.
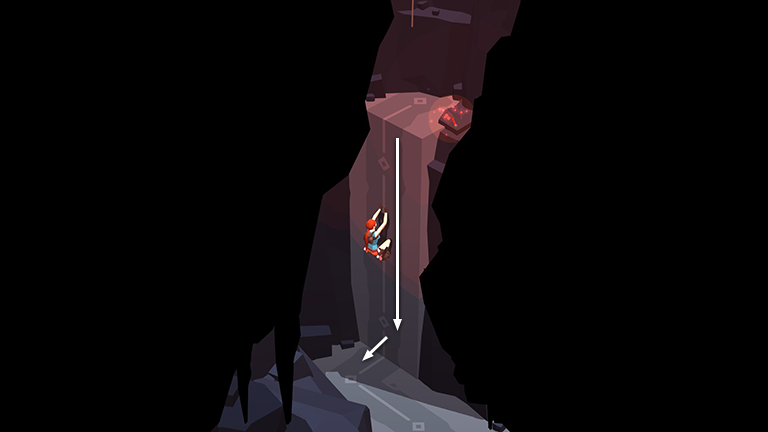
When you gain control, climb down the wall to the floor below.
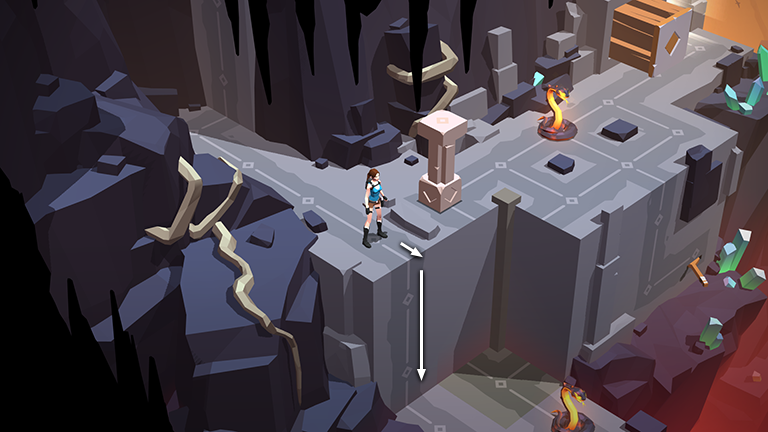
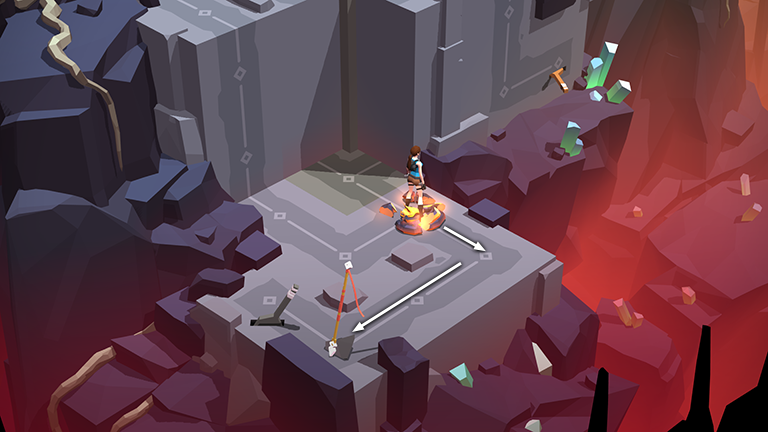
Move forward to the edge and drop down into a ledge with a snake.
Step forward once then right once to shoot the snake. As you'll now see, the enemies in the Cave of Fire have the ability to regenerate. They only stay "dead" for five turns. This makes them more dangerous but can also be used strategically.

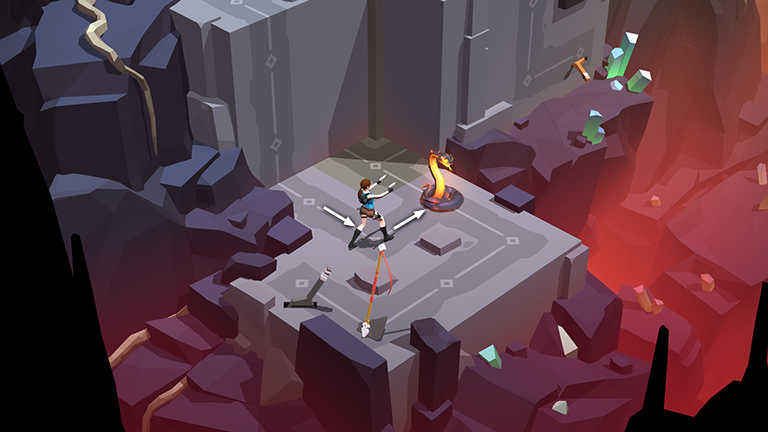
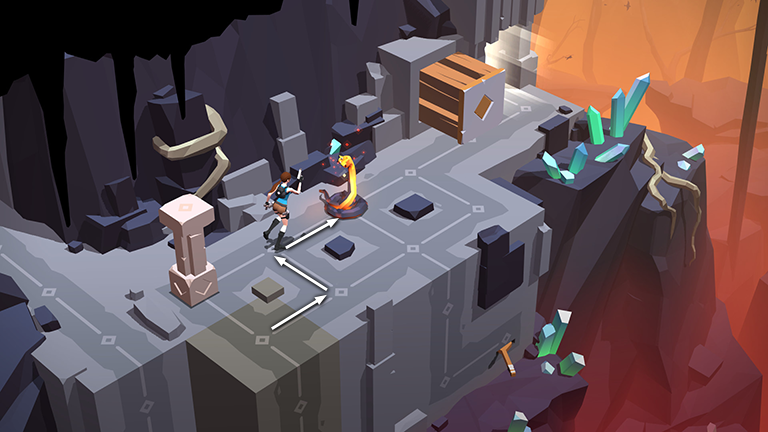
Here is a good opportunity to unlock the Déjà Vu achievement/trophy by killing the same creature four times in a row. Step to the left, away from the snake, then back to the right onto the spot where the shattered snake is lying. Move left, right, and left again. As you do, the snake reassembles from its shattered pieces. Move to the right again to shoot the snake once more. Repeat this maneuver until you have "killed" it four times. The achievement/trophy should then unlock. Don't worry if you miss it. You'll have another opportunity in the next level.
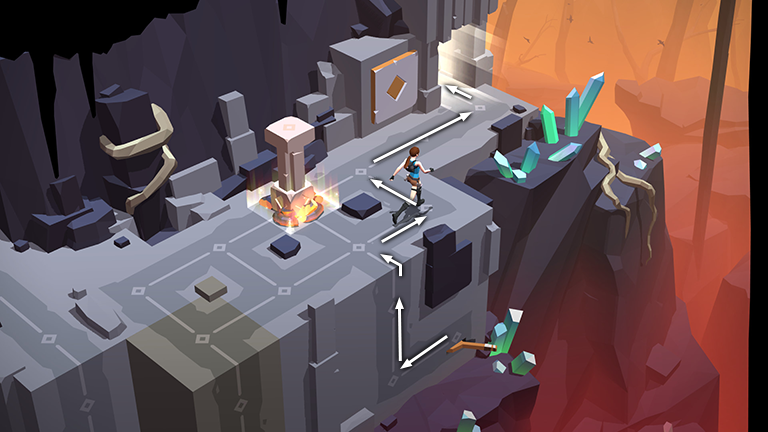
Regardless of whether or not you unlocked the achievement/trophy Lara should now be standing on top of the snake, having just shot it. You now have five turns before the snake revives. Move into the right corner then to the lower left to pick up the SPEAR.
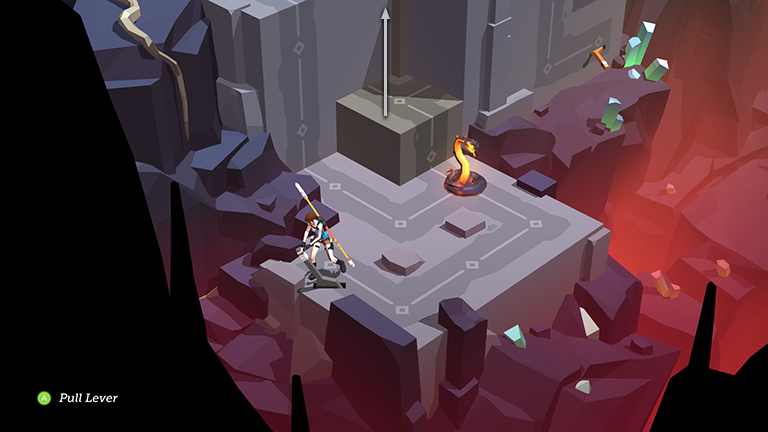
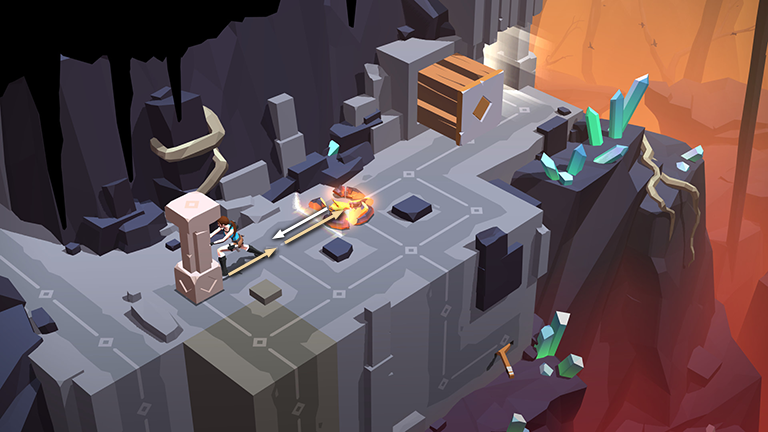
Move left to the lever. As you do, the snake re-materializes. Pull the lever to raise the gray block in the corner behind the snake.
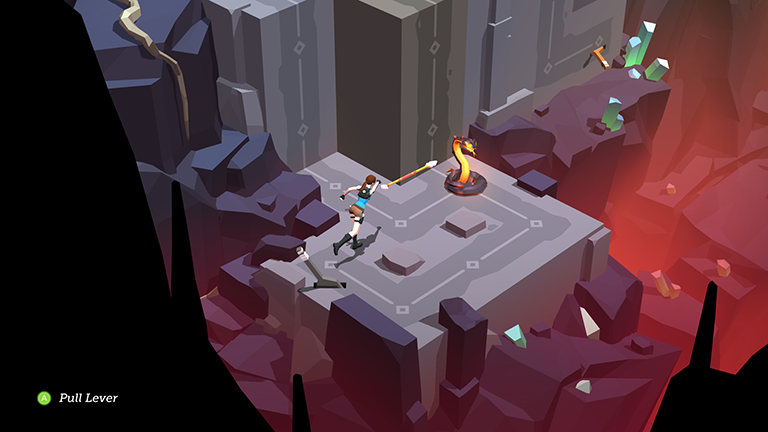
Now throw the spear at the snake to put it out of commission for five more turns.
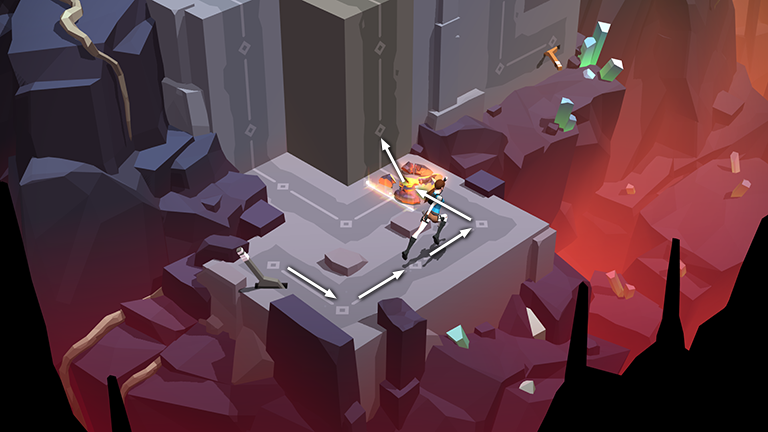
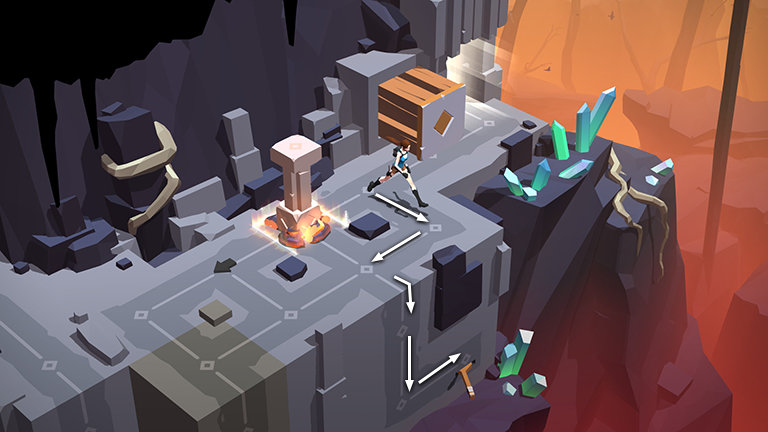
Use this time to move back around toward the snake and climb up the gray block you just raised.
When you reach the top of the gray block, and smash the vase off to the right to get a piece of THE SACRED BEETLE relic (1/11).
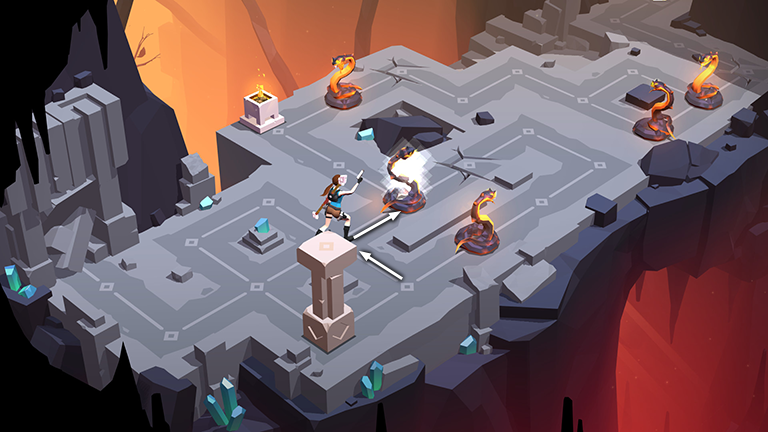
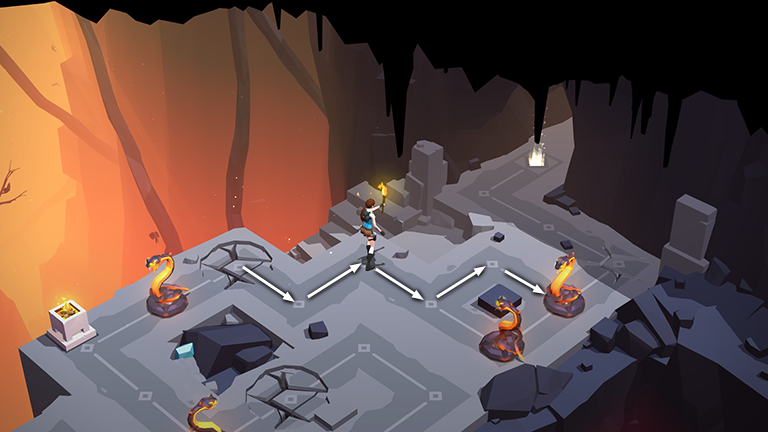
Move right, left, then right to shoot another snake here on the upper level.
While the snake is indisposed, move toward the freestanding pillar and pull it twice to the right so it ends up on top of the snake. This keeps the snake out of commission as long as you don't move the pillar.
Climb down the wall and over to the lever below on the right.
Kick the lever to retract the block trap near the exit.
Climb back up and make your way to the exit.

In the next area, smash the vase near the top right edge of the screen to obtain an OBSIDIAN gem (1/13).
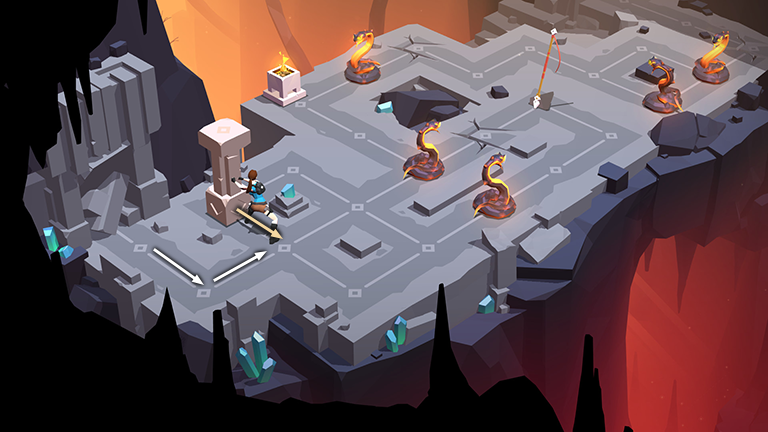
Move around to the freestanding pillar and pull it once toward the lower right.
Move around behind the pillar. (You can ignore the 2 snakes off to the right for now.)
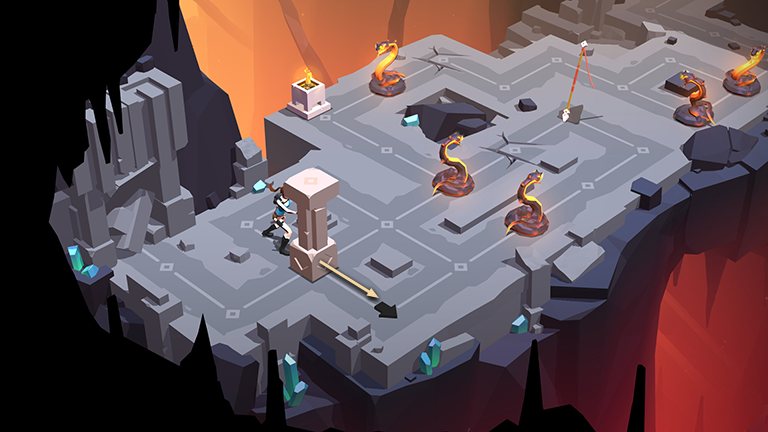
Push the pillar into the lower right corner.

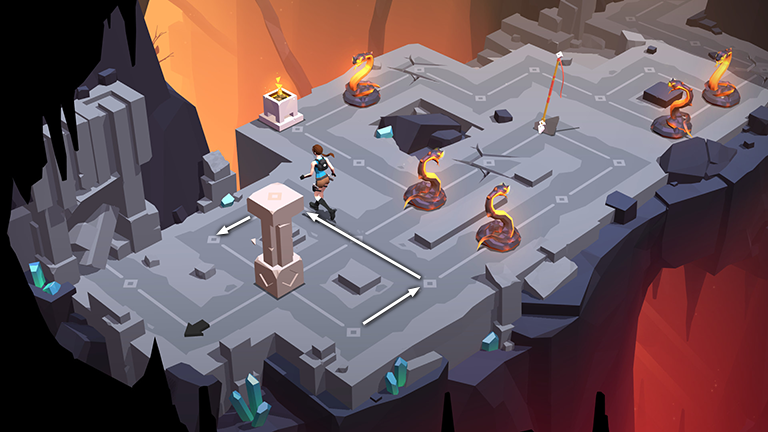
Move around behind the snake on the right (i.e., the one in line with the pillar you just moved) and step forward it to shoot it.
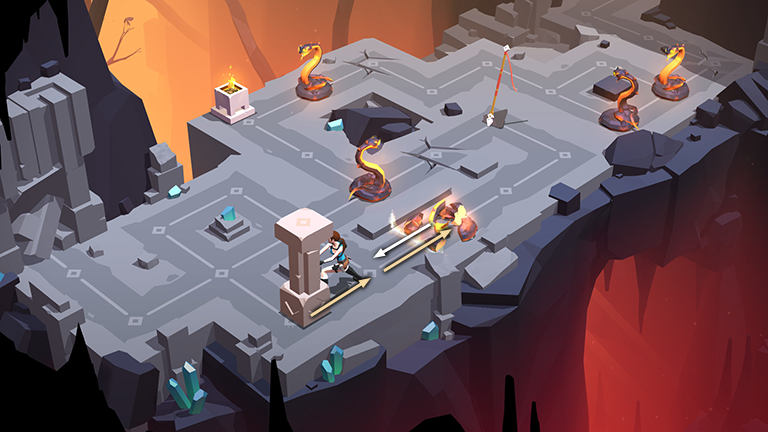
Move back toward the pillar and pull it twice until it rests on top of the snake you just shot. The pillar will keep the snake immobilized for now.
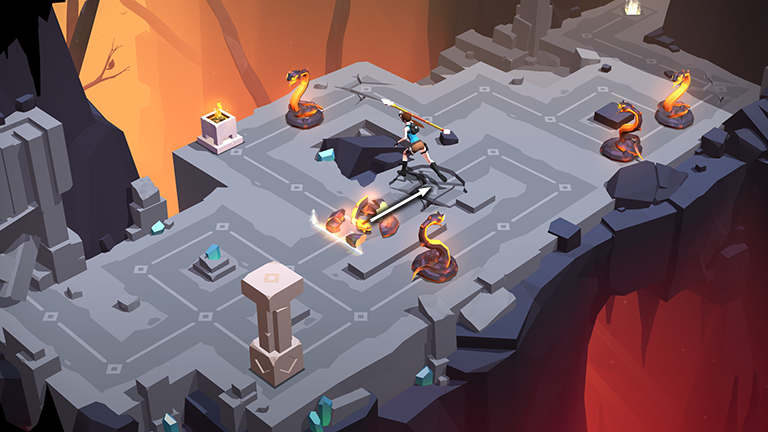
Follow the path around to the SPEAR. Pick it up but don't use it on the snake in front of you.
Instead move back to the pillar resting on top of the first snake. Push the pillar twice, back into the bottom corner. As you do this, the snake that had been crushed, springs back to life.
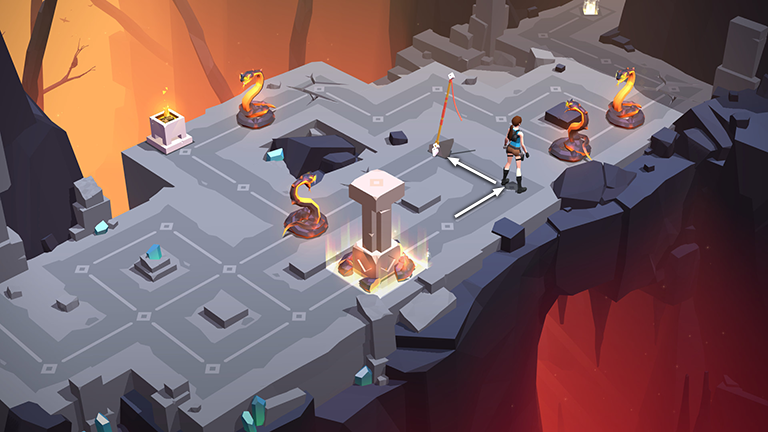
Move around behind the second snake (i.e., the one sitting just to the left of the one you crushed). Step forward to shoot it, putting it out of commission for the next five turns.
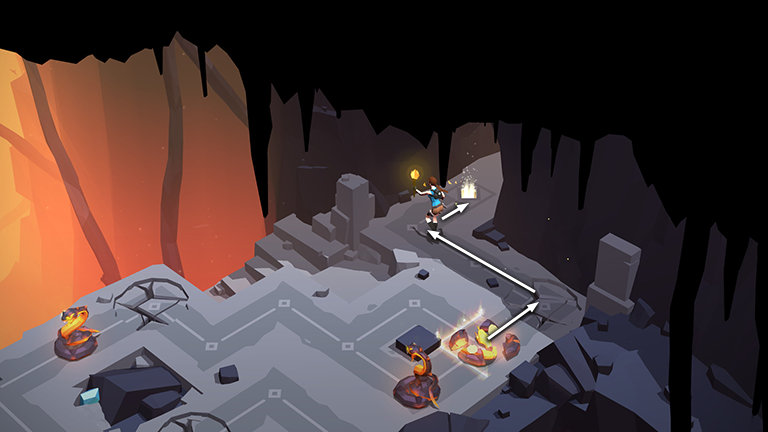
Step forward onto the cracked floor tile and then throw the spear at the third snake sitting near the brazier.
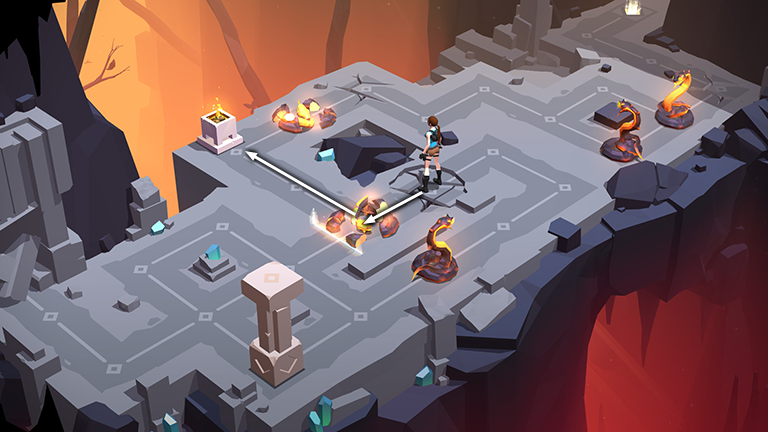
Step back onto the snake you just shot with your pistols. Then move to the brazier on the upper left to obtain a TORCH.
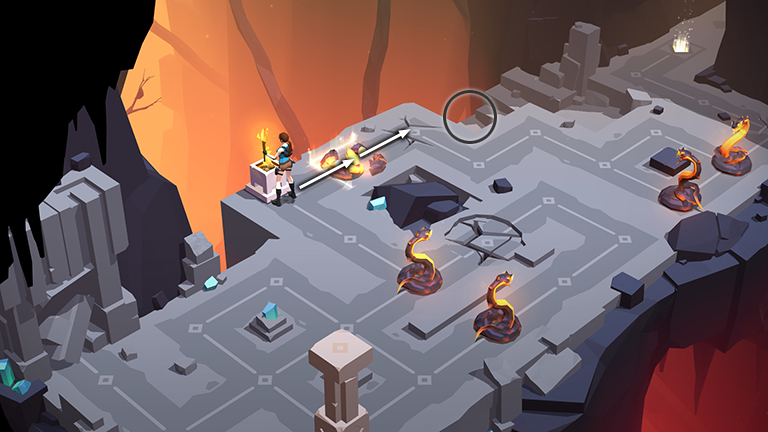
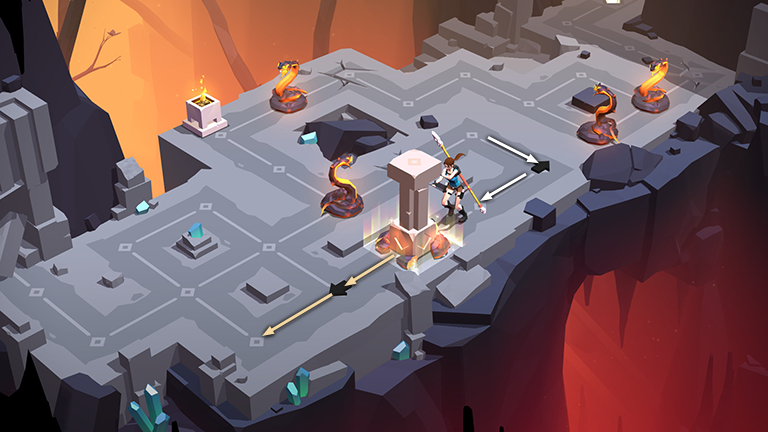
As you do this, the snake you just stepped over comes back to life, but the snake next to the brazier, which you hit with the spear, should still be lying in pieces. Move over it onto the cracked floor behind it. If you haven't already broken the vase to get the first piece of OBSIDIAN (1/13), do that now. (Here I've already smashed it, but the spot where it was is circled in the screenshot above.)
With torch still in hand, continue carefully toward the exit. Avoid the fourth snake entirely and approach the fifth snake from the side in order to shoot it.
If you accidentally shoot the fourth snake, the fifth snake will slither back onto the cracked floor, preventing you from escaping. You will then have to reset the puzzle and try again.
After shooting the fifth snake, step over the cracked floor and make your way to the exit.
†UPDATE HISTORY: 3/19/17 - Walkthrough first posted.
WAS THIS WALKTHROUGH HELPFUL? If not, I apologize and invite you to contact me with any questions. If you need help right away, I recommend the r/TombRaider subreddit. Other fan-run forums are listed at tombraiders.net/stella/community.html. If this site was useful, please consider supporting it financially or in other ways. For details, visit tombraiders.net/stella/support.html. As always, I welcome your corrections/suggestions. Thank you!
Copyright © - Stellalune ( ). Screenshots for the Shard of Life expansion levels were made using the Steam version of Lara Croft GO. Feel free to copy or print this walkthrough for personal use. Share it with friends if you like, but please include this credit line so people can send me their feedback. No part of this walkthrough may be reproduced on another site without permission. Follow this link for details about this site's advertising and privacy policy.
Stella's Tomb Raider Site: tombraiders.net.