STELLA'S LARA CROFT GO WALKTHROUGH - Android, iOS, PS4 and Vita, Steam, and Windows Phone/PC/Tablet
MAZE OF STONES - PART 10: A NARROW ESCAPE
Updated: 9/17/15(†)
Relic Fragments: 1
Gems: 2
Follow this link for my video walkthrough.
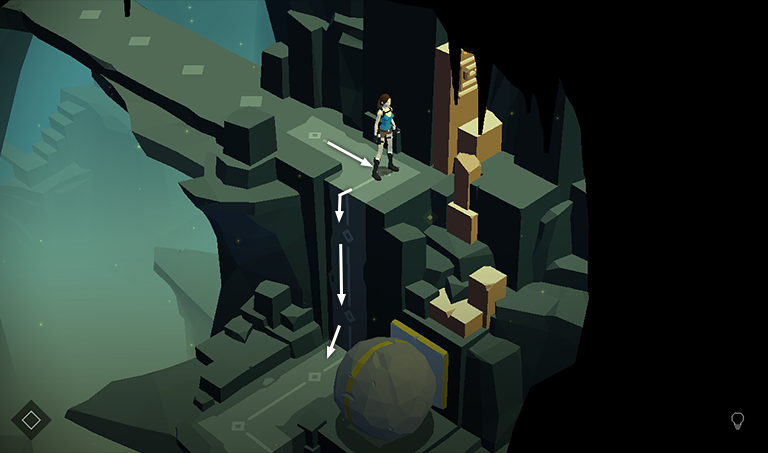
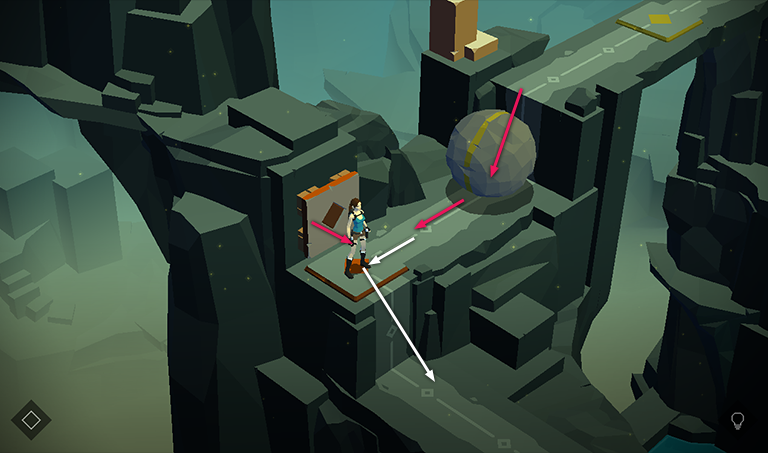
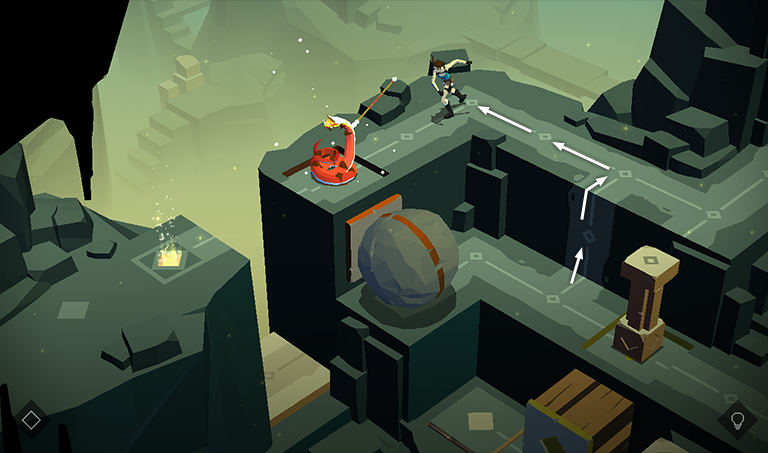
Move to the right and then climb down onto the ledge with the huge boulder. It doesn't move yet, so Lara is safe for now.
Climb down onto the ledge below the boulder and move to the left.
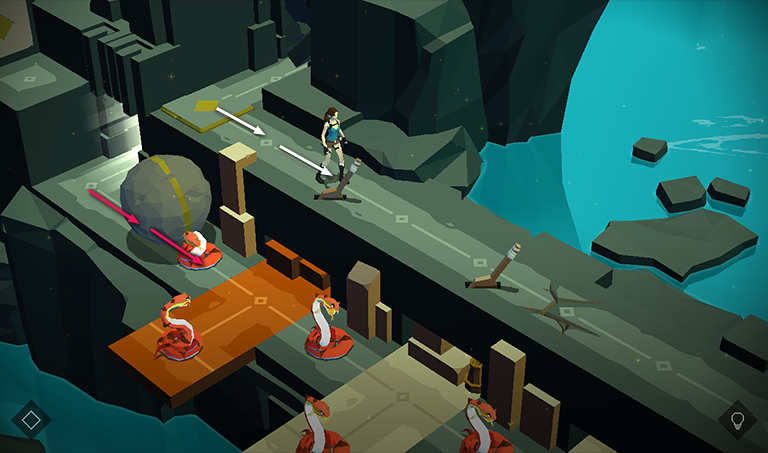
When Lara steps on the pressure pad with the yellow diamond, the block trap behind the boulder is activated, pushing the boulder off the ledge. Like Lara, the boulder only moves once per turn, so as long as you stay ahead of it, you're safe.
You may want to deliberately move back toward the boulder, letting it squash Lara, in order to unlock the Gathering Moss achievement/trophy. You can do this with any of the boulders in the game, and of course you may unlock it accidentally as you work out the boulder puzzles, but this is an easy opportunity to do it.
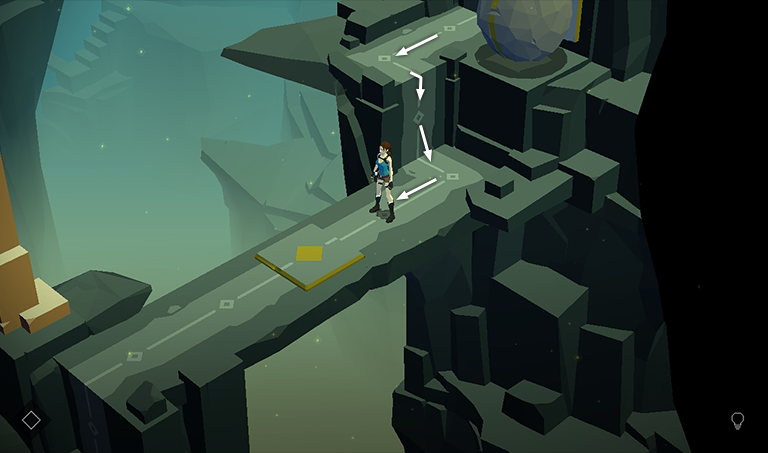
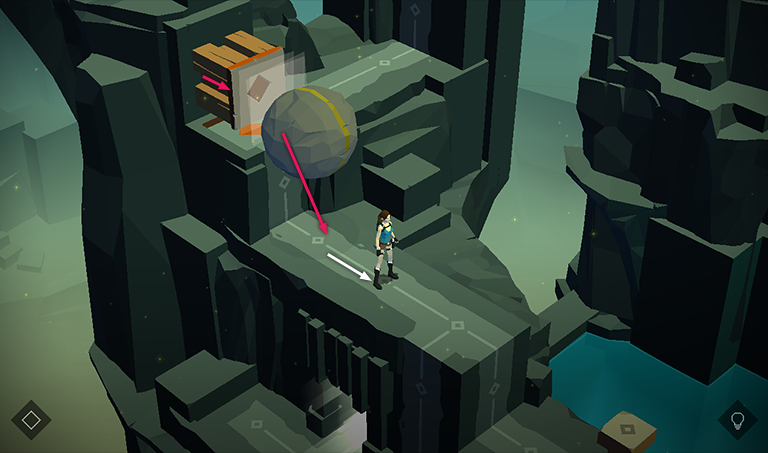
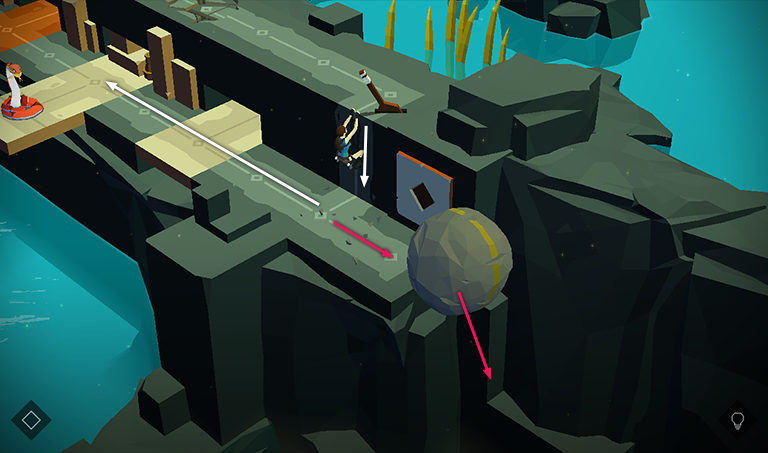
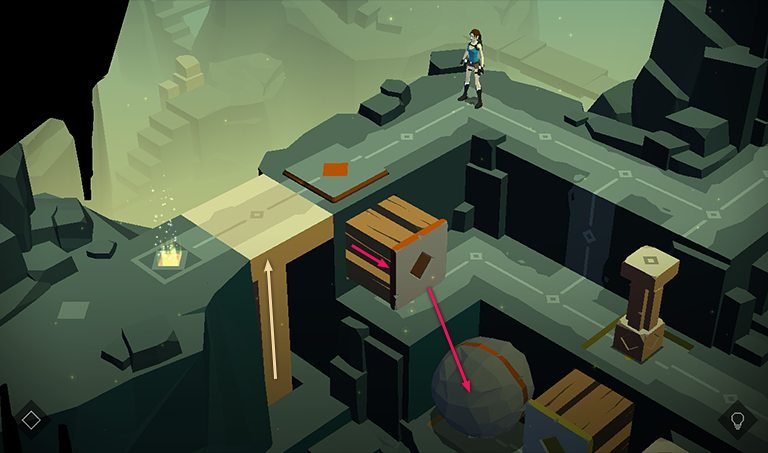
Continue forward and drop down onto the ledge below. The boulder follows behind you. Smash the vase sitting on the cliffside below on the right to get a SAPPHIRE (25/32).
Move onto the pressure pad with the orange diamond to activate the block trap just above the pad. This shoves Lara off the ledge onto the walkway below, while the boulder advances to the space just before the pressure pad.
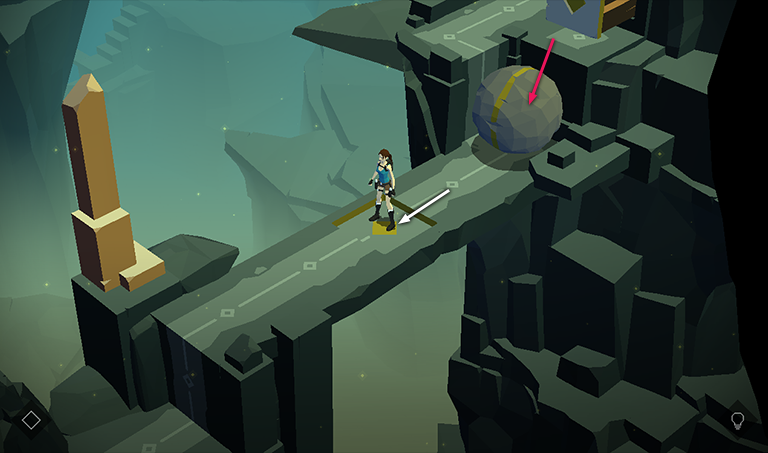
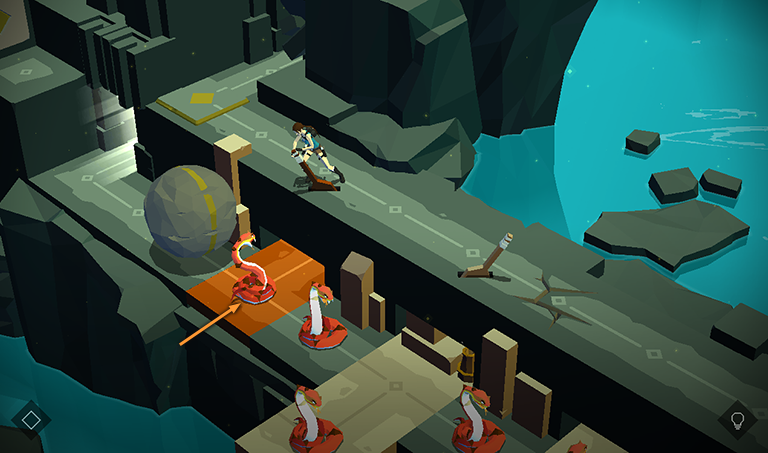
As you move to the right, the boulder rolls onto the pressure pad, causing the block trap to push it off the ledge so it lands behind Lara.
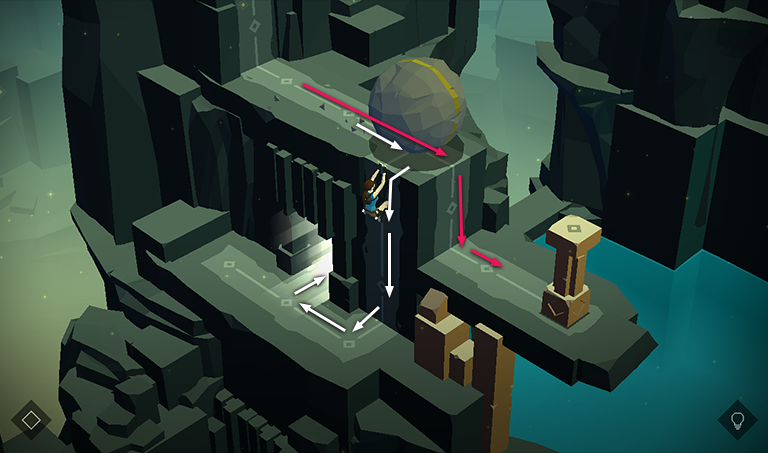
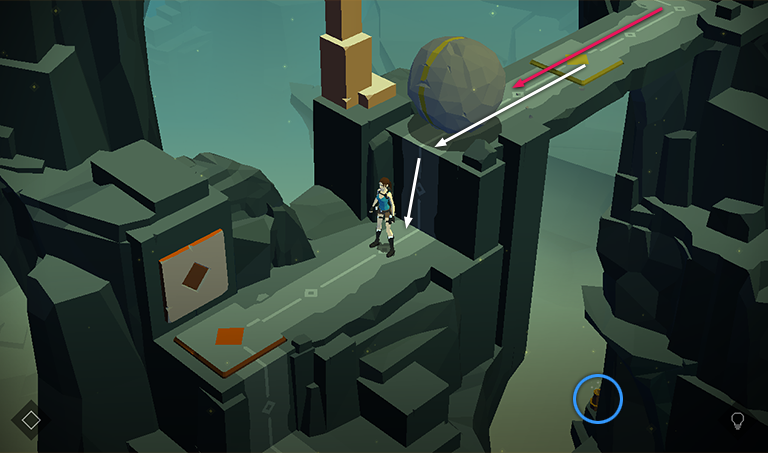
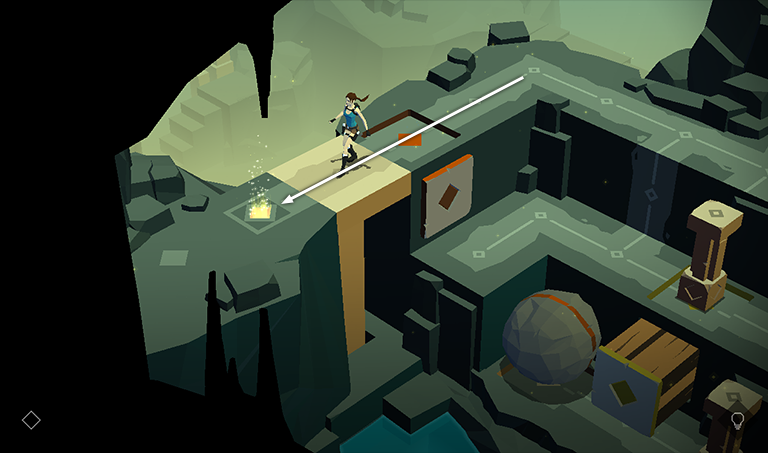
Move forward once more. Then drop down on the left to avoid the boulder. As you climb down to the doorway, the boulder rolls off the right edge and is then stopped by the tan pillar.
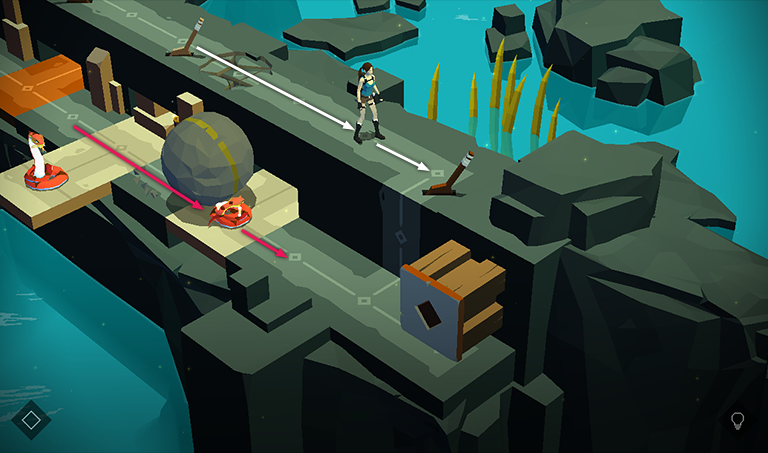
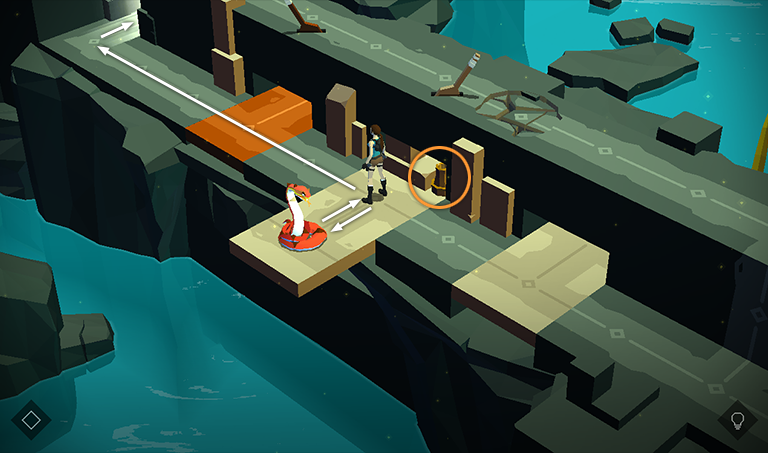
In the next area,
step forward onto the pressure pad with the yellow diamond to activate the block trap off to the left, knocking the boulder onto the ledge below.
Move to the right until Lara is standing next to the first lever. As you go, the boulder rolls two spaces to the right, squashing the first of several snakes on the ledge below.
Pull the lever to shift the orange ledge to the right, so the snake sitting on that ledge is now directly in the path of the boulder.

Move toward the second lever. As you go, the boulder rolls over 2 more snakes—the one on the orange ledge and the next one to the right. Do not pull the second lever, which toggles the tan ledges below. If you do this accidentally, just pull the lever again to return the ledges to their original positions.
Continue to the right end of the walkway, passing over the cracked floor. As you go, the boulder continues to roll to the right, squashing 2 more snakes.

Pull the third lever to retract the block trap below.
Move back to the left, then right again toward the lever. During these two turns, the boulder rolls to the right until it is sitting in front of the block trap.
Now you can either pull the lever to push the boulder off the edge, or just climb down onto the ledge and let the boulder continue rolling to the right.
Follow the lower ledge to the left, breaking the vase in the alcove to get a piece of THE FROZEN SPIDER relic (10/12). As you pass the last snake, you can move toward it to kill it, or just continue to the end of the walkway and through the door.
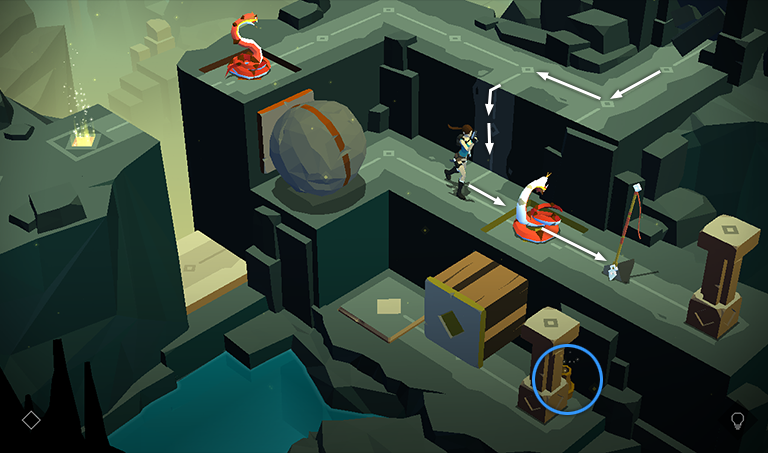
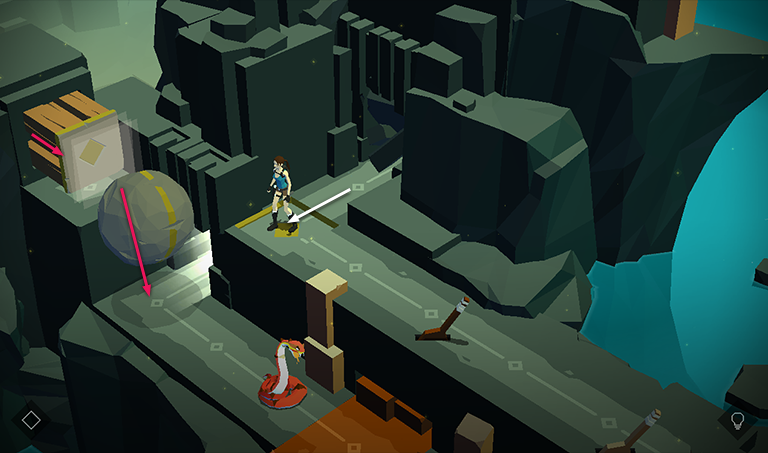
In the next area, climb down onto the middle ledge, move to the right to shoot the snake, and then grab the SPEAR. Break the vase concealed behind the tan pillar on the lower level. This one contains another SAPPHIRE (26/32).
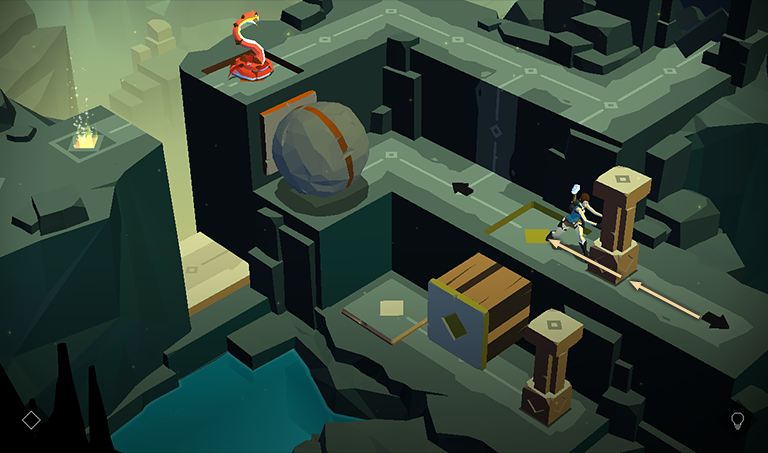
Drag the pillar on the middle level, where Lara is standing now, onto the pressure pad with the yellow diamond, in order to keep the block trap on the lower ledge extended.
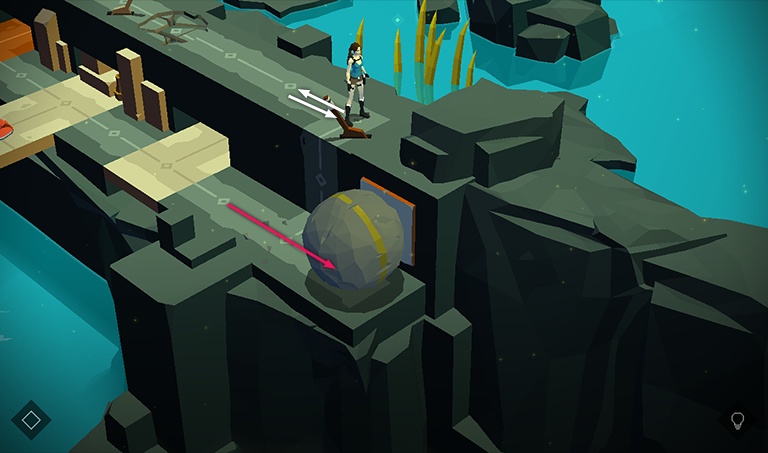
Now climb back onto the upper ledge, move left to the corner of the walkway, and use the spear to kill the snake sitting on the pressure pad above the boulder.
When the snake disappears and the pressure pad with the orange diamond is no longer depressed, the block trap below is triggered, knocking the boulder off the ledge. It lands on the pressure pad with the tan diamond on the lower level, raising the tan platform near the exit.
The pillar sitting on the pressure pad on the middle level keeps the block trap on the lower level extended, preventing the boulder from rolling off the pressure pad. The tan platform then remains level with the walkway so you can cross over it and exit the level.
†UPDATE HISTORY: 9/4/15 - Walkthrough first posted.
9/7/15 - Added video walkthrough.
9/17/15 - Added note about the Gathering Moss achievement.
WAS THIS WALKTHROUGH HELPFUL? If not, I apologize and invite you to contact me with any questions. If you need help right away, I recommend the r/TombRaider subreddit. Other fan-run forums are listed at tombraiders.net/stella/community.html. If this site was useful, please consider supporting it financially or in other ways. For details, visit tombraiders.net/stella/support.html. As always, I welcome your corrections/suggestions. Thank you!
Copyright © - Stellalune ( ). Screenshots were made using the Andy Android emulator. Feel free to copy or print this walkthrough for personal use. Share it with friends if you like, but please include this credit line so people can send me their feedback. No part of this walkthrough may be reproduced on another site without permission. Follow this link for details about this site's advertising and privacy policy.
Stella's Tomb Raider Site: tombraiders.net.