Stella's Lara Croft and the Guardian of Light Walkthrough - For Xbox 360, Xbox One, PlayStation 3, Windows PC & iPad/iPhone/iPod Touch*
Throughout this walkthrough I use abbreviations for north (N), northeast (NE), southwest (SW), etc., to give directions. There is no compass in this game, but just to make it easier to navigate on screen, we'll assume north is up, west is left, east is right and south is down. Outdoor levels include a map screen in the Inventory in case you get lost. Also, I played using the medium combat difficulty setting so your experiences may differ slightly on a different setting.
*Although the PC, console and iOS versions are similar, there are significant differences in a few areas. The iOS version does not include this level. It skips directly from the Twisting Bridge level to Xolotl's Stronghold.
Level 12: Stronghold Passage (Single Player) | Updated: 1/21/14(†) |
For the 2-player co-op walkthrough, please see here.
Score Challenges: 60K, 90K, 120K (Bonus: Railgun) Reward Challenges:
Artifacts: Stone Serpent, Jade Heart A complete list of artifacts, relics and weapons can be found here. |
ENTRANCE: The urns just beyond the entrance contain health, ammunition and gems. You won't need the supplies yet, but you can always come back for them. Equip a powerful weapon like the rocket launcher and continue to into the large room to the north.
You'll notice some similarities between this area and the Forgotten Gate. As the on-screen message states, you'll need to find 6 rolling balls to extinguish the flames.
MAIN ROOM WITH SIX FIRE PITS: As you descend the staircase, the 6 fire pits ignite and a fire golem appears. (Again, I don't know the official names for the various enemies, but this guy looks like a D&D fire golem.) You can destroy it with a few well-placed rockets. (screenshot) Just watch out for the lava boulders it throws and the ones that explode outward when it dies. It drops health and/or ammo, and you'll find more supplies—a health pack and 2 boxes of ammo, plus some gems—in the urns and around the edges of the room.
Climb the stairs to the NW, avoiding the falling lava in the doorway at the top.
ROOM WITH PRESSURE PAD AND TALL COLUMNS: The first LARGE BALL (1/6) is perched atop the tall column. To retrieve it, move carefully around the burners to the left side of the column. Plant a bomb on the carved tile at the base of the column. (This tile is actually the top of another column.) Go back around to the square pressure pad. Step on it to lower the tall column and raise the other one out of the floor. When the 2 columns are level with each other, detonate the bomb to knock the ball down. Then get out of the way. (screenshots)
When the ball is moved, a long-haired ogre and 2 skeletons appear in the northern corner. The burners near the columns go out, but you still need to watch out for the falling lava near the entrance as you fight. As usual, be sure to destroy the skeletons' fallen bones with explosives so they don't rise up again.
Break the urns to get 3 boxes of ammo and a health pack if you need them. The ogre also drops health/ammo.
To get the AMMO UPGRADE floating above the tall column, roll the ball onto the pressure pad to bring the column down. Drop a bomb next to the ball, climb onto the column and detonate the bomb to move the ball off the pad and raise the column. Grab the upgrade and drop down. Then roll the ball down the stairs to the NE so it lands in the MAIN ROOM below.
Continue up the next flight of stairs to the SE. Grapple the golden ring at the corner of the walkway and rappel down the support column to get a HEALTH UPGRADE. (screenshot) Then climb back up and continue to the NE. Jump across the wide gap in the stairs and grab the opposite edge; pull up.
ROOM WITH GIANT BOWL: This big bowl is similar to the round cage in the Forgotten Gate level. Use a bomb to blow the LARGE BALL (2/6) into the bowl. It will then roll down through the hole into the MAIN ROOM below. (screenshot) Gather the gems in the corners and head up the stairs to the NE.
Go past the golden handle for now and squeeze between the broken doors into the next room.
ROOM WITH BALL ON BURNERS: Stand near the handle in the NE corner and throw a spear into the square column just to the left. Pull the handle to raise a set of wooden ledges above the burners. These ledges collapse when the handle retracts, so quickly jump onto the spear, climb on top of the column and take a running jump across to the other column, dropping a bomb into the gap as you go. Drop down and then detonate the bomb to blow the LARGE BALL (3/6) off the burners. (screenshots)
A pair of fire shamans appears on the burners. Kill them. Then smash the urns to replenish your health and ammo if necessary.
NOTE: If you're having trouble coordinating dropping the bomb as you jump across the retracting ledges, instead climb onto either of the urns or the golden handle. From atop the urn, launch a grenade toward the ball to knock it off the burners. The fire shamans will still spawn so be ready for them. (screenshot)
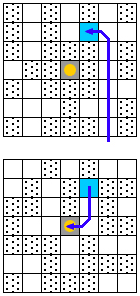
DETOUR FOR GOODIES: If you're going after red skulls and artifacts, leave the ball for now and climb down the ladder to the SE. (screenshot) On the walkway below, head to the SW to find a red skull (1/10) sitting on a broken column. Shoot a spear into the column from the stairs and climb up to the skull. Hop down and move to the west corner to find the first hidden spider tile (1/3) mentioned in the Reward Challenge. When you step on the tile it glows blue and the on-screen counter shows you've found one. (This screenshot shows both the skull and the spider tile.)
Return up the stairs and go past the falling lava to the NE end of the walkway.
 FIRST CHALLENGE TOMB: Inside is a huge field of spikes with a shiny artifact sitting the middle. These spikes don't extend when you step on them. Instead, they're controlled by the bull's-eye switch. Shooting the switch retracts certain spikes and extends others, but there's one set that remains retracted in both configurations: It's the 5th tile in the 2nd row from the top left (N) corner. (screenshots)
If you've already shot the target, shoot it again so the green side shows, rather than the red, and the entire sixth column of spikes is clear (as shown in the first of the 2 diagrams at right). Plant a bomb next to the target and move onto the safe tile (marked in blue). Then detonate the bomb to flip the target and rearrange the other spikes. Or shoot the target from the safe tile if you prefer. Now the path to the center is clear, enabling you to reach the Stone Serpent Artifact (+ weapon, + defense, + bomb). When you take it, all the spikes retract so you can exit safely.
Return to the main area and climb the ladder to the room where you got the ball off the burners.
ROOM WITH BALL ON BURNERS (again): Roll the ball up against the gap in the wooden door where you entered. Plant a bomb behind the ball. Then climb over it and pull the handle in the hallway to open the door. Detonate the bomb to blow the ball out into the hallway and quickly move out of its way. (This is shown in the screenshots for the ball-and-burner room.) Then roll it down the stairs and bomb it into the GIANT BOWL.
Leave the bowl room through the doorway to the SE and jump across the gap in the walkway. Wait until the rotating flame jet sweeps across the corner of the walkway before jumping across the next gap.
Go up the stairs and around the next corner in the walkway, but do not approach the base of the wooden wall ahead. It's covered with spikes that will kill Lara on contact. Instead, throw a spear into the wall and climb up that way. (screenshot) When you do, 2 skeletons appear below. Drop a bomb at the edge of the ledge, shoot them as they jump up and then detonate the bomb. (screenshot) Then climb the ladder to the NW.
SMALL ROOM WITH FALLING LAVA BOULDERS: To avoid the lava boulders bombarding the walkway ahead, stand close to where they fall, wait for 2 boulders to hit then quickly run/roll through the doorway. Approach the pedestal from either side, wait for 2 lava boulders to hit the pedestal, and then quickly jump across the pedestal to pick up the DUAL SMGs. (screenshot)
There are also urns here with health and ammo inside, plus some gems on the floor. Take what you need and continue upstairs to the NE.
ROOM WITH STONE FISTS: As you enter, the 2 giant stone fists on the NW wall smash down, the wooden ramp behind you retracts, blocking the exit, and a LARGE BALL (4/6) rolls down the stairs from above. You'll need 2 more balls to solve the puzzle here, so ignore the pressure pad and burners for now. Break the urns to get health and ammo if you need them. Then climb the stairs to the NW where the big ball came from.
ROOM WITH SQUARE PILLAR IN LAVA TRENCH: Carefully retrieve the gems from the burners. Each burner ignites just after you pass over it. Then hop across the square pillar sticking out of the lava trench to the ledge on the other side. (screenshots)
Roll the LARGE BALL (5/6) into the slight depression at the edge of the ledge near the square pillar. Plant a bomb behind the ball so the red circle indicating the blast radius overlaps the ball just slightly. This placement will cause the ball to be blasted forward more than upward. Detonate the bomb to hurl the ball across the square pillar to the other side of the lava trench. If you don't get it right at first, a new ball will drop out of the chute so you can try again.
NOTE: If your bombs aren't quite powerful enough to propel the ball all the way across the trench, try this: Position the ball in the depression and place the bomb behind the ball but closer to it. Shoot the bull's eye and immediately set off the bomb to blast the ball forward just as the square pillar rises. The pillar then lifts the ball, causing it to drop onto the opposite ledge, rather than into the lava.
Also be sure to step on the hidden spider tile (2/3) in the far left corner. This is part of the spider-tile Reward Challenge. (Again, check the screenshots if you need a visual.)
Now jump onto the pillar and shoot the target to raise Lara to the HEALTH UPGRADE floating in midair. Jump down onto the ledge. Then carefully roll the ball past the burners and down the stairs into the ROOM WITH STONE FISTS.
You're still one ball short. So exit this room to the NE and follow the walkway up and around to a golden ring. Jump off the edge toward the red skull (2/10) and quickly grapple the ring in mid-air to prevent Lara from falling to her death. (screenshot) Climb back up the cable and continue along the walkway.
Shoot the bull's-eye switch to extinguish the wall of fire, while simultaneously activating the flame vent on the ledge above. Plant a bomb near the bull's eye. Then throw a spear into the wall and climb onto it. Detonate the bomb to flip the switch and quickly climb up onto the ledge before the flames on the wall re-ignite. (screenshots)
ROOM WITH SKULL PEDESTAL: This is the site of a Reward Challenge: Rest a ball atop the skull pedestal. You don't have a ball yet, though. So smash the urns for health, ammo and gems. Then follow the scrape marks on the floor to the NE.
WIDE LAVA STREAM WITH BURNERS: The urns along the NW wall contain gems and a health pack. Pull the golden handle on the NE wall to temporarily extinguish the 4 single burners sitting in the lava stream to the right. Hop across the burners, picking up a red skull (3/10) on the way. You'll need to move quickly before the burners re-ignite. (screenshots)
When you take the red skull, 2 fire shamans appear near the handle. Finish crossing the lava stream and shoot them from the other side.
Here you'll find the final LARGE BALL (6/6), along with urns containing health and a gem. There's also an AMMO UPGRADE sitting on the large set of burners in the lava stream. Go after that first. Wait for the flames to move away to the NW, jump across the lava onto the burners, run to the upgrade and then run and jump back onto the SE ledge. (screenshots)
Now roll the ball to the edge of the lava stream, just across from the burners where you got the upgrade. Plant a bomb just behind the ball to blast it onto the burners. After you've upgraded your bombs a bit, it may be possible to blast the ball all the way across to the opposite side of the room. But it's OK if you don't manage this. As long as the ball ends up on the far side of the burners, as shown above, you're good to go.
Wait for the flames to move away and jump across the lava onto the burners. Quickly move to the left edge, where Lara will be safe from the flames, and make your way to the other side of the burners. Plant a bomb behind the ball, move back to the safe area on the left, and then blast the ball onto the NE ledge. Then jump across after it and roll it out of the room to the SW. (screenshots)
NOTE: Of course you can go after the upgrade and move the ball at the same time, but I found it easier to do one thing at a time. Also, if you mess up and the ball ends up in the lava, a new one will drop out of the chute in the NE corner.
ROOM WITH SKULL PEDESTAL (again): Now you can complete the Reward Challenge. Position the ball on the decorative tile border surrounding the skull pedestal, directly SE of it. Plant a bomb behind the ball and detonate it to (hopefully) blast the ball onto the pedestal. If it doesn't work at first, try again. Doing so earns you a HEALTH POWERUP. The pedestal then sinks into the floor. (screenshots)
Roll the ball into the chute in the NW corner. When the ball goes in, a fire golem appears. Destroy it and pick up any health/ammo it drops. Then return down the stairs to the SW, leaping over the wall of fire at the bottom. Continue past the bull's eye and the grapple ring to the room below.
ROOM WITH STONE FISTS (again): You should now have 3 LARGE BALLS here. If you're missing any, check the walkthrough above. Now you must position 2 of them under the huge, stone fists in order to block the holes where the lava boulders emerge.
To do this, position a ball touching one of the stone fists, on the side nearest the golden handle/burners. Place a bomb on the other side of the fist, near the outer corner of the room, so the red circle marking the blast radius is not touching the ball. (If the blast radius of your bomb is too big to do this, try un-equipping bomb-enhancing items.) Stand near the ball, detonate the bomb to raise the fist into the air, and then quickly roll the ball under the fist before it falls. Repeat with the second ball and fist. (screenshots)
With both lava boulder vents blocked, you can roll the 3rd ball onto the round pressure pad to extinguish the burners. Now pull the handle to open the exit in the SW corner.
Begin rolling the 3 LARGE BALLS down the ramp into the SMALL ROOM WITH FALLING LAVA BOULDERS. As you start to move the second ball, 2 fire shamans and 2 skeletons appear. When you've destroyed them, 3 more skeletons jump in from the NE. After you've dealt with them all, roll the remaining balls down into the room below. Then go down and deposit all 3 balls in the chute. (screenshot)
You may also notice a new urn that wasn't here before. It contains more ammo. If you return to the STONE FIST room again, you'll find another mystery urn with ammo inside. (That Xolotl...always so thoughtful!)
Carefully run/roll out the SW doorway, avoiding the falling lava boulders. Climb down the ladder and be sure to jump down from the next ledge, rather than dropping down, to avoid the crack of doom at the base of the ledge. Continue down the stairs to the gap with the rotating flame jet. Jump across after the flame has moved away. When you pass the corner, 2 skeletons leap up from the room below. Destroy them and jump across the next gap to the NE.
ROOM WITH GIANT BOWL (again): The 3 LARGE BALLS you sent down the chute should be waiting here for you. Use bombs to propel them into the bowl, as you did the others. This time, you need to watch out for falling lava boulders as you work. There are also 2 new urns with health and ammo in case you need it.
Now exit to the SW, jump across the gap in the staircase and continue down to the room below.
ROOM WITH PRESSURE PAD AND TALL COLUMNS (again): Two skeletons greet you at the bottom. Deal with them before venturing farther into the room. When you approach the columns, a fire golem and a swarm of red lizards appear. Use a powerful weapon like the rocket launcher or high-power, single-shot rifle on the golem. Then switch to something with a faster fire rate to finish off the lizards. Return downstairs past the falling lava to the MAIN ROOM. Again, there are a couple of new urns with ammo if you need a top-up.
MAIN ROOM WITH SIX FIRE PITS (again): Carefully roll the 6 LARGE BALLS onto the 6 fire pits to extinguish them. When all 6 are in place, the large gate to the north opens. Go through.
SECOND CHALLENGE TOMB: The entrance to this tomb is located on the left, just before the TRAPPED CORRIDOR leading to the exit. Enter the tomb and shoot the bull's-eye switch to extend a set of wooden ledges above the deep pit. Doing so also retracts the spikes on the fat column rising out of the pit and closes the gate in front of the relic on the right side of the pit. (screenshots)
Drop a bomb near the switch. Then go out onto the ledge near the relic. Throw a spear into the spiked column so it protrudes toward the relic. Jump onto the spear, detonate the bomb to flip the switch and quickly jump off the spear into the relic alcove before the spikes extend. Claim the Mask of Tezcatlipoca Relic (Power Shot, Power Bomb, Scatter Shot). Then shoot the switch to re-extend the ledges so you can get back to the exit.
TRAPPED CORRIDOR: Before setting out across the burners, blow up the stone coffins on both sides of the corridor to get a few more gems. (screenshot)
Then quickly but carefully run forward across a floor lined with burners. An orange glow on the floor provides a little advance warning when one of the flames is about to come on. Try to avoid them, since a full-on flame means instant death. There are 2 red skulls (4 and 5/10) on this first section of burners: one just ahead on the left, one a bit farther along on the right. (The accompanying screenshots include more details. There's also a short video walkthrough if you need it.)
Beyond the first set of burners is a section with collapsing tiles with gaps where some tiles are already missing. Lava boulders rise up from the pool below, so run along either side to avoid the large, square gap. Then jump across the next two gaps in the middle of the walkway. Remember that holding the jump button will keep Lara in the air just a little longer.
Beyond the break-away tiles is another stretch of burners. The next red skull (6/10) is on the left side of this section. If you just roll forward along the center-left row of burners, you can grab the skull while staying ahead of the flames.
After clearing these burners, you come to another area with collapsing tiles. This time there are falling lava boulders as well. One huge boulder drops onto the walkway just as you arrive. Leap across the wide gap it leaves or go around it on the left side, since the next 3 red skulls (7-9/10) are sitting along the left side of these tiles. The final red skull (10/10) is on the right, just before the end of the collapsing tiles. Grab it, move toward the center of the walkway and take one final long jump across to the ledge near the exit as the last 2 sets of tiles fall away.
If you've found all 10 red skulls, you'll get the Fist of Tezcatlipoca Relic now (Power Shot, Power Bomb, Ammo Regeneration and Scatter Shot).
Before running through the exit, blow up the stone coffin to find the final hidden spider tile (3/3). Step on it to make it glow. If you've located the others as well, you'll beat this Reward Challenge and receive an AMMO POWERUP. (screenshots)
And, if you manage to reach the exit within 15 minutes, you'll get a Jade Heart Artifact (+ weapon, + defense, + bomb, + speed!).
†UPDATE HISTORY: 9/6/10 - First draft walkthrough posted.
9/16/10 - Added the alternate method for getting the 5th ball across the lava trench, thanks to Cas. Also noted the new urns that appear on your second pass through certain areas.
10/20/10 - Fixed typo in first section. (Yes, there are 6 burners and not 8.) Thanks to Smartypants70 for the correction.
11/3/10 - Added screenshots and video. Also made a few minor corrections and clarifications.
11/10/10 - Amended the strategies for the rooms with the 3rd and 6th balls, thanks to tips from Mr. Furious. Also changed the 6 'round burners' to 'fire pits' to distinguish them from the run-of-the-mill burners which don't work as switches.
10/1/12 - Fixed an error in the section just after the Room with Ball on Burners (again). The wooden wall is actually lined with spikes, as pointed out by Brett.
1/21/14 - Added update about missing levels in iOS version, thanks to a tip from Sean O.
WAS THIS WALKTHROUGH HELPFUL? If not, I apologize and invite you to contact me with any questions. If you need help right away, I recommend the r/TombRaider subreddit. Other fan-run forums are listed at tombraiders.net/stella/community.html. If this site was useful, please consider supporting it financially or in other ways. For details, visit tombraiders.net/stella/support.html. As always, I welcome your corrections/suggestions. Thank you!
Copyright © 2010- - Stellalune (). All rights reserved. The screenshots and videos included here were made using Fraps. Feel free to copy or print this walkthrough for personal use. By all means, share it with friends, but please include this credit line so people can send me their feedback. No part of this walkthrough may be reproduced on another site without permission. Follow this link for details about this site's advertising and privacy policy.
Stella's Tomb Raider Site: tombraiders.net.