IMPORTANT: The material in this section pertains only to Tomb Raiders 1 through 5. Angel of Darkness and the newer games are built using different engines and thus require different approaches. I will eventually add useful bugs for those games, but for now, I recommend searching YouTube for the name of the game plus keywords like "bug," "glitch," etc.
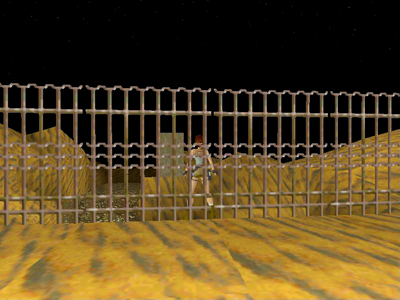
This bug works best in TR1, TR2 and TR3 and the bonus levels for these games. Here you take advantage of seams between two-dimensional textures (like fences or balconies) to force Lara through to the other side. The fence bug doesn't require as careful positioning as the corner bug, but I have described one possible technique below, since it is fairly accurate and fairly easy to follow. Once you've gotten the hang of it, you won't need to use such a precise setup.
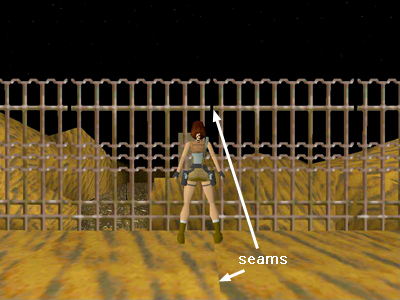
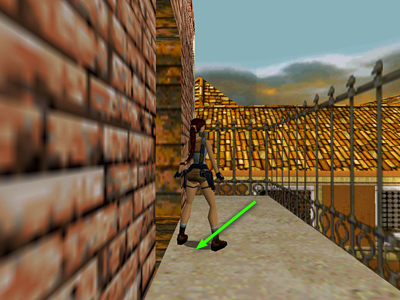
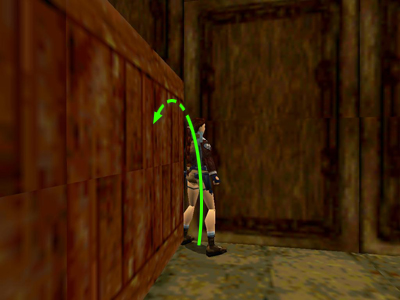
Position Lara against a fence just to the left of a seam between two textures. A good way to ensure correct positioning is to place her right foot just to the right of the seam between the corresponding floor textures. (screenshot 1)
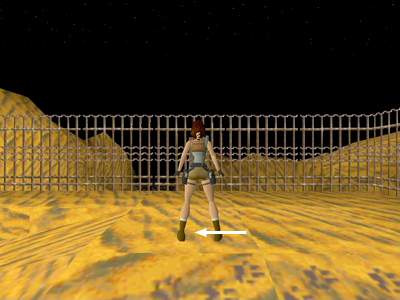
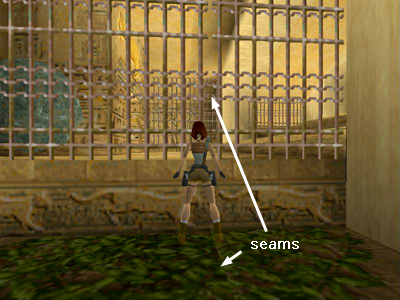
Hop back once. Lara's right foot should still be on or near the seam. (screenshot 2)
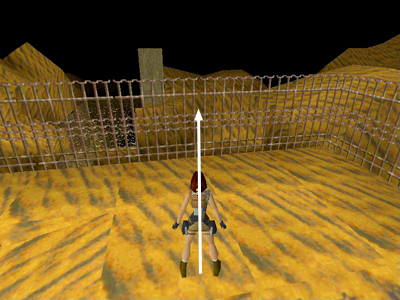
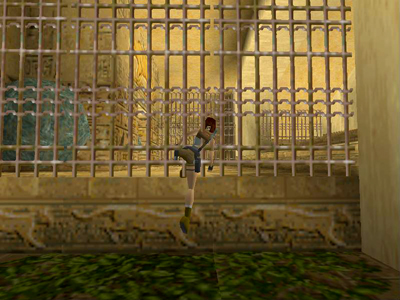
Sidestep to the left once. (screenshot 3)
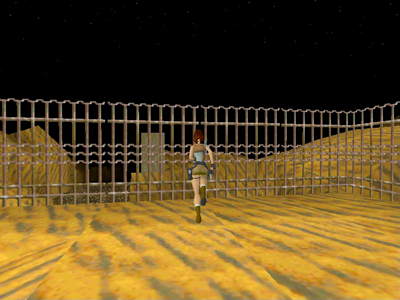
Turn just a little to the right and use the Look button to check Lara's position. She should be facing the seam between the two fence textures at an angle of about 20-30 degrees. Her head should be lined up with the seam between the two textures or just a tiny bit to the left of it. (screenshot 4)
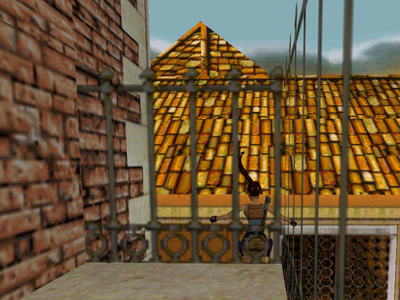
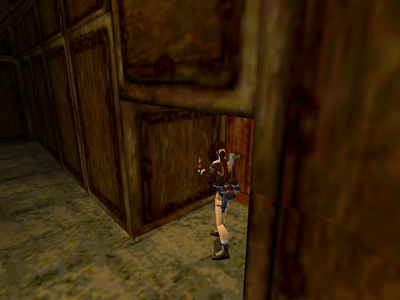
Run at the fence. If you've positioned Lara correctly before starting to run, she'll go right through the gap between the sections of fence. (screenshots 5 & 6)
Click on each screenshot to see a larger version. For all screenshots on one page, click here. The video following the next section shows both the basic and vaulting fence bugs in action.
Vaulting Fence Bug
This is a simple variation on the basic fence bug. It can be used where a fence is built on top of a wall that is low enough to vault up onto. If Lara has to grab and pull up, the wall is too high and the bug won't work.
screenshot 1
screenshot 2
Position Lara against a fence just to the left of a seam between two textures. A good way to ensure correct positioning is to place her right foot just to the right of the seam between the corresponding floor textures. (screenshot 1)
In some spots, the reverse positioning is necessary: Stand to the right of the seam with Lara's left foot just to the left of the seam.
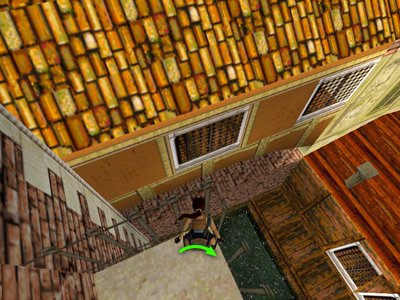
Press Action + Forward. If the positioning is correct, Lara will vault up onto the wall right through the seam in the fence. (screenshot 2)
Click on each screenshot to see a larger version. For all screenshots on one page, click here.
Fence Bug Balcony/Corner Variation
screenshot 1
screenshot 2
screenshot 3
screenshot 4
screenshot 5
This variation on the fence bug was found by Joe C. and reported on tombraiders.com. It works in Tomb Raiders 1-3 in most locations where there is a concave corner in a fence or balcony (i.e., a thin texture with regular seams and open space on the other side).
Position Lara squarely facing one section of the fence. Then sidestep into the corner so one hand and foot touches it. (screenshot 1)
Pivot about 20 degrees toward the corner. Check your angle using the Look button. (screenshot 2)
Hop back once or twice. (screenshot 3)
Now just run forward. If you've set it up correctly, Lara should run straight at the point just to the left of the corner seam... (screenshot 4)
...and pop through to the other side. (screenshot 5)
I don't find that it matters, but if you're having trouble, it may help to press Action as you run. And, again, once you get the hang of the maneuver, you won't need to set it up so precisely each time.
Click on each screenshot to see a larger version. For all screenshots on one page, click here. The video below shows this bug in action.
Movable Block or Crack Bug
This technique was also discovered by über-bugmeister Stiletto. It works in TR1 and 2 and is similar to the fence bug in that you force Lara through the seam between two textures, in this case a wall and a movable block. These screenshots were taken in the Barkhang Monastery level in TR2, where this bug can be used to avoid the pool with the strong current (as suggested by Baz on tombraiders.com). It's also perfect for taking a shortcut into the pyramid in the Atlantean Stronghold level of Unfinished Business (as suggested by Wes D.).
screenshot 1
screenshot 2
screenshot 3
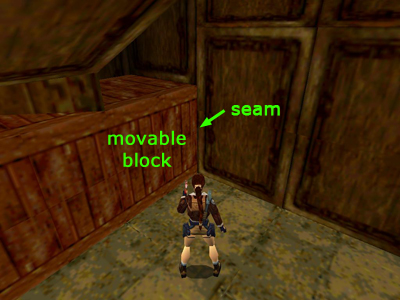
If necessary, push or pull the movable block so there are empty spaces on the side where Lara is standing and on either side beyond the block (as shown in the diagram above and screenshot 1). Depending on what's beyond the block, you may be able to see light through the vertical crack between the block and the wall or see through to the other side by standing close and using the Look button.
Position Lara at a 45 degree angle to the corner with the seam. Sidestep into the corner so Lara's foot and arm are right against the crack. Then just side flip toward the crack... (screenshot 2)
...and Lara should go right through it into the open space beyond. (screenshot 3)
Once you become familiar with the basic technique, you can probably make most crack bugs work with either a forward, back or side jump, but I find the side jump works best when learning.
Click on each screenshot to see a larger version. For all screenshots on one page, click here.

 Custom Search