Sinking Submarine - Secrets #1 and #2 - Level Exit
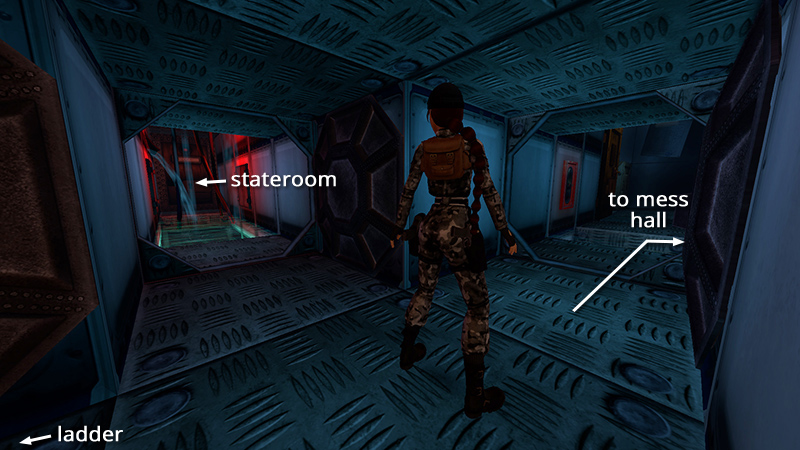
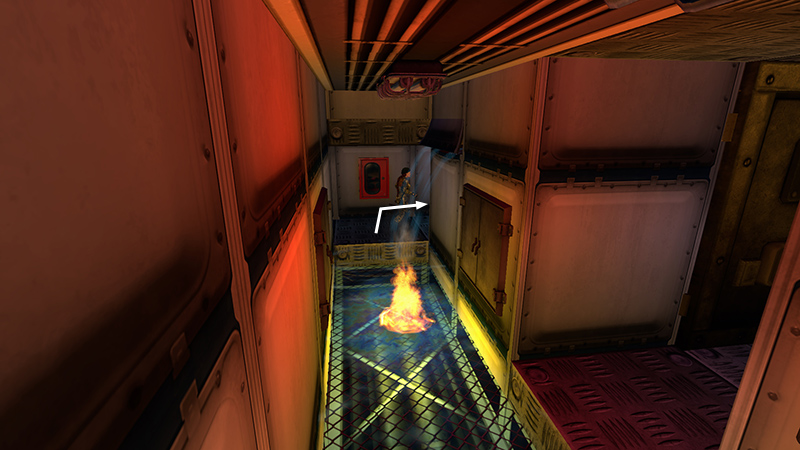
After collecting the NITROGEN CANISTER and SILVER KEY, as shown in the previous section, you climbed back down the ladder to the lower deck. The first passageway on the left, leading to Yarofev's STATEROOM, was previously blocked by live wires but is now safe. Before going in, take a side trip for a secret: Continue straight on through the open swipe-card door. Turn right and follow the corridor back to the BURNING HALLWAY.
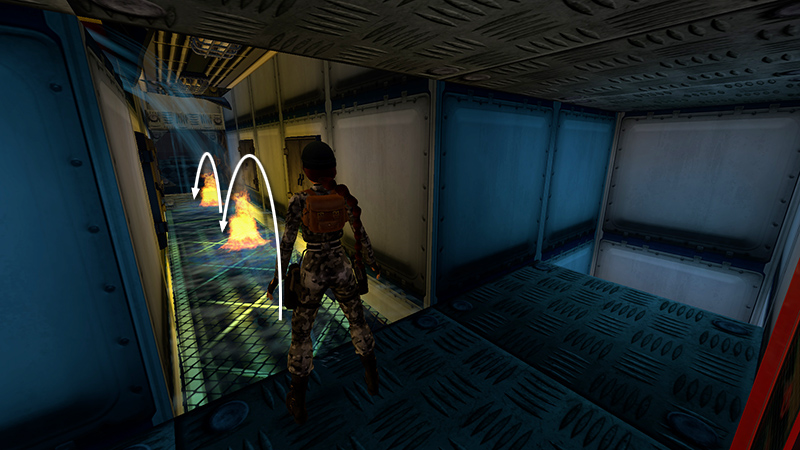
Jump the flames like you did before. (Refer to the earlier section of the guide if necessary.)

Run through the MESS HALL, which is safe now that the power is shut off, into the KITCHEN, on the left.
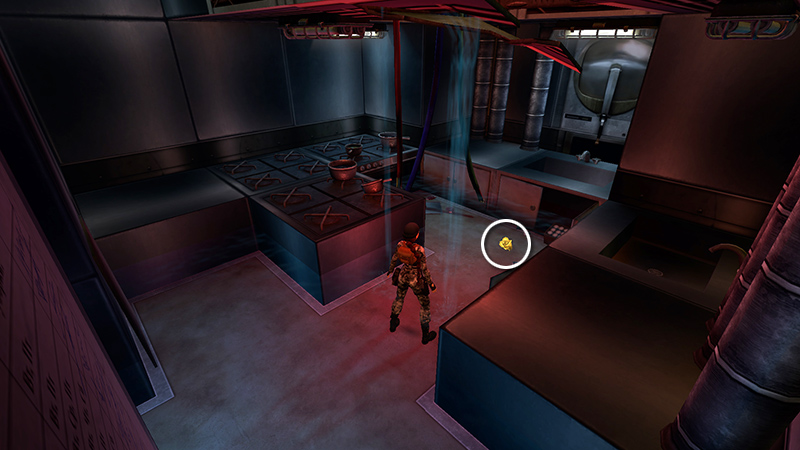
Pick up the golden rose (13) (132/239) from the floor. This is SECRET #1 (17/36).
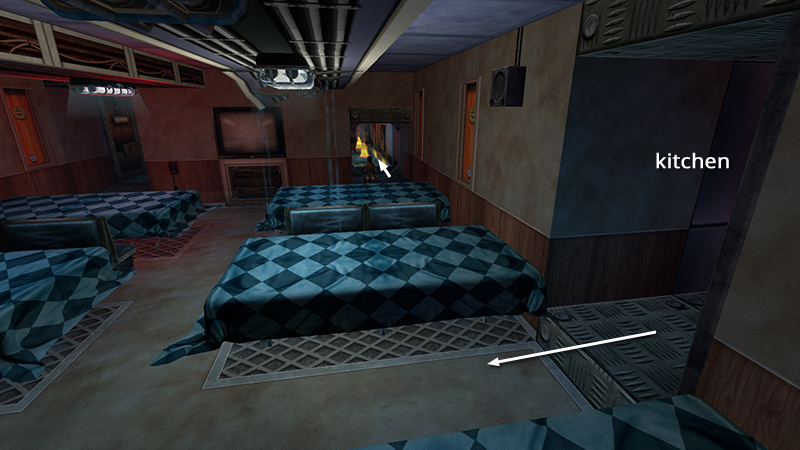
Return through the MESS HALL and the BURNING HALLWAY.
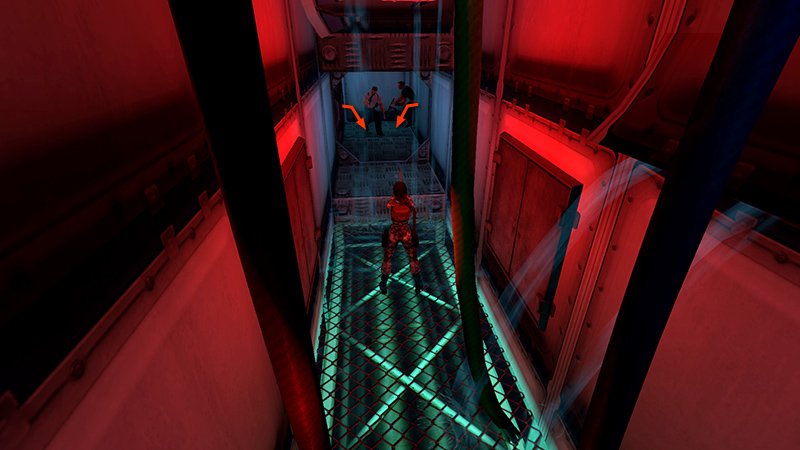
Turn right at the T...

...and continue around the corner then through the open swipe-card door at the end of the hall.
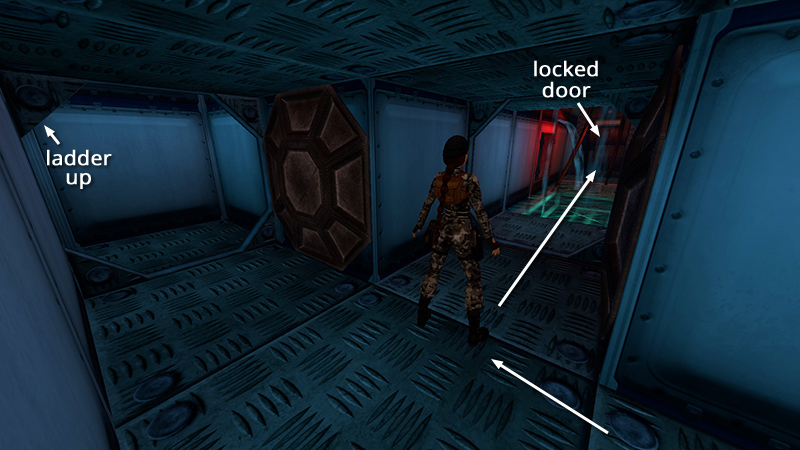
On the right, before the ladder leading to the UPPER DECK, is the corridor with dangling wires. The power is off, and you have the admiral's SILVER KEY, so move past the wires, unlock the door, and go in.
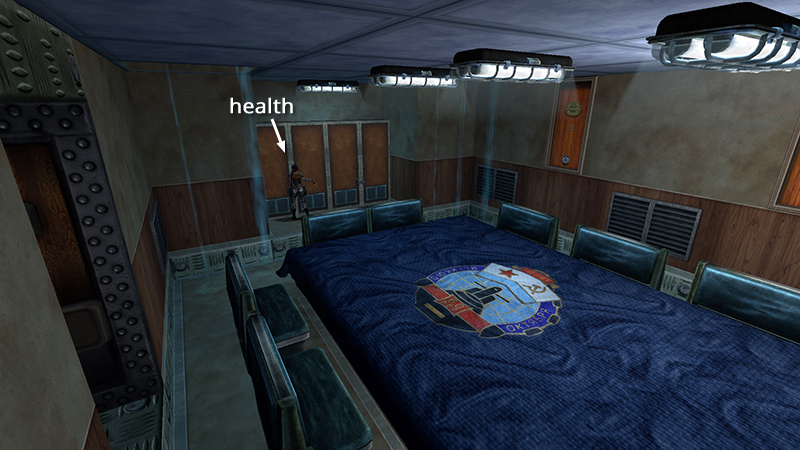
Inside the STATEROOM, search the cabinets. You'll find a small medipack (14) (133/239) in the left cabinet on the left side of the room...
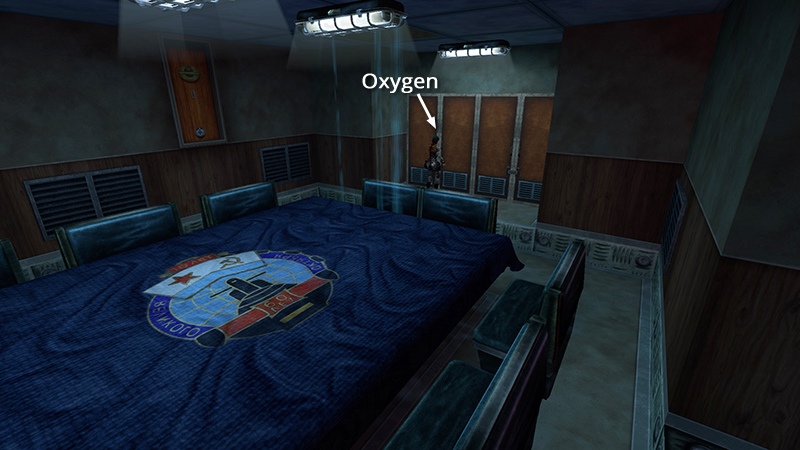
...and the OXYGEN CANISTER (15) (134/239) in the left cabinet on the right side of the room.
Two bad guys (5-6) (43-44/62) ambush Lara in the hallway as she leaves. Take care of them. (Might as well whip out that Desert Eagle, since this will be your only opportunity to use it.)
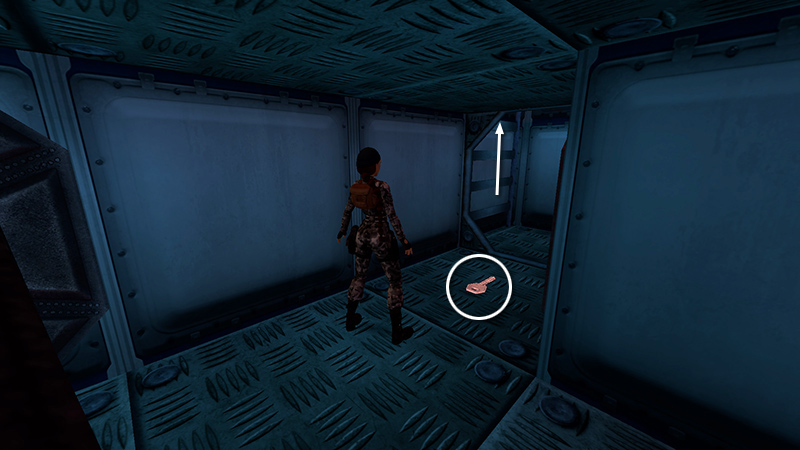
Pick up the BRONZE KEY (16) one of them drops. Now you can get the second secret. Climb the ladder at the right end of the passageway to get back to the UPPER DECK.
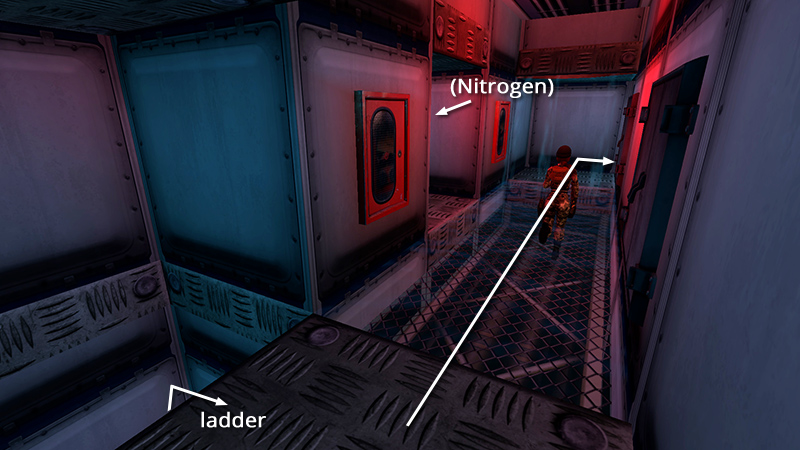
Follow the corridor past the CONTROL ROOM where you found the NITROGEN CANISTER earlier...

...to the SECOND CONTROL ROOM WITH PERISCOPES. Jump from the map table to grab the open duct, pull up, and crawl in.
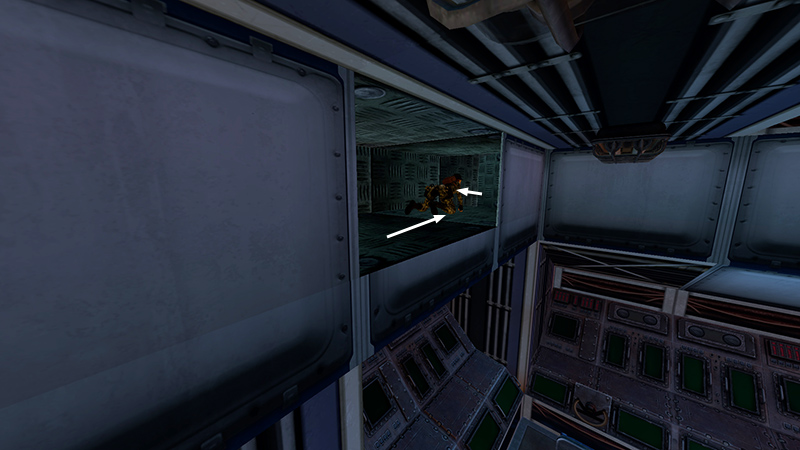
Follow the duct...
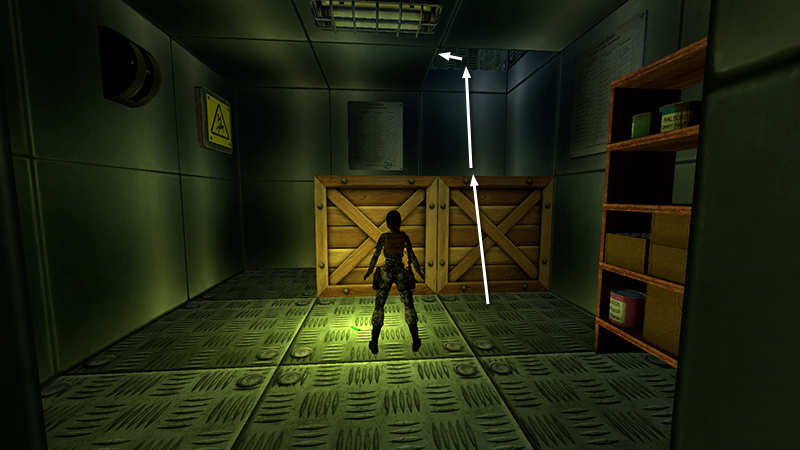
...back to the STOREROOM WITH THE ELECTRICAL SWITCH. Use the BRONZE KEY to open the locked door.

There's another golden rose (17) (136/239), SECRET #2 (18/36), in the drawer. If you found all of the other secrets in the submarine levels, the "Codex of Zapadnaya Litsa" achievement/trophy unlocks here.
Return through the ducts to the CONTROL ROOM WITH PERISCOPES.
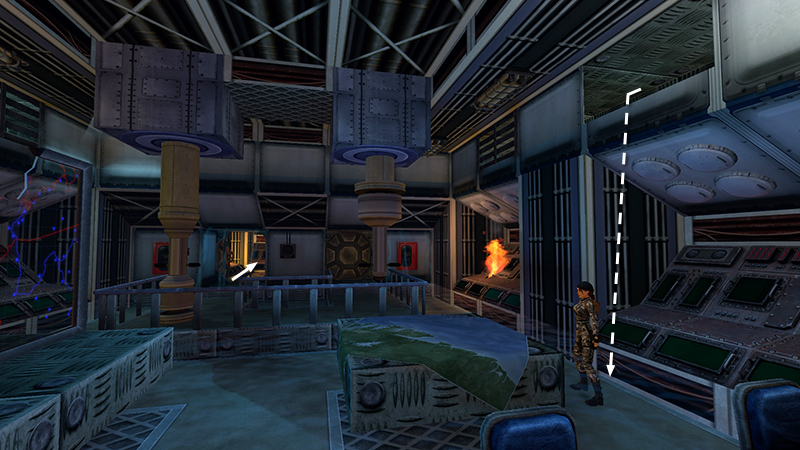
Go through the open hatch at the back into the small room with the injured admiral.
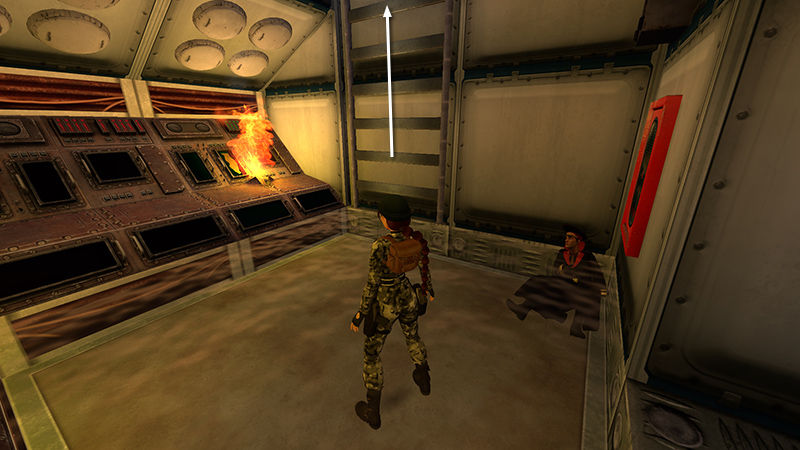
Climb the ladder to the ESCAPE POD.
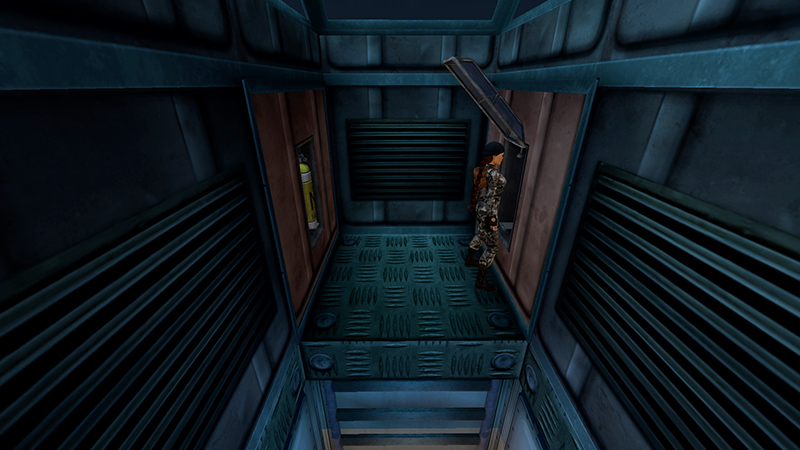
Use the NITROGEN CANISTER in the receptacle on the left. This opens the other receptacle. Use the OXYGEN CANISTER there.
DARK MODE: I plan to add optional dark mode for these pages, but my current priority is updating the walkthroughs. Meanwhile, may I suggest a reputable dark mode browser extension, such as Dark Reader? (Download only from trusted sites, like darkreader.org or your browser's web store.)
Walkthrough text and diagrams copyright © Stellalune (email ). Feel free to copy or print this walkthrough for personal use. By all means, share it with friends, but please include this credit line so people can send me their feedback. No part of this walkthrough may be reproduced on another site without permission.