Stella's Classic Tomb Raider 3 Walkthrough
NOTES ON THE REMASTER: This guide has not yet been updated for the remastered game. Revisions are in progress but will take time. I hope this version, based on the classic game, will still be helpful. Thanks for your patience.
TRAINING LEVEL: LARA'S HOME
Updated: 3/27/24(†)
STARTING INVENTORY: none
Kills: 0 Items: 3 plus 1 key and PISTOLS
IMPORTANT WARNING FOR CLASSIC PLAYSTATION USERS: If after starting a game you return to the training level to mess around, do not save the game using the save crystal in your inventory. If you do, it will overwrite your earlier game save and you will lose all the progress you've made. (Thanks to the guys at Tomb Raiders Traveler's Guide for this.) This is not an issue in the remastered game.
LEVEL MAP by VGCartography (used with permission)
Lara's Home Video Walkthroughby Eldincy‡
ENTERING THE TRAINING LEVEL: To get into the training level, choose the Polaroid photo labeled "Lara's Home" from the main menu and press Enter/Select.
THE BASICS: This is the place to learn (or brush up on) Lara's basic moves. I won't list every control here. Refer to your manual and/or my Controls and Strategy pages if necessary.
You begin in Lara's BEDROOM where she welcomes you back. There are several silver buttons on the walls of the mansion. Most of these open nearby doors. The first is just to the left of the bed. To use it, position Lara in front of it and press Action. This opens the closet, where you'll find a box of flares. To pick them up, position Lara over them and press Action. The flares will then appear in your inventory. To use one, select it from inventory or use the flare hotkey ( < or , on the PC or Mac, Select + R1 for PlayStation).
Most of the manor is open for free exploration, but if you enter certain areas Lara will guide you verbally through basic training. After exploring the bedroom and bath, head downstairs to the MAIN HALL. Enter the INDOOR GYM (through the doorway to the right of the grandfather clock) and approach each of the numbered ramps in turn. Then follow Lara's instructions to learn how to walk, run, jump, crawl, and climb. Continue through the gym to the SWIMMING POOL to practice swimming and diving. Lara won't coach you here, so refer to the Controls List if necessary.
The DINING ROOM and KITCHEN are also off the MAIN HALL (to the left of the grandfather clock). The button on the DINING ROOM wall turns on some music. The light brown door looks inviting but doesn't open. The button in the kitchen opens the walk-in freezer. If you like, you can lure Winston, Lara's trusty though flatulent butler, inside. Then run out and press the button to lock him in.
In addition to practicing the controls, there are also a few secrets to be discovered. Lara has relocated her TREASURE ROOM since Tomb Raider 2, and she's added a RACETRACK. This track is where the hedge maze was located in TR2 (outside the front door and to the left, just beyond the statue of the horse). Getting to these hidden areas is a bit of a challenge. So read on.
LARA'S TREASURE ROOM: This sequence is also shown in this series of screenshots and this video. Lara's new treasure room is located off the MAIN HALL, on the left if you're facing the front door. To get in, first go through the GYM to the SWIMMING POOL. Press the button behind the diving board to open a secret panel opposite the TREASURE ROOM door. Return through the GYM to the MAIN HALL. (There's no hurry at this point since the secret panel remains open.) Behind this panel is the switch that opens the TREASURE ROOM door. This door is timed to close after a few seconds. To get through, throw the switch but don't move yet. Wait for the switch to go up again and then immediately pull it once more. Immediately roll and start to Sprint (Forward and / on the PC or Mac, R2 on the PlayStation). If you've pulled the switch twice, the door will just be starting to open, so you'll have plenty of time to get through.
Alternatively, throw the switch just once, roll, take two running jumps, then sprint toward the door. While sprinting, press Jump when Lara is almost at the door to somersault through as it comes down.
If the butler gets in the way while you're attempting the timed run, use the button near the front door to open it, lure him outside, run back in and press the button again to close the door, locking him out.
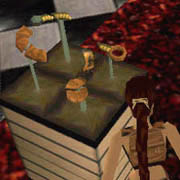
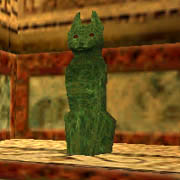
Once inside the treasure room, there isn't much to do except admire Lara's acquisitions. If you've played other games in the series, you'll recognize some of these. (You'll also find the jade cats from TR1/Gold displayed near the SWIMMING POOL.) To exit the TREASURE ROOM, press the button to the left of the door twice.
|
|
|
|
|
|
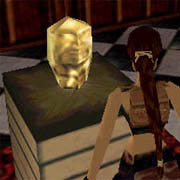
NOTE: According to the Tomb Raiders Traveler's Guide, Rich Morton, lead level designer for TR3, confirmed that this gold head is an inside joke—a cross between the gold idol Indiana Jones found at the beginning of Raiders of the Lost Ark and the face of Eidos producer Mike Schmitt. The guys at the TRTG think it resembles the Golden Mask of Tornarsuk from TR2 Gold. I think it looks more like the gold idol in TR1 City of Vilcabamba. Take your pick...or use your imagination.
OBTAINING THE RACETRACK KEY: If you haven't already retrieved the flares from the closet in Lara's bedroom, do that now. I also recommend getting the butler out of the way, since he has an uncanny way of wandering into Lara's path just as she's attempting a timed run or other difficult maneuver. Just lead him out the front door, run back inside and press the button to lock him out. Or lure him into the walk-in freezer in the kitchen, quickly jump out past him, and press the button to trap him inside for the duration. (screenshot)
The racetrack key sequence is shown in this series of screenshots and this video. Go to the top of the main staircase and head to the right along the mezzanine. Use the button in the corner to open the door to the attic. (You can explore up there now if you like, but it's not necessary. You'll be coming through a different way shortly.)
Continue along the mezzanine to the MUSIC ROOM. Go through it and to the left into the library. Find the loose book in the bookcase on the right and pull it to extinguish the fire in the fireplace. Step into the fireplace and scale the climbable wall on the left. At the top, climb to the right and then let go to land on the ledge. Follow the secret passageway to a room with a switch and a couple of wooden crates. Pull the crate on the floor once. Behind it are some more flares.
ADJUSTING BRIGHTNESS/GAMMA: The default brightness setting in this game is fairly dark. To conserve flares in dark areas like the ATTIC, you can adjust the gamma setting in the PC/Mac version. Choose the Video options (sunglasses) from the main menu and set the gamma higher. For the PlayStation version, you'll probably need to turn up the brightness on your TV.
NOTE TO NEW RAIDERS: To move a box or block, position Lara with her chest against it. Press and hold Action. Lara will grab the block and go into a slight crouch, indicating that she's ready. While holding Action, press Forward or Back to push/pull the object. Keep in mind that there must be sufficient space behind or in front of the block for Lara to move it.
After moving the first crate, climb onto the ledge and pull the second crate twice. Lara will end up standing on the first crate. Go around to the right side of the second crate and push it once to get it out of the way. This opens up a passageway into the attic. (You could also simply push the second crate forward into the attic, but then you'll have to navigate around it during the upcoming timed run.)
The switch at the other end of the wooden ledge opens the basement door, which is downstairs just off the MAIN HALL on the way into the GYM. The door is timed to close after about 28 seconds, so you'll have to hustle. Light a flare to aid in navigating the dark attic. Pull the switch, press the Look button to get Lara's perspective back, and immediately roll. Run straight forward along the ledge, turn right through the doorway where the second crate was, cross the attic, and make a hard left into the stairwell. Continue left and down the stairs.
As you run through the attic and down the stairs, press Sprint on the straight-aways but release it to navigate the curves. At the bottom of the attic stairs, turn right. (You should have opened the attic door already from the other side, but if not, press the button do it now. Then go back up to the switch and try again.) As you exit the attic, take a running jump to clear the railing. Aim for the middle of the stairs so you can jump forward or side flip to the right over the banister and not have to run all the way down the stairs. Roll and sprint through the open door.
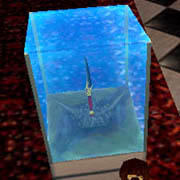
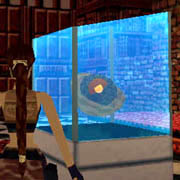
Once you've made it through the timed door and it closes behind you, you no longer need to hurry. Pick up the flares sitting on the floor just inside. The button on the wall opens the timed door so you can exit later. Continue down to the huge fish tank. Note the position of the RACETRACK KEY on the bottom of the tank just beyond the leopard-print chaise lounge. Position the movable crate under the opening in the ceiling. Climb onto the crate, walk to the edge, jump straight up, and press Action to grab the edge of the opening. Pull up and follow the passageway to the end. Jump into the water and swim around to the other side of the tank. Maneuver Lara over the RACETRACK KEY and press Action to pick it up. Swim back to the opening and climb out.
Return upstairs to the MAIN HALL. Press the button to the right of the front door to open it and go outside. Turn left and cross the courtyard to the small gate beyond the prancing horse statue. Position Lara in front of the lock next to the gate and press Action twice to use the key. Enter the RACETRACK for some hard-won joyriding.
NOTE: In the PC and Mac games, once you've obtained the racetrack key, it should remain in your inventory until you use it to unlock the gate, even if you quit the game and come back later. Once you've unlocked the gate, however, the key disappears. If you subsequently quit and restart the game, you'll need to retrieve the key again to unlock the racetrack. I'm not sure if the PlayStation version works the same way.
ALTERNATE METHODS FOR GETTING INTO THE RACETRACK: If you're having trouble with the timed run, there are a few ways to bypass it.
PlayStation Cheat for Racetrack Key: Quickly press R2, L2 (3x), R2, L2 (6x), R2, L2 (5x), R2, L2 (2x) during game play. If you've entered the cheat correctly, you'll hear Lara say "No," and the key will appear in your inventory.
PC Patch for Racetrack Key:
- Before changing any files, rename your original Tomb Raider III data.bin file. To do this, browse to the game folder. (If you didn't change the default path when you installed the game, the Tomb Raider III folder will be inside the Core Design folder, which is inside the Program Files folder on your hard drive. If you're having trouble finding it, search your hard drive for tomb3.exe, the game program, right-click its icon and choose 'open file location' or 'open containing folder'. That should put you in the correct directory.) Rename the data.bin file something like 'original-data.bin' for now. Later, if you run into problems, you can rename it back to 'data.bin'.
- Download this file: key.zip and save it to a location where you can easily find it, such as the desktop.
- Double-click the key.zip file to open it. (If you have Windows Me, XP, Vista, or 7 the zip file should open automatically. If not, use WinZip, PKZip, or another archive utility to unzip the files.) Inside you should see two items: data.bin and key.txt.
- Move the data.bin file into your Tomb Raider III directory (i.e., the same folder where you just found and renamed the original data.bin). When you have replaced the old data.bin file with this new one, play the game as usual. Lara should have the racetrack key in her inventory in the training level.
NOTE: The key.txt file included in the download includes these same instructions and contact information for its creator, Brian Whiteside. (Thanks, Brian!)
Corner Bug Shortcut to Racetrack (All Systems): See "The Rooftop and Other Points of Interest" (below) for more info.
THE RACETRACK: Once you've gotten inside the racetrack, approach the quad bike from either side and press Action to get on. Forward is also Action. Reverse is the same as Jump. Brake is the same as Sprint. For a turbo boost, press and hold the brake (same as Sprint), rev the engine (Action), then release the brake to speed forward. To get off the quad bike when you're finished, press Roll + Left or Right.
NOTE: Using Up + Down arrow keys to substitute for Roll won't work when dismounting the quad bike. You must use the actual Roll key—End on the PC, \ on the Mac, and Circle on the PS1. (If you're unsure of the basic controls, refer to your manual and/or my Tomb Raider 3 Controls page.)
GETTING THE QUAD BIKE OUT OF THE RACETRACK: Doing this without cheating is extremely difficult, if not impossible. I've seen it done a few times on the PlayStation, but I don't know of anyone who's been able to do it on the PC or Mac. If you want to try, I've collected tips and tricks on a separate page.
ASSAULT COURSE & SHOOTING RANGE: As in Tomb Raider 2, there's an outdoor training area around the back of the mansion. To get there, exit through the front door, go to the left past the statue of the prancing horse and around the corner of the house. Follow the alleyway between the house and the tall hedge around the glass-domed swimming pool. When you approach the beginning of the course, the voice-over explains what to do.
At the end of the assault course is a sandy area where Lara can crawl through a tunnel covered with greenery. Here you'll find the PISTOLS. Crawl in, position Lara over the guns, and then press Action to pick them up. Beyond this tunnel is a shooting range. Knock down all the targets and run to the finish line between the two Union Jack flags. Then, if you like, Lara can continue her target practice with Winston. ;)
NOTE: Sarah sent me another tip on keeping the butler out of Lara's way. When he appears on the shooting range, go around behind him and start shooting so that each time he falls down he gradually moves toward the tunnel where you got the pistols. Eventually you'll be able to knock him over so he lands inside the tunnel and gets stuck there. Then you can continue to explore in peace.
If you like, you can race the assault course and quad track competitively. Try to beat your friends' best times, improve on your own record, or compete against world-class speedrunners. To the best of my knowledge, the current records for both courses belong to MMAN. Check out his 1:43:23 assault course speedrun and 0:05:70 quad bike speedrun for inspiration. xXApelaumXx has also covered several quad course shortcuts in this video.
After completing the assault course, the wrought-iron gate separating the shooting range and the front garden opens, as does the kitchen door. You can continue exploring or go on to the main adventure. (See "Exiting the Training Level," below.)
THE ROOFTOP AND OTHER POINTS OF INTEREST: Lara's mansion is a great place to begin experimenting with useful glitches, such as the corner bug. You can use it to reach the roof of the mansion or get into the racetrack more quickly.
If you've never used the corner bug before and need assistance, see my Useful Bugs page and/or watch this video walkthrough.
To get onto the balcony outside Lara's bedroom, first use the corner bug to get up onto the roof. Then head for the back left corner. Move to the edge overlooking the monkey bar portion of the assault course. (screenshot) Turn around so Lara's back is facing the wooden support for the monkey bars and the brick chimney is on her left. Slide back and grab the edge of the roof. Let go to land on the angled concrete ledge below and slide down onto the balcony. To get down from there, take a running jump over the railing to land in the pool below or use the fence bug: aim just to the left of the corner of the railing and run forward, holding Action. Lara should run through the railing and land safely on the ground below. (screenshot)
To get from the roof of the mansion to the RACETRACK, go to the back right corner of the roof to the spot overlooking the glass-roofed swimming pool. (screenshot) Turn so Lara's back is toward the edge. Step back and grab, as if you were trying to do a safety drop. Lara will fall onto a brick ledge at the corner of the building. She'll lose quite a bit of health but less than she would if you just stepped off the edge. Take a running jump from the stone wall to the top of the hedge surrounding the RACETRACK. From there, you can drop down into the track. Or, if you'd rather not lose any health in the process, use the crawling corner bug inside the archway with the wrought-iron gate leading into the racetrack (screenshot), or at the corner of the tall hedge on the path to the assault course (screenshot). All of these methods are shown in the video walkthrough.
EXITING THE TRAINING LEVEL: When you're ready to leave the training level and move on to the main adventure, press Escape/Select and use the direction keys to rotate the menu ring to the passport (labeled "Game"). Press Enter/Select and then use direction keys to page through the passport to the Load Game or New Game screen. Or, while playing in the training level, have Lara approach the front gate outside the mansion. Press the button next to the gate to open it. Then run outside. This will send you to the passport in the main menu ring, where you can choose to load a saved game or start a new game.
Next time you play, if you want to skip the training, use the direction keys to rotate the main menu ring from the Polaroid photo to the passport and press Enter/Select to access the Load Game option.
[On to TR3 Level 1 | Lost Artifact Level 1]
†UPDATE HISTORY: 8/2/12 - First major update since this walkthrough was created in 1998. This revision includes many new screenshots and a couple of videos, as well as various other corrections and clarifications.
3/27/24 - Added VGCartography's level maps, with permission. Visit VGCartography on DeviantArt for high-res versions, and follow on Twitter/X and YouTube for more fantastic game maps.
ACKNOWLEDGEMENTS: I especially want to thank the participants in the alt.games.tombraider newsgroup, without whom some parts of this walkthrough couldn't have been written. Thanks also to Dave H. and Suvi for suggesting the more reliable method for getting through the timed door to Lara's treasure room, and to Laura, Lucas, and Serena for other help with this level.
‡NOTE ON VIDEO GUIDES: Eldin's videos don't always follow the same strategies I use in my walkthroughs, but if you prefer that format, I think you'll find them very useful.
WAS THIS WALKTHROUGH HELPFUL? If not, I apologize and invite you to contact me with any questions. If you need help right away, I recommend the r/TombRaider subreddit. Other fan-run forums are listed at tombraiders.net/stella/community.html. If this site was useful, please consider supporting it financially or in other ways. For details, visit tombraiders.net/stella/support.html. As always, I welcome your corrections/suggestions. Thank you!
Copyright © 1998- - Stellalune (). Feel free to copy or print this walkthrough for personal use. By all means, share it with friends, but please include this credit line so people can send me their feedback. No part of this walkthrough may be reproduced on another site without permission. Follow this link for details about this site's advertising and privacy policy.
Stella's Tomb Raider Site: tombraiders.net.
