The Hidden City – Path of Battle Challenge Tomb (part 2)
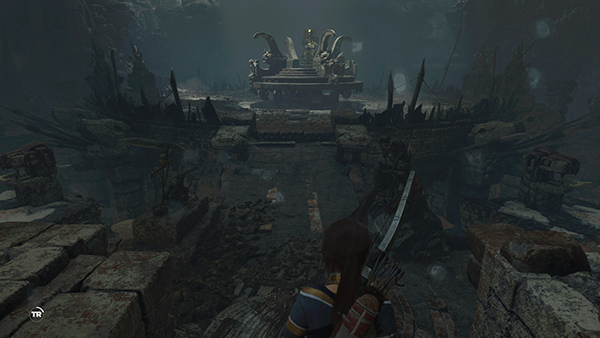
The tomb stele is sitting in plain view at the center of a large, round platform. But as you enter, a mechanical tower rises from the central platform, lifting the stele high out of reach.
The tower then begins to spin, extending several mechanical arms edged with obsidian shards. Yes! This is going to be fun!
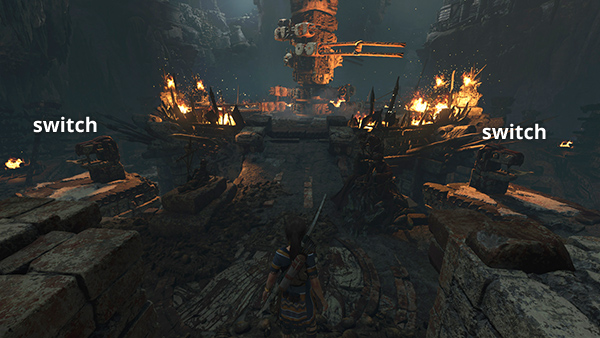
There are 2 jaguar-head switches, one on each side of the walkway leading to the center platform. These will eventually lower the tower, but first you'll need to activate a separate handle on the far side of the room to retract the mechanical arms. It doesn't matter which side you do first, but I found it a little easier to start on the left. Here's the sequence:
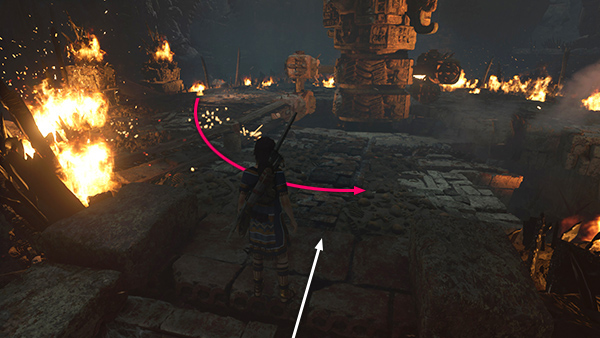
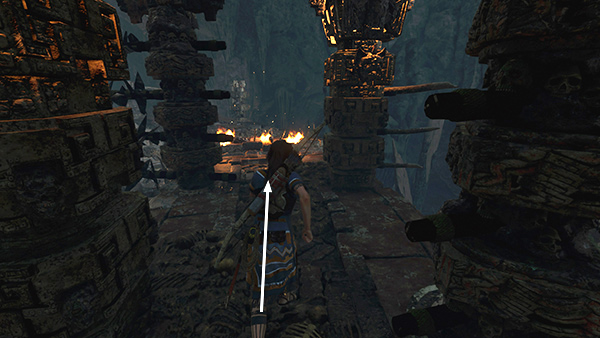
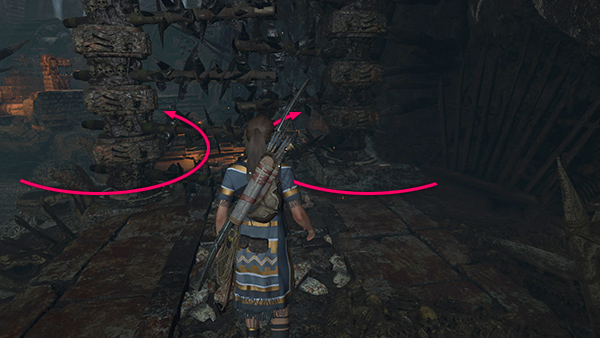
Move up the walkway toward the central platform. Watch as the spinning arms sweep past.
When one of them passes, run across the left side of the round platform. As the second arm moves toward you...
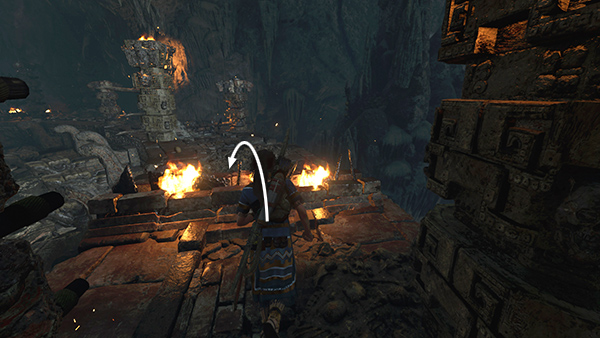
...keep running, jump over it...
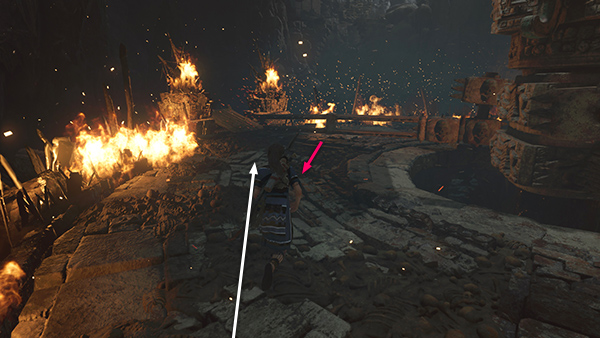
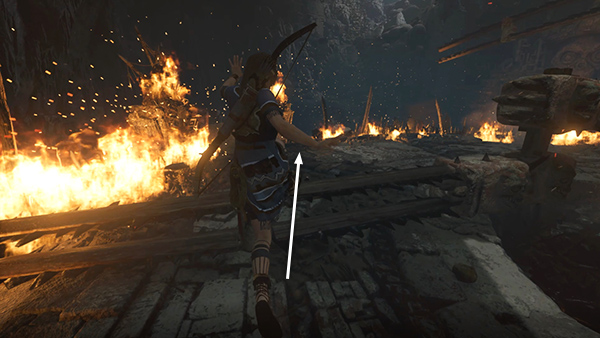
...and race out onto the wooden platform on the left. Lara is safe here.
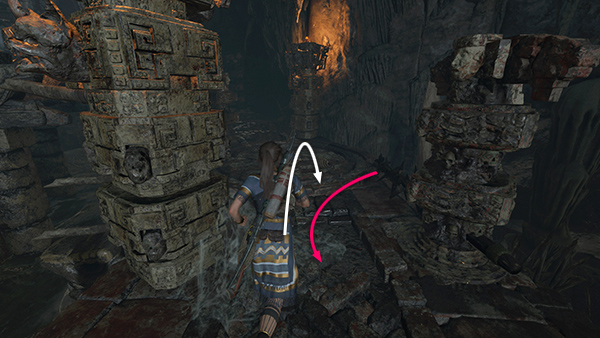
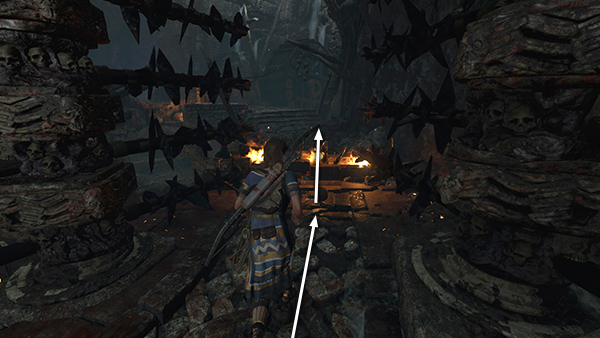
Jump down onto the outer walkway on the left (west).
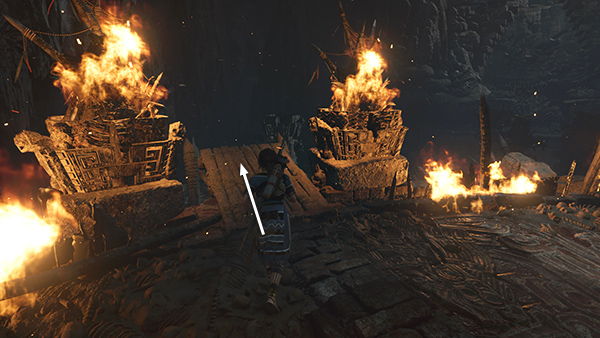
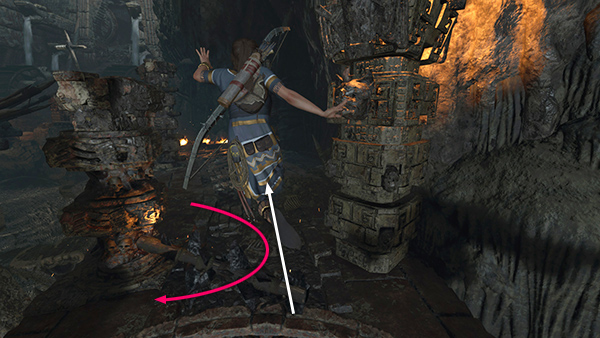
Turn right and follow the outer walkway around to the end, jumping over some flaming spikes and avoiding the pillars with obsidian blades, which at this point are either stationary or moving very slowly.
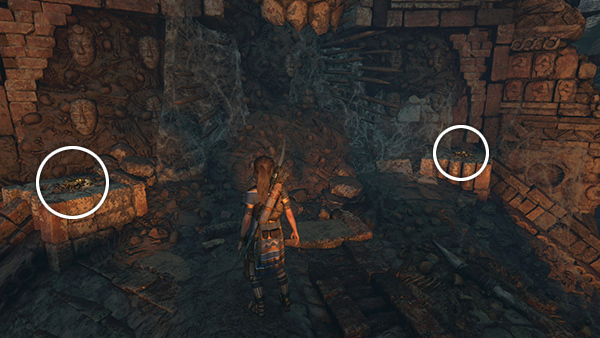
At the top of the steps, collect the 2 piles of gold opposite the handle.
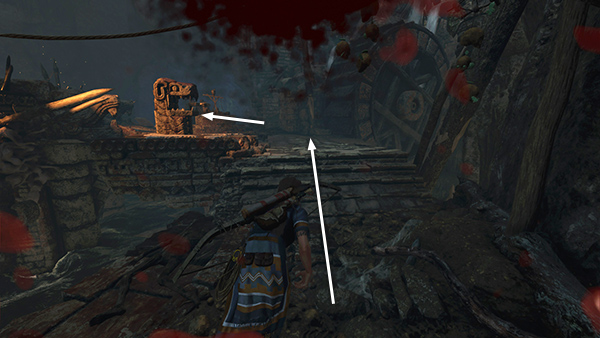
Now comes the real challenge. When you pull the handle, the arms on the spinning tower temporarily retract. You then have about 30 seconds before the handle returns to its original position and the arms extend again. Using the handle also activates the obsidian blade traps along the outer walkway, so you'll need to be careful as well as quick.
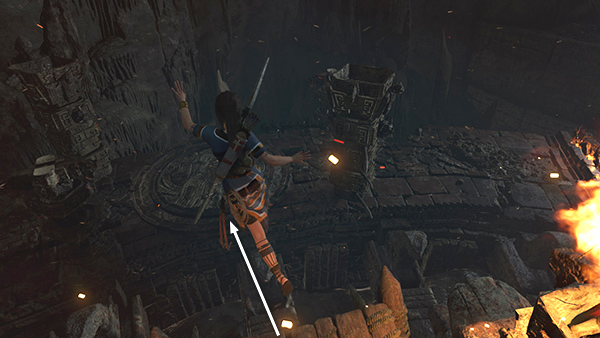
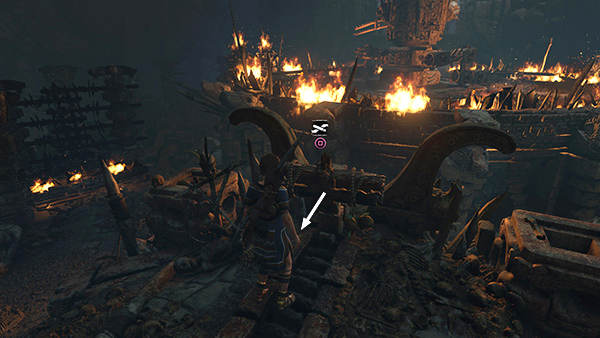
As soon as you've pulled the handle out as far as it goes, release it, turn right, and run down the steps.
Pause briefly if necessary until the first set of rotating blades starts to move away from you. Then run through...
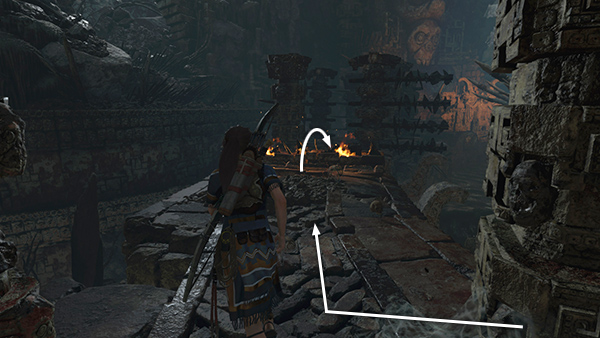
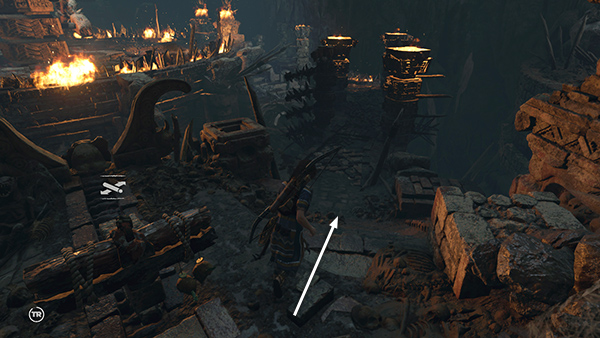
...and keep running between the second and third sets. The tutorial suggest sprinting, but if you time it right, this isn't necessary. The rotating pillars are synchronized, so as long as you start running as soon as the first set of blades moves away from you and don't stop, the others won't hit you.
Keep running and jump over the flaming spikes.
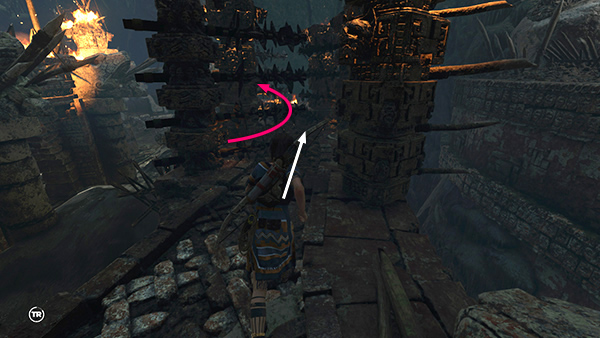
Keep running forward, jumping over the single spiked beam if it happens to be sweeping across the walkway as you approach.
Repeat for the second beam without breaking stride.
Now pause before the next pair of rotating pillars. Wait for the blades to move away from you...
...and run between the pillars after them. Keep running and jump over the second set of flaming spikes.
If Lara takes a little damage during the run, don't fret. Just keep running up the steps and left to the first jaguar-head switch.
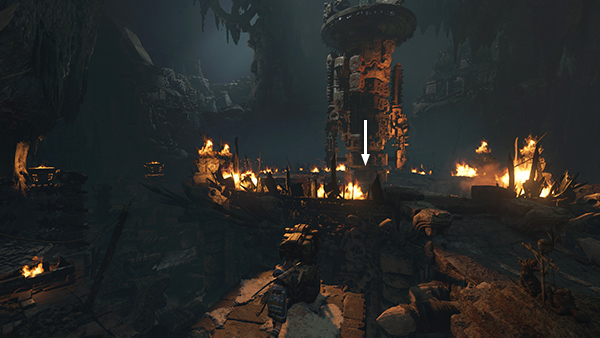
Use it to lower the tower partway. The tower then begins spinning once more and the mechanical arms extend, but you're halfway to the solution. (If you don't get to the jaguar-head switch fast enough, everything resets and you'll need to repeat the sequence until you get it right.)
[Previous | Next | Tomb Walkthrough | Main Walkthrough]
Copyright © - Stellalune ( ). All rights reserved. Feel free to copy or print this walkthrough for personal use. By all means, share it with friends, but please include this credit line so people can send me their feedback. No part of this walkthrough may be reproduced on another site without permission. Follow this link for details about this site's advertising and privacy policy.