Shadow of the Tomb Raider - Porvenir Oil Fields Collectibles
Updated: 9/23/21(†)
This guide focuses on revisiting this level after you complete it. If you are playing through for the first time, follow the main walkthrough instead. That way you can retrieve the collectibles as you complete the trial. Collectibles are numbered in the order they appear in the main walkthrough and on the annotated level map.
Follow this link for a List of All Artifacts by Story/Dialect.
Relic · Documents · Mural · Archivist Map · Artifacts & Photos
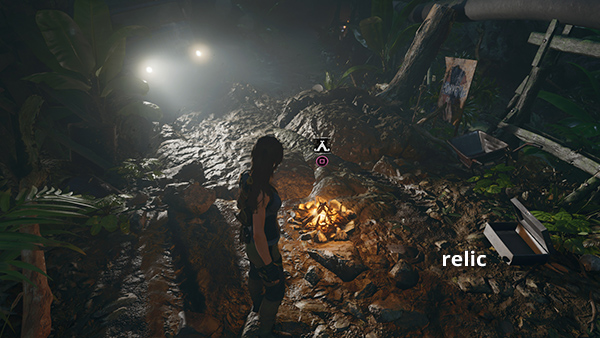
RELIC 1 - Hardhat (Inside Out)
The only relic is just before the bridge leading to the refinery, near the end of the level. If you missed it, fast travel to the Destroyed Bridge Base Camp, which appears once you've cleared this area. The relic is right next to the campfire. Lara can no longer cross the bridge and descend to the refinery, so if this is all you need, use the camp again to fast travel away. (Click screenshot to enlarge.)
DOCUMENT 1 - Journal of T. Serrano 9 (Gates of Hell)
This document is in the canyon below the first base camp. If you missed it, fast travel to The Beach Base Camp. Move to the southwest side of the ledge and use a rope arrow to run a line down across the canyon. Slide down and follow the path to the south. You'll find the document on the ground on the left side of the path, just before the shallow pool. Climb back up the rope line to the base camp and fast travel away. (Click image for more and larger screenshots.)
DOCUMENT 2 - Not Yet? (Trinity)
This document is sitting on the ground next to The Beach Base Camp. (Click screenshot enlarge.)
DOCUMENT 3 - The Truth (Trinity)
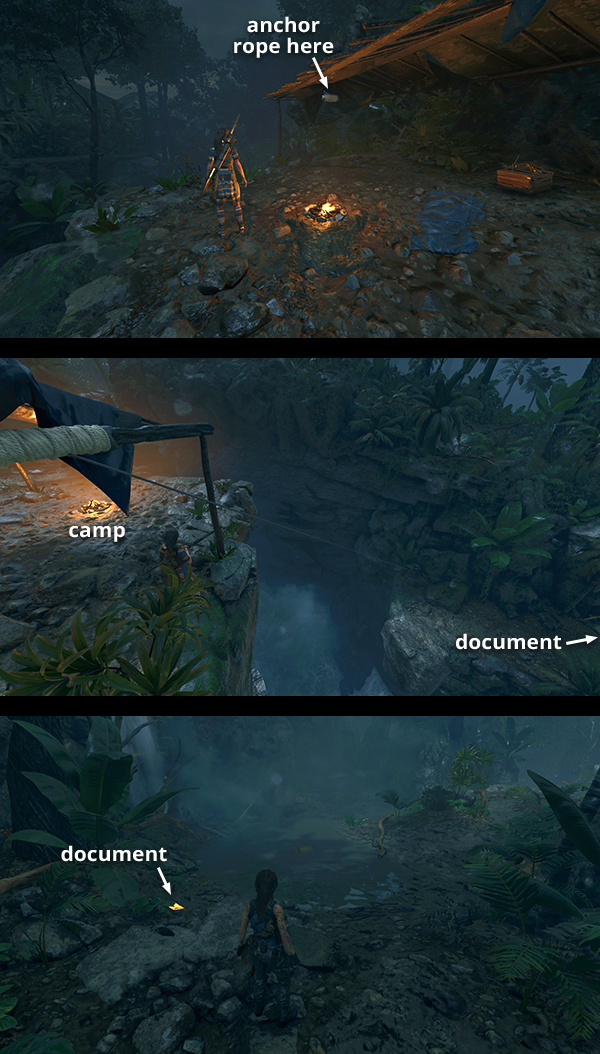
This document is in the cave where you found the Mama Zara mural and Six Sky's War Bow. It's slightly closer to the Destroyed Bridge Base Camp; however, climbing the tree just north of the cave with the document can be challenging if you're approaching from the north. It sometimes works, sometimes not. So I recommend starting from The Beach Base Camp instead.
This page with screenshots shows the route from the camp to document #3 and the mural, then on to the next base camp. (Click screenshot to enlarge.)
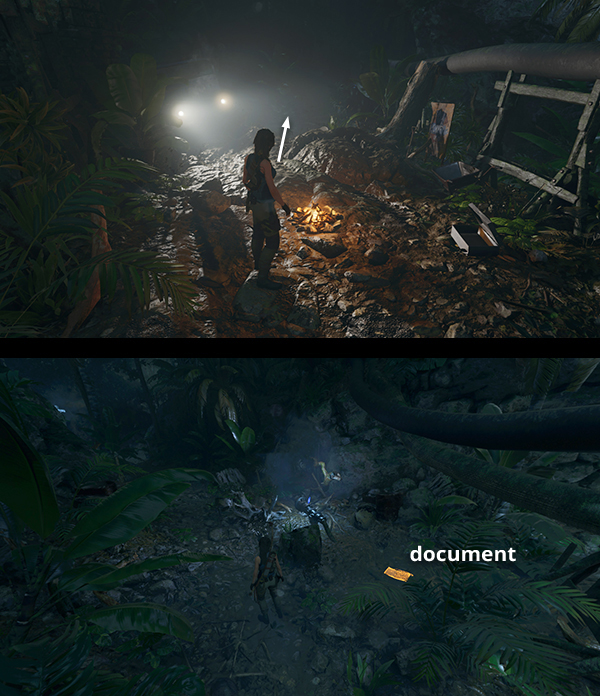
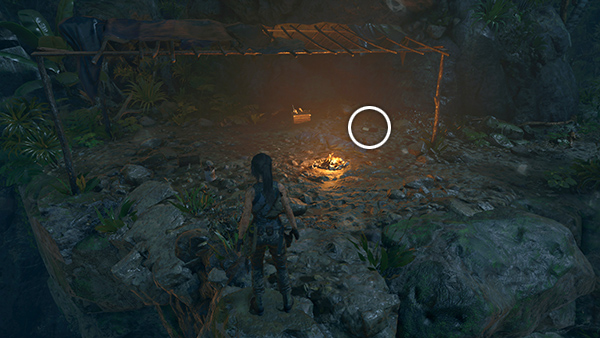
DOCUMENT 4 - A Lost World (Inside Out)
This document is just north of the bridge leading to the refinery. If you missed it, fast travel to the Destroyed Bridge Base Camp, which appears once you've cleared the level. Follow the path to the north, past the truck with its headlights on. Just ahead on the right is a flaming gas jet that cycles on and off. The document is lying on the ground next to this gas jet. If that's all you need, return to the campfire and fast travel away. (Click image for more and larger screenshots.)
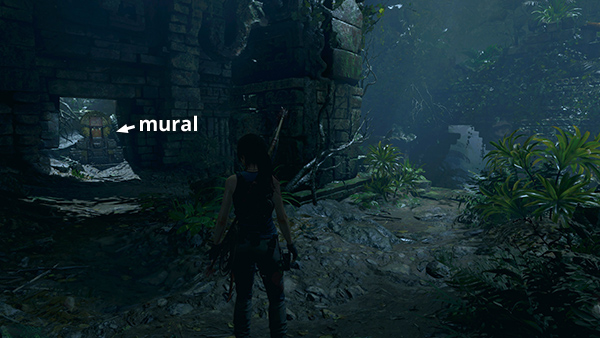
MURAL - Mama Zara (Pantheon of Gods 2)
This mural is in the cave where you found the Mama Zara mural and Six Sky's War Bow. It's slightly closer to the Destroyed Bridge Base Camp; however, climbing the tree just north of the cave with the document can be challenging if you're approaching from the north. It sometimes works, sometimes not. So I recommend starting from The Beach Base Camp instead.
This page with screenshots shows the route from the camp to document #3 and the mural, then on to the next base camp. (Click screenshot to enlarge.)
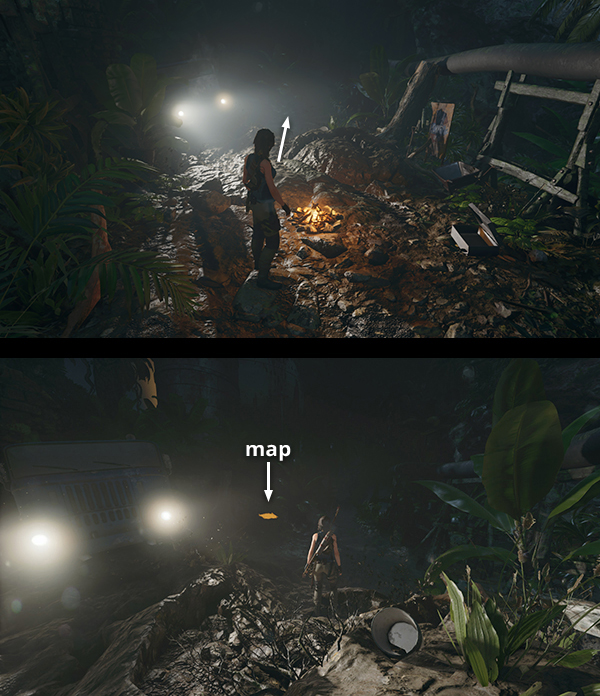
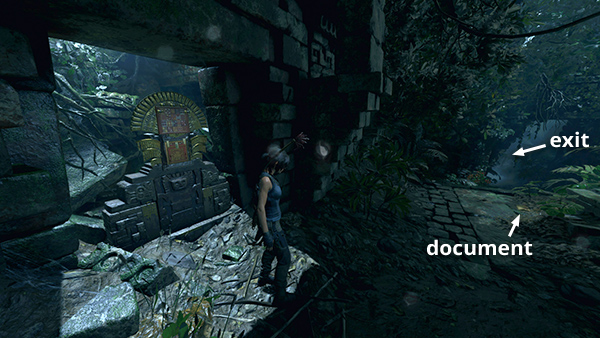
ARCHIVIST MAP
Archivist Maps are not required for 100% completion, but they're useful for locating other collectibles. If you missed this one, fast travel to the Destroyed Bridge Base Camp, which appears once you've cleared the level. Follow the path to the north and you'll find the map sitting on an oil barrel just beyond the truck with its headlights on. Examining it reveals the locations of the relic, mural, and all documents in this level. (Click image for more and larger screenshots.)
Other Artifacts
In addition to the collectible documents and relics listed above, certain artifacts and photos are added to Lara's collection automatically as you play through the game. These are mentioned at the relevant points in the main walkthrough and listed on the page with All Artifacts Listed by Story/Dialect.
Photo: Commander Rourke (Lara's Notebook) - story progression
Walkthrough | Collectibles Guides | Main SOTTR Page
†UPDATE HISTORY: 6/2/19 - Page first posted online.
9/23/21 - Corrected references to the Jungle Cliffs Base Camp, which I had mistakenly labeled "Jungle Ruins". Thanks to Robert for the heads-up.
WAS THIS WALKTHROUGH HELPFUL? If not, I apologize and invite you to contact me with any questions. If you need help right away, I recommend the r/TombRaider subreddit. Other fan-run forums are listed at tombraiders.net/stella/community.html. If this site was useful, please consider supporting it financially or in other ways. For details, visit tombraiders.net/stella/support.html. As always, I welcome your corrections/suggestions. Thank you!
Copyright © Stellalune (). All rights reserved. Feel free to copy or print this walkthrough for personal use. By all means, share it with friends, but please include this credit line so people can send me their feedback. No part of this walkthrough may be reproduced on another site without permission. Follow this link for details about this site's advertising and privacy policy.
Stella's Tomb Raider Site: tombraiders.net.