Rise of the Tomb Raider - Soviet Installation Challenges
Updated: 5/28/17(†)
There are 4 challenges in the Soviet Installation. This guide, along with the annotated level maps linked below, should help you find any challenge items you missed. If you are playing this level for the first time, you may want to follow the main walkthrough instead.
To check your progress on any challenge, open the map screen in game. Then press Y on the controller or click the Missions/Challenges button at the bottom of the map screen. This sub-menu shows active and completed missions and challenges, and lets you toggle between them if you have more than one active at a time.
INTO DARKNESS
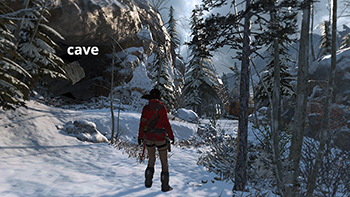
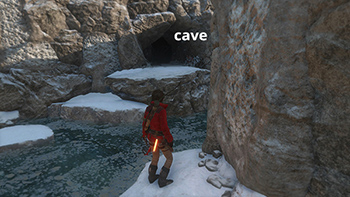
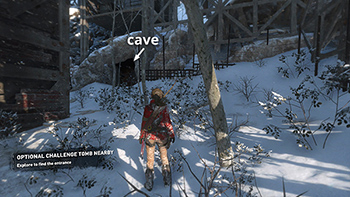
In order to beat this challenge, you must enter 5 of the 11 caves in the Soviet Installation. It doesn't matter which caves you explore or the order in which you do it. In fact, you'll probably beat it by accident just as you play through. In case you come up short, here are all the cave locations. They are also marked C1-C11 on the annotated Soviet Installation map.
CAVE 1
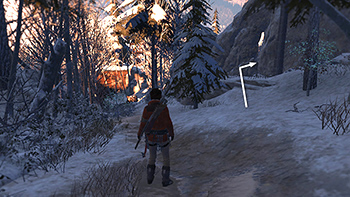
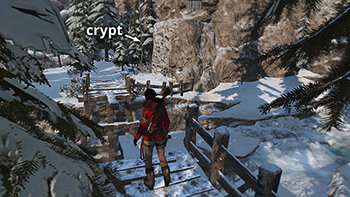
The cave that houses The Astronomer's Crypt in the area just below the Installation Vista Base Camp counts as one. You'll want to explore this crypt for other reasons in any case. Check the walkthrough and level map for details. (Click screenshot to enlarge.)
CAVE 2
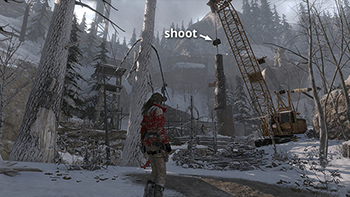
Exploring the Ancient Cistern Challenge Tomb also counts for the Into Darkness Challenge. Head uphill from the Logging Camp Base Camp. Just north of the abandoned sawmill, shoot down the log hanging from the crane. Check the walkthrough and map for details. Then climb down into the shaft. (Click screenshot to enlarge.)
CAVE 3
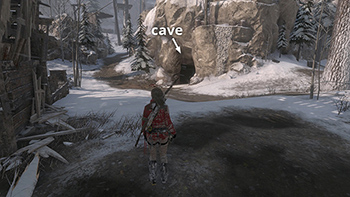
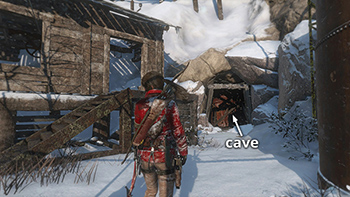
The next cave is just east of the abandoned sawmill. Watch out for wolves when you explore here. Again, the walkthrough and map have details. (Click screenshot to enlarge.)
CAVE 4
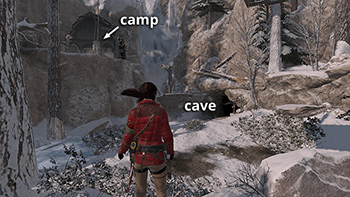
This cave leads to the Voice of the Gods Challenge Tomb. You'll find it in the northeast corner of the main area, just below the Sheltered Ridge Base Camp. Depending on when you visit, it may be guarded by a snow leopard, so stay alert. See the walkthrough and map for more info. (Click screenshot to enlarge.)
CAVE 5
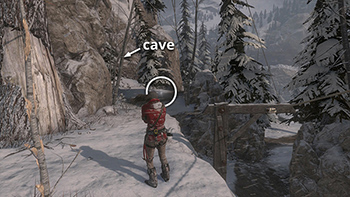
If you follow this walkthrough, the fifth cave you'll enter will be the entrance to The Forge's Crypt, in the cave below the Hidden Refuge Base Camp. It can also be reached by crossing the broken wooden bridge due north of the Logging Camp. (Click screenshot to enlarge.)
CAVE 6
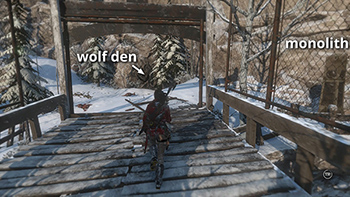
This is the wolves' den just across the bridge to the northwest of the Sawmill. You'll explore it in the course of completing the Dangerous Territory Mission. If you missed any of the other caves, this one will also count toward the challenge. (Click screenshot to enlarge.)
CAVE 7
This cave is on the north side of the main area, west of the Sheltered Ridge Base Camp and below and south of the Communications Tower Camp. It's in the same area with the shack, guard tower, and rusted water tank, but you'll need a shrapnel grenade, regular grenade, or other explosives to destroy the metal barrier and enter the cave. Strongbox #7 is inside. See the walkthrough and map. (Click screenshot to enlarge.)
CAVE 8
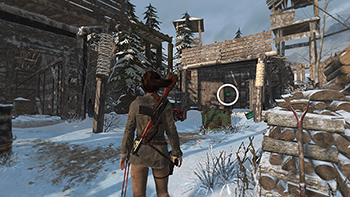
This cave is on the northeast side of the main area, closest to the Sheltered Ridge Base Camp. Use your pistol (or other gun if you have one) to destroy the wooden impact barrier so you can get inside. Coin cache #3 is buried just outside the cave, and Explorer Satchel #4 is inside. (Click screenshot to enlarge.)
CAVE 9
This cave is also on the east side of the main area, about halfway between CAVE 8 and the Copper Mill. Use a rope arrow to pull down the barrier blocking the entrance. Inside you'll find strongbox #8. (Click screenshot to enlarge.)
CAVE 10
You may spot this cave while completing The Unlucky Ones mission. You can carry a tin can from the SAWMILL with you as you set out on that mission. Use it to craft a shrapnel grenade and destroy the barrier. I found it more convenient to do this on the way to the COPPER MILL, or even later after unlocking grenades. At that point, return to the Logging Camp or Copper Mill Yard Base Camp, head for the southern cliff overlooking the river, and climb down to the cave. There are no major collectibles here, just a few supplies. See the walkthrough and map. (Click screenshot to enlarge.)
CAVE 11
This cave is northeast of the Copper Mill Yard Base Camp, on the ground level behind the train cars and other buildings. You'll need explosives to break through the impact barrier in order to get inside. I was not able to use a shrapnel grenade here, since any cans Lara carries disappear from her hand before you get close enough. Once you have grenades, it's easy enough to break down the barrier. The cave contains some coins and supplies but no major collectibles. See the map and walkthrough for details. (Click screenshot to enlarge.)
DATA CORRUPTION
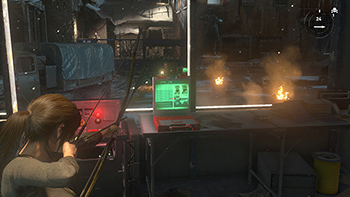
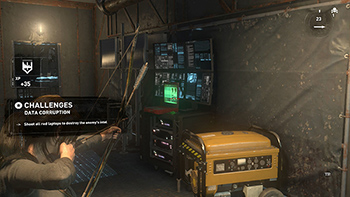
In order to beat this challenge, you must find and destroy 10 red laptops scattered around the Gulag section of the Soviet Installation. They are marked with red dots on the annotated level map.
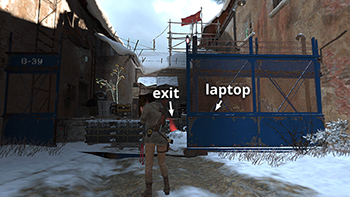
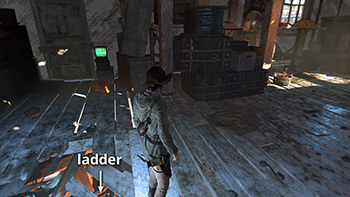
The first 6 laptops are all in the prison yard with the command center trailer where you fought the first big group of Trinity soldies. If you missed any of them the first time, fast travel to the Gulag Base Camp then head up the hill to the south. Make a U-turn to the left, wade through the water-filled trench, and climb the ladder into the shack above. Watch out for possible enemies ahead as you follow the path through the little shacks to the room with the pool and electrical socket (still deactivated). Go through that building and follow the next flooded tunnel to the PRISON YARD. To get back to the Gulag Base Camp from the PRISON YARD, re-enter the tunnel near the red flare. (screenshot) Then continue to backtrack the way you came.
NOTE: If you want to conserve ammo the laptops can also be destroyed using melee attacks with the climbing axe.
LAPTOP 1
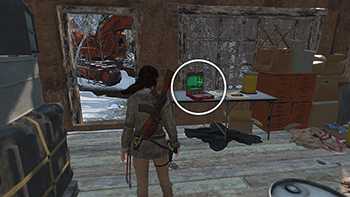
This one is inside the command center sitting on the table next to the switch that opens the gate. The walkthrough includes details. (Click screenshot to enlarge.)
LAPTOP 2
This red laptop is also inside the command center on the other side of the room from the first. (Click screenshot to enlarge.)
LAPTOP 3
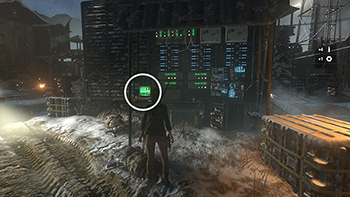
There are 3 more laptops outside the command center. One is on the northeast side near some other computer equipment. (Click screenshot to enlarge.)
LAPTOP 4
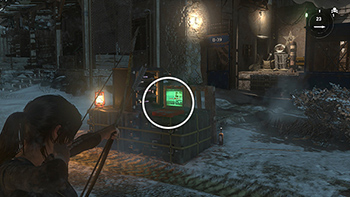
Out in front (southeast) of the command center there's a barrel with a fire burning inside and several stacks of crates. The next laptop is sitting on one of these crates. (Click screenshot to enlarge.)
LAPTOP 6
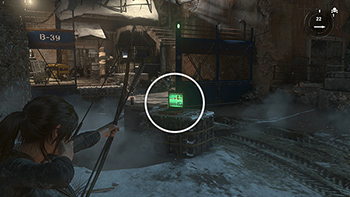
The next laptop is just beyond the large, blue gate that you opened with the switch inside the control room. The first time through, it's nighttime and you must use a rope arrow to climb out of this area. If you returned via fast travel, you'll need to follow the tunnel near the burning flare, and continue through the shacks and tunnels back to the Gulag Base Camp. (Click screenshot to enlarge.)
LAPTOP 7
This laptop is the seventh if you destroy them in order during your first playthrough, but if you return later, just fast travel to the Gulag Base Camp, head up the hill to the south, make a U-turn to the left, wade through the water-filled trench, and climb the ladder into the shack above. The laptop is at the top of the ladder on the left. (Click screenshot to enlarge.)
The last 3 laptops are all between the base camp and the train yard to the northwest. If you missed any of them the first time, fast travel to the Gulag Base Camp then squeeze through the large, partially open gate into the hillside with the little shacks where you fought the Trinity soldiers earlier. There may be more enemies here when you revisit. Follow the directions below to find the caches. Then, head back down the hill and through the gate to the campfire and fast travel back to wherever you left off.
LAPTOP 8
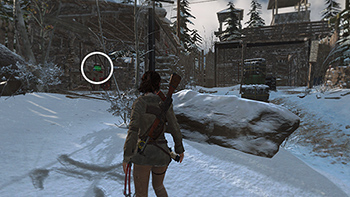
This laptop is in the first wooden shed on the left as you come up the hill from the large gate. The walkthrough describes this whole area. (Click screenshot to enlarge.)
LAPTOP 10
From the area with the sheds containing laptops 8 and 9, continue up the hill, through the next building and out the other side. Cross the little stream with the abandoned trackhoe, and enter the next building. Turn around to face the doorway and you'll spot the last laptop sitting on a table. (Click screenshot to enlarge.)
Top of Page | Challenges Part 2 | Collectible Guides | Main ROTTR Page
†UPDATE HISTORY: 4/24/16 - Page first posted online.
5/28/17- Changed the order for exploring the caves, thanks to a tip from Jeff Reid.
WAS THIS WALKTHROUGH HELPFUL? If not, I apologize and invite you to contact me with any questions. If you need help right away, I recommend the r/TombRaider subreddit. Other fan-run forums are listed at tombraiders.net/stella/community.html. If this site was useful, please consider supporting it financially or in other ways. For details, visit tombraiders.net/stella/support.html. As always, I welcome your corrections/suggestions. Thank you!
Copyright © 2015 - Stellalune (). All rights reserved. Feel free to copy or print this walkthrough for personal use. By all means, share it with friends, but please include this credit line so people can send me their feedback. No part of this walkthrough may be reproduced on another site without permission. Follow this link for details about this site's advertising and privacy policy.
Stella's Tomb Raider Site: tombraiders.net.
