STELLA'S LARA CROFT GO WALKTHROUGH - Android, iOS, PS4 and Vita, Steam, and Windows Phone/PC/Tablet
THE CAVE OF FIRE - PART 11: CORE OF THE MOUNTAIN
Updated: 3/19/17(†)
Relic Fragments: 1
Gems: 1
Follow this link for my video walkthrough.
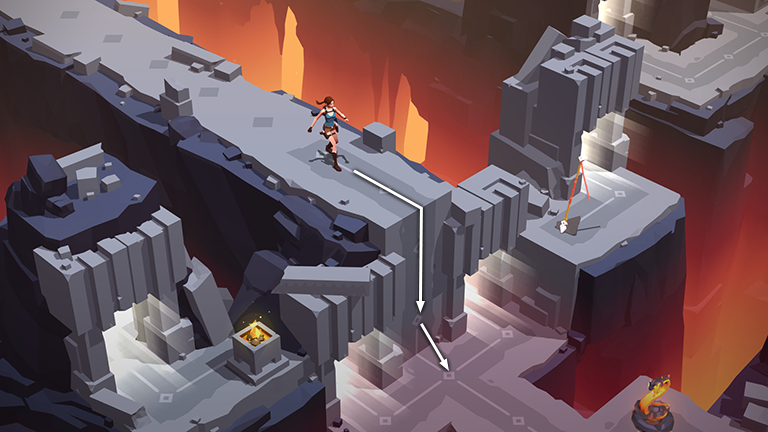
From the starting point, step forward and then climb down into the room below.
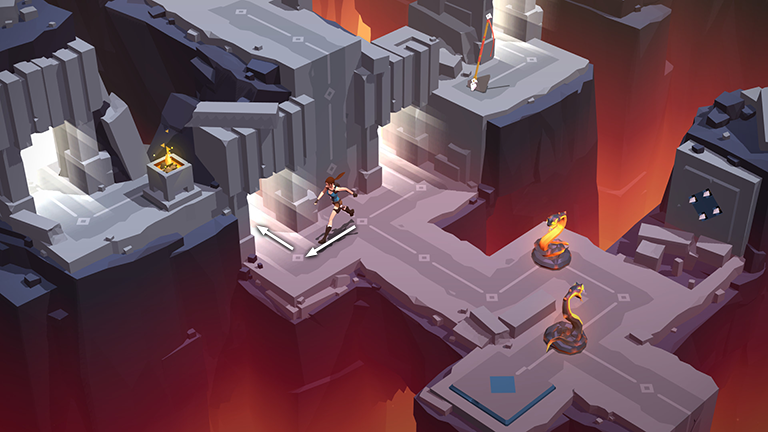
Ignore the snakes ahead for now and go through the doorway on the left.
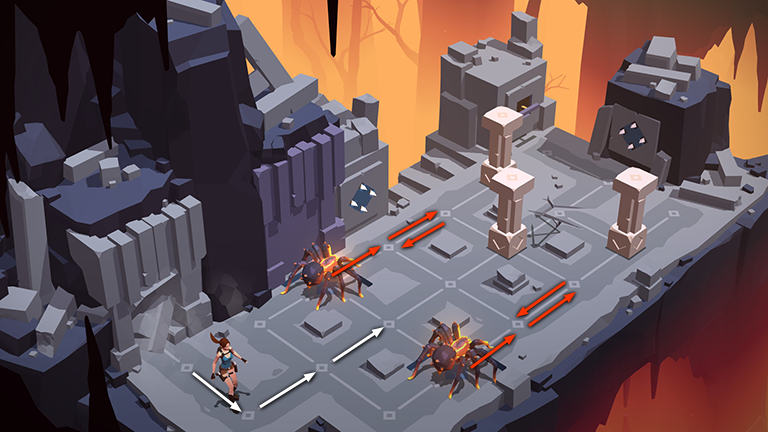
This side area contains 2 spiders and 3 movable pillars. Start by stepping forward once, then to the upper right twice. As you go, the spiders move off the pressure pads and toward the pillars, then turn around and move back once space.
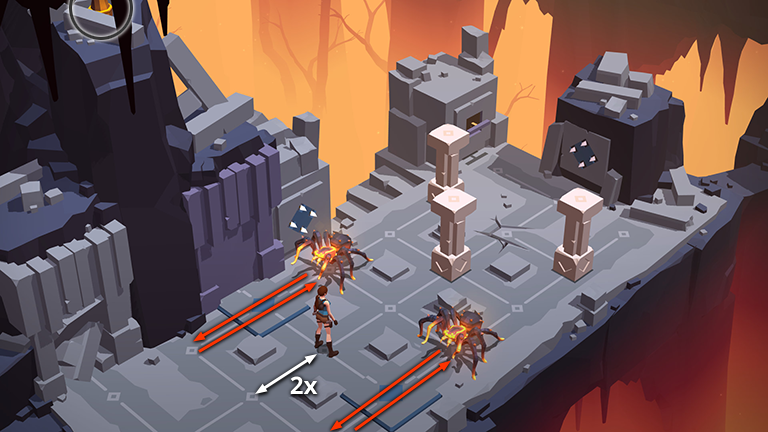
Before proceeding, smash the vase on the rocky ledge at the top left corner of the screen to get one last shard of OBSIDIAN (13/13). Then step back then forward, back then forward, so Lara ends up standing between the 2 pressure pads, and the spiders end up in line with the dart trap but facing away from Lara.
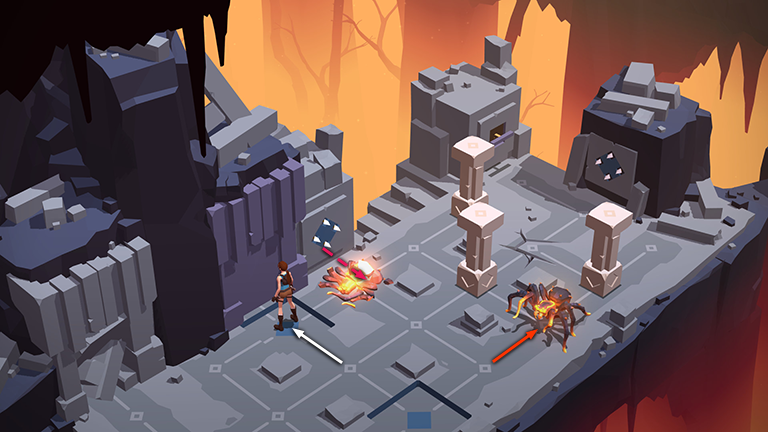
Now step onto the pressure pad on the left to activate the arrow trap, temporarily disabling the spider nearest the trap. The other spider continues to pace back and forth.
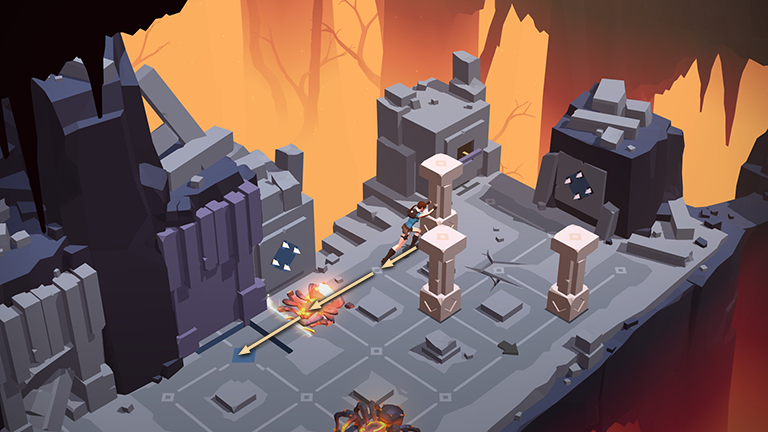
Step over the broken spider, grab the movable pillar on the left and pull it three times, onto the pressure pad near the wall. (The other spider continues to pace.)
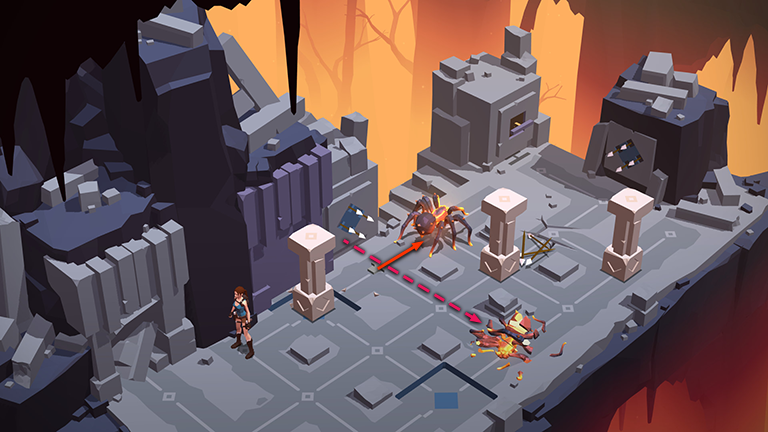
After you pull the pillar off the crushed spider, it springs to life and moves away. The second spider should have just moved into the path of the arrow trap, so when the pillar depresses the pad, the arrows should strike the spider, disabling it for five turns.
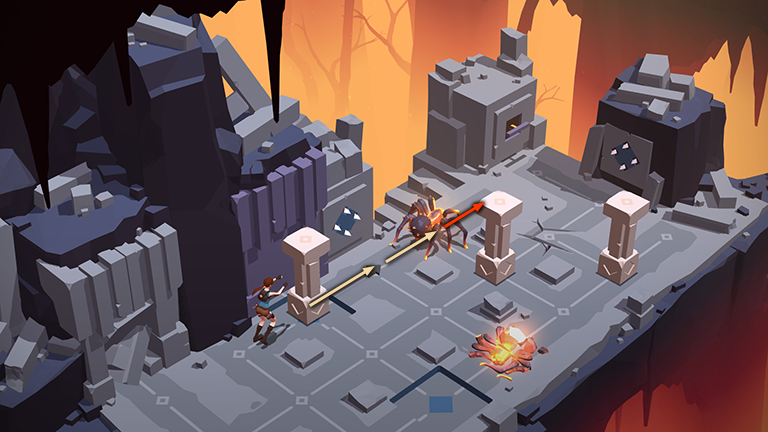
Push the pillar back toward the switch twice. This boxes the spider on the left into the corner so it can't bother you anymore.
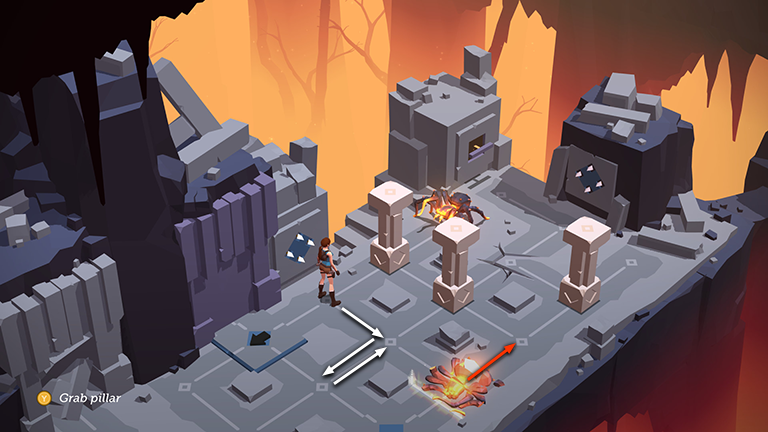
Step toward the spider on the right, then to the lower left, then back to the upper right. As you run out these turns, the spider reanimates and moves toward the pillar in front of it.
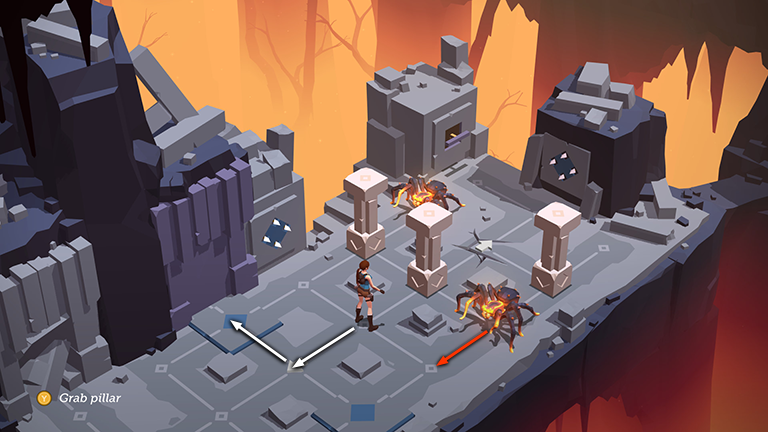
Move back to the lower left, then onto the left pressure pad. The spider moves into the path of the arrow trap...
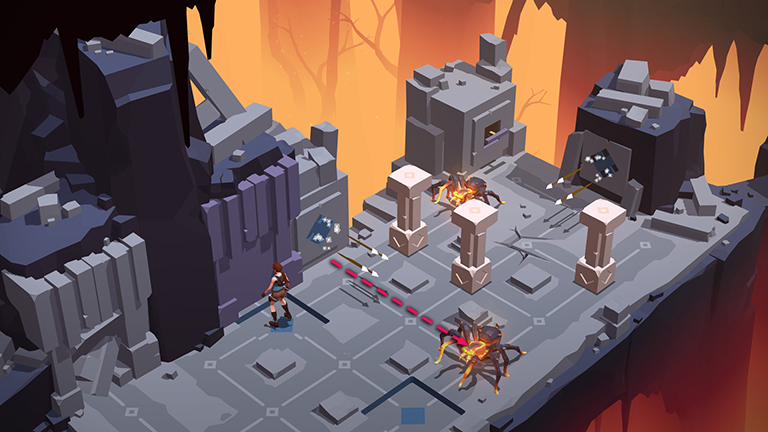
...but can't get out of the way fast enough to avoid being skewered again.
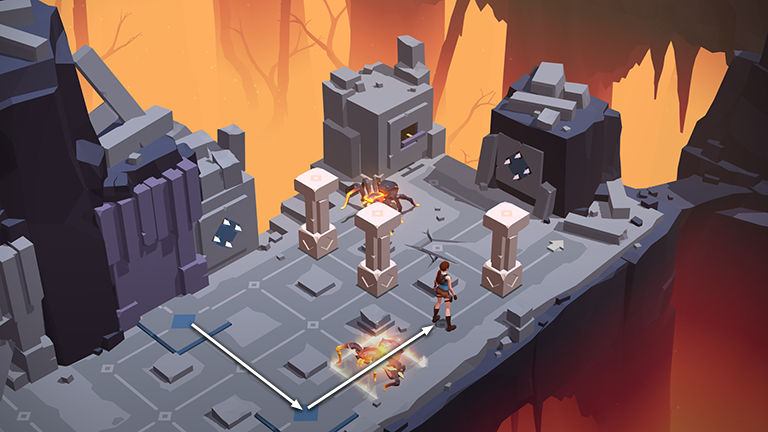
Move over the spider toward the movable pillar on the far right.
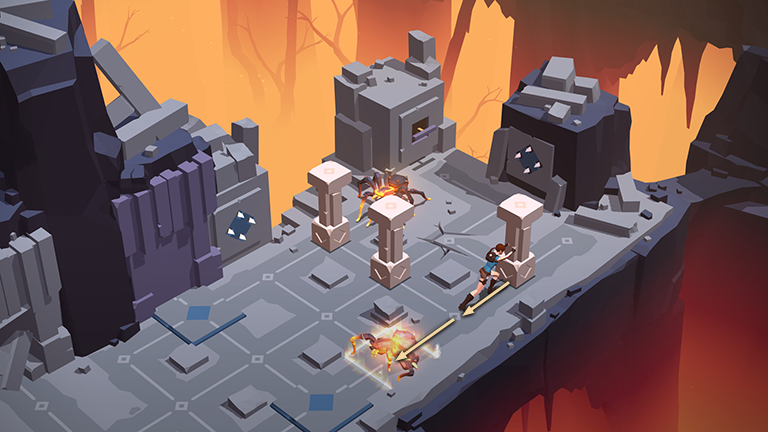
Pull the pillar twice to pin the spider underneath it.
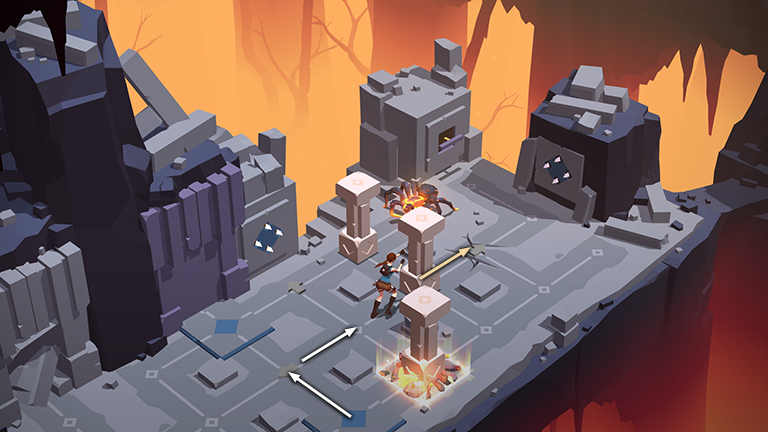
Move around to the middle pillar and push it onto the cracked floor.
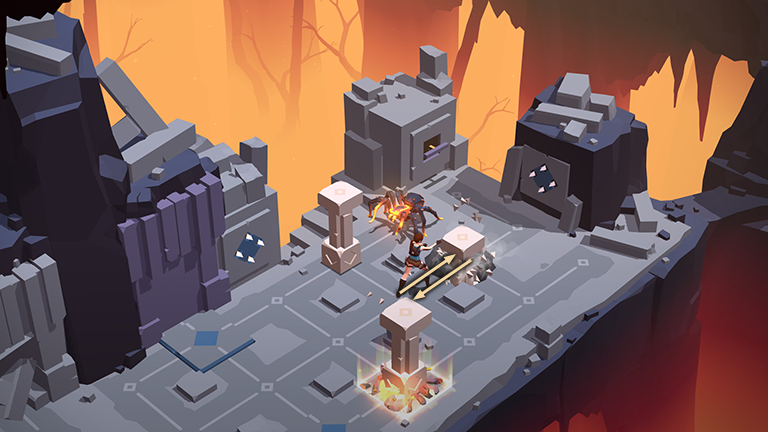
Pull the pillar back and then push it forward again so it falls through the cracked floor.
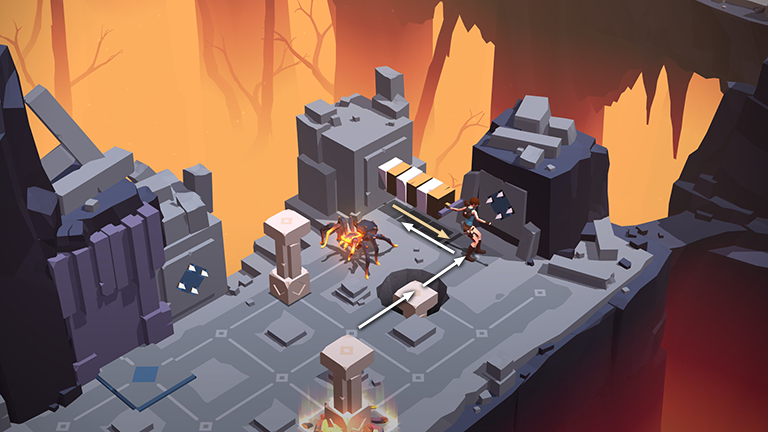
Hop across the sunken pillar to reach the switch. Pull it to open the exit. You now have six turns to get there before the switch retracts and the door closes.
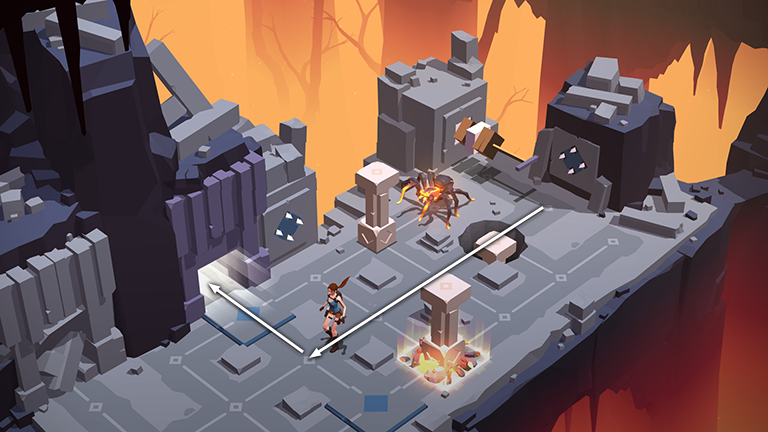
As long as you don't waste any movement, you'll get there just in time. If necessary you can return to the switch and pull it again.
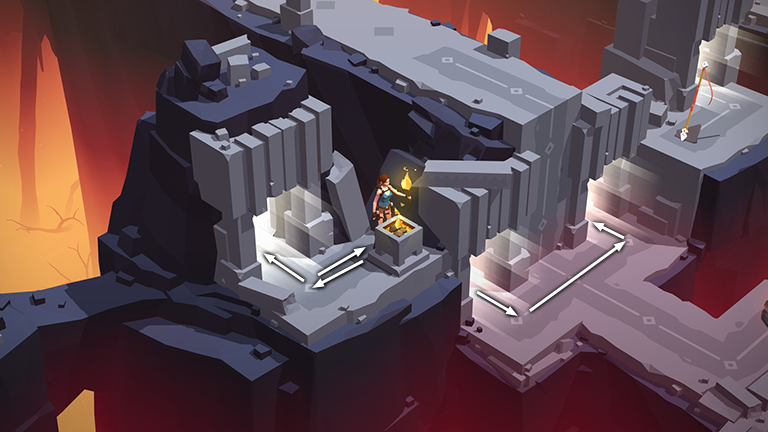
In the next small area, move to the right to light a TORCH at the brazier. Then return through the doorway to re-emerge back in the first area. Again, there's not much you can do here yet, so go through the doorway on the right.
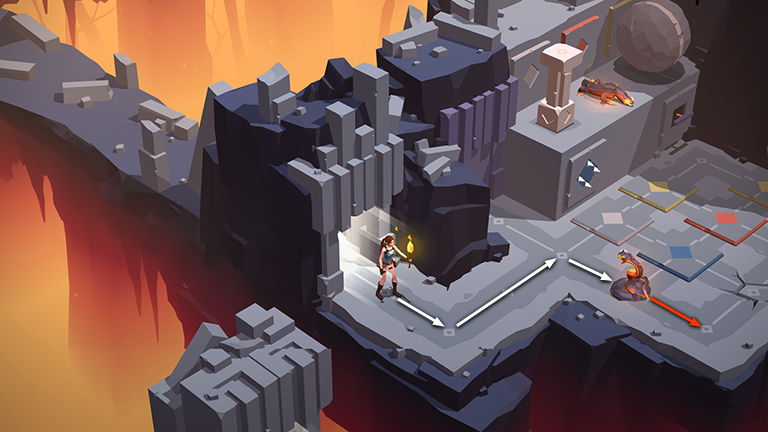
In the next area, move around toward the snake. As you approach, the torch drives the snake back into the corner.
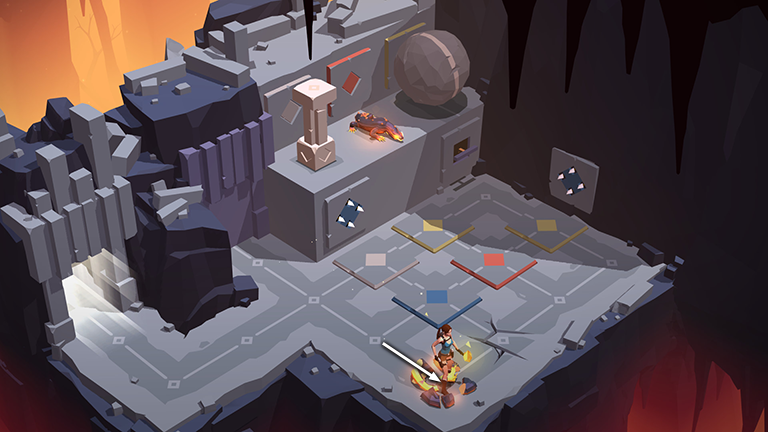
Move toward the snake again to shoot it with your pistols, disabling it for five turns.
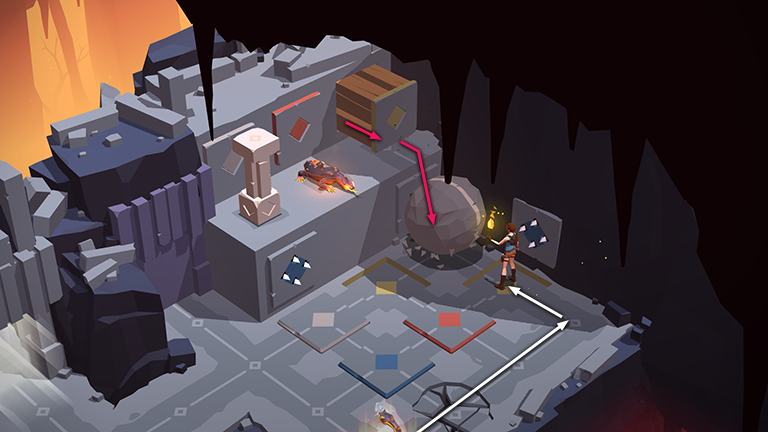
Step over the cracked floor, into the right corner, then back to the upper left, onto the nearer of the 2 yellow pressure pads. This activates the yellow block trap on the ledge above, shoving the boulder off the edge.
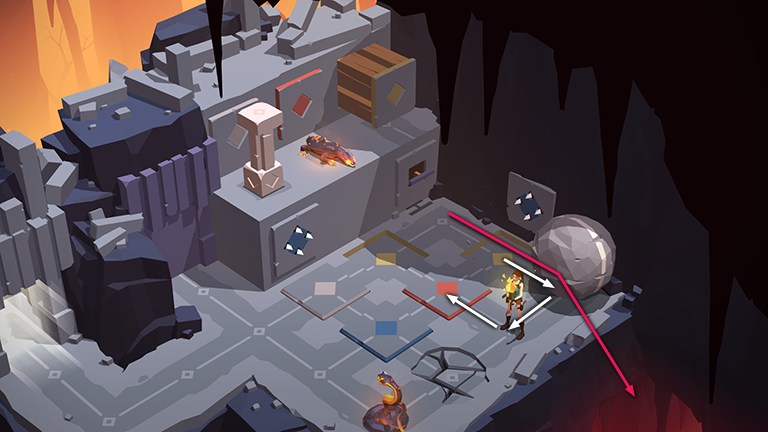
Move back to the lower right, then to the lower left, then to the upper left onto the orange pressure pad. Meanwhile, the boulder rolls over the yellow pad and off the edge.
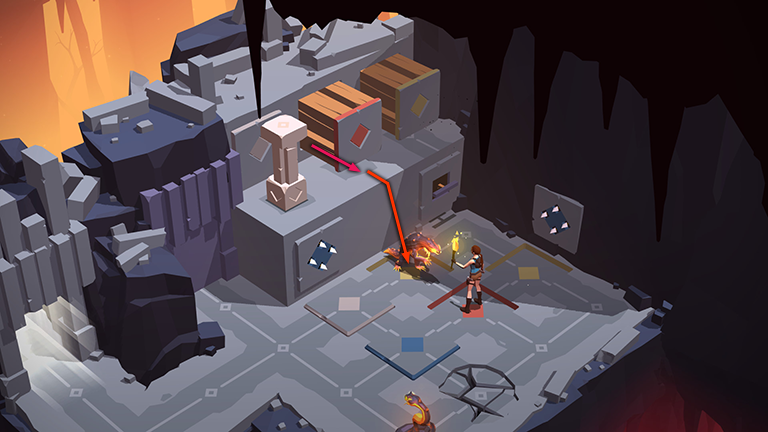
When Lara steps on the orange pad, the orange block trap pops out, pushing the lizard off the edge onto the other yellow pad. Since the boulder has already rolled, this has no effect, and since Lara is still holding the torch, the lizard will not attack.
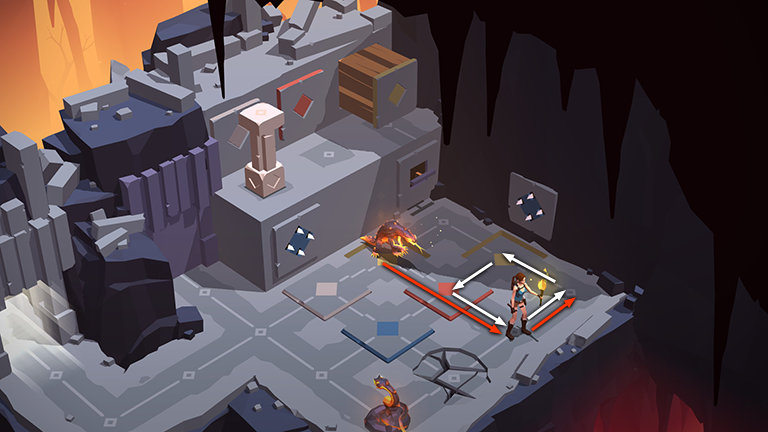
Now here's where things get a little complicated. Step off the orange pad to the lower right. Then move to the upper right, upper left (onto the yellow pad near the arrow trap), left onto the orange pad once more. The lizard follows two spaces behind Lara. So when she returns to the orange pad, he has just moved into the right corner.
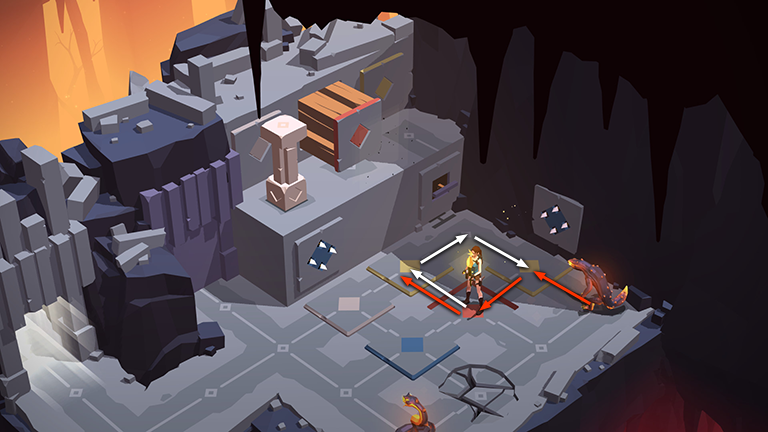
Step to the upper left (onto the second yellow pad), to the upper right (into the corner near the switch), then to the lower right (onto the first yellow pad). The lizard continues to follow, ending up on the second yellow pad.
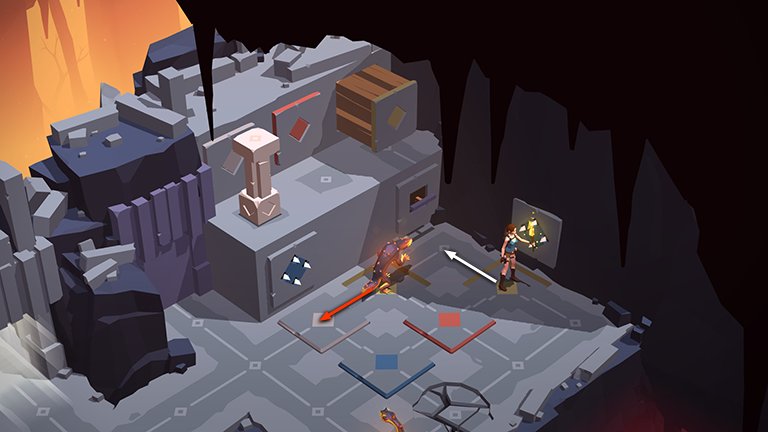
Move back to the upper left, into the space in front of the switch. Since Lara is still holding the torch, the lizard is driven back onto the tan pressure pad.
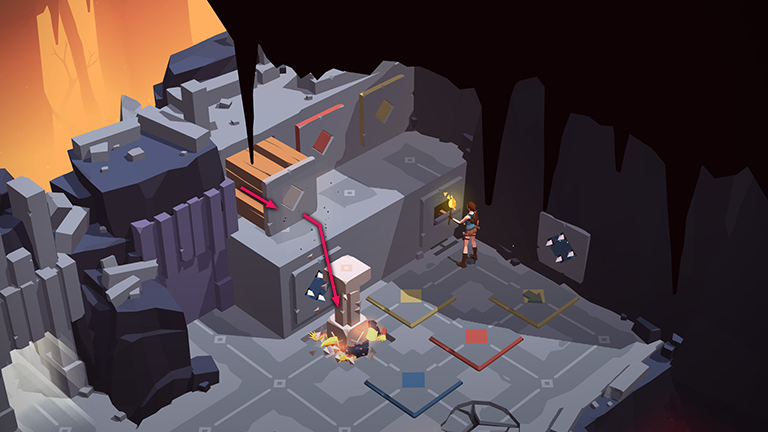
This activates the corresponding block trap above, pushing the pillar off the ledge and squashing the lizard.
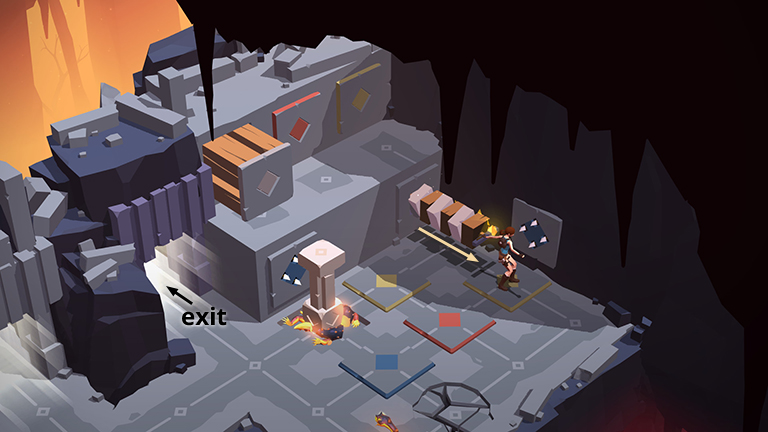
Pull the switch to open the exit. You now have six turns to get through before the door closes.
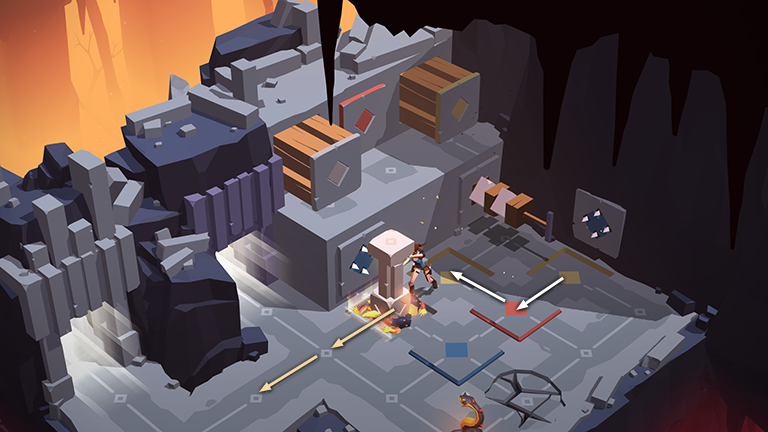
Move around to the right side of the freestanding pillar and push it twice to the left.
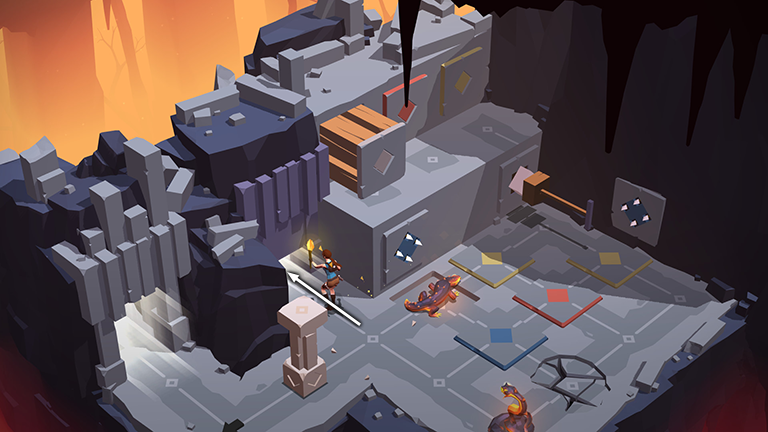
The lizard springs back to life, but since he's facing away from Lara, he's no trouble. Use the remaining two turns to slide under the closing door.
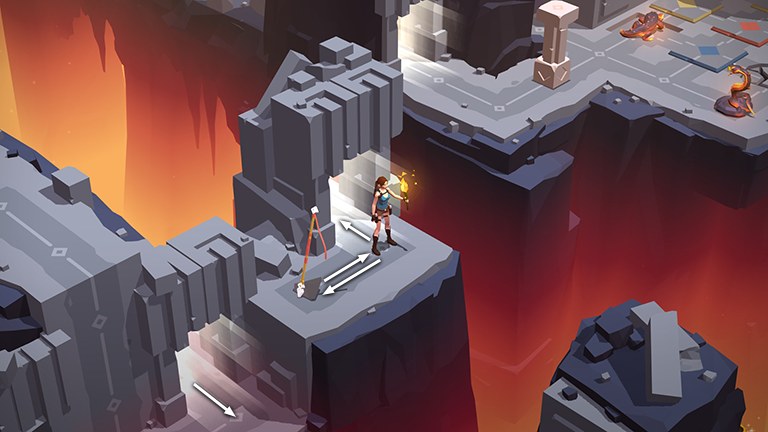
In the next small area, grab the SPEAR and return through the doorway to emerge back in the first area.
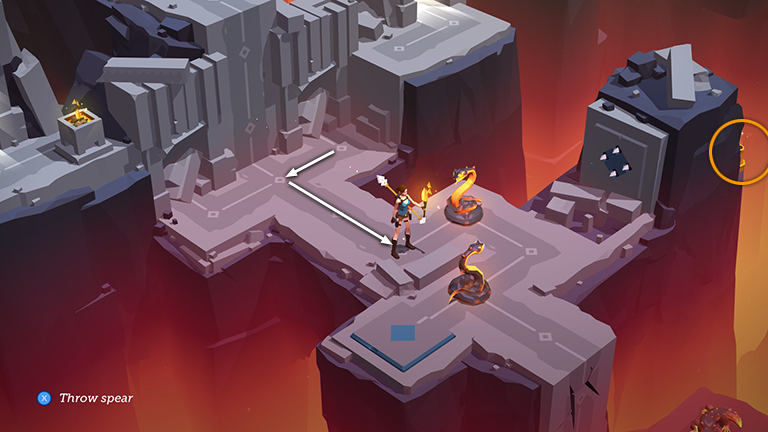
Move to the left then advanced to the first bend in the pathway. Since Lara is still holding the torch, the first snake does not attack. Smash the vase in the background on the right to obtain the final piece of the SACRED BEETLE relic (11/11).
NOTE: If you've found all the other pieces of this relic, you'll now unlock the ANGEL OF DARKNESS OUTFIT. To change outfits, return to the main menu. Rotate the menu items until the watch (labeled "Outfits") is visible. Select it to examine and equip any outfits you've purchased or unlocked. If you missed any gems, you can replay any previously completed level by selecting it from the journal in the main menu ring.
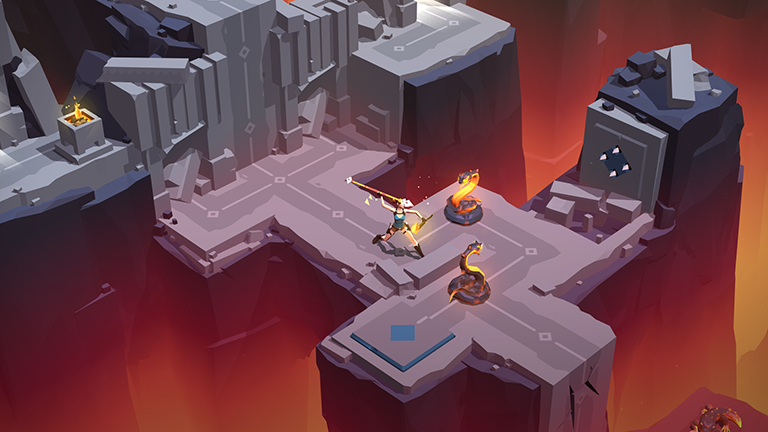
Throw the spear at the second snake to disable it for five turns.
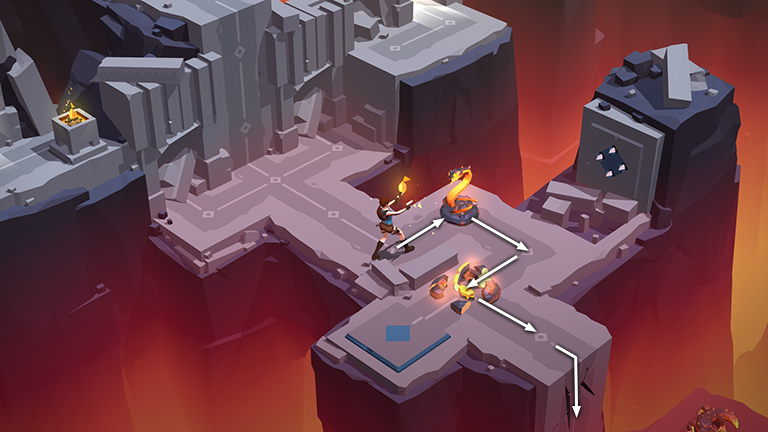
Step to the right to shoot the first snake. Continue along the path, stepping over the second snake, and then climb down to the level below.
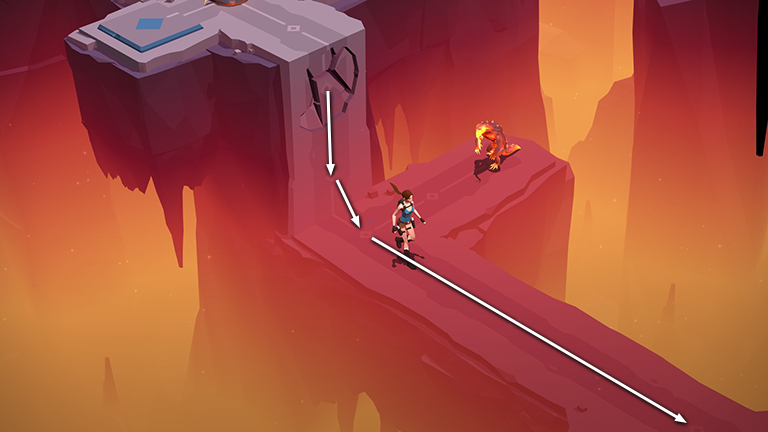
Now just follow the walkway to the end of the level.
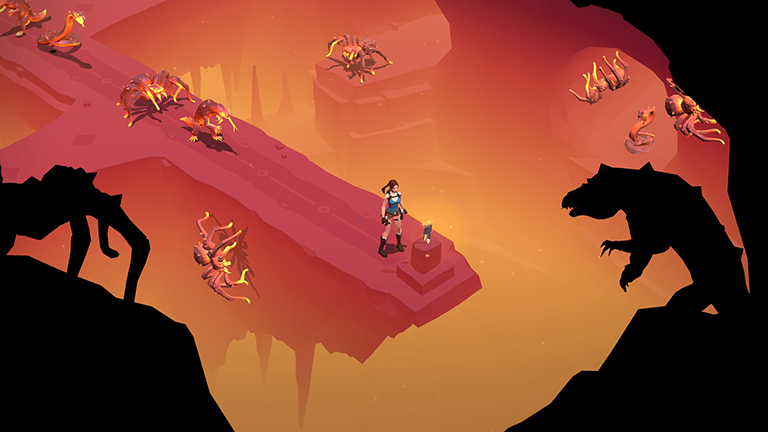
As you go, a bunch of creatures converge upon Lara's position, but you don't need to fight them. Just approach the pedestal with the SHARD OF LIFE to finish the level, unlock the Immortal No More achievement/trophy, and escape from the cavern, ending this mini-adventure.
If you also have the Mirror of Spirits expansion, you can continue with the next level now.
†UPDATE HISTORY: 3/19/17 - Walkthrough first posted.
WAS THIS WALKTHROUGH HELPFUL? If not, I apologize and invite you to contact me with any questions. If you need help right away, I recommend the r/TombRaider subreddit. Other fan-run forums are listed at tombraiders.net/stella/community.html. If this site was useful, please consider supporting it financially or in other ways. For details, visit tombraiders.net/stella/support.html. As always, I welcome your corrections/suggestions. Thank you!
Copyright © - Stellalune ( ). Screenshots for the Shard of Life expansion levels were made using the Steam version of Lara Croft GO. Feel free to copy or print this walkthrough for personal use. Share it with friends if you like, but please include this credit line so people can send me their feedback. No part of this walkthrough may be reproduced on another site without permission. Follow this link for details about this site's advertising and privacy policy.
Stella's Tomb Raider Site: tombraiders.net.