Stella's Walkthroughs - Tomb Raider: Underworld for Nintendo DS
This page includes the following levels (click the links to go directly to each section): Part Six: Amanda's Ship |
|||
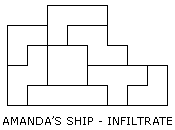
42 – AMANDA'S SHIP – INFILTRATE
Kills: 0 Artifacts: 3 Treasure Chest: 1
Cinematic: Lara pulls her boat alongside Amanda's ship, anchored off the southwestern coast of Thailand. The fierce weather seems a perfect complement to Lara's new toy—and perhaps her mood as well.
Go to the right through the hatch. Chimney jump up to the ledge with the health pack. (CHECKPOINT)
Stand at the edge of the ledge facing the three small, stacked boxes on the right. Jump forward toward the small boxes and, when Lara touches them, jump again to spring back and grab the horizontal bar above. Pull up to perch on the bar and then jump forward to grab the bar above. Swing and jump to grab the next bar. Jump up to perch on this bar and then jump forward to grab the bar above. Swing and jump to the right. Lara will fall quit a distance but end up grabbing the bar just above the yellow metal structure. Drop down onto it. Jump across the hole in the middle to the right side of the yellow structure. (CHECKPOINT)
Hang from the right edge and drop to grab the handhold below. Jump to the right and grapple the winch hook. Swing back and forth until Lara is swinging as high as she can. Then jump to grab one of the handholds on the next yellow structure on the right. If Lara grabs the lower handhold, jump up to the higher one. Then jump to the left to grab the horizontal bar behind her. Jump up to perch on the bar and then jump to grab the handhold on the wall to the left. Jump to the right to grab the bar above the previous one.
Pull up to perch on the bar and then jump to the left to grab the edge of the yellow structure ahead. Pull up to get some rifle ammunition. Then jump to the right to grab the edge of the next ledge. Pull up and take the ARTIFACT (1/3). (CHECKPOINT) Then drop down on the right to find the TREASURE CHEST. (Click to click to show/hide treasure chest puzzle solution or click for all solutions on one page.)
Take a running jump to the right to grab the handhold on the yellow wall ahead. Jump up to the handhold above and then pull up onto the ledge where you got the rifle rounds. Step to the right edge and jump forward to land on the next yellow ledge below.
Hang from the right edge and drop down onto the catwalk. Duck through the low opening on the right, picking up a health pack on the way. (CHECKPOINT) Then chimney jump up onto the wooden crate to get another ARTIFACT (2/3).
Run (don't jump) off the right edge of the crate to grab the horizontal bar ahead. Swing and jump to grab the edge of the wall on the right. Pull up. Jump to grab one of the handholds on the right wall. Climb to the highest handhold. Then jump to the left and grapple the winch hook above. Swing back and forth to build momentum and then jump to grab a handhold on the wall to the left.
Jump to the uppermost handhold and then jump to the right to grab the edge of the ledge behind. Pull up and enter the low ventilation duct ahead, picking up some shotgun ammo as you go. Advance to the edge of the duct, just before it starts to slope downward, and get the last ARTIFACT (3/3).
Then slide down the slope and jump to the ledge on the right, where you'll find a grenade and some automatic pistol rounds. Drop off the ledge and slide down to the next flat part of the duct. Step onto the slope below and slide down to finish the level.
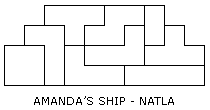
43 – AMANDA'S SHIP – NATLA
Kills: 4 Artifacts: 0 Treasure Chest: 1
NOTE: The way this room is set up, with high ledges on both sides, means you must sacrifice one pickup—some shotgun shells on the ledge just below the entrance—in order to get the TREASURE CHEST. The walkthrough below describes the path to the treasure. If you're replaying the level and have already obtained it, you can decide whether to drop down for the shotgun ammo or swing across the room for an extra health pack that is not reachable from below.
Lara drops in from the duct above. (CHECKPOINT) Hang from the edge of the walkway and lean to the right to spot a metal valve handle above on the right. It's marked with a flashing light, indicating that it's a grapple point. Jump to the right and fire the grapple to snag the valve handle. Swing and jump to the right. Then quickly grapple the next valve handle. Swing and jump to the ledge on the right, where you'll find a health pack. Drop down to the ledge below and take the TREASURE CHEST. Then drop to the floor. (Click to click to show/hide treasure chest puzzle solution or click for all solutions on one page.)
Pick up the rifle ammo and run past Natla to the left to get another health pack. Then approach Natla's glass cage and press X.
An armed mercenary enters through he door on the left. Blast him with Thor's hammer. Then go to the right to find that another pair of soldiers has come in there. Deal with them and pick up the automatic pistol ammo one of them drops. Then return to the left to take out one last straggler.
Cinematic: Lara enters the large room housing Natla's glass cage and demands to know the location of Helheim. True to form, Natla stalls a bit by complimenting Lara's tenacity, but when Lara presses, she channels energy through her fingertip to scribble something on the glass.
"Before you put me to death," Natla says, "tell me, are you prepared to wait for Odin to appear and perform the ritual to open Helheim?"
Lara now understands Natla's plan. The two need each other in order to reach their opposing goals. Lara will have to agree to work with the erstwhile queen, at least for the time being. But she musters a bit of bravado and assures Natla that the moment she steps out of line, Lara will kill her.
But before Lara can release Natla, Amanda appears with the doppelganger and orders Lara not to break the glass.
Lara turns on her former friend with cold fury. "You destroyed my home," she accuses. "You killed Alister!"
"I got what I wanted," Amanda replies. "Isn't that all we care about?"
Amanda begins to power up the Wraith Stone as Lara stands poised to wield the hammer. But the standoff is broken when the doppelganger intervenes, hoisting her mistress and tossing her off the walkway. Lara attempts to kill her double, but her lightning bolt doesn't completely do the job.
"Ah, Lara, you really are a woman after my own heart," Natla croons.
The taunt is enough to bring Lara back to her senses. She smashes the cage and orders Natla out of her sight. Natla nudges a shard of glass with her toe, indicating the coordinates she etched upon it earlier.
"Meet you there," she says before escaping through the vent above.
44 – AMANDA'S SHIP – ESCAPE
Kills: 7 Artifacts: 3 Treasure Chest: 0
Follow the hallway to the left. (CHECKPOINT) Advance just as far s the doorway and use the hammer to blast the soldier on the catwalk to the left. Slide down the slope to the floor and pick up an ARTIFACT (1/3).
Switch to the rifle or automatic pistols and move to the left just far enough to get a lock on the mercenary on the stacked cargo containers ahead. (Sadly, Mjolnir can't fire at an angle.) Kill him, climb up to where he fell and take the shotgun ammo he dropped.
Re-equip the hammer if you like. Then climb over the wooden crate (CHECKPOINT). There are 2 more men ahead—one on the same level as Lara, one on the slightly lower box behind him. If you kill the first guy, then grab the edge of the container where he was standing and pull up, you can probably take out the second guy with one or two hammer blasts before he hurts Lara too badly. When he dies, he drops shotgun shells. Make sure you get the ARTIFACT (2/3) on the stairs below before moving on.
Step to the left edge of the wooden crate where the last enemy stood. Notice the small slope protruding from the ledge and take care not to step out onto it, or Lara will start to slide. From this position, crouch, and stand up again, and you should be able to see—and target—the 2 soldiers on the left. Get a lock on the one down below and toss a grenade if you have one. That should take care of him. Then target the man above and blast him with the hammer. If that doesn't work for you, try using the rifle or automatic pistols for the man above; otherwise he'll start tossing grenades. Then drop down and deal with the guy below using the hammer or shotgun. The man on the floor drops pistol ammo.
When the coast is clear, climb up the crates on the left. (CHECKPOINT) Pick up the ARTIFACT (3/3). Then press R to target the man just outside the door to the left. You should then have enough time to smite him with the hammer before he gets to Lara. He also drops auto pistol rounds. Continue to the left to end the level.
†UPDATE HISTORY: 1/15/09 - Walkthrough first posted.
WAS THIS WALKTHROUGH HELPFUL? If not, I apologize and invite you to contact me with any questions. If you need help right away, I recommend the r/TombRaider subreddit. Other fan-run forums are listed at tombraiders.net/stella/community.html. If this site was useful, please consider supporting it financially or in other ways. For details, visit tombraiders.net/stella/support.html. As always, I welcome your corrections/suggestions. Thank you!
Copyright © 2007- Stellalune (). All rights reserved. Feel free to copy or print this walkthrough for personal use. By all means, share it with friends, but please include this credit line so people can send me their feedback. No part of this walkthrough may be reproduced on another site without permission. Follow this link for details about this site's advertising and privacy policy.
Stella's Tomb Raider Site: tombraiders.net.

