Stella's Walkthroughs - Tomb Raider: Underworld for Nintendo DS
This page includes the following levels (click the links to go directly to each section): Part Five: Valhalla (Jan Mayen Island) |
|||
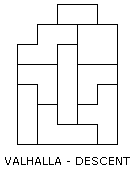
36 – VALHALLA – DESCENT
Kills: 0 Artifacts: 3 Treasure Chest: 1
An introductory cut scene shows a long, multi-tiered ramp leading into the depths of the ruins.
Go to the right for an ARTIFACT (1/3) then head to the left down the ramp. (CHECKPOINT) Take a running jump to grab the higher of the handholds on the left. If Lara grabs the lower one, jump up to the gone above. Climb to the left and jump to grab the next handhold. Climb to the left and jump to grab the ladder. Climb to the bottom and then drop past the gap in the ladder to grab on below. Climb down a little and then jump to grab the ladder on the right. Climb up or down this ladder if necessary and then jump to grab the handhold on the right. Climb to the right, jump to the next handhold and then jump to the ledge beyond. Run down the ramp to the bottom. (CHECKPOINT)
Take a running jump to grab the next ladder. Climb nearly to the top. Then jump to the right, grapple the metal disk and then swing and jump to the light-colored handhold to the right. Climb along this handhold and drop onto the small ledge with the ARTIFACT (2/3).
Jump up to grab the handhold again and continue to the right. Jump to grab the next handhold and climb to the right some more. Drop onto the slope below, slide and jump just before the end to grab the ladder on the left. Climb down and then jump to grab the handhold on the left. Climb to the left and jump to the next ladder. Climb to the top of this ladder and jump to the left to grab the nearest handhold. Jump to the next handhold, climb to the left and jump to grab the ledge on the left. Pull up.
Go down the ramp and take a running jump off the end of the ledge to grab the handhold on the back wall. Climb and jump across these two handholds to the ladder beyond. Climb down to the break in the ladder. Drop down and grab on below. Then jump over to the ledge on the left. (CHECKPOINT)
Take a running jump off the left edge and grapple the metal disk above. Swing to the left and jump to grab the ladder. Climb down and drop onto the slope. Slide down to the left. Let Lara fall off the edge and she'll automatically grab the handhold below. Climb to the right, beneath the slope you just slid down. At the end of the handhold, jump to the right and grapple the metal disk above. Swing and jump to the next ledge on the right. Run down to the bottom of the ramp. (CHECKPOINT)
Take a running jump to grab the ladder ahead. Climb up a little if necessary, but not all the way to the top, and then jump to the right and grapple the metal disk. Swing and jump to grab one of the handholds on the wall to the right. Drop from the lower handhold into space and grapple the metal disk ahead as Lara falls. Swing to the right and jump to grab the long, light-colored handhold. Climb along it to the right and jump to grab the edge of the next ledge. Pull up next to an ARTIFACT (2/3) and a TREASURE CHEST. (CHECKPOINT) (Click to click to show/hide treasure chest puzzle solution or click for all solutions on one page.)
Jump from the edge of this ledge to grab the ladder above. Climb to the top and jump to the slope on the left. Slide down and about halfway along, jump and grapple the metal disk ahead. Swing to the left and jump to grab the ladder. Climb down, jump to grab the handhold to the left, climb along it to the left and jump to grab the next ledge. Pull up and approach the door to end the level.
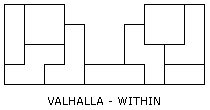
37 – VALHALLA – WITHIN
Kills: 0 Artifacts: 3 Treasure Chest: 1
Go to the right (CHECKPOINT) past the lever to get the health pack on the low wall just beyond. Be careful not to step off on the right into the spikes. Then return to the lever and pull it to raise a ladder out of the floor just to the right. It retracts after a few second so quickly climb to the top (tap A to climb faster) and jump to grab the ladder to the right. Climb up just a little and then jump to the narrow ledge on the right. Slide down the slope ahead and jump to grab the next ladder. Climb up and jump to the small ledge with the ARTIFACT (1/3).
Run off the ledge to grab the ladder again. Climb to the bottom. A short cut scene shows a huge axe beginning to swing back and forth below. Drop onto the slope below, slide just a little and jump to grab the pole on the left wall. Slide down tot the bottom. Hold Control Pad Right to make Lara lean away from the wall and watch the swinging axe. Just as it starts to swing back toward the niche in the wall, press B to jump past it and grab the pole on the right wall. Slide down and jump to grab the ladder to the left.
Climb to the bottom of the ladder and watch the next swinging axe. Just as it starts to swing back toward the niche, jump past it to grab the pole on the left wall. Drop onto the slope below, slide nearly to the end and then jump past the top of the next swinging axe to land on the ledge to the right. (CHECKPOINT) Pick up the automatic pistol ammo if you have room in your inventory.
Hang from the edge of the ledge. Lean to the left and watch the swinging axe. Just as it begins to swing inward toward the niche, jump past it to land on the ledge beyond it, where you'll find a health pack. Go to the left side of this ledge and jump to grab the ladder beyond. Climb down to the break in the ladder and then drop to grab on below where the ladder continues. Climb to the bottom and then jump to grab the ledge on the right.
Drop down to the ledge below to find a TREASURE CHEST. (Click to click to show/hide treasure chest puzzle solution or click for all solutions on one page.)
Climb back up to the ledge above. Drop down to the ledge on the right. Drop down once more to the right to find another ARTIFACT (2/3) on a narrow ledge below the swinging axe. Get it, climb back onto the ledge above and turn right. Step to the edge and watch the swinging axe. As before, wait for it to start to swing back toward the niche, and then jump forward to grab one of the handholds on the wall beyond it. Climb the handholds to the ledge above. (CHECKPOINT)
Stand at the right edge, facing the next swinging axe. When it swings back toward the wall, jump past it to grab the ladder beyond. Climb down to the bottom and jump to the ledge on the left. Pick up some shotgun ammo and an ARTIFACT (3/3).
Hang from the edge of the ledge and drop down the handholds onto the slope below. Slide down to the right and jump to grab the short ladder ahead. Climb to the top and jump to grab the next ladder, just to the right. Climb down a bit if necessary and jump to the ledge on the right. (CHECKPOINT) When Lara lands here, the ladder she had been climbing breaks off and falls into the chasm below, preventing you from going back.
So press on to the right. Pull the lever to raise the wall ahead. Go through to finish the level.
38 – VALHALLA – VALGRIND
Kills: 2 Artifacts: 3 Treasure Chest: 0
Go to the right. (CHECKPOINT) Jump to the small stepping stone in the toxic pool and from there to the flat ledge on the right. Pick up the grenade. Continue to the right to the right edge of the ledge to find an ARTIFACT (1/3). Then backtrack to the left a bit and climb the lattice on the back wall.
As you go, you'll see a Viking thrall shambling around on the ledge above. Climb up the lattice and jump over to the ledge where the thrall is. There's a health pack here as well. Human thralls are not too fast, but they do have long swords that can reach Lara from quite a distance. So get a lock on the thrall, fire if there's time, then jump over it to land on the other side of the ledge and start shooting. Just take care not to fall off the edge. Keep firing. Then, when the thrall turns around and approaches, jump over it once more. Keep this up until it falls. Then pick up the ARTIFACT (2/3).
Jump to grab the lattice to the right. Climb to the right side of the lattice and drop onto the ledge with the automatic pistol ammo. (CHECKPOINT)
Jump to grab the next section of lattice. Climb down and to the right, taking care not to drop into the blue pool below. There's another Viking thrall and some shotgun ammo on the ledge below. Climb down near the bottom of the lattice to attract the thrall's attention. Then jump past it to land on the right side of the ledge. Get a lock and start shooting. Then, when the thrall approaches, jump over it so it doesn't push Lara back into the pool.
When it falls, take a running jump off the right side of the ledge to grab the next section of lattice. Climb to the right above the blue pool until Lara is hanging above the next ledge. Drop down to get some more shotgun shells. Jump to the next ledge on the right to find the third ARTIFACT (3/3).
You can't climb over the wall on the right. So jump back to the previous ledge and jump to the left to grab the lattice again. Climb upward and to the right. Jump onto the ramp on the left. Go to the top to find some rifle ammunition.
Cross the wooden bridge and pick up a health pack at the other end. Go down the ramp, where there's another rifle ammo pickup. Jump across the gap to the ledge on the right and continue right to the exit.
As the level ends, a brief cut scene shows a huge Yeti thrall emerging from the pool. You'll be seeing him again later.
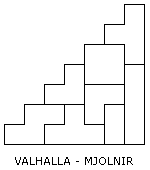
39 – VALHALLA – MJOLNIR
Kills: 0 Artifacts: 3 Treasure Chest: 1 Weapons: Mjolnir
The door closes behind Lara. Go the right, climb onto the ledge and head down the ramp on the other side. (CHECKPOINT) Climb onto the next ledge with the fat wooden column on top. Jump to grab the horizontal pole, jump up to perch on top of it and then jump to the right to grab the pole above. Perch on top of that pole and then jump to the right again to land on the narrow ledge with the ARTIFACT (1/3). (If you try to swing from the upper pole, Lara will overshoot the artifact.) From the ledge where the artifact was, jump to the top of the wall on the right.
Drop down on the other side. Go to the right, duck under the low overhang and chimney jump between the walls to reach the ledge above on the left. The next jumping sequence is a little tricky. Face the left wall and chimney jump up to the ledge above on the right. When Lara moves level with the ledge with the artifact, it will look like she's going to grab it, but the ledge is set up so she can't. So you'll need to jump once more to land on the ledge on the right. (Six jumps in all.) Then jump across to the ARTIFACT (2/3).
Jump back to the ledge on the right, slide down the slope and continue to the right. (CHECKPOINT)
Go down the stairs to a room with a large statue. Approach THOR'S HAMMER and press X to take it.
Cinematic: Lara deciphers the runes carved around the doorway, recording her findings on camera. "Thor, greatest of my sons, and the greatest weapon on Earth are at last reunited," she reads. "Upon my return, through rituals old and the power of Mjolnir, together we will open the seals of Helheim and fulfill our destinies."
As she enters the room, the belt and gauntlets begin to glow once more. Mist swirls around the pedestal holding the hammer. Lara strides forward as lightning crackles between the hammer and the statue, then between the hammer and her fingertips. As she grasps the weapon and removes it from its resting place, a blinding light shines down from above then subsides.
"Mjolnir," she muses, examining the hammer more closely, "slayer of giants and the Midgard Serpent. . . more importantly, the key to Helheim, wherever that is." Then, as she turns away from the statue, she adds, "Time to pay Natla a visit."
After the movie, Lara comments about traps being activated. She says she'll have to avoid the hammers and get out of this temple. Note that Thor's Hammer, Mjolnir, is now available in your inventory. Tap it on the touch screen to equip it.
(CHECKPOINT) Return up the stairs on the left. The huge hammer that was stationary earlier is now swinging back and forth. Wait for it to swing toward the back wall and then drop down off the ledge and run to the right. Slide down the steep slope and jump near the end to grab the horizontal pole. Perch on the pole and jump to the right to grab the pole above. Swing and jump to grab the edge of the ledge ahead. Pull up and take the TREASURE CHEST. Drop off the edge and slide down the slope to the floor below. (CHECKPOINT) (Click to click to show/hide treasure chest puzzle solution or click for all solutions on one page.)
Go to the left and take a running jump to grab the lattice above the blue water. Climb to the left side of the lattice and position Lara at the bottom of the lattice, level with the horizontal pole to the left. Jump to grab it. Then perch on top of it and jump to the left to grab the pole above. Perch on top of that pole and jump to the left to grab the next section of lattice. Climb up and jump to the lattice on the right. Climb up this section of lattice so Lara is level with the horizontal pole to the left. Do not climb all the way to the left side of the lattice or Lara will overshoot the pole when you jump. Instead, jump from about the middle of the lattice to grab the pole. Swing and jump to the next section of lattice to the left.
Climb to the top left corner and watch the huge, swinging hammer. When it passes Lara on its way back into the dark niche, jump to the left. A situational adrenaline sequence kicks in. Press X to grab the lattice below on the left. Climb to the bottom of the lattice and drop to grab the pole below. Swing and jump to the lattice on the left. Climb to the bottom and then jump to the ledge on the left. (CHECKPOINT)
Slide down the slope and jump to grab the horizontal pole above the poisonous pool. Swing and jump to grab the lowest handhold on the wall to the left. Climb to the highest handhold and jump to the right to grab the ledge behind. Pull up. Face left and chimney jump between the walls to grab the ledge above on the right. Pull up.
Grab the edge of the ledge with the artifact, but don't pull up immediately. Watch the swinging hammer above and when it swings back toward the wall, pull up, take the ARTIFACT (3/3) and quickly run back off the ledge. If Lara is killed by the hammer after getting the artifact, repeat the jumps up to the ledge just below the hammer. You won't need to get the artifact again.
Jump across the gap to grab the lowest handhold on the left wall. Wait for the hammer to swing toward the wall and quickly climb the handholds to the ledge above. Go to the left. (CHECKPOINT)
Go up the slope to the next hammer. Take a take a running jump across the gap when it swings past in either direction. Just be sure to take off just at the edge so Lara lands on the next ledge, rather than grabbing it. Lara probably won't have time to pull up before being smashed.
Continue left to the door. Lara says it won't budge, but she should be able to make short work of it with Thor's hammer. So equip Mjolnir by tapping it on the touch screen, if you haven't already, and press Y to blast through the door. Go through to end the level.
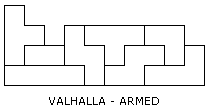
40 – VALHALLA – ARMED
Kills: 4 Artifacts: 3 Treasure Chest: 1
Go to the right. (CHECKPOINT) Equip the hammer, if you haven't already, then take just a step or two beyond the checkpoint and fire twice or three times to the left to kill the fearsome Yeti thrall. You don't even need to get a target lock first. As long as Lara is facing the enemy, the hammer's energy blasts should connect. When it falls, jump across the gap on the left. (CHECKPOINT)
Head up the long ramp. When Lara steps forward, the wooden bridge collapses beneath her, dumping her into the room below, with another Yeti thrall. Try to blast it with the hammer before it reaches Lara. Yeti are too big to jump over. So if you don't have time to finish it off before it gets to Lara, slide past it (Control Pad Down + B), run to the left and then turn and fire again. When it's dead, take the TREASURE CHEST and ARTIFACT (1/3). (Click to click to show/hide treasure chest puzzle solution or click for all solutions on one page.)
Hop over the pile of rocks on the left, duck through the tunnel and drop down into the space beyond. Here you can pick up another ARTIFACT (2/3) and some shotgun ammo. (You may have noticed the shotgun from the other side when you passed this way earlier.)
To get out of here, face the left wall and chimney jump to land on top of it. Drop down on the other side. (CHECKPOINT) Jump across the gap and then jump to grab the lattice on the back wall to the left. Climb across to the left and jump to the flat ledge, where you'll face another Yeti thrall. Fight it using the same strategy as the last one, just mind the edges of the ledge so Lara doesn't fall into the blue pool. Or, if you prefer a safer approach, jump onto the ledge to get the Yeti's attention and then jump back to the lattice. Hang there until the Yeti moves to the right edge of the ledge. Then climb back to the right and drop down onto the ledge below. Stand at the left edge facing left. As long as Lara can see the Yeti across the pool, you can hit it with blasts from the hammer.
When it's dead, climb the lattice at the left end of the ledge and jump to the ledge above on the left. (CHECKPOINT) Grab the next section of lattice. Climb up and to the left and jump onto the next ledge. At the left end you'll find the last ARTIFACT (3/3).
Step off the left edge to grab the lattice on the wall. Climb down and to the right, beneath the ledge on which Lara was just standing. Climb to the right and downward. Then drop onto the wide, flat ledge below. Pick up a grenade at the right side of the ledge. Then go to the left side. (CHECKPOINT)
Use the little stepping stone to hop across the pool to the next ledge. Get the attention of the Yeti thrall ahead and then jump back to the stepping stone. You can then blast the Yeti from safety. When it's dead, hop back to the ledge and proceed to the exit on the left.
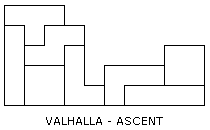
41 – VALHALLA – ASCENT
Kills: 0 Artifacts: 3 Treasure Chest: 1
Head to the right, past the lever for now. (CHECKPOINT) Pick up the rifle ammunition and return to the right. Pull the lever four times in order to tip the huge metal block off the ledge above and raise the block on the right as well. Climb on top of the block on the left, turn right and jump to grab the horizontal pole. Swing and jump to the ledge with the ARTIFACT (1/3). To get back to the pole without falling, position Lara a few steps back from the edge, facing left, and then jump. When Lara grabs the pole, press X for the saving grab. Then swing over to the ledge on the left.
Climb the handholds on the left wall. Turn back to the right and jump to grab the horizontal pole. Perch on top of it and then jump to grab the pole above. Swing and jump to grab the ledge on the right. Pull up. (CHECKPOINT)
Climb the chain. Jump to grab the next chain. Climb to the top and jump to grab one of the handholds on the wall to the right. Climb to the upper handhold and jump back to grab the pole. Turn to face right and jump up to perch on the pole. Then jump forward onto the ledge with the spikes. Just be careful not to run forward into them. (CHECKPOINT)
Watch the spikes and notice how they have a short "down" phase, followed by a short "up" phase. Then a longer down, followed by a longer up. Wait for the short up phase and then, as the spikes retract for the longer down phase, step forward to grab the ARTIFACT (2/3). Then quickly jump to grab the pole ahead.
Swing and jump to grab the pole below. Perch on top of it and jump forward to grab the lowest handhold on the wall to the right. Jump to the handhold above then wait for the spikes on the wall to retract. Then jump up to the handhold above and quickly jump to the left to grab the chain.
Climb up a little and lean left to spot a TREASURE CHEST on the ledge to the left. Climb a bit higher than the ledge and jump to land there. Grab the chest and then take a running jump back to the chain. (Click to click to show/hide treasure chest puzzle solution or click for all solutions on one page.)
Climb to the top and jump to grab a handhold on the right wall. Jump to the upper handhold and wait for the spikes behind to retract. Then jump to the left to grab the handhold above the spikes and quickly jump up to the next handhold, which is safe. Jump to the highest handhold on this side and once more wait for the spikes on the opposite wall to retract. Jump across and then quickly pull up onto the ledge. (CHECKPOINT)
Stand at the right edge of the ledge, overlooking the shallow spike pit ahead. Jump forward onto the next ledge, taking care not to run on into the retracting spikes. Again, watch the rhythm of these spikes—short down, short up, longer down, longer up—and step forward when they retract for the longer period. Grab the ARTIFACT (3/3) and jump across the next spike pit to the safe ledge beyond.
Move to the right edge of this ledge and watch the retracting spikes ahead. These have the same rhythm as the others. Wait for the short up phase and then, just as they start to retract for the longer down phase, jump across the spike pit and run on to the right.
Climb the handholds on the wall and jump back to grab the horizontal pole. Swing, jump and grab the chain. Climb up a bit, so Lara is hanging just a little higher than the pole on the right and then jump to grab it. Swing around the pole and jump to grab the edge of the ledge on the left. Don't pull up right away. Wait for the spikes above to retract on the long down phase. Then pull up and run to the left. Climb the chain to end the level.
†UPDATE HISTORY: 1/15/09 - Walkthrough first posted.
WAS THIS WALKTHROUGH HELPFUL? If not, I apologize and invite you to contact me with any questions. If you need help right away, I recommend the r/TombRaider subreddit. Other fan-run forums are listed at tombraiders.net/stella/community.html. If this site was useful, please consider supporting it financially or in other ways. For details, visit tombraiders.net/stella/support.html. As always, I welcome your corrections/suggestions. Thank you!
Copyright © 2007- Stellalune (). All rights reserved. Feel free to copy or print this walkthrough for personal use. By all means, share it with friends, but please include this credit line so people can send me their feedback. No part of this walkthrough may be reproduced on another site without permission. Follow this link for details about this site's advertising and privacy policy.
Stella's Tomb Raider Site: tombraiders.net.
