Stella's Walkthroughs - Tomb Raider: Underworld for Nintendo DS
This page includes the following levels (click the links to go directly to each section): Part Three: Croft Manor |
|||
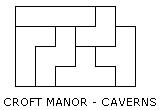
21 – CROFT MANOR – CAVERNS
Kills: 0 Artifacts: 3 Treasure Chest: 1
Cinematic: Back at Croft Manor, Lara enlists Zip, Alister and her faithful manservant, Winston, to help carry gear down into the family crypt. Winston opens a secret panel, revealing a dark, cobwebby staircase. Lara carries the flashlight and leads the way down. Winston follows, and the two younger men bring up the rear, carrying a heavy box of equipment. Lara then locates her grandfather's tomb and begins examining it. She soon finds a concealed switch, flicks it, and the coffin slides to one side, revealing an opening.
After the movie Lara drops into a rough tunnel beneath the crypts. Go to the left up the slope (CHECKPOINT). Climb the ledges, but before following the instructions in the tutorial, drop down and go to the left to find the first ARTIFACT (1/3). Then climb back up on the right and grapple swing across the gap to the top of the ledge on the left.
A tutorial explains how to grapple swing: It isn't possible to grapple just any object, but when you find a grapple point—like the one marked by the flashing light on the ceiling ahead—you can use it to anchor the magnetic grapple and swing across wide gaps. To do this, press X while jumping off the edge to connect with the grapple point and hang from the cable. Then alternate pressing Left and Right on the Control Pad to swing back and forth, as you would on a rope. When Lara is swinging high enough, wait for her to swing to the left and press B to release the cable and jump forward.
When you reach the ledge on the left, above where the artifact was, drop down on the other side. (CHECKPOINT)
Proceed left to a broken bridge, where there is now a wide gap above a chasm. Grapple swing across as you did before and continue to the left. (CHECKPOINT)
Climb the wall and take a take a running jump to grab the ledge above on the left. Jump to grab the next set of handholds on the wall ahead. Then climb to a higher ledge to get another ARTIFACT (2/3). Hang from the edge, drop down once and then jump back to the ledge on the right.
Face left, step off the edge and grapple the ring on the ceiling. Swing across to the ledge on the left. (If you miss, go back to the right, climb the handholds, jump over to the ledge on the left and try the grapple swing again.) When you reach the ledge on the left, drop down on the other side. (CHECKPOINT)
Slide down the slope and, as Lara slides, jump to grab the ledge on the left. Pull up. Then slide or duck through the tunnel on the left. (CHECKPOINT)
Jump across the gap to the left, grab the edge and pull up. Climb to the ledge above on the left. Use the lever to turn on the power. Then take a running jump to the next ledge on the left, where you'll find a TREASURE CHEST. You can't reach the previous ledge from here. So drop down to the floor. (Click to click to show/hide treasure chest puzzle solution or click for all solutions on one page.)
Go left for some shotgun ammo and then continue left to a second lever. Pull it. (If you've used the first lever, you should see sparks on the electrical device to the right, but you do need to use the levers in order to make them work.)
Return to the right, jumping across the hole in the floor. Continue up the slope to the right wall. Climb up and jump back to the ledge on the left. Then jump to the left and pull up onto the ledge with the first lever, which you should have already used.
This time jump to the right to grab the ledge above. Pull up and go to the right. Take a take a running jump to grab one of the handholds on the right wall. Jump up twice and then jump to the left to grab the ledge behind. Pull up and take a running jump across the gap to the left. Grapple swing across the next gap, which is wider than the last two. Step forward and slide down two short slopes to land on the ledge below. (The wall on the right separates this ledge from the one where you found the TREASURE CHEST earlier.) Take a running jump to the next ledge on the right. (CHECKPOINT)
Drop down on the left side and go down the hill to the left to find an ARTIFACT (3/3). After getting it, return to the right, climb back up and jump to the next ledge on the left.
Slide down the slope and jump to the ledge ahead (i.e., above and to the left of where the artifact was). Pull the third lever to open the door on the left.
NOTE: Lara says there must be a trick to activating the switches and mentions the numbers 2, 1 and 3. If you've followed this walkthrough, then you've already pulled the levers in the correct order.
Go through the door and climb over the carved block beyond. (Without gauntlet power, you can't move it.) Go up the stairs. (CHECKPOINT) Cross the room to the left and press X to open the secret door disguised as a bookcase. Continue to the left to Richard Croft's secret study. Approach the desk.
In an in-game cut scene, Lara discovers a cassette recorder. She presses Play and hears her father's last message to her. He says that this room contains everything he recovered from the site at Bhogavati. Along with THOR'S RIGHT GAUNTLET, he's left the copy he made of the map showing the locations of the other artifacts needed to open the way to Avalon. He warns Lara about the "thralls" found guarding the gauntlet, but unlike the other versions of the game, you won't have to fight any of them in this room.
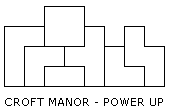
22 – CROFT MANOR – POWER UP
Kills: 0 Artifacts: 3 Treasure Chest: 1
Return downstairs to the right. (CHECKPOINT) Grab the carved block and pull it to the left. Take a few steps back up the stairs, jump to grab the edge of the carved block and pull up. Climb the handholds to the rough stone ledge above.
Climb up on the right and go forward to a tall, narrow carved block. Pull it to the left a bit and then climb on top of it. There are handholds on both the left and right sides of this big hole. Jump to the ones on the right and climb to the level above.
Pick up the shotgun ammo and head up the hill. (CHECKPOINT) Take a running jump across the wide gap with the big, metal wheels in the background. Pull up on the other side and take the ARTIFACT (1/3).
Jump back to the left, run down the hill and hang from the edge of the big hole. Drop down to the lowest handhold and then jump to the left to land on the carved block. Go to the left side and jump to grab the handholds on that side of the hole. Climb up to the rim and head to the left. (CHECKPOINT)
When you come to the wall, climb the low wooden boxes and turn right. Jump to grab a handhold on the wooden structure in the background, jump up and then jump to grab the ledge on the left. Pull up. Go up the hill, turn around and jump to grab the edge of the wooden structure with the health pack on top. Pull up, step to the right and then jump to the right to grab another plank handhold on the back wall.
Here you can see the huge water wheel in the background. Something is preventing it from turning.
Climb to the end of this plank and jump to grab a handhold on the wooden wall to the right. Climb up as far as you can. Then jump back to the left to grab another plank on the structure in the background. Climb along this plank to the left. Jump to grab the left wall and then jump up twice. Climb to the right along this plank. When Lara is hanging beneath the edge of ledge above, jump up to grab it. (You may have to adjust her position left and right a bit, but keep trying; it'll work.) Pull up and take the ARTIFACT (2/3) and TREASURE CHEST. (Click to click to show/hide treasure chest puzzle solution or click for all solutions on one page.)
Hang from the edge and drop back down to the handhold below. Climb then jump to the right. Then jump to the right once more to land at the top of a steep wooden slope. Slide down toward the right. Jump near the bottom of the slope to grab a thick, horizontal beam that looks like it's part of the background but isn't. If you have time to notice while sliding, it's got one of those flashing white lights on it to get your attention. Press X for a saving grab.
NOTE: If you miss this and end up sliding down the ramps to the ground, Lara will be OK. Just return to the left, climb back to the top of the ramp and try again.
Climb along the thick beam to the right. Drop onto the slope below and slide down to the left. Near the bottom of the slope, jump to the ledge on the left. Press X to remove the board that's jammed in the water wheel.
A cut scene shows the water wheel begin to turn and electricity begins to arc between the insulators above the generator. At the far right, you see the lever you'll need to pull to turn on the generator in order to power the elevator.
Hang from the edge, drop onto the slope and slide to the floor. Step off the edge to the right, drop down to the handhold below and then jump to the right to land on top of the tall carved block. Drop down on the right side and continue to the right. (CHECKPOINT) Climb onto the ledge.
Face the elevated wooden structure with the arcing electricity. Watch the electrical arc ahead. When it stops, jump forward to land on the crossbeam between the two insulators. Quickly jump to the next crossbeam, which is safe. Wait for the electricity to the right to stop sparking and jump to the next crossbeam. Quickly jump to the ledge on the right. If you miss, or if Lara gets shocked falls to the floor below, just head back to the left, climb up and try again. When you reach the ledge on the right, pull the lever to bring the elevator down from above. (CHECKPOINT)
Step off the edge to land on the ground next to the third ARTIFACT (3/3). Grab it and head to the left, where you'll find a health pack. Climb the wall on the left, drop down on the other side and continue left to the carved block. Climb on top of it and jump to grab the handholds above on the right. Climb to the rim of the hole and pull up. (CHECKPOINT)
Go up the hill to the right and enter the elevator to complete the level.
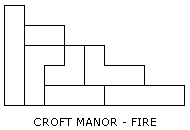
23 – CROFT MANOR – FIRE
Kills: 0 Artifacts: 3 Treasure Chest: 1
Most of this level is identical to the flashback sequence in the PROLOGUE. The artifacts are in different places, though, and there is a treasure chest to be found.
Step out of the elevator and go to the right. (CHECKPOINT) Jump over the shallow hole in the floor and climb the stairs. Continue to the right, climbing the ledges. Vault up onto the fallen column and walk to the upper end. (CHECKPOINT)
This time, there's no artifact down below. So just jump forward to grab the handhold on the bookcase. Jump up twice until Lara is standing on top of it. (CHECKPOINT) Then go to the right edge and drop down.
Climb all the way down to the floor and continue to the right, past the pile of burning debris, to find the TREASURE CHEST. (Click to click to show/hide treasure chest puzzle solution or click for all solutions on one page.) Return to the left, climb onto the upper ledge and take a take a running jump to grab the top of the wall above where the treasure was. Press X to do a saving grab. Then pull up onto the ledge and slide down the slope on the other side.
The first ARTIFACT (1/3) is hidden behind the square column that also obscures the slope. You can see it when you first slide down and when you move to the right end of this fallen column. Once you've spotted it, step to the left and press X to pick it up.
Continue to the right, jumping over the flames. (CHECKPOINT) When you reach the fallen column with the glowing embers, go halfway up and press X to pick up another ARTIFACT (2/3) concealed behind the tall, square column.
Then run to the top of the slope and jump up to grab the lowest handhold on the wall ahead. Jump up three times. When Lara is hanging from the uppermost handhold, jump to grab the ledge on the left. Pull up. (CHECKPOINT)
Now head to the left along the upper level. Jump the gap in the floor. Climb on top of the bookcase and jump across the next gap to the left. Hang from the other side of the bookcase, drop down to the handhold below and then jump to the ledge on the left. (CHECKPOINT)
Continue to the left, tip over the next bookcase (by standing next to it and pressing X). (CHECKPOINT) Cross over it and continue to the left.
Just before the wooden door, there are two tall, square columns. The final ARTIFACT (3/3) in this level is concealed between them. You can see it if you approach the columns slowly. Take it and approach the door to end the level.
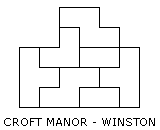
24 – CROFT MANOR – WINSTON
Kills: 0 Artifacts: 3 Treasure Chest: 1
Go to the right. A beam falls from above blocking your retreat. Continue to the right. (CHECKPOINT) Jump over the flame into the pool.
Swim down to the bottom left corner to find the first ARTIFACT (1/3). Don't forget to press A to swim faster. Swim back up to get air if necessary. Then swim downward once more and find the opening in the wall of debris about halfway down and swim through to the right. There's another ARTIFACT (2/3) on the bottom of the pool near the middle. Swim up for air first if you like, then swim back down for the golden vase. Swim through another gap in the debris on the right and then up to the surface. Climb out of the pool on the right. (CHECKPOINT)
Winston trapped under a heap of burning debris just ahead.
DS Challenge – Rescue Winston: Here you must touch the burning planks with the stylus and drag or flick them away from Winston toward the edge of the screen. You'll have to work quickly to remove all of the planks before Winston's health bar (displayed at the bottom of the screen) runs out. This isn't especially complicated except that sometimes the planks don't move the first time you try to flick them away. If that happens, try a different plank and then return to the problematic one later.
Continue to the right. (CHECKPOINT) As you go up the slope, you can catch a glimpse of the TREASURE CHEST ahead, partially obscured by the angled stone wall and flames. If you move forward slowly, the camera will shift so you can see it. (Click to click to show/hide treasure chest puzzle solution or click for all solutions on one page.)
After getting the treasure chest, backtrack to the left a few steps. Jump straight up to grab the broken section of the back wall. Jump straight up to grab the handhold above. Then climb to the left. Jump to the left and grapple the chandelier. Swing and jump to the ledge on the left. take a running jump to the left and grapple the metal bar on the ceiling ahead. Swing to the left and jump to grab the narrow handhold on the back wall. Climb along it to the left. Jump up to grab the handhold above and continue to the left. Jump past the flame to land on the safe ledge beyond. (CHECKPOINT)
Cross this ledge and jump to grab one of another set of handholds on the back wall. Climb these handholds across to the ledge on the left. (CHECKPOINT) The last ARTIFACT (3/3) is concealed behind the square columns here. You can see it from the right end of the ledge, but when you get close to the columns, they hide it. Grab it and run up the ramp on the left to finish the level.
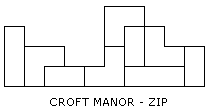
25 – CROFT MANOR – ZIP
Kills: 0 Artifacts: 3 Treasure Chest: 1
Avoid the flame on the right. Instead head to the left (CHECKPOINT), jump over the flame and climb the pile of debris. At the top, take a running jump to the left to clear the flames and grab the next ledge. Before pulling up, drop down to retrieve an ARTIFACT (1/3). Then climb up and continue to the left. (CHECKPOINT)
Climb over the bookcase and push it from the other side so it falls down to the right. Go a little farther to the left to find another ARTIFACT (2/3). It's standing dangerously close to an open flame, so inch forward gradually, pressing X each time you move, and you should be able to grab it without getting burned.
Return to the right, cross over the bookcase you pushed over and take a running jump to grab the horizontal pole ahead. Swing and jump to the broken staircase and head for the top.
Climb over the low wall and drop down on the other side to get the last ARTIFACT (3/3). Jump over the burning debris and continue to the right. (CHECKPOINT)
Climb on top of the display case and jump to grab the lowest handhold on the wall ahead. Jump to the handhold above and then jump to the left to grab the horizontal pole. Swing and jump to the ledge on the left, where you'll find a health pack.
Take a running jump across the burning hole in the floor to grab the opposite edge. Pull up and take the automatic pistol ammo.
Take a take a running jump to the left to grab a handhold on the thick, vertical wooden beam. Jump to the handhold above and then jump to grab a handhold on the wall to the right. Jump up once more. Then jump left to grab the top of the thick beam and pull up. (CHECKPOINT)
Slide down the slope and jump to grab the light-colored horizontal pole. Swing and jump to grab a handhold on the vertical beam to the left. Climb on top of it.
There are handholds below on the other side, but don't drop down. Instead jump across the gap to the left, grab the edge and quickly press X to do a saving grab. Pull up next to a TREASURE CHEST. Jump back to the top of the beam on the right. Now use the handholds on the left side of the beam to drop down onto the chandelier below. (Click to click to show/hide treasure chest puzzle solution or click for all solutions on one page.)
In an action-packed cut scene, the chandelier cable snaps and the entire fixture collapses, knocking over a bookcase down below. Fortunately Lara lands safely on the floor below.
Go to the left, climb over the fallen bookcase and approach Zip, who is lying on the floor ahead.
DS Challenge – Rescue Zip: Here you must complete another touch-screen sequence like the one with Winston. Use the stylus to drag the burning planks toward the edge of the screen before Zip's health runs out.
Afterward, follow Zip to the left to finish the level.
Cinematic: As Lara prepares to view the security recordings, she notices a shadowy figure beyond the glass wall. She moves closer to the glass to get a better look, and the other figure also moves in closer, eyes glowing in the firelight. With a shock, Lara realizes this is not just an ordinary intruder but a copy of herself. She draws a pistol, and the copy does the same. In fact, it mimics her every movement.
Alister staggers into the room, but before Lara can do anything to help him, the doppelganger shoots and Alister crumples to the floor. Lara quickly goes for the door switch, but the double is faster. She's on Lara in a flash, dodging her shots and disarming her before she knows what's happened. Then the doppelganger dashes out of the room. With super-human strength and agility, she leaps up the burning staircase and out through a hole in the roof.
Lara rushes to Alister's side, but she's too late to help her friend. With his last breath, Alister says he'll see her in Avalon.
The scene shifts to Zip and Winston waiting outside in the drive. They watch in amazement as the doppelganger drops out of the burning building and darts off into the night. Moments later the real Lara staggers out carrying Alister's body.
When Zip demands answers about the double, Lara explains that she's only seen something like it once before. Many years ago she encountered another double, one of Natla's creations and apparently an early prototype, since this new "Lara" is much more sophisticated. [Players of the original Tomb Raider or TR: Anniversary will remember the Atlantean flesh creature that mimicked Lara's movements.] Zip doesn't understand how Natla could have sent it, seeing as she is now Amanda's prisoner, but Lara takes a guess: the two must be working together. "Amanda and Natla, her pet Atlantean god," Lara says sarcastically.
Lara then announces her intention to follow the trail her father left, starting with a trip to southern Mexico to retrieve Thor's belt.
"What?!" Zip demands. "Alister's dead and it's just. . . business as usual?" But Lara knows she's going to need more than just guns and brains to deal with Natla.
"I need Thor's belt to get his hammer," she explains, "and I need the hammer to kill a god."
She then turns away, staring into the night as her home burns to the ground. We hear sirens in the distance as the scene fades to black.
NOTE: Don't forget to solve any treasure chest puzzles you may have had to skip as you played through the Croft Manor levels.
†UPDATE HISTORY: 1/15/09 - Walkthrough first posted.
WAS THIS WALKTHROUGH HELPFUL? If not, I apologize and invite you to contact me with any questions. If you need help right away, I recommend the r/TombRaider subreddit. Other fan-run forums are listed at tombraiders.net/stella/community.html. If this site was useful, please consider supporting it financially or in other ways. For details, visit tombraiders.net/stella/support.html. As always, I welcome your corrections/suggestions. Thank you!
Copyright © 2007- Stellalune (). All rights reserved. Feel free to copy or print this walkthrough for personal use. By all means, share it with friends, but please include this credit line so people can send me their feedback. No part of this walkthrough may be reproduced on another site without permission. Follow this link for details about this site's advertising and privacy policy.
Stella's Tomb Raider Site: tombraiders.net.
