Rise of the Tomb Raider - Geothermal Valley Survival Caches
Updated: 10/7/17(†)
This guide, along with the annotated level maps linked below, should help find any survival caches you missed. If you are playing through this level for the first time, you may want to follow the main walkthrough instead. If you'd rather not wait for clues, survival caches can be collected before you find the Explorer Satchels that reveal them on your in-game map. Just look out for the flashing light that indicates where each cache is buried. If you can't see the light, move around the general location until you see the Interact icon. Then press Interact to dig.
Weapons, Equipment, and Outfits are covered elsewhere. Other collectibles are detailed on separate pages:
Relics · Documents · Murals · Coin Caches · Strongboxes · Archivist Maps · Explorer Satchels · Codices · Crypt Treasures · Challenges · Missions
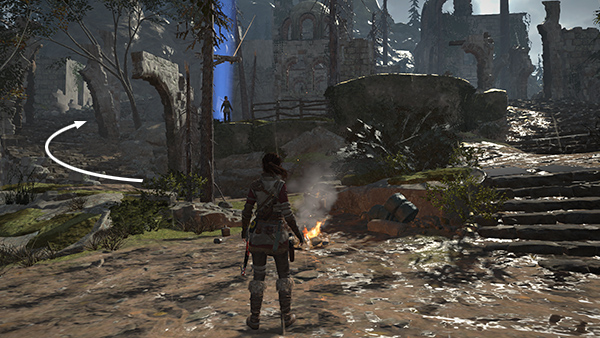
SURVIVAL CACHE 1
The first cache is on the right as you enter the village. If you missed it the first time, fast travel back to the Valley Farmstead Base Camp, climb the stairs to the the west, and you'll find the cache on the left opposite strongbox #1. (screenshot) See the map and walkthrough for details. (Click screenshot to enlarge.)


SURVIVAL CACHE 2
The next 3 caches are in the House of the Afflicted Challenge Tomb. If you're entering the tomb from the valley, as described in the walkthrough, when you come to the room with the huge metal cauldron in one corner, look for the cache buried just to the right of the cauldron. Later on, fast travel back to the Infirmary Base Camp and follow the hallway to the northeast. As you enter the room with the shallow pool, the cache and cauldron will be on your right. (screenshot) (Click screenshot to enlarge.)
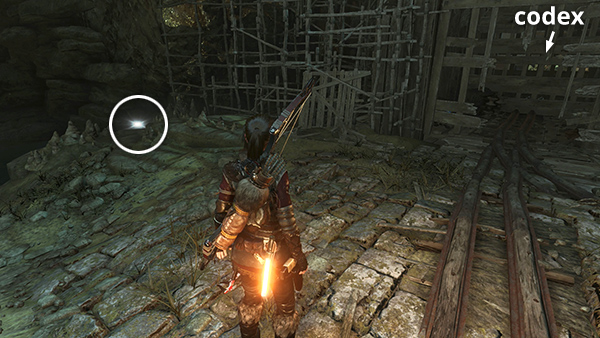
SURVIVAL CACHE 3
This cache is also in the House of the Afflicted Challenge Tomb. It's buried in the northern corner of the room with the puzzle leading up to the codex, near the wooden stairs. The arrow in the screenshot points the way back to the Infirmary Base Camp. (Click screenshot to enlarge.)
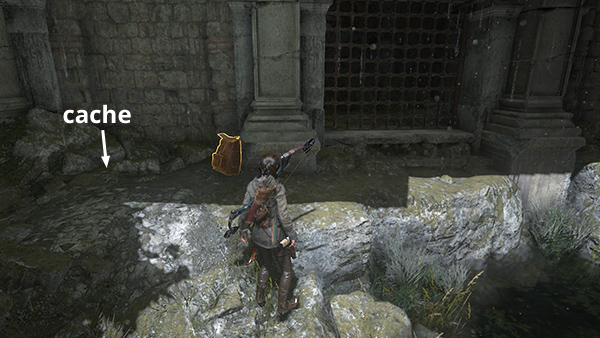
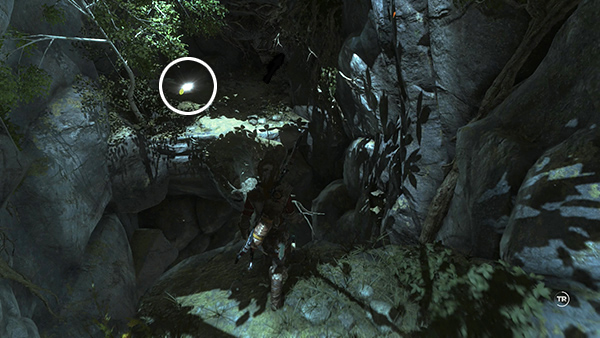
SURVIVAL CACHE 4
The next cache is also in the House of the Afflicted Challenge Tomb. On your first visit, follow the walkthrough. To retrieve the satchel later on, return to the Infirmary Base Camp and re-enter the puzzle room. Hop into the shallow pool on the right (northwest) side of the room and swim through an underwater opening into the next room. (screenshot) The cache is buried next to the Explorer Satchel. (Click screenshot to enlarge.)
SURVIVAL CACHES 5 & 6
These two caches are buried on the valley floor a little to the east of the raised wooden structure with strongbox #3. In this screenshot, Lara is standing in the wooden structure looking down over the edge toward the stream. Check the walkthrough and map for details. (Click screenshot to enlarge.)

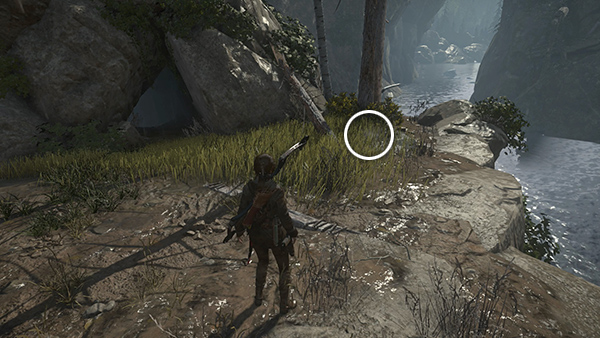
SURVIVAL CACHE 7
The next cache is on a rock ledge about halfway along the western wall of the lower valley, just to the right of the cave containing document #7. This area is marked C1 on the level map and is covered in the walkthrough. You can either climb the rough wall to reach it or drop down from the village above. (Click screenshot to enlarge.)
SURVIVAL CACHE 8
This cache is at the southwest end of the valley, about halfway between the Remnant hunter's cabin and the elevated shack with the ladder built onto the western cliff wall. The cache and the Hunter's cabin are marked on the map and covered in the walkthrough. (Click screenshot to enlarge.)

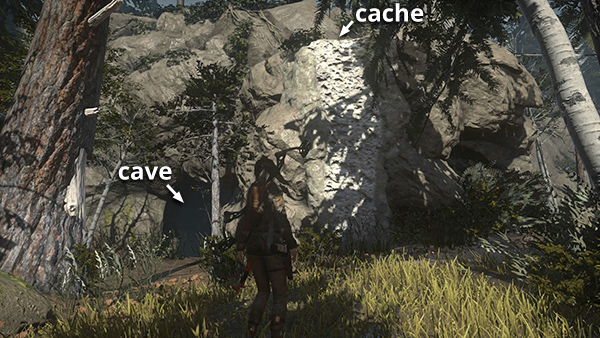
SURVIVAL CACHE 9
The next cache is buried to the right of the entrance to the razorback boars' den, which is between the Remnant hunter's cabin and the Ruins Encampment Base Camp. The cave is marked C2 on the map, and the walkthrough includes additional details. (Click screenshot to enlarge.)
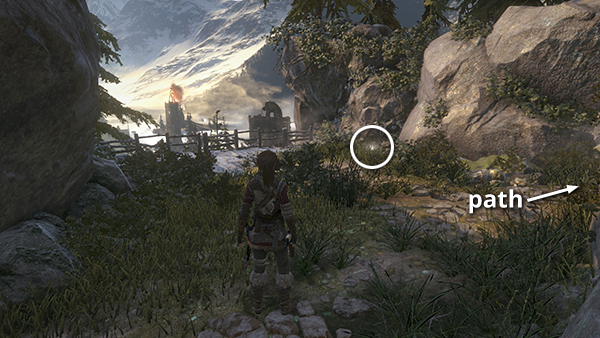
SURVIVAL CACHE 10
Follow the path from the village to the northwest, toward the Architect's Crypt. This cache is in a little clearing a little more than halfway up on the right. (screenshots) Or, after completing the level, fast travel to the Ridgeline Base Camp. Then head down the path to the south. The clearing with the cache will then be on your left. It's in the same spot where you unlock the Paying Respects Achievement. (screenshots) (Click screenshot to enlarge.)

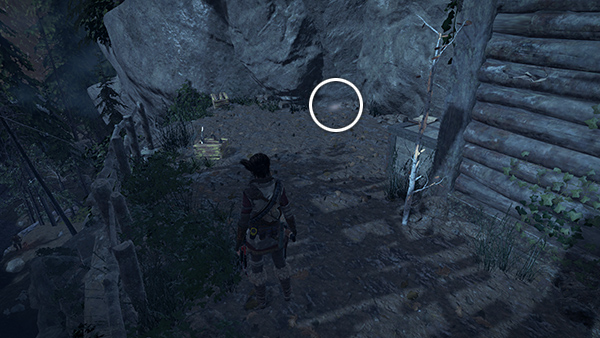
SURVIVAL CACHE 11
This cache is buried just up the hill to the east of the Ruins Encampment Base Camp. Follow the left staircase about halfway up and then look to the right to spot the cache. (screenshot) Check the map and walkthrough for more info. (Click screenshot to enlarge.)
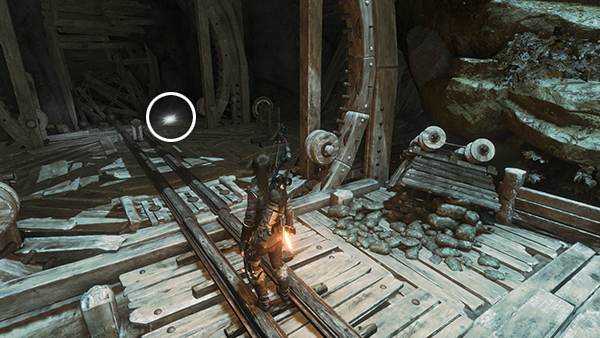
SURVIVAL CACHE 12
The next 3 survival caches are in the Pit of Judgment Challenge Tomb area. From the Hidden Ravine Base Camp, follow the tunnel toward the tomb. The first cache is just beyond the chasm you cross using the fallen tree trunk. See the walkthrough for details. (Click screenshot to enlarge.)
SURVIVAL CACHE 13
The next cache is also in the Voice of God Challenge Tomb. Follow the walkthrough if you have not yet raided this tomb. If you did but missed this document, return to the Hidden Ravine Base Camp. Follow the tunnel down to the main cavern, swim across the pool, and you'll find this cache buried just to the left of the codex room. (Click screenshot to enlarge.)
SURVIVAL CACHE 14
This cache is also in the Pit of Judgment Challenge Tomb. To backtrack for it later, return to the Hidden Ravine Base Camp, follow the tunnel down to the main cavern, swim across the pool, and turn around to face the mine cart tracks. Climb the tracks on the right, using your grapple to cross the wider gaps. Then slide down the zip line. The relic is on the upper level of the wooden structure where the second mine cart was. (Click screenshot to enlarge.)
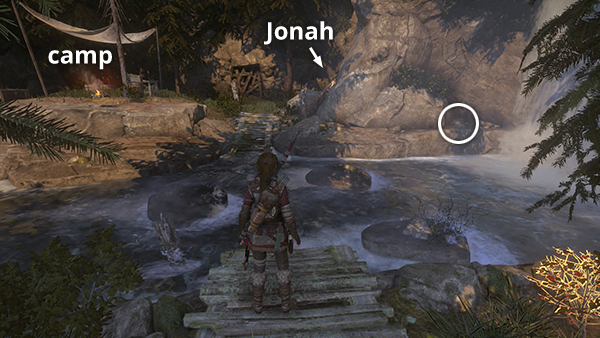
SURVIVAL CACHE 15
This cache is just down the hill to the north of the Cliffside Lookout Base Camp, which is only accessible after completing THE ACROPOLIS. After sliding down the zip line, move past the row of shacks built against the cliff wall. The cache is buried near the rock wall beyond the last shack. Check the walkthrough and map for details. (Click screenshot to enlarge.)
SURVIVAL CACHE 16
This survival cache is near the Cathedral Courtyard Base Camp, which you discover shortly before entering THE FLOODED ARCHIVES. If you missed it the first time, return to that base camp and search along the south wall to find the cache. Just watch out for the lynx that lives nearby. The walkthrough includes more info. (Click screenshot to enlarge.)
SURVIVAL CACHE 17
The next cache is just outside the tunnel where you emerge into the valley after completing the FLOODED ARCHIVES level. See the walkthrough and map for details. If you missed it the first time, return to the Ridgeline Base Camp in the northwest corner of the valley and follow the path back to the southeast. When you come to the tunnel entrance turn around to spot the cache. (Click screenshot to enlarge.)
SURVIVAL CACHE 18
This cache is sitting on a stone ledge on the west bank of the stream that runs along beside the Ridgeline Base Camp. If you're approaching the camp along the path from the FLOODED ARCHIVES, the cache is just ahead on the right, as shown here. Again, check the map and walkthrough if necessary. (Click screenshot to enlarge.)

SURVIVAL CACHE 19
This cache is buried close to the wall just south of the Ridgeline Base Camp. Coin Cache #9 is nearby, as is the fourth diving board for the High Dive Challenge. All are marked on the map and described in the walkthrough. (Click screenshot to enlarge.)
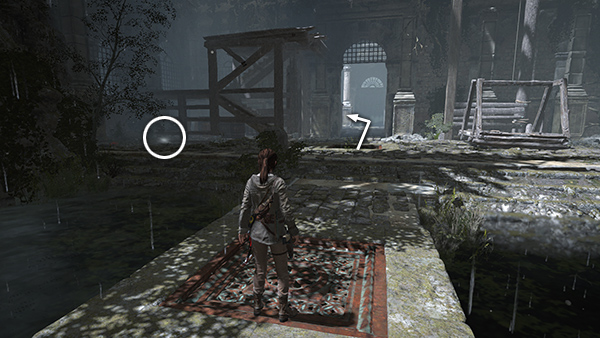
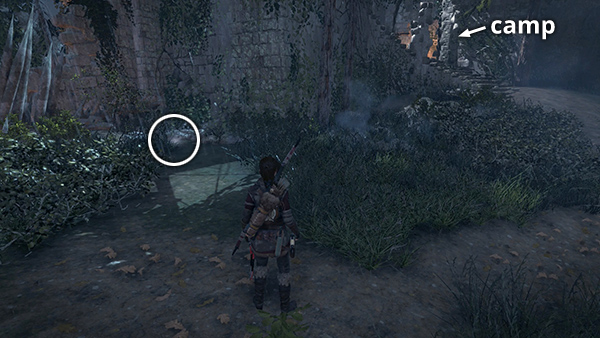
SURVIVAL CACHE 20
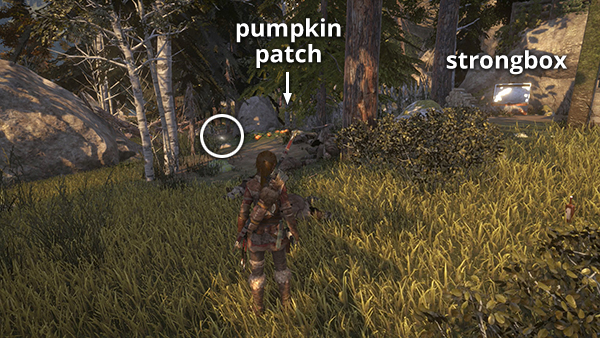
The last cache is in the part of the upper village that you passed through on your way to the FLOODED ARCHIVES. The spot where it's buried was previously blocked by a log fence. To get back there, go to the Cathedral Courtyard Base Camp, climb the stairs, and drop down into the village. (screenshot) Head south, then west, through the village to find the cache buried just to the left of the Pumpkin Patch for the Tossing Gourds Challenge and strongbox #8. map/walkthrough (Click screenshot to enlarge.)
Top of Page | Collectible Guides | Main ROTTR Page
†UPDATE HISTORY: 6/11/16 - Page first posted online.
10/7/17 - Switched the numbering of survival caches #2 and #3 on the map, thanks to a correction from huddy.
WAS THIS WALKTHROUGH HELPFUL? If not, I apologize and invite you to contact me with any questions. If you need help right away, I recommend the r/TombRaider subreddit. Other fan-run forums are listed at tombraiders.net/stella/community.html. If this site was useful, please consider supporting it financially or in other ways. For details, visit tombraiders.net/stella/support.html. As always, I welcome your corrections/suggestions. Thank you!
Copyright © 2015 - Stellalune (). All rights reserved. Feel free to copy or print this walkthrough for personal use. By all means, share it with friends, but please include this credit line so people can send me their feedback. No part of this walkthrough may be reproduced on another site without permission. As an Amazon Associate I earn from qualifying purchases. Follow this link for details about this site's advertising and privacy policy.
Stella's Tomb Raider Site: tombraiders.net.