Rise of the Tomb Raider - Geothermal Valley Archivist Maps
Updated: 6/11/16(†)
Archivist Maps are not required for 100% completion, but they can help you find documents and relics. This guide, along with the annotated level maps linked below, should help find any archivist maps you missed. If you are playing this level for the first time, you may want to follow the main walkthrough instead.
Weapons, Equipment, and Outfits are covered elsewhere. Other collectibles are detailed on separate pages:
Relics · Documents · Murals · Coin Caches · Survival Caches · Strongboxes · Explorer Satchels · Codices · Crypt Treasures · Challenges · Missions
ARCHIVIST MAP 1
This map is in a small, dark room below the Valley Farmstead Base Camp. To get there, head down the stairs to the east. Then make a U-turn to the right and continue down more stairs to a wooden barrier. (screenshot) Destroy the barrier with any gun and go inside to find the map sitting on a table. See the walkthrough and level map for details. (Click screenshot to enlarge.)
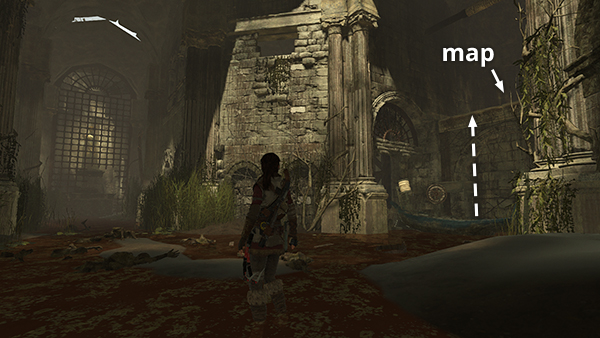
ARCHIVIST MAP 2
This map is in the House of the Afflicted Challenge Tomb. See the walkthrough and level map for details. If you missed it the first time, fast travel to the Infirmary Base Camp, climb back up to the codex room, and you'll find the map just to the right of the codex. (Click screenshot to enlarge.)
ARCHIVIST MAP 3
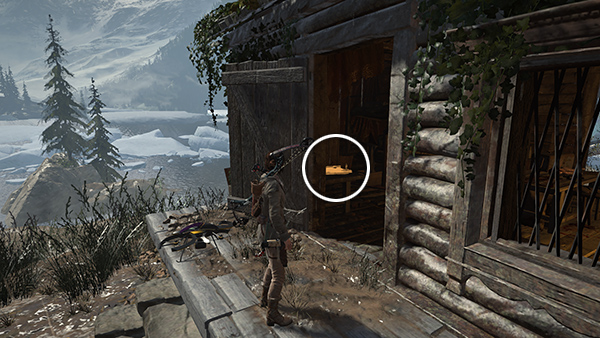
This map is inside the Remnant Hunter's cabin on the lakeshore. If you missed it, return to the Ruins Encampment Base Camp, cross the stream to the northwest, and then follow the shoreline southwest to the cabin. It is marked "Hunter" on the level map. (Click screenshot to enlarge.)

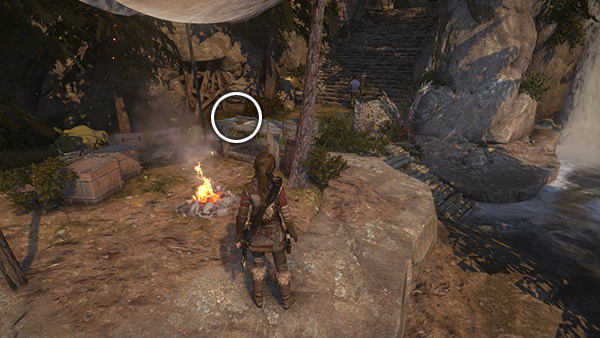
ARCHIVIST MAP 4
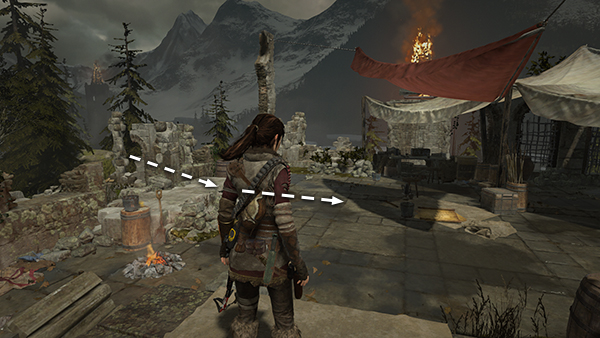
This map is in the part of the upper village where the Remnant set up a makeshift hospital after the battle with Trinity. (See the walkthrough and map.) To get back there later, fast travel to the Cathedral Courtyard Base Camp, climb the stairs, and drop down into the village. (screenshot) Head down the hill toward the second bonfire, and then go through the building to the east of the fire. (screenshot) The map is inside the building ahead on the left. (Click screenshot to enlarge.)
ARCHIVIST MAP 5
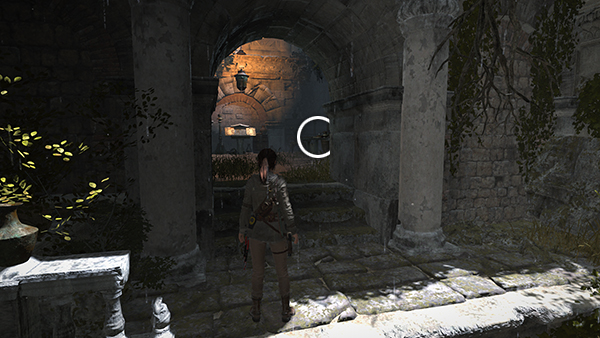
This map is in the Catacomb of Sacred Waters Challenge Tomb. On your first visit, follow the walkthrough. Otherwise, return to the Aquifer Cavern Base Camp, drop into the big room with all the skulls, and go up the stairs. Swim or use the zip line to cross the pool, and on the right, you'll find the doorway to the codex room. (screenshot) Go through the codex room and up the steps to find the map sitting on a table. (Click screenshot to enlarge.)
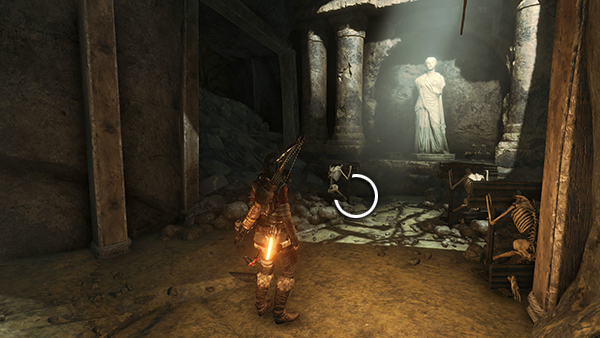
ARCHIVIST MAP 6
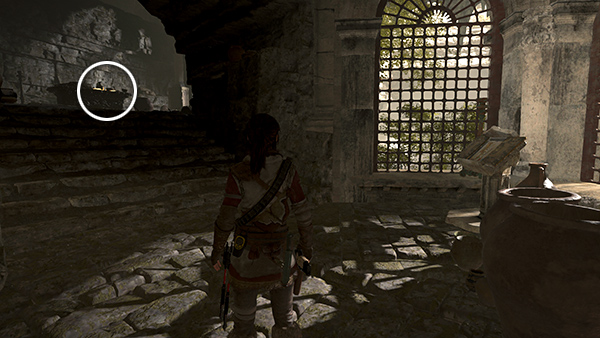
This map is in the Pit of Judgment Challenge Tomb. Follow the walkthrough the first time. To get it later, return to the Hidden Ravine Base Camp. Follow the tunnel down to the main cavern, swim across the pool, and turn around to face the mine cart tracks. Climb the tracks on the right, using your grapple to cross the wide gaps. Then follow the passageway at the back right of the alcove where the first mine cart was. (screenshot) You'll find the map in a small room with skeletons and a statue. (Click screenshot to enlarge.)
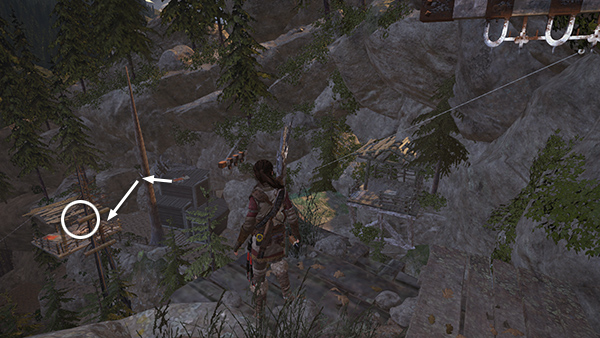
ARCHIVIST MAP 7
This map is in a treehouse on the hillside below the Cliffside Lookout Base Camp. This camp is not accessible until you've completed THE ACROPOLIS level. Swing/slide down to the cabins below, and then swing across to the treehouse. Check the walkthrough and map if necessary. (Click screenshot to enlarge.)
ARCHIVIST MAP 8
This map is sitting on a table next to the Ridgeline Base Camp, which is accessible once you've completed the FLOODED ARCHIVES level. Check the map and walkthrough for details. (Click screenshot to enlarge.)
ARCHIVIST MAP 9
The last map is in the Baths of Kitezh Challenge Tomb. If it's your first time in that area, follow the main walkthrough. Otherwise, return to the Whirlpool Sanctuary Base Camp, go through the trapped hallway to the northwest, and down the stairs to the main room. The map is in the raised alcove on the right when facing the codex room. Use your grapple axe to reach it. (Click screenshot to enlarge.)
Top of Page | Collectible Guides | Main ROTTR Page
†UPDATE HISTORY: 6/11/16 - Page first posted online.
WAS THIS WALKTHROUGH HELPFUL? If not, I apologize and invite you to contact me with any questions. If you need help right away, I recommend the r/TombRaider subreddit. Other fan-run forums are listed at tombraiders.net/stella/community.html. If this site was useful, please consider supporting it financially or in other ways. For details, visit tombraiders.net/stella/support.html. As always, I welcome your corrections/suggestions. Thank you!
Copyright © 2015 - Stellalune (). All rights reserved. Feel free to copy or print this walkthrough for personal use. By all means, share it with friends, but please include this credit line so people can send me their feedback. No part of this walkthrough may be reproduced on another site without permission. As an Amazon Associate I earn from qualifying purchases. Follow this link for details about this site's advertising and privacy policy.
Stella's Tomb Raider Site: tombraiders.net.