Kingdom - Secret #2 (Gold Bars) and
"Na Zdorovye!" Achievement/Trophy Progress
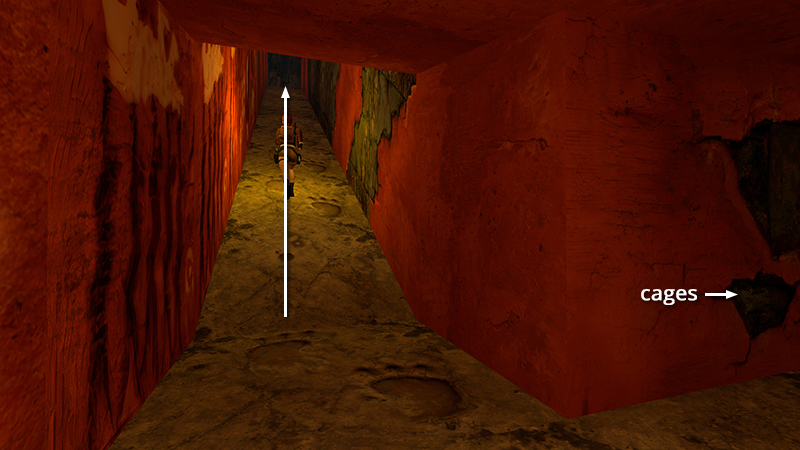
After collecting the first secret and making your way back through the NETWORK OF CAGES, as shown in the last section, you followed the long ramp with the huge footprints.
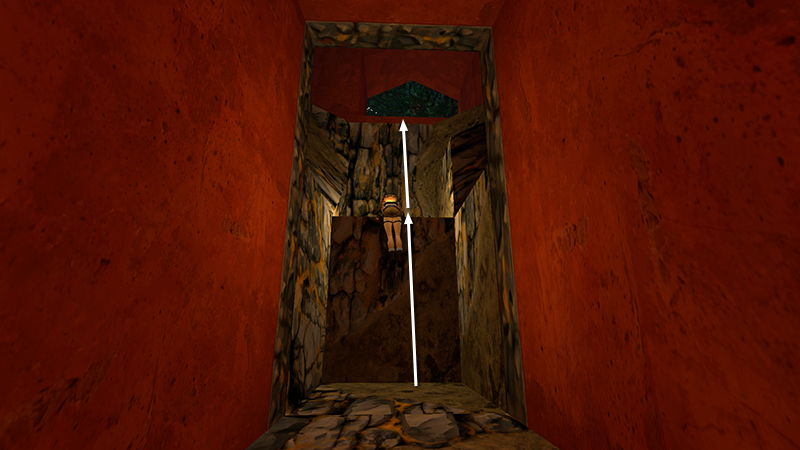
At the top of the ramp, climb the rocks to the orange opening.
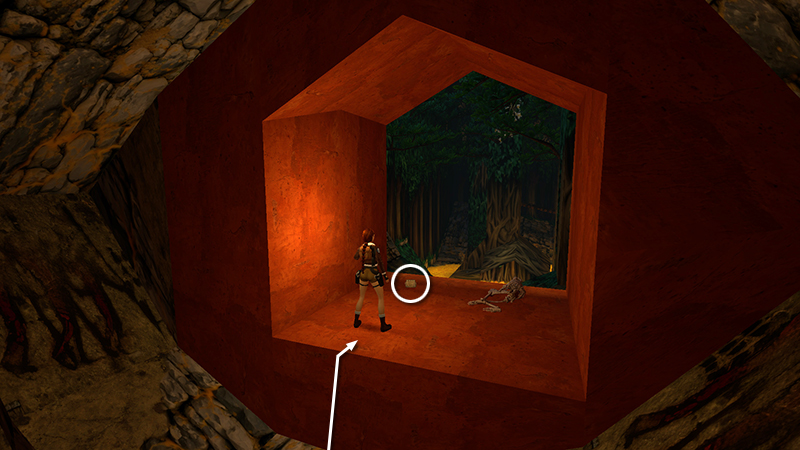
When you take the large medi pack (15) near the skeleton...
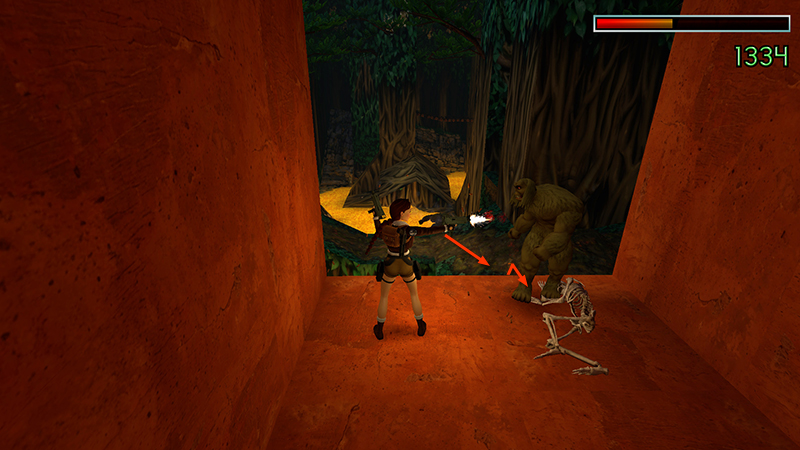
...2 sasquatches (8-9) charge out of the woods. Shoot them as they approach.
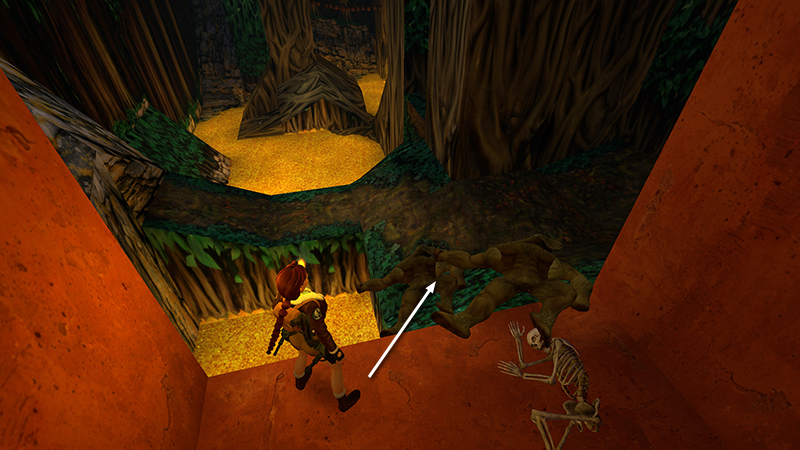
Then jump down to the flat area ahead on the right. Watch out for the pool of molten gold.
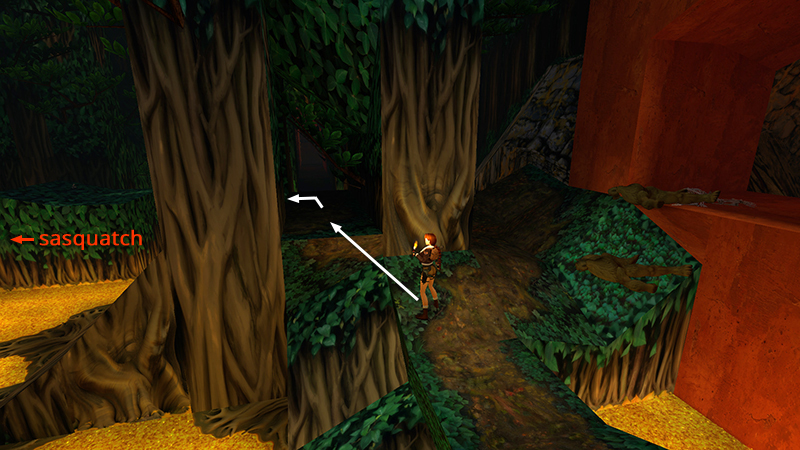
Take a standing jump up to the flat spot in the middle of the blocky clump of trees just ahead on the right. Between the trees, go forward then left.
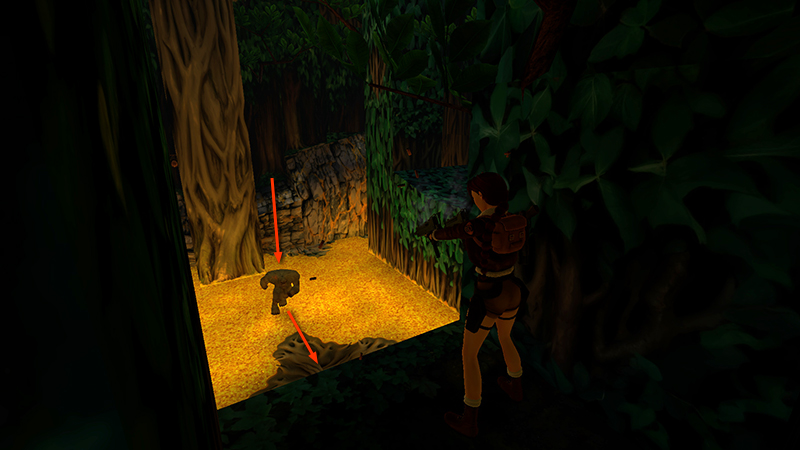
Draw weapons and shoot a third sasquatch (10) as it runs toward you. For some reason, it's able to withstand the heat of the bubbling pool.
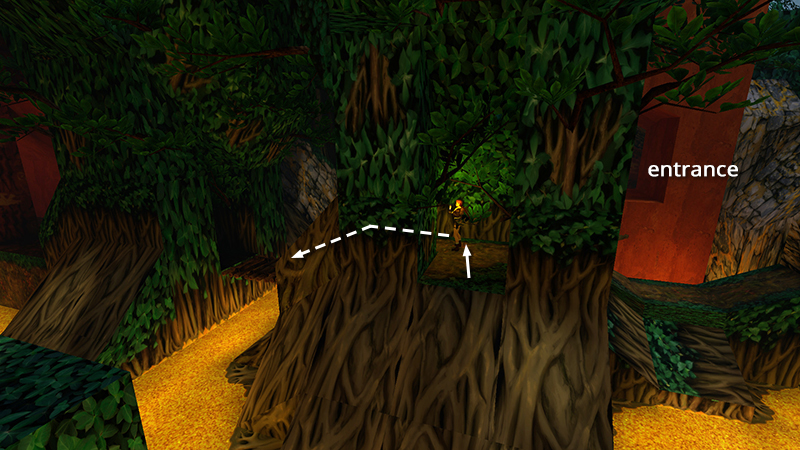
Turn around, move back inside the clump of trees, and head to the left onto the wooden bridge.
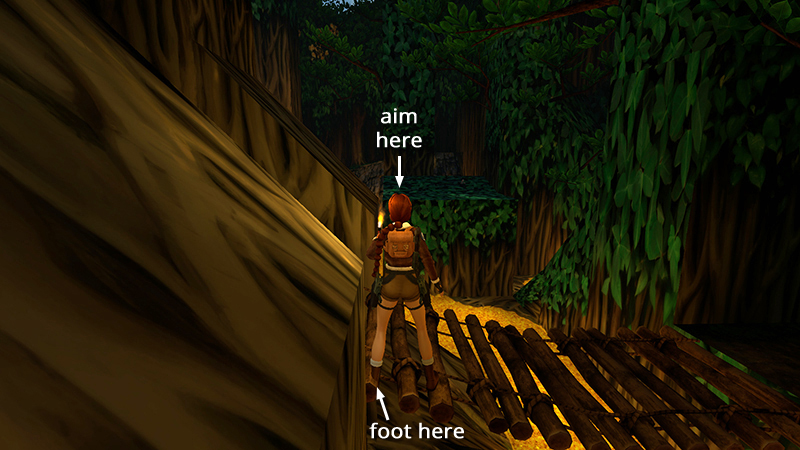
Turn left and do a tricky running jump across the pool to grab the left side of the leafy green ledge. To line up this jump, position Lara at the back edge of the bridge with her left foot almost touching the blocky brown root where the bridge connects to the tree. Don't get too close or she'll bump into the tree when you do the running jump and fail to reach the ledge.
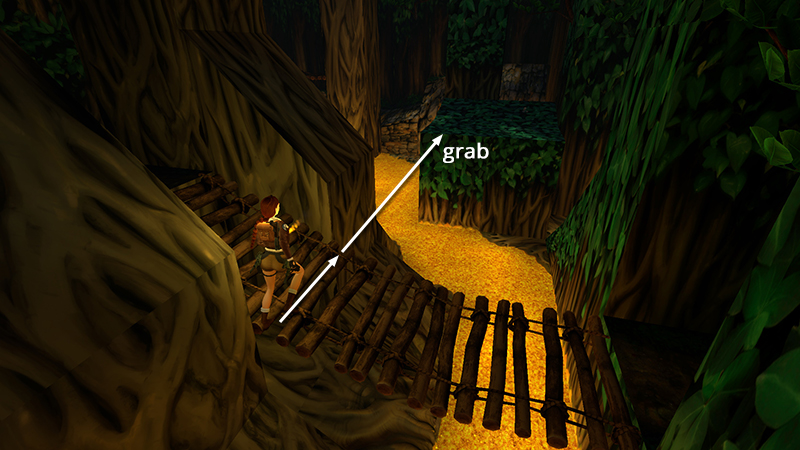
Take the running jump and grab the green ledge close to the left end.
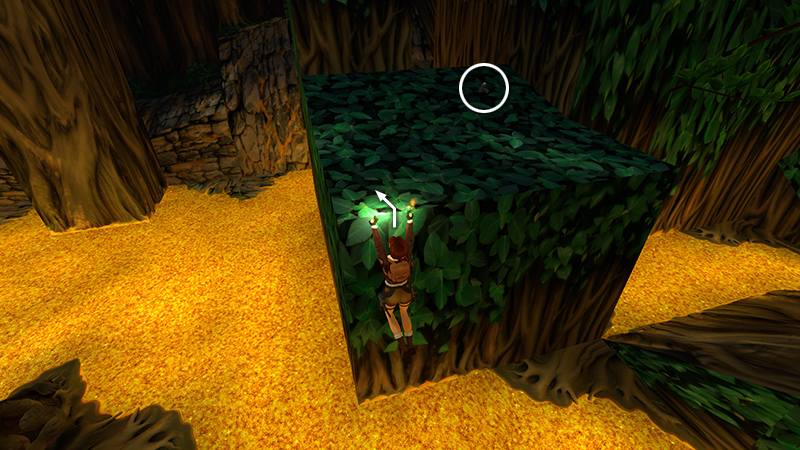
Pull up and claim 2 sets of automatic pistol clips (16-17).
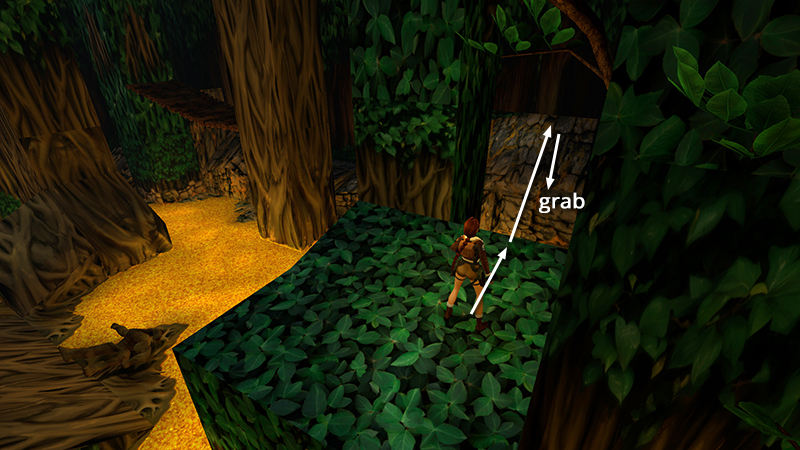
Once you have the ammo, move forward to the edge of the green ledge. Hop back once, then take a running jump to land on the sloping stone wall ahead. Slide back and grab the edge.
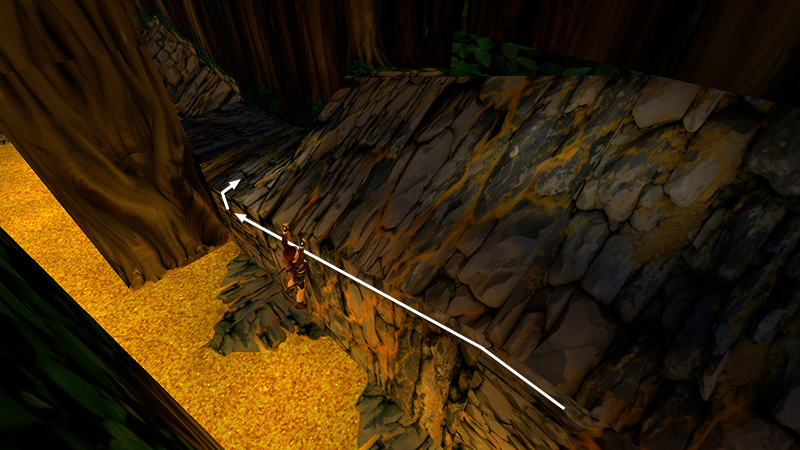
Traverse to the left and pull up onto a flat section of the wall.
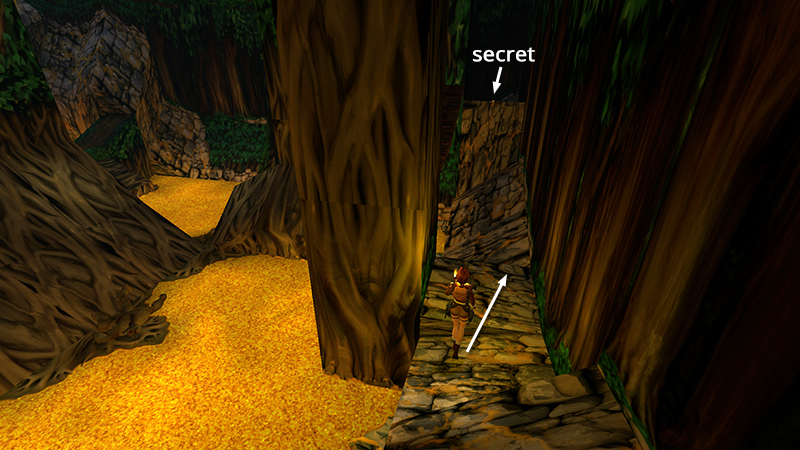
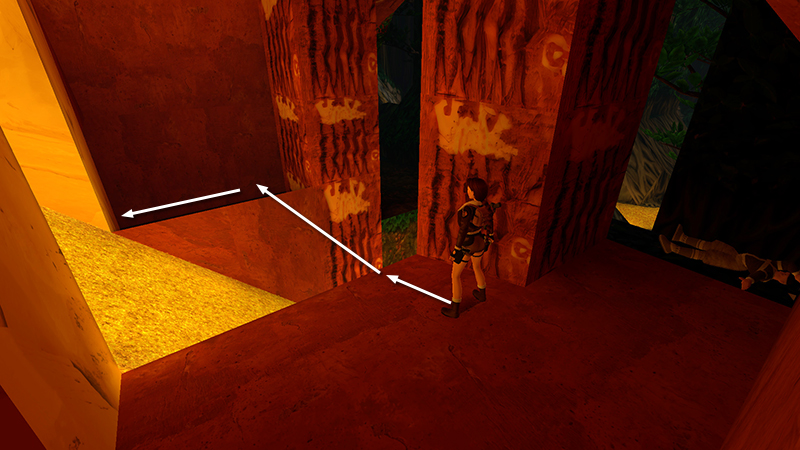
Turn left and walk carefully forward to the edge. It's dark here, so take care not to step off into the molten gold.
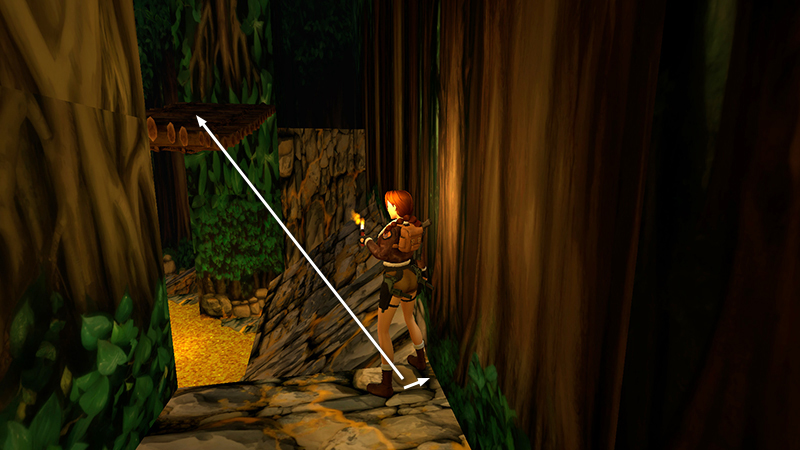
Stand at the edge and sidestep to the right until Lara is touching the wall. Pivot slightly to the left and take a standing jump onto the wooden bridge.
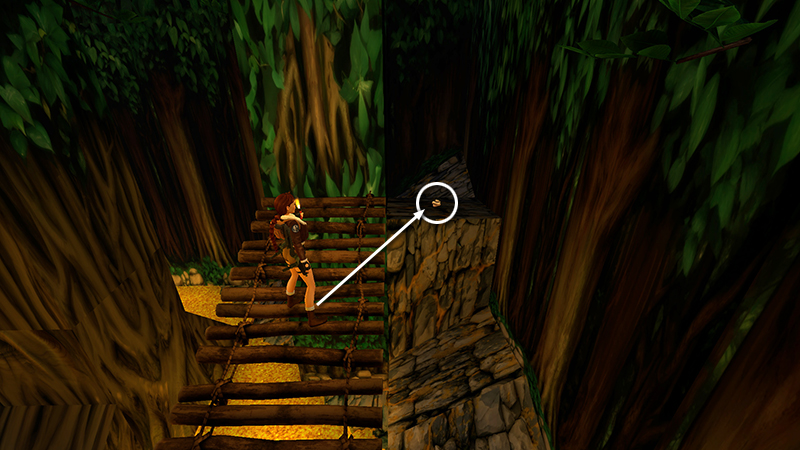
Start toward the other end of the bridge but stop a little before the last section. Take a standing jump onto the ledge with SECRET #2, the gold bars (18). Make sure you give Lara enough room to jump; it's easy to overshoot this ledge and land on the slope behind it. If that happens, you'll have to reload or come all the way back around to get the secret.
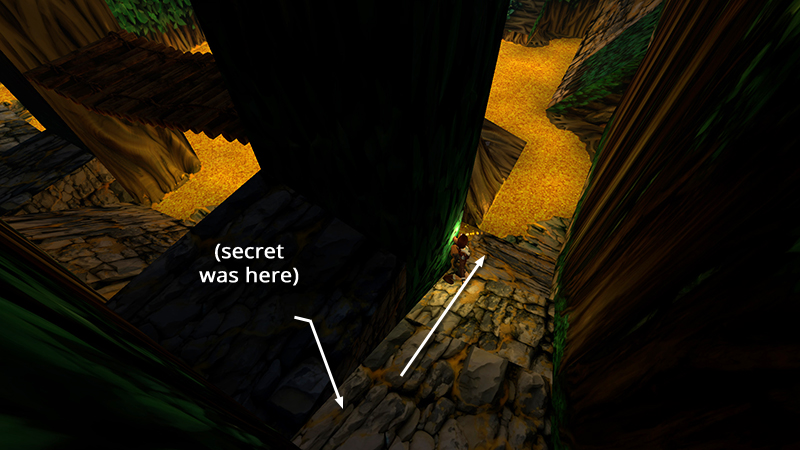
Once you have the gold bars, step forward off the ledge and slide down to a flat spot at the edge of the molten pool.
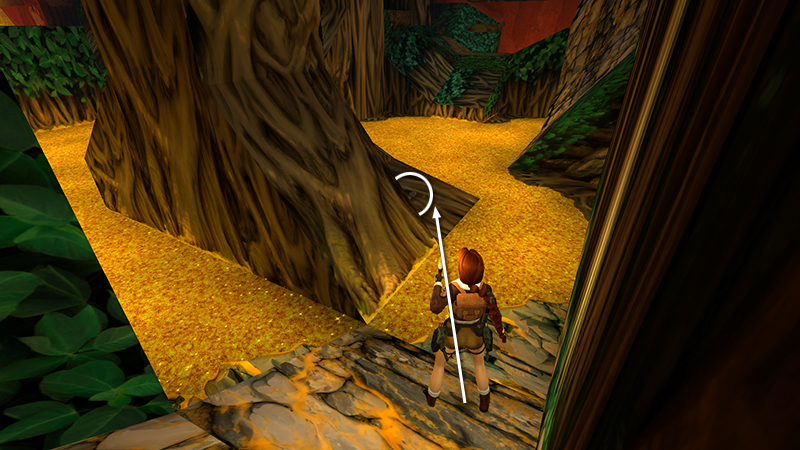
Move to the middle of this block, angle Lara slightly to the left, and take a standing jump onto the tree root with the M16 ammo (19).
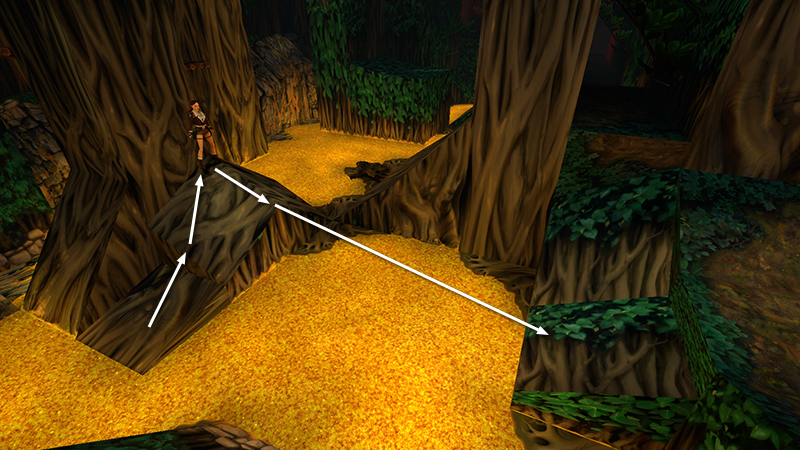
Turn left and walk up to the highest point on the tree root. Position Lara with her back to the tree trunk and take a running jump across the pool. Do not press Action during this jump or Lara won't make it...
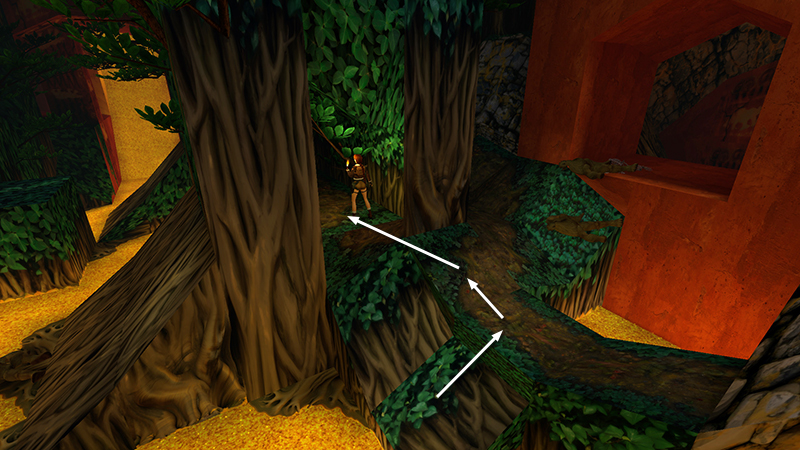
...and take care not to run on into the pit of molten gold. Go forward, then left, then jump back up to the flat spot in the middle of the clump of trees.
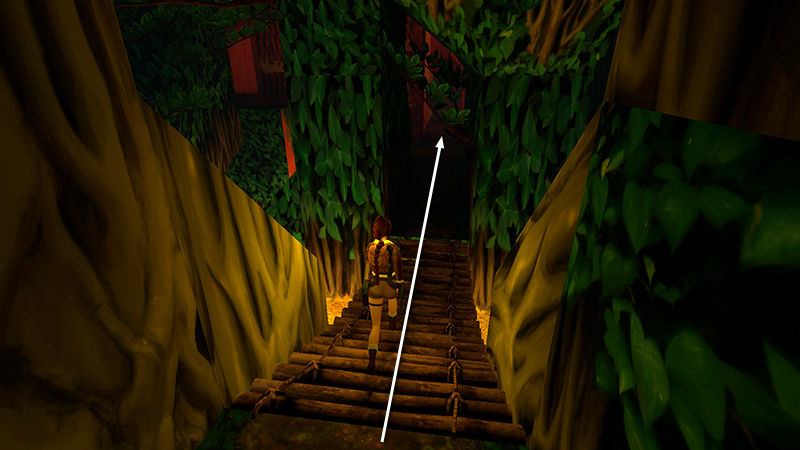
This time, go all the way through and cross the wooden bridge.
IMPORTANT: If you're going for all achievements/trophies, you'll have to make a choice now. There's an Inuit warrior (1) just ahead. You can spare him for the "Na Zdorovye!" achievement/trophy (don't anger the warriors or their spirits) or kill him to get the grenades he drops, for all pickups and the "Harvest Plan Implemented" achievement/trophy. If you want both, save the game before killing him and do not overwrite this save. Then follow the steps outlined in the main walkthrough to get all pickups, then "Na Zdorovye!"
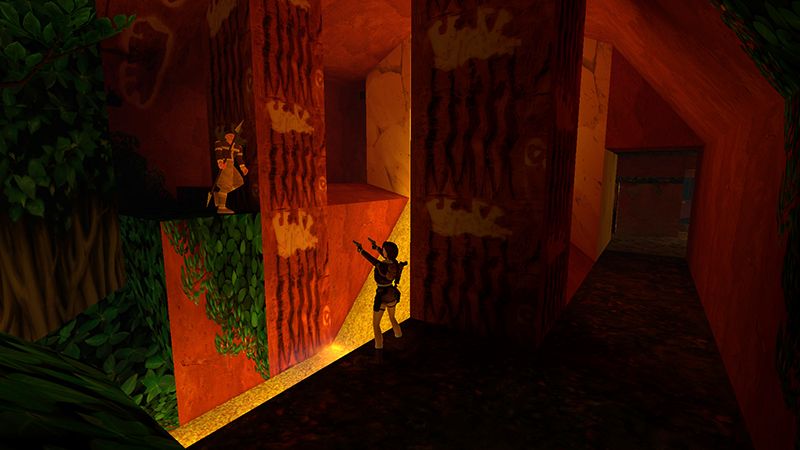
Beyond the bridge, look to the left across the stream of gold and you'll see the Inuit warrior (1) pacing on a small ledge. If you choose to kill him, do it before crossing the gap.
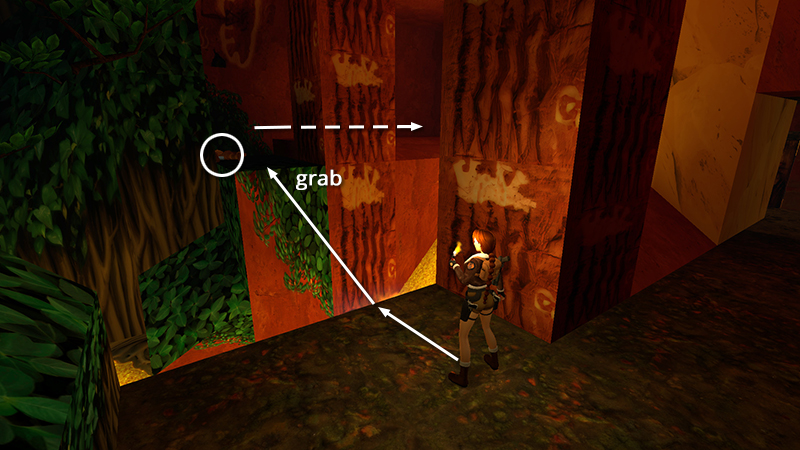
Then take a running jump to grab the vine-covered ledge where he was standing, pull up, and retrieve the 2 pairs of grenades (20-21) he dropped.
NOTE: If you don't already have it, one of these items will be the GRENADE LAUNCHER.
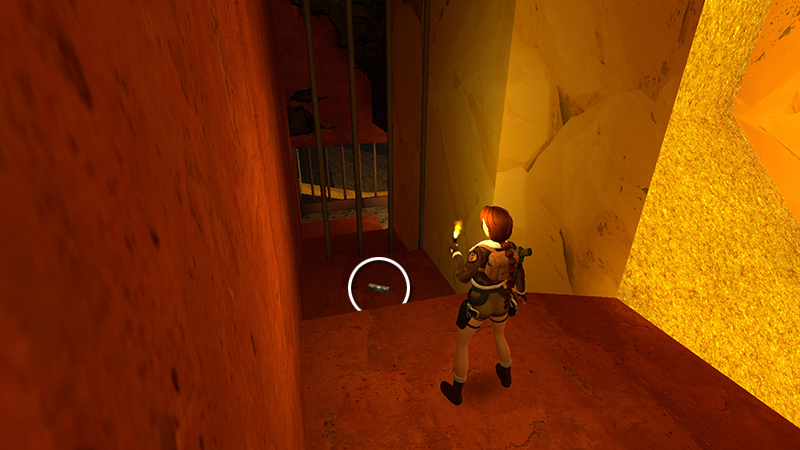
Follow the ledge to the right to find a small medi pack (22) sitting in a barred alcove.
Then take a running jump back across the golden stream. Turn left and continue into the building.
[Previous | Next | Kingdom Walkthrough]
DARK MODE: I plan to add optional dark mode for these pages, but my current priority is updating the walkthroughs. Meanwhile, may I suggest a reputable dark mode browser extension, such as Dark Reader? (Download only from trusted sites, like darkreader.org or your browser's official add-on/extension site.)
Walkthrough text and diagrams copyright © Stellalune (email ). Feel free to copy or print this walkthrough for personal use. By all means, share it with friends, but please include this credit line so people can send me their feedback. No part of this walkthrough may be reproduced on another site without permission.