The Cold War - Climbing Down to the Ice Cavern Floor
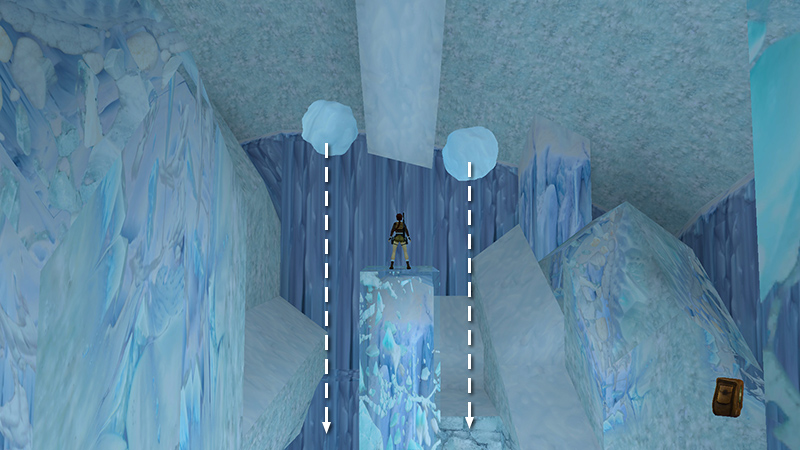
In the last section, you climbed up to the large medi pack (49) sitting on top of the tall block of ice. When you take it, two giant snowballs crash through the floor, opening up the lower area of the cavern. If he's still alive, the first spirit warrior (1) drops down to the floor.
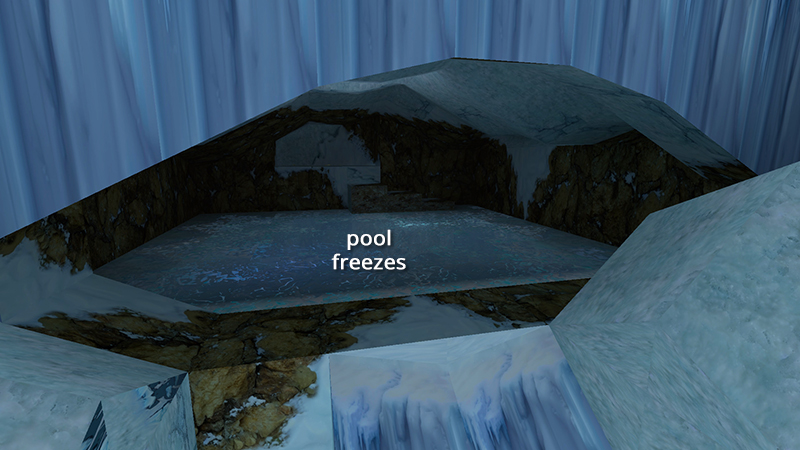
For whatever reason—wind chill...magic?—the pool where you entered also freezes over so you can reach the pickups on the high shelf. So, before descending, take a little detour to get them.
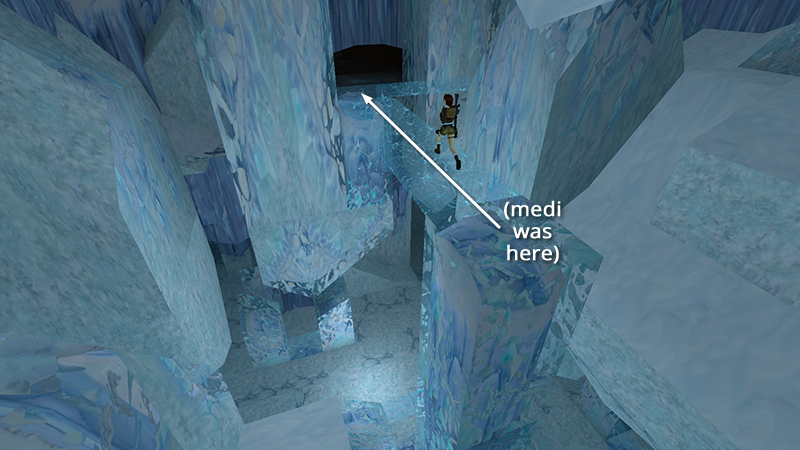
If the ice tiles are still intact, you can take that route. It's a lot more exciting now with the hundred-foot drop! First run straight from the pillar where you found the medi pack to the corner block, which is solid.
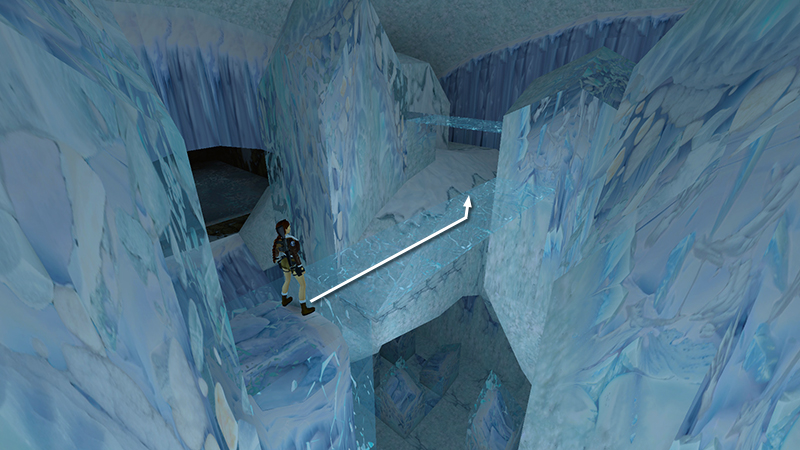
Then turn right and run across the next section of ice tiles. As you cross the third tile, veer to the left...
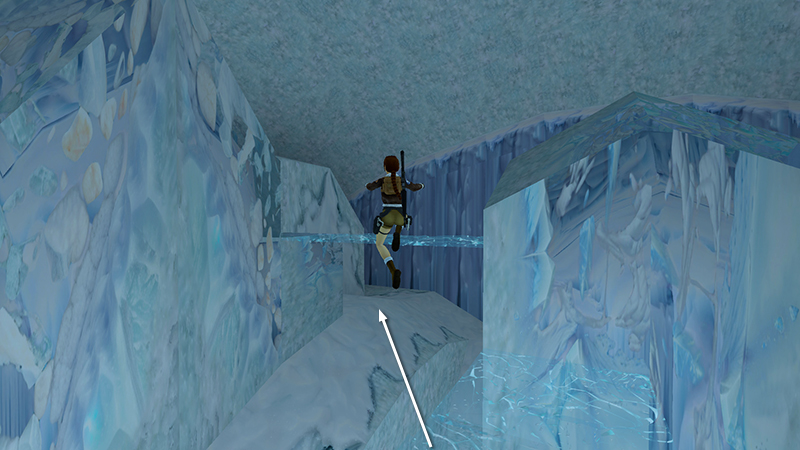
...and jump toward the shorter, perpendicular walkway, in order to land on the solid snowbank below it.
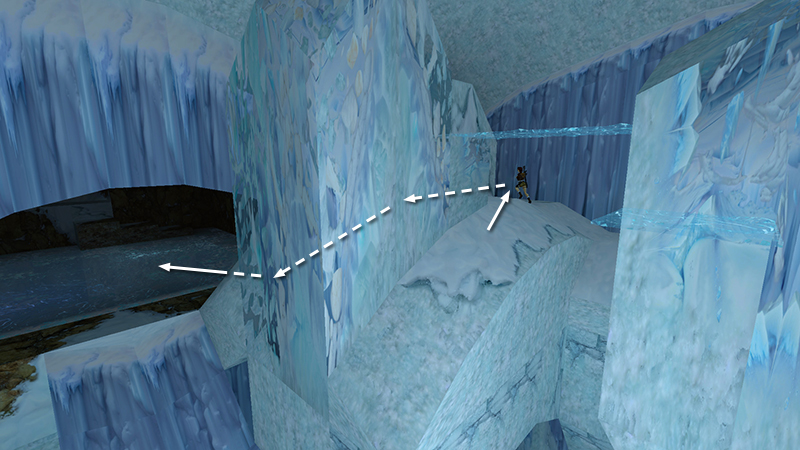
From there, move forward toward the cavern wall, turn left, and make your way around the outer wall of the cavern. This will lead you back to the pool.
- OR -
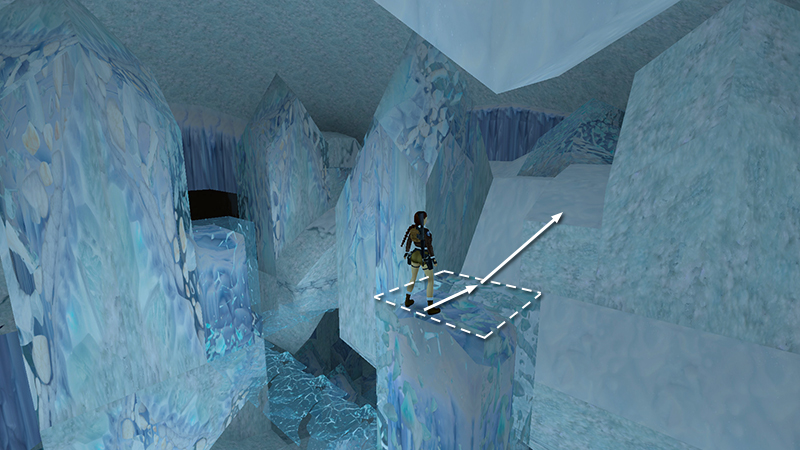
If you shattered the ice tiles in order to reach the medi pack, you can't go back that way. Instead, turn so the open cavern is on Lara's left and take a running jump to the snowy ledge ahead.
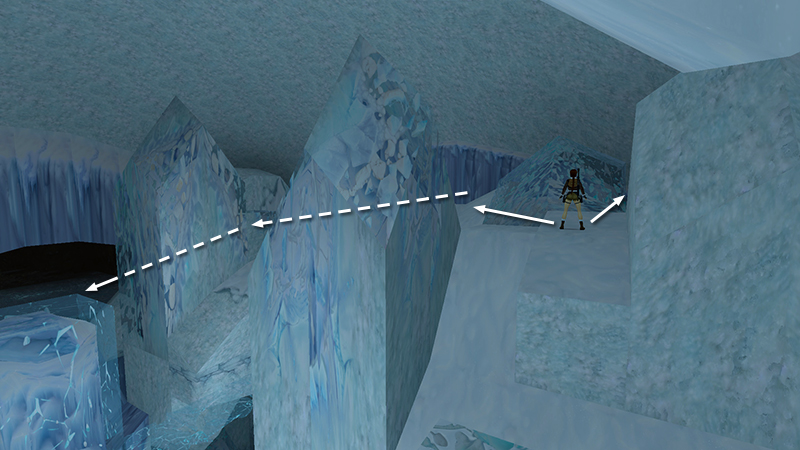
Go around the mound of clear ice on either side. When you reach the cavern wall, turn left and follow the wall around to the pool.
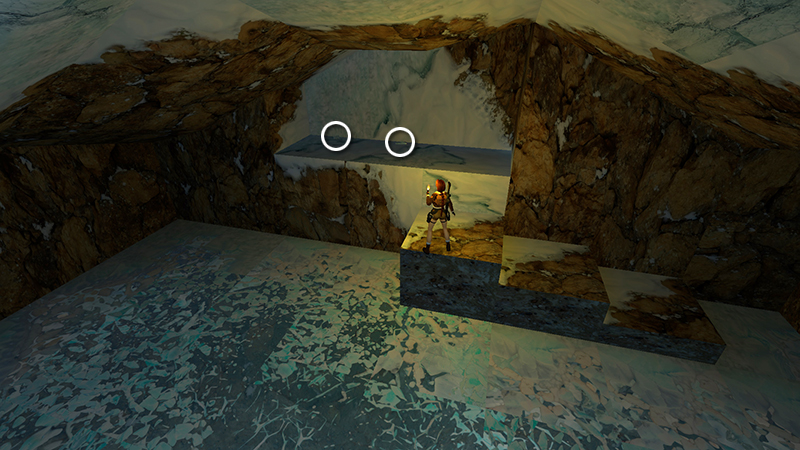
Cross over the frozen surface of the pool and climb onto the ledge to get some Uzi ammo and grenades (50-51).
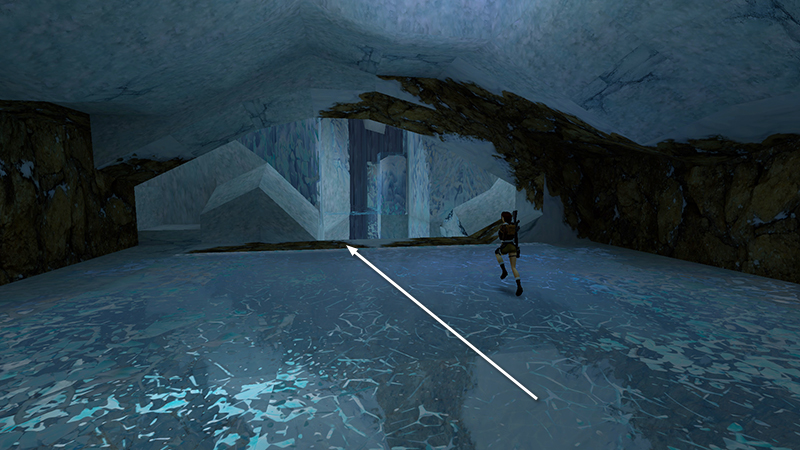
Return across the frozen pool...
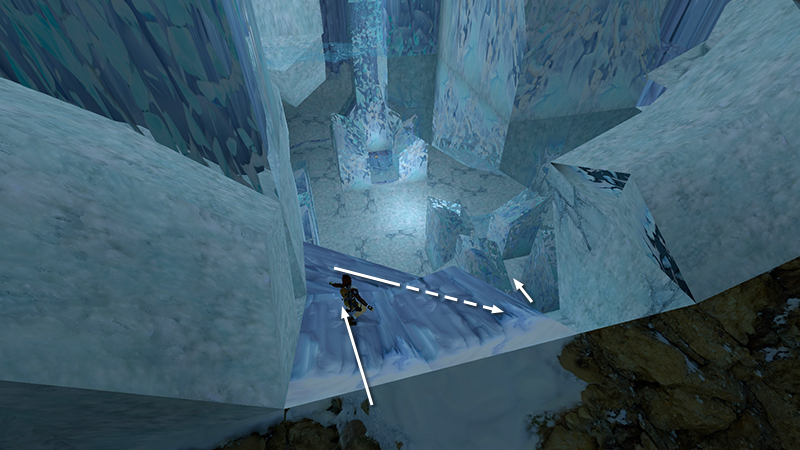
...and slide down the slopes made of bluish ice to the bottom of the cavern.
NOTE: If you're planning to fight the spirit warriors, instead of sliding all the way down, climb down the flat ledges to the right of the slide and shoot from there. (screenshot)
[Previous | Next | Cold War Walkthrough]
DARK MODE: I plan to add optional dark mode for these pages, but my current priority is updating the walkthroughs. Meanwhile, may I suggest a reputable dark mode browser extension, such as Dark Reader? (Download only from trusted sites, like darkreader.org or your browser's official add-on/extension site.)
Walkthrough text and diagrams copyright © Stellalune (email ). Feel free to copy or print this walkthrough for personal use. By all means, share it with friends, but please include this credit line so people can send me their feedback. No part of this walkthrough may be reproduced on another site without permission.