Archaeological Dig - Climbing to the Puzzle Door
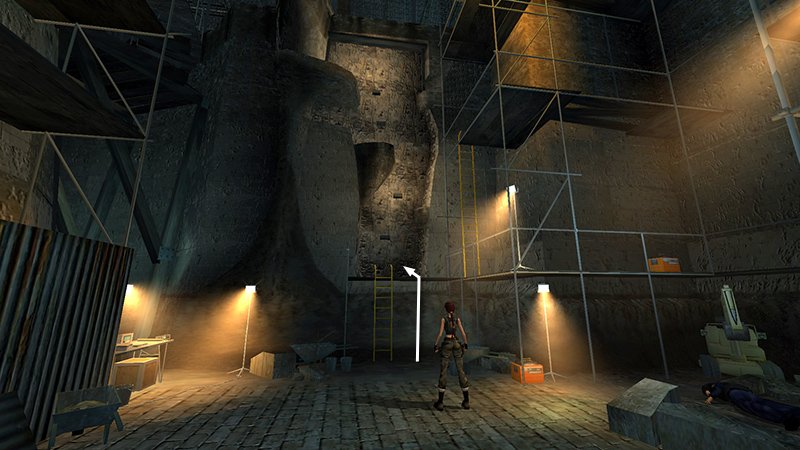
After dealing with the guard (5) at the bottom of the excavation, climb onto the scaffold below the rough-surfaced wall.
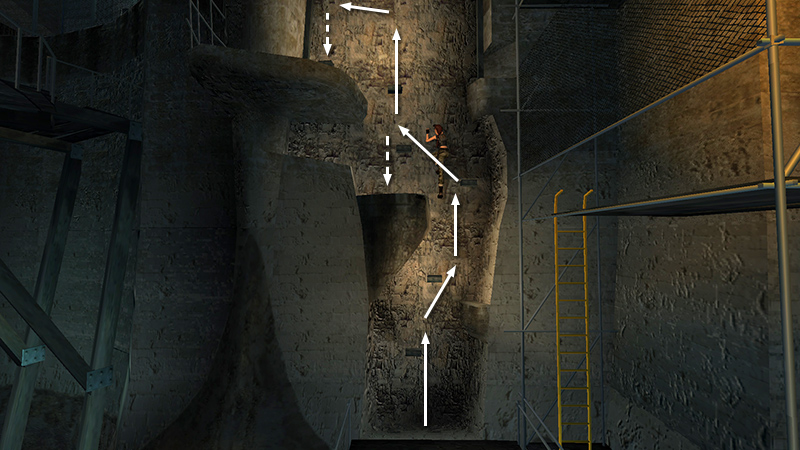
Then scale the wall itself. To make the climb without getting stuck, it helps to climb as though following the larger protruding stones. If necessary, you can pause to refresh your grip on the small ledge about halfway up. Then continue climbing straight up, then over to the ledge at the top left.
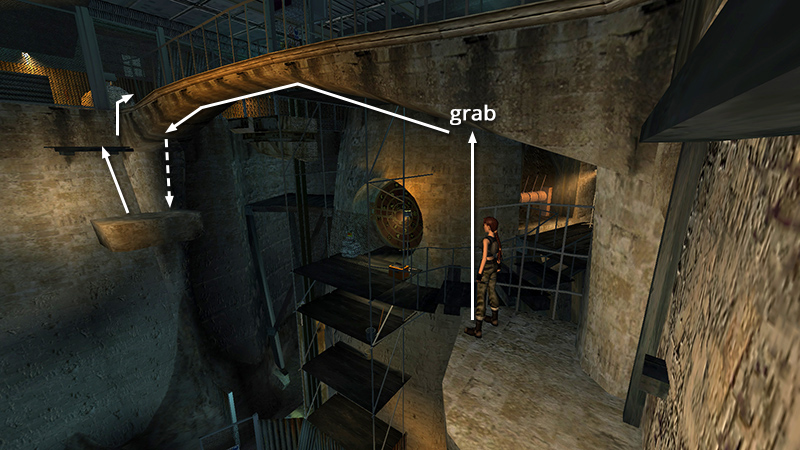
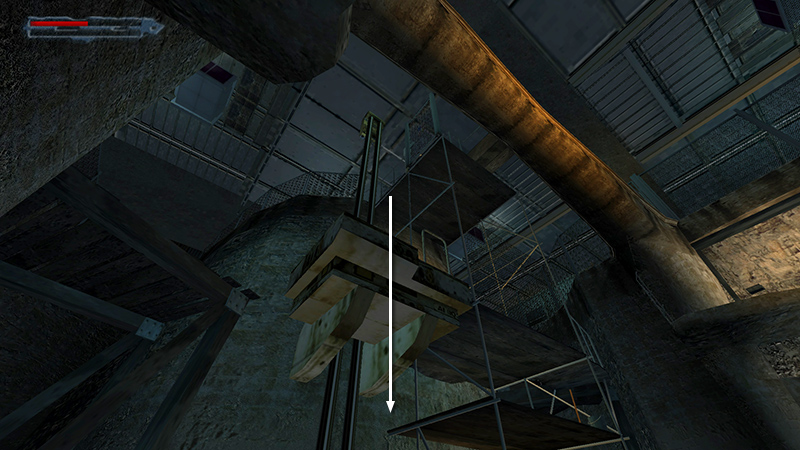
When you reach the upper ledge, turn and walk to the edge. Jump straight up to grab the climbable surface on the underside of the rock arch. Traverse all the way across the pit and drop onto the stone ledge. (Lara is just strong enough to make it.) Climb onto the small wooden platform and from there to the top of the walkway that runs along the top of the stone arch.

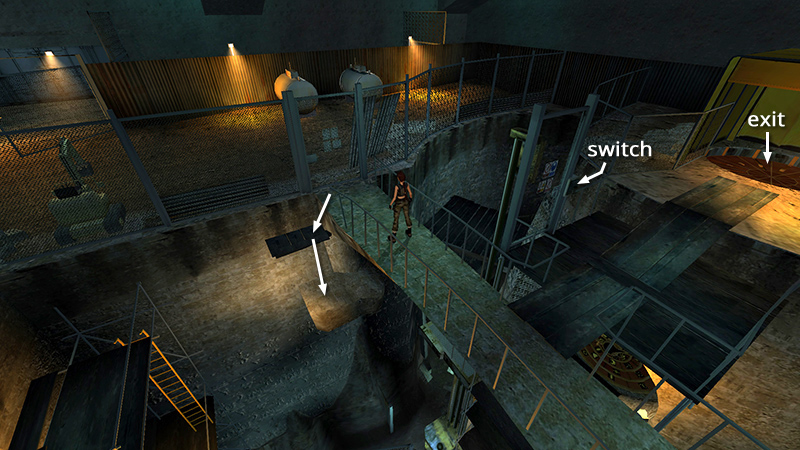
Once you've reached the top of the stone walkway (either via the regular route or by taking the shortcut), move out to the middle of the walkway and turn left. Note the huge circular trapdoor under the yellow tent. This is the level exit. You'll need to solve a puzzle to open it.
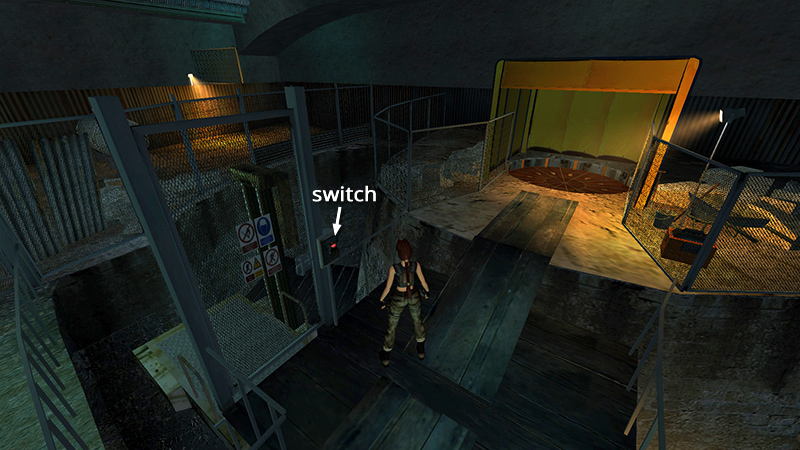
Start by using the switch near the wire mesh door...
...to lower the hydraulic lift.
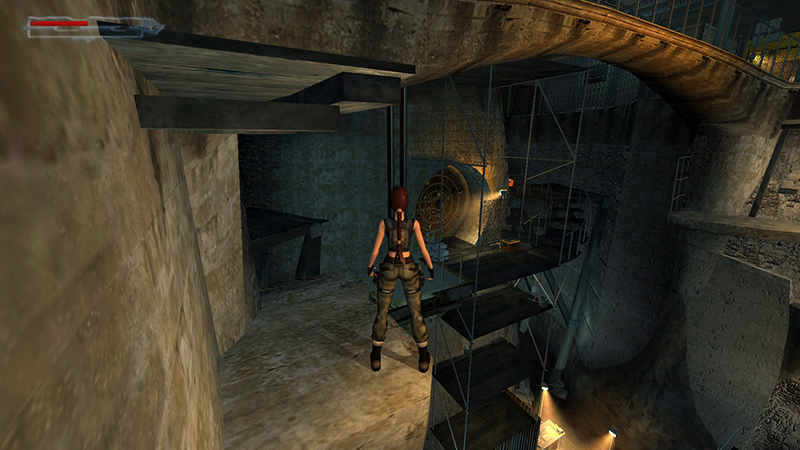
The game won't let you jump over the railing here, so return to the stone walkway, head to the right and climb back down onto the small wooden platform. From there, drop down onto the ledge below the end of the walkway.
Save the game because the next jump, from the ledge to the lift platform, can be a little tricky. If you jump forward from the edge, Lara grabs the underside of the walkway instead. So either position her near the edge and side-flip onto the lift platform (not shown), or face the lift platform, take a few steps back from the edge (as shown in the screenshot above)...
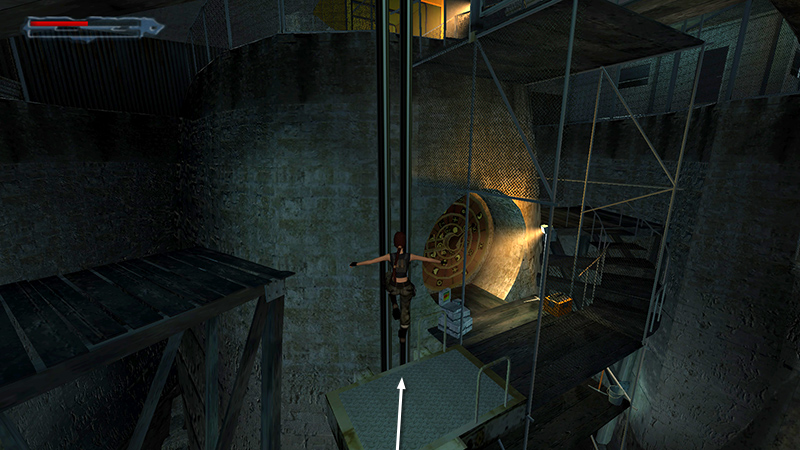
...and then jump forward.
[Previous | Next | Archaeological Dig]
DARK MODE: I plan to add optional dark mode for these pages, but my current priority is updating the walkthroughs. Meanwhile, may I suggest a reputable dark mode browser extension, such as Dark Reader? (Download only from trusted sites, like darkreader.org or your browser's official add-on/extension site.)
Walkthrough text and diagrams copyright © Stellalune (email ). Feel free to copy or print this walkthrough for personal use. By all means, share it with friends, but please include this credit line so people can send me their feedback. No part of this walkthrough may be reproduced on another site without permission.