Red Alert! - Returning to the Start
In the last section, you used the GRAPPLING GUN to reach a high duct, slid back down into the hallway near the ARMORY, killed 2 guys in power suits, then rode the ELEVATOR back to the LASER-TRAPPED HALWAY.
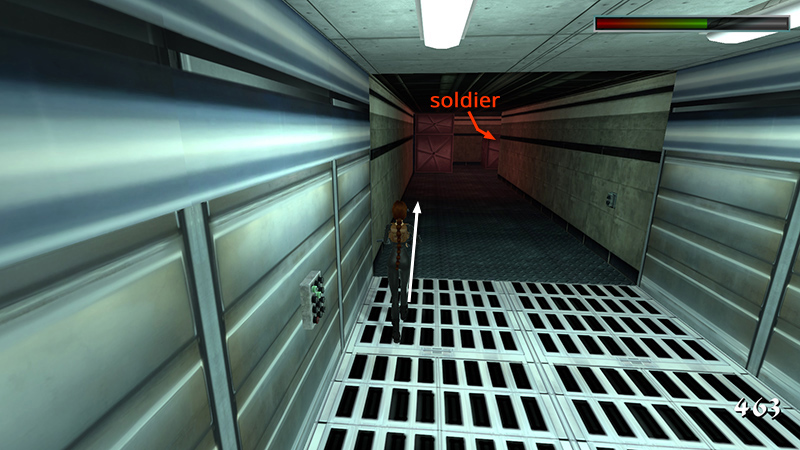
Another soldier (6) (55/62) now lurks ahead on the right, near the crates. If you keep the HK on sniper mode and walk carefully along the left wall...
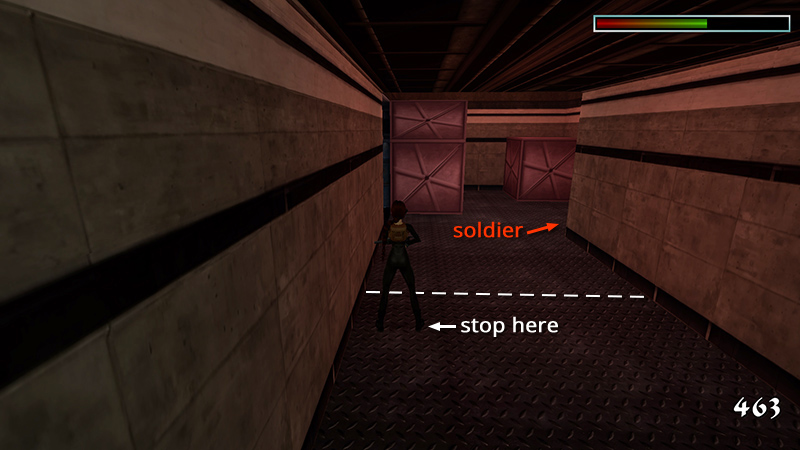
...checking your scope every few steps, you'll be able to spot him from about here.

You can then kill him with a well-aimed headshot before he notices Lara.
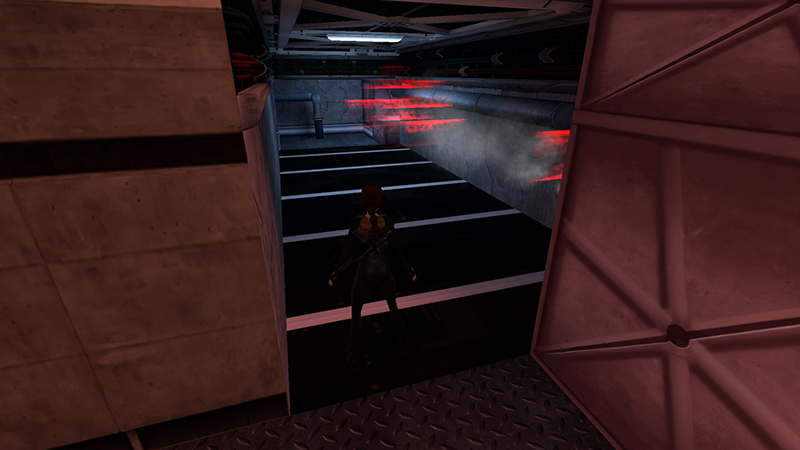
Return carefully past the 5 laser traps. (Again, stand clear of the white lines on the floor indicating each set of lasers. Watch the pattern: on, off, on, long off; and run past each set during the long-off phase.)
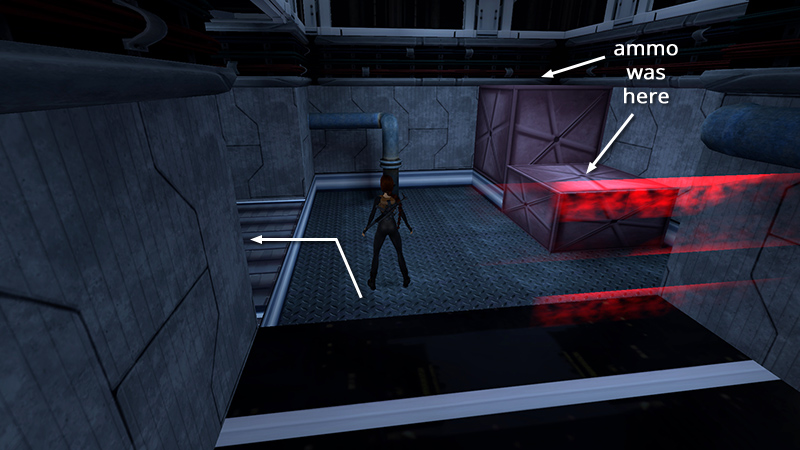
If you didn't get the HK ammo and grappling gun ammo (2-3) on the crates just beyond the lasers, be sure to do that now.
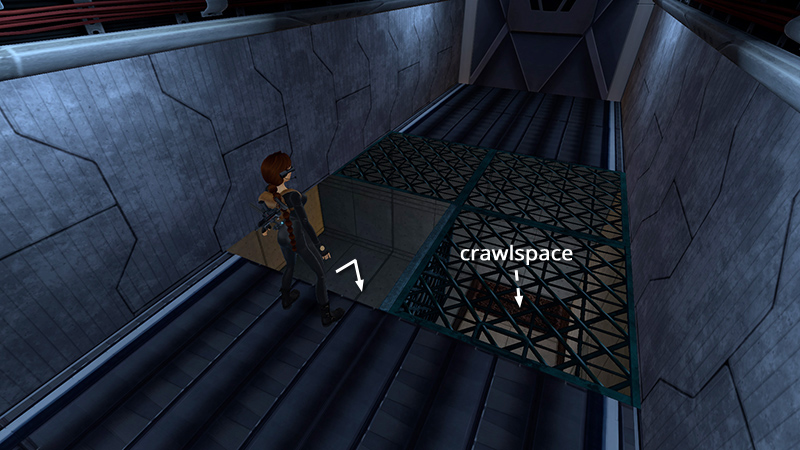
Continue to the grate with the trapdoor, drop through, and go back through the crawlspace to the EXPOSED STAIRWELL.
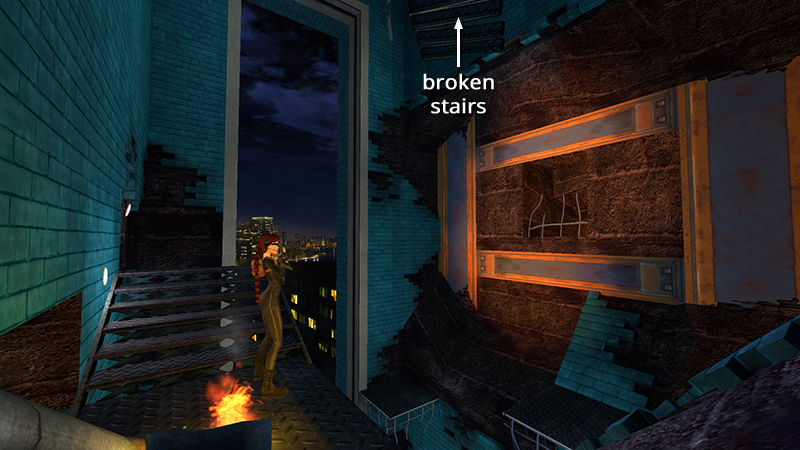
Use the GRAPPLING GUN to target the the twisted stairs dangling above the stairwell.
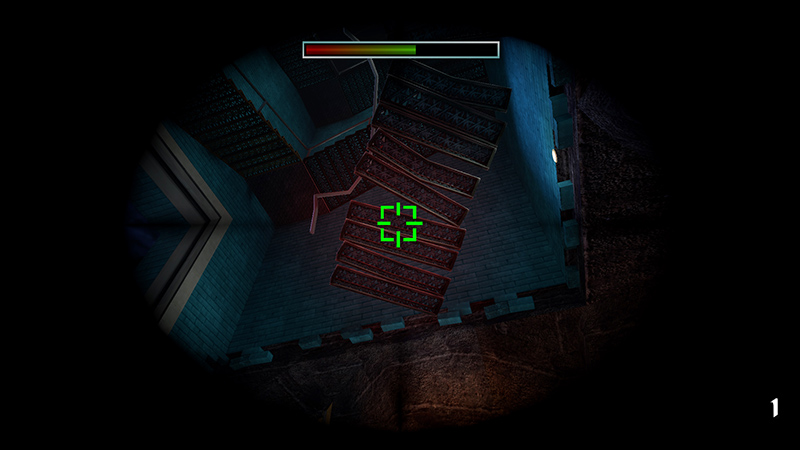
Again, the reticle will flash green when you sight the correct spot. Shoot a hook into the metal.
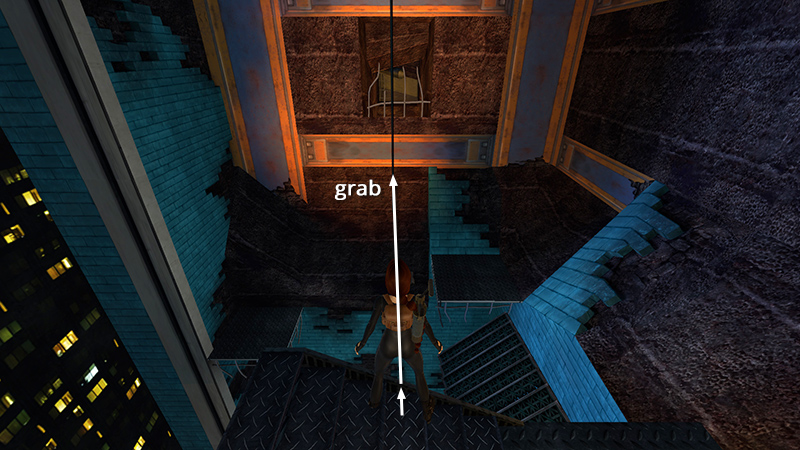
Position Lara on the stairs so she's squarely facing the dangling rope and the opening with the twisted metal bars on the other side of the stairwell. Walk to the edge, quick-save, then take a standing jump to grab the rope.

Slide to the bottom of the rope.
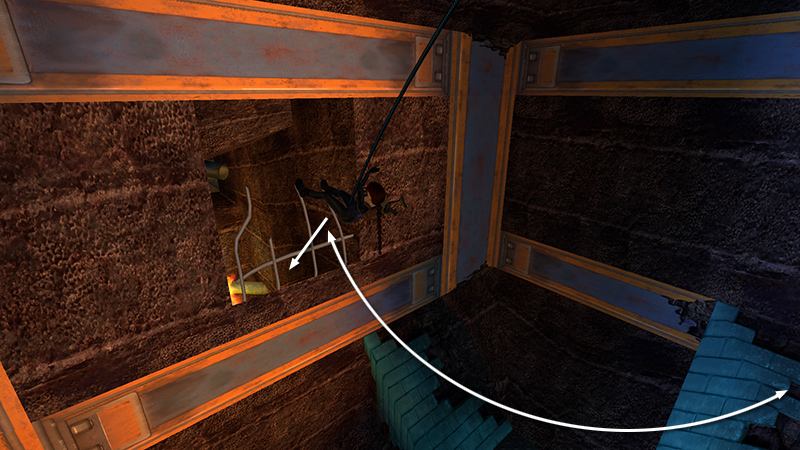
Work up a good, long swing. Then, on the forward swing, jump off the rope into the opening.
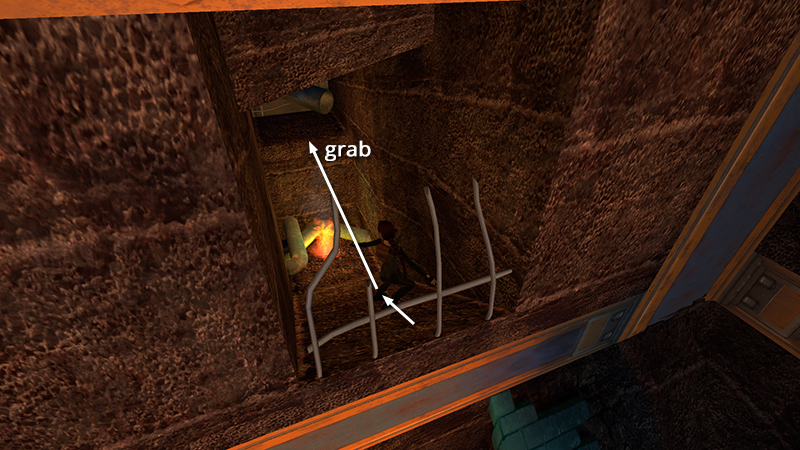
Slide almost to the bottom of the slope, jump, and grab the ledge above the open flame. (If Lara slides into the fire, she'll die.)

Pull up and crawl into the duct ahead.
DARK MODE: I plan to add optional dark mode for these pages, but my current priority is updating the walkthroughs. Meanwhile, may I suggest a reputable dark mode browser extension, such as Dark Reader? (Download only from trusted sites, like darkreader.org or your browser's web store.)
Walkthrough text and diagrams copyright © Stellalune (email ). Feel free to copy or print this walkthrough for personal use. By all means, share it with friends, but please include this credit line so people can send me their feedback. No part of this walkthrough may be reproduced on another site without permission.