Red Alert! - Storage Room with Grapple Swinging and Ventilation Ducts
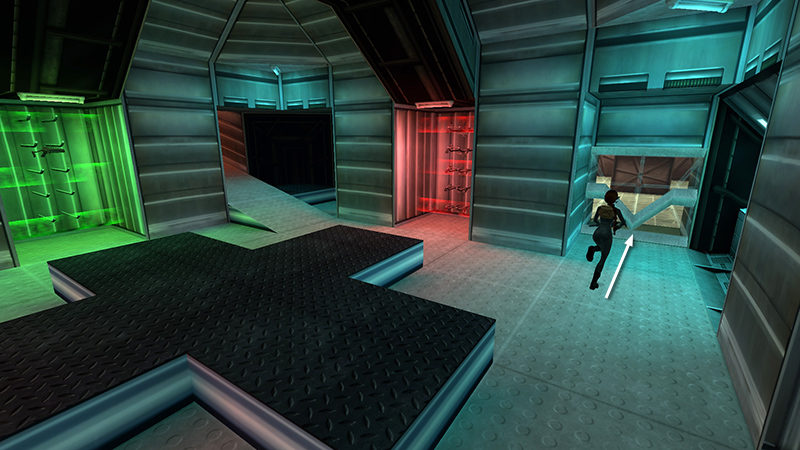
After collecting everything in the ARMORY, as shown in the previous section, proceed into a WELL-LIT STORAGE ROOM with your weapon drawn.

Advance just until you hear dramatic music. Another soldier (5) (55/62) emerges from behind the crates. He's wearing a helmet with a faceplate; so going for a headshot won't work. Shoot him in the chest several times using sniper or burst mode.
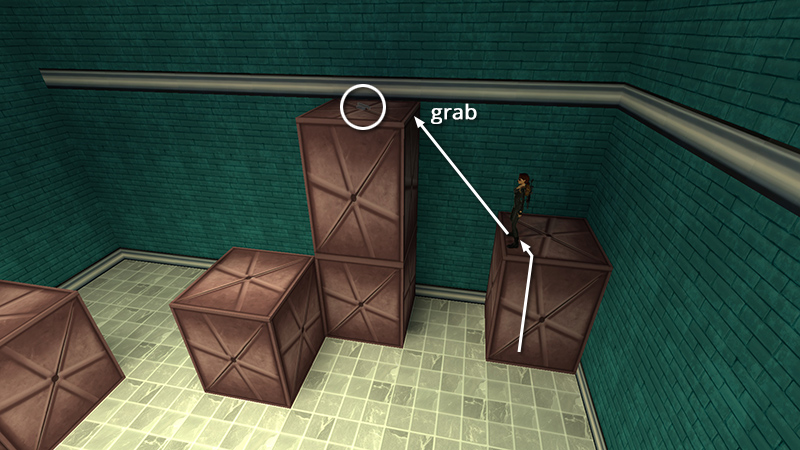
Climb on top of the stacked crates to get some HK ammo (12) (230/239).
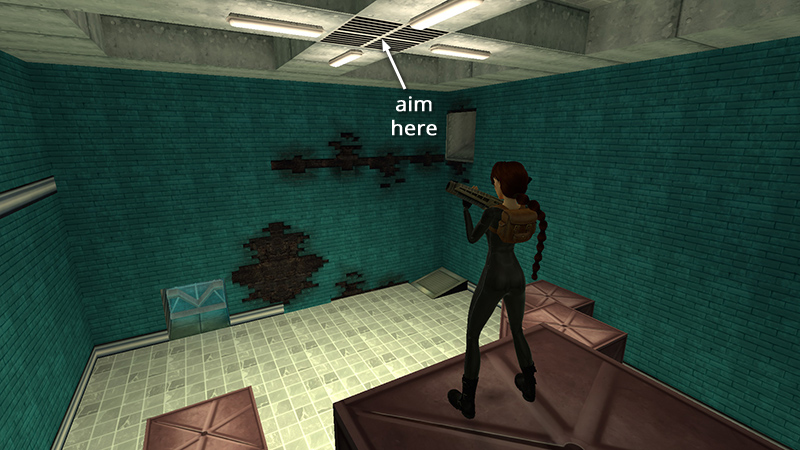
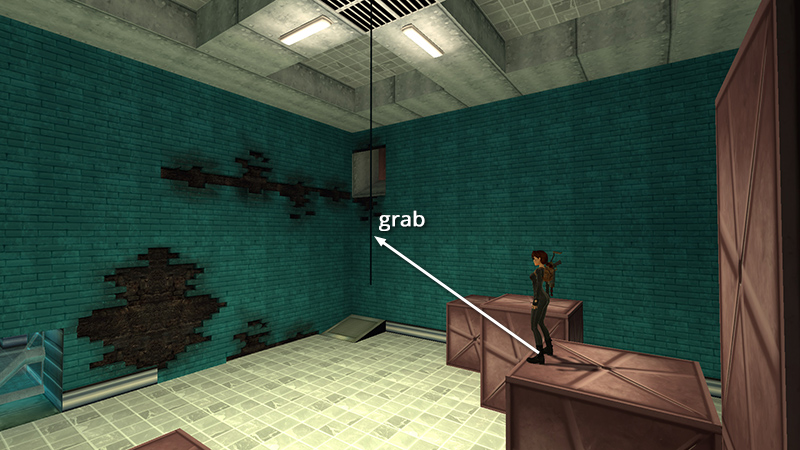
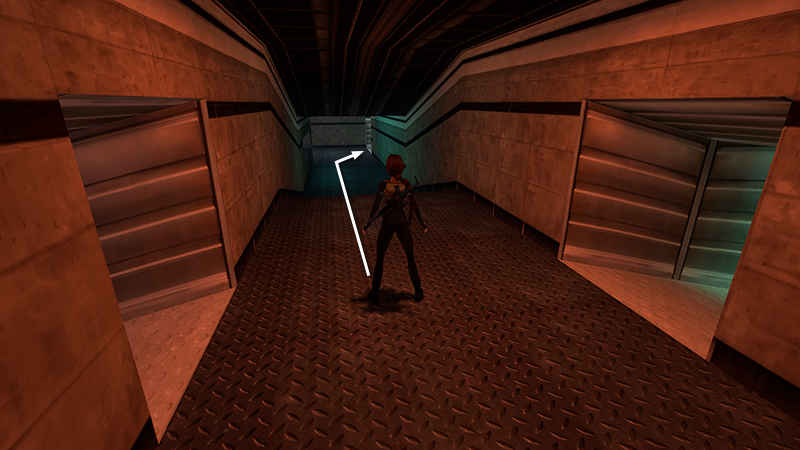
Equip the GRAPPLING GUN and use the scope (Look) to aim for the grate where the ducts converge on the ceiling.

The targeting reticle flashes green when you're aiming at a viable target.
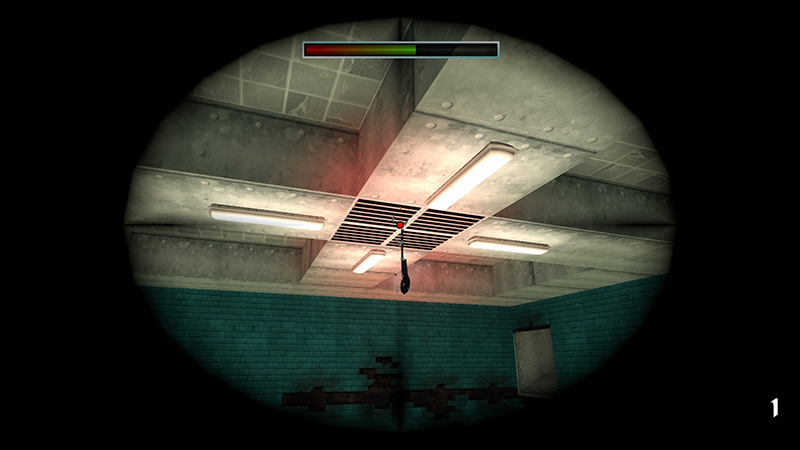
Shoot a grappling hook into the grate.
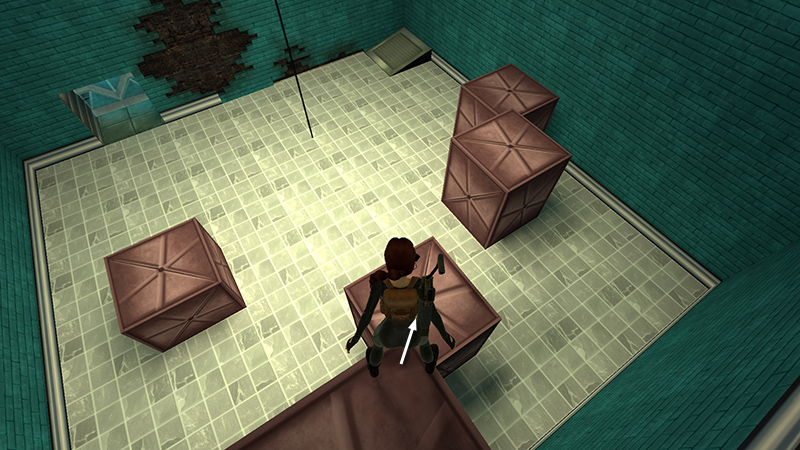
Move to the right corner of the tall crate and step off to land on the crate below.
Walk to the edge and take a standing jump to grab the rope.
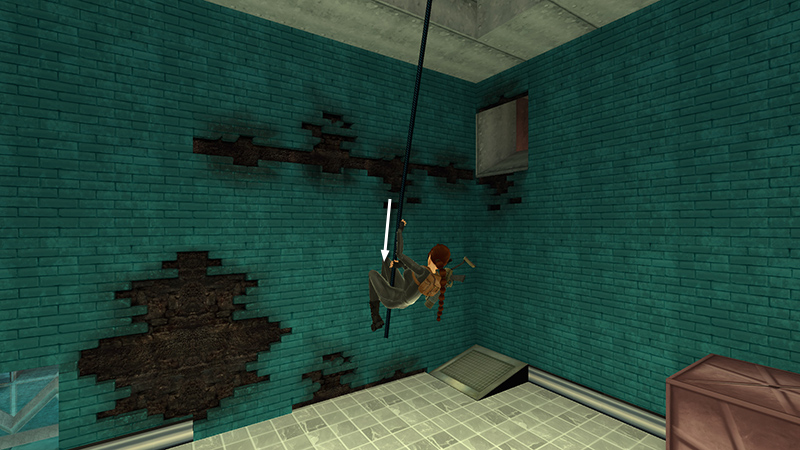
Slide to the bottom of the rope.
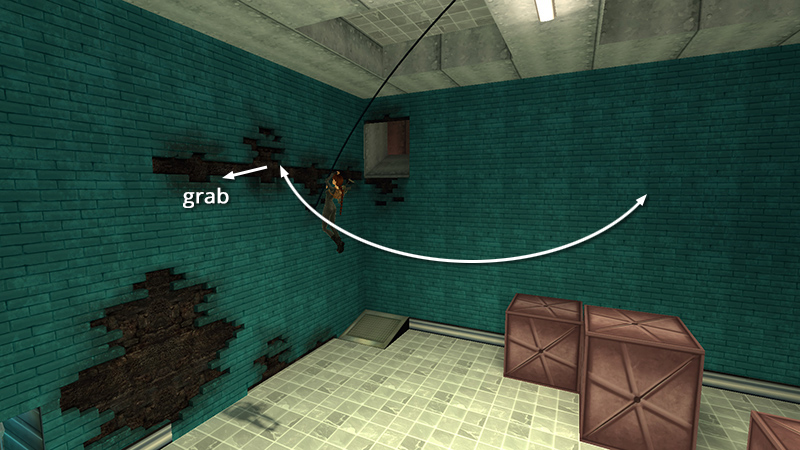
Then swing toward the crumbling blue-black section of wall directly ahead. At the peak of the forward swing, jump and grab the horizontal crack in the wall.
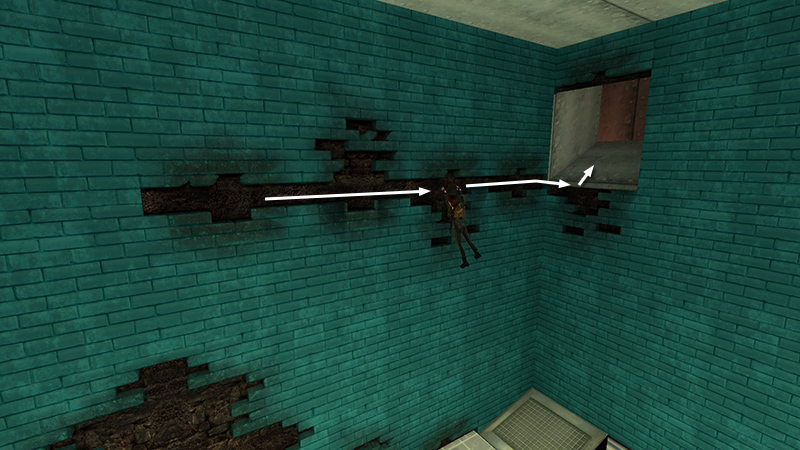
Traverse to the right, around the corner, and pull up into the metal duct.
NOTE: Refer to the rope swinging tips in the OLD MILL level if you need a refresher.
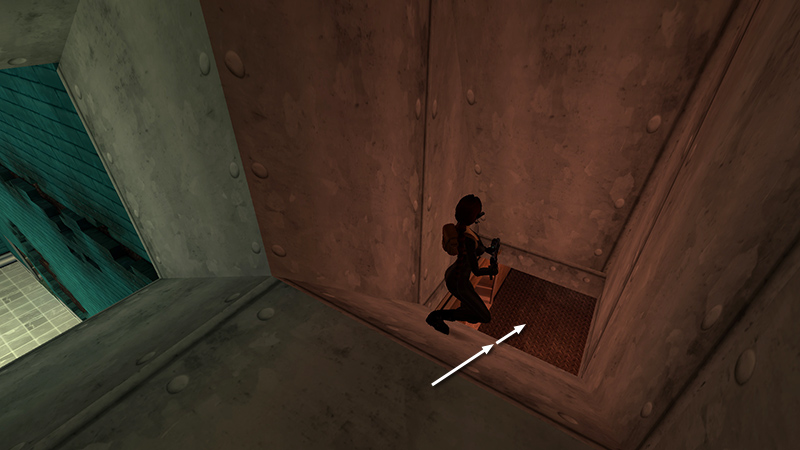
Proceed through the duct, but before sliding down the chute, ready the HK in sniper mode.
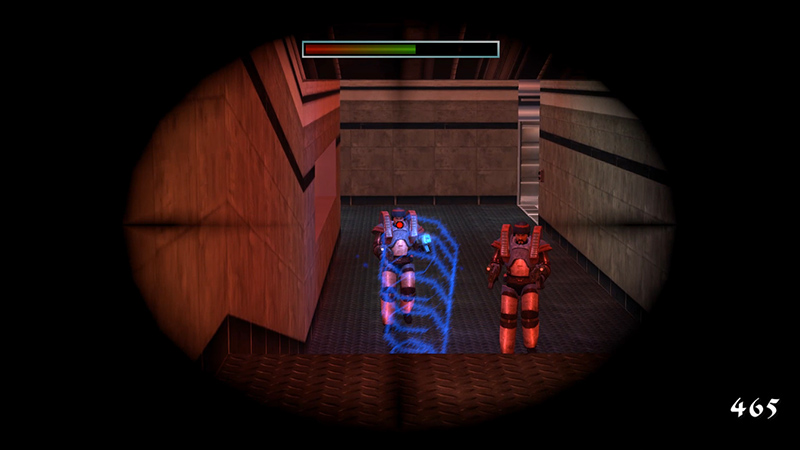
Two guys in power suits (not counted) approach from the ELEVATOR ahead. Fortunately they can't zap Lara until they make their way up the ramp...
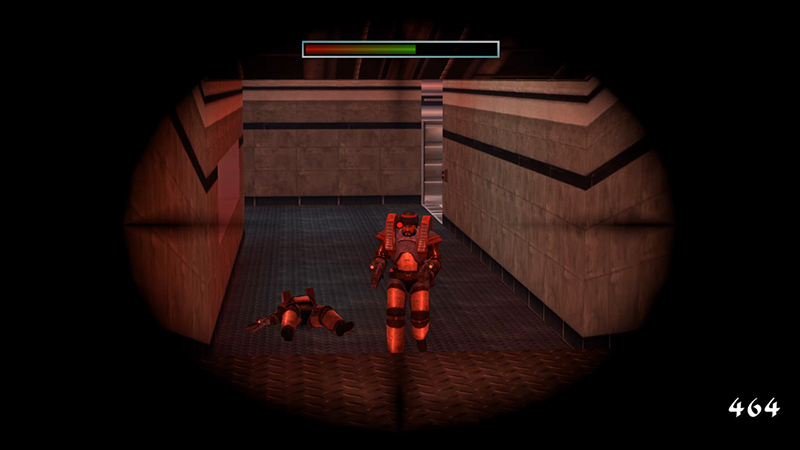
...so you have a few seconds to line up a headshot on each one.
 Unless you missed a pickup, do not go back into the ARMORY on the left. The door closes behind you, and you'll have to repeat the grapple swing and climb to the duct. Return to the ELEVATOR...
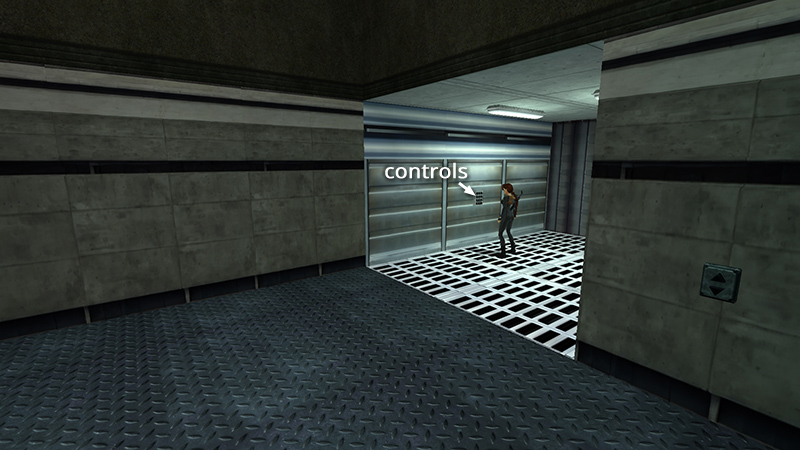
...and press the button inside to ride back to the previous floor.
DARK MODE: I plan to add optional dark mode for these pages, but my current priority is updating the walkthroughs. Meanwhile, may I suggest a reputable dark mode browser extension, such as Dark Reader? (Download only from trusted sites, like darkreader.org or your browser's web store.)
Walkthrough text and diagrams copyright © Stellalune (email ). Feel free to copy or print this walkthrough for personal use. By all means, share it with friends, but please include this credit line so people can send me their feedback. No part of this walkthrough may be reproduced on another site without permission.