Red Alert! - Room Below Grate and Hallway with Lasers
After obtaining the first secret and kicking a hole in a wall, as shown in the previous section, follow the crawlspace forward...
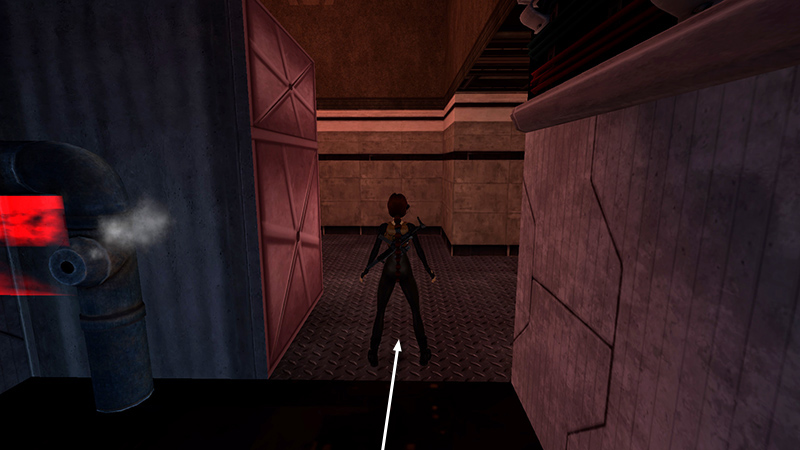
...then left. Quick-save before crawling out into a small room where Lara can stand.
There's a soldier (1) (51/62) patrolling above. If he spots Lara through the grate, it will make the next section more difficult. Ideally, you want to wait until he moves off, then run to the far right corner of the room, so Lara isn't directly under the grate.
Press Look to reorient the wonky camera. Back up toward the wall. Then watch the grate.
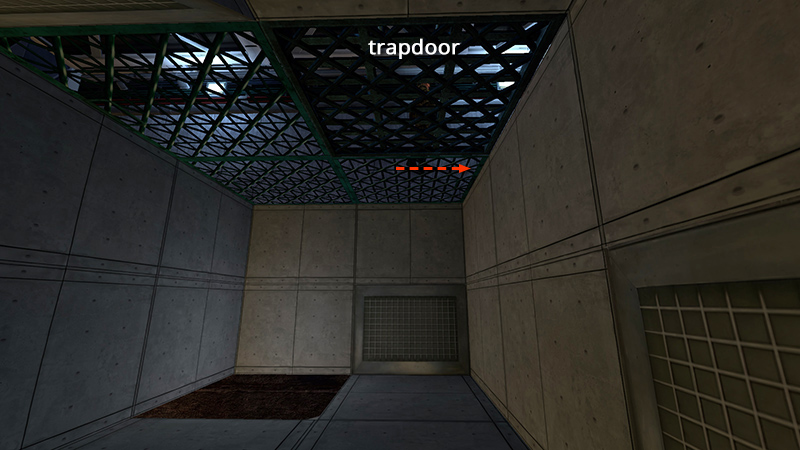
The darker section is actually a trapdoor. When the soldier moves off to the right...
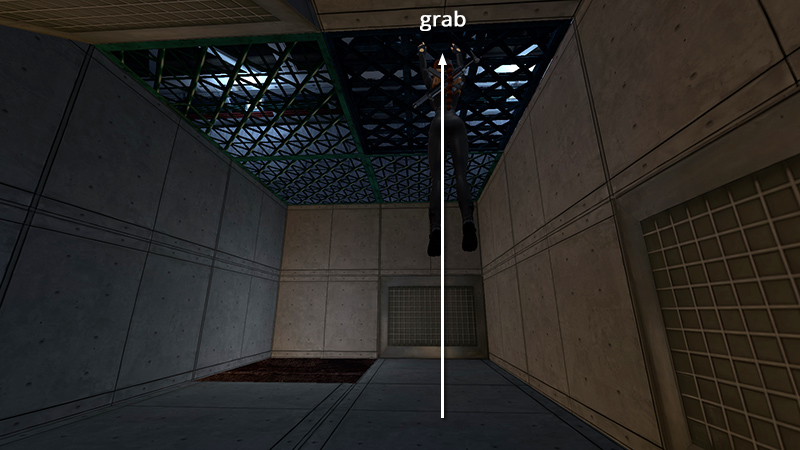
...step forward, stand under the trapdoor, jump up, and grab the edge to open it.
Move back to the wall and wait for the soldier to return.
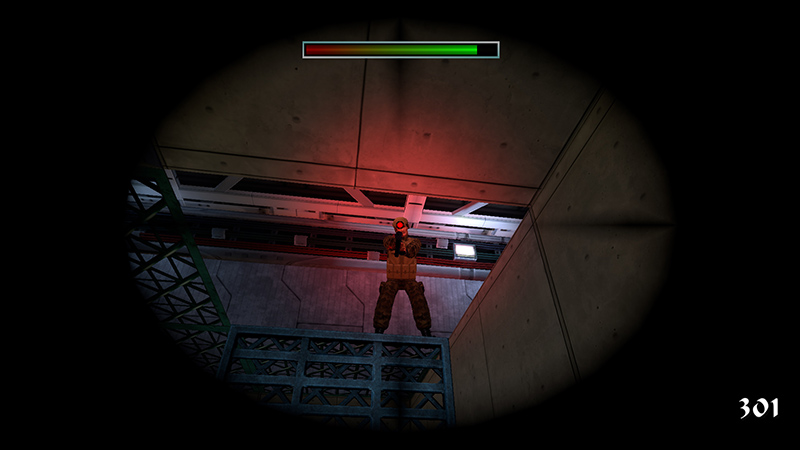
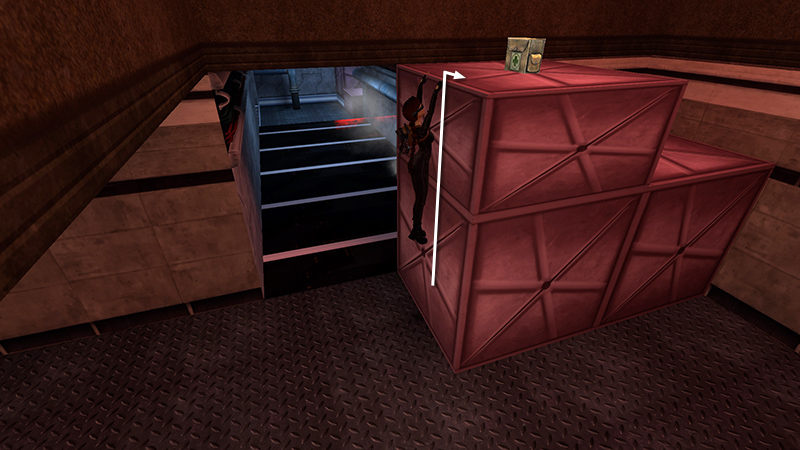
Take him out from below with a headshot...
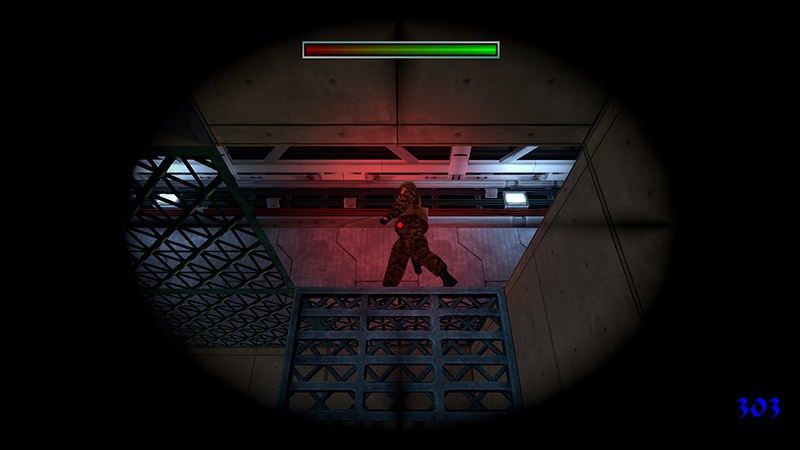
...or several shots using burst mode.
If he notices Lara and jumps down into the room, switch to burst mode and kill him quickly.
NOTE: As in the first VCI level, if you headshot the guard before he notices you, the kill will not be added to the running total.
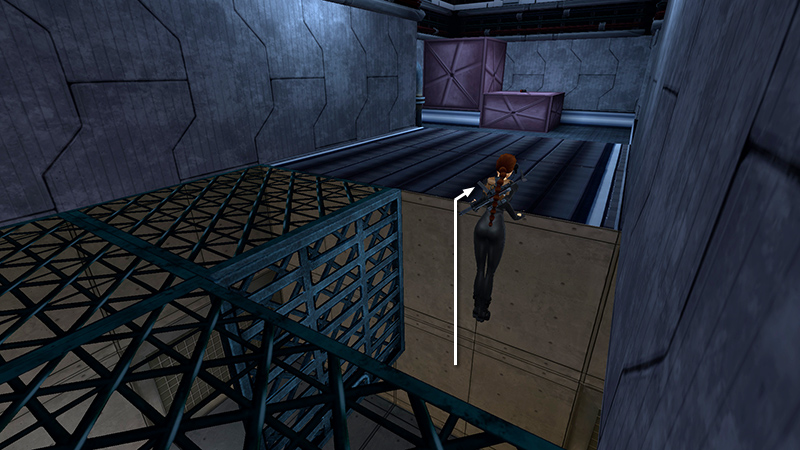
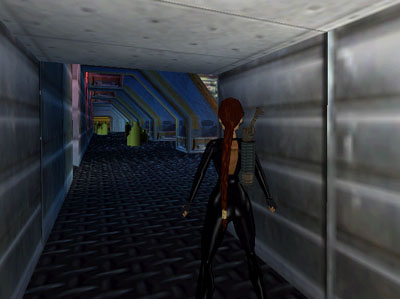
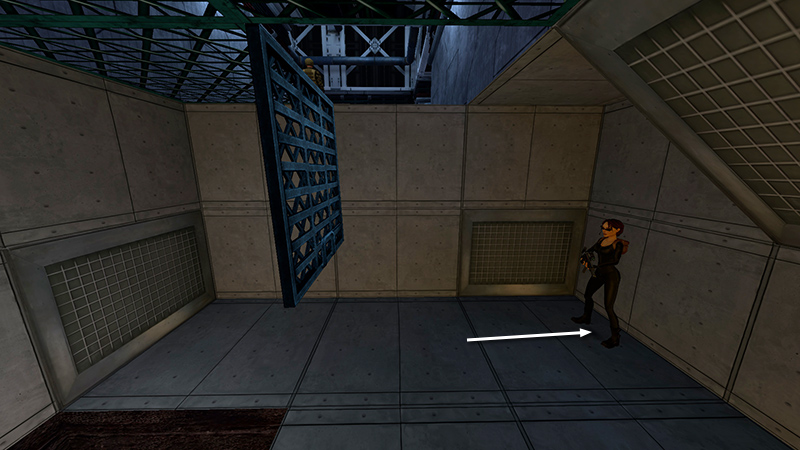
Climb up through the grate and head toward the metal boxes.
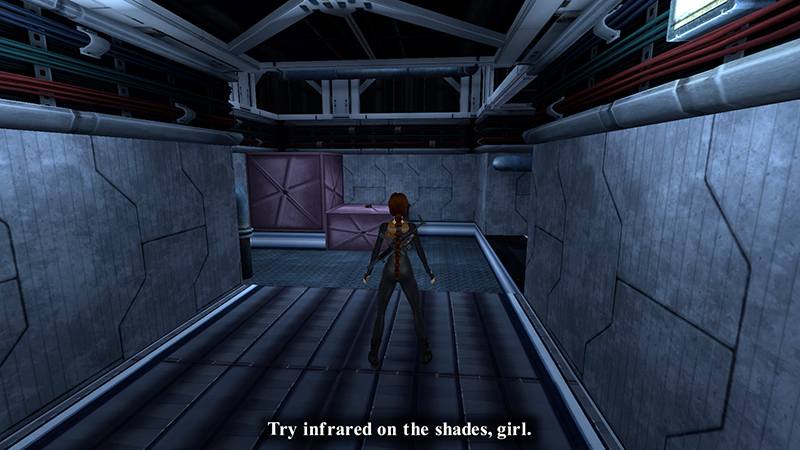
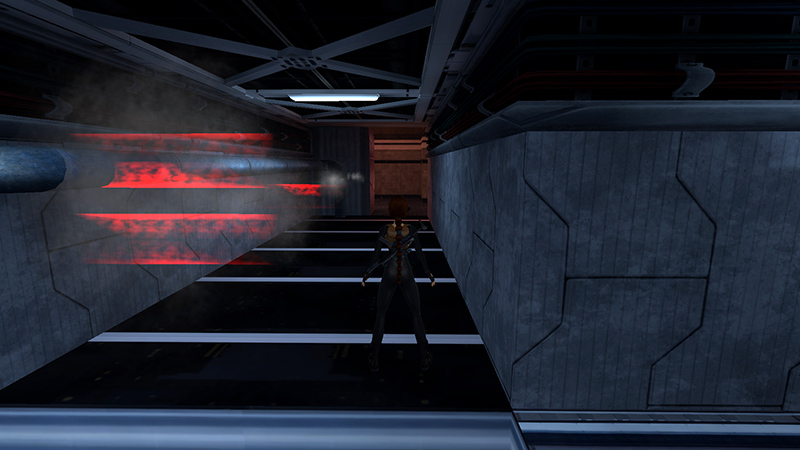
Voiceover: Zip warns Lara of danger ahead and advises her to use the infrared setting on her shades.

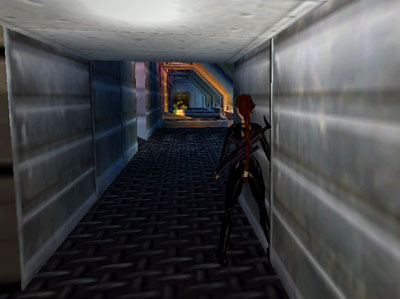
If you take Zip's advice and equip the headset, then press Action for infrared, you'll notice the hallway to the right is crisscrossed with 5 sets of invisible lasers.

Equip the HK in sniper mode and shoot the red valve at the end of the hall beyond the lasers. Steam escapes, making the lasers visible.
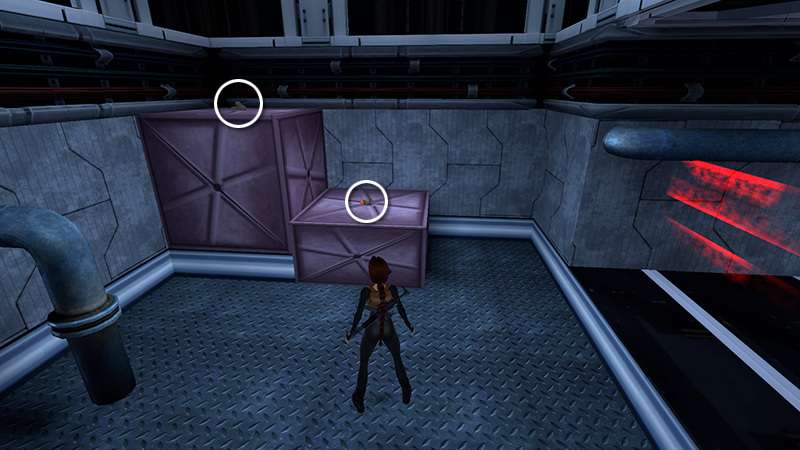
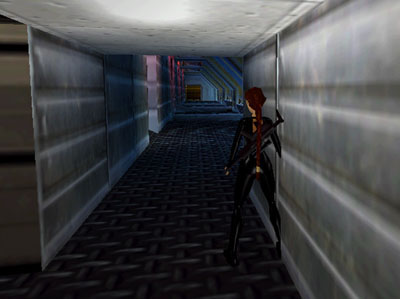
Before attempting to get through, pick up some HK ammo and grappling gun ammo (2-3) (220-221/239) on top of the crates.
Approach the lasers carefully. The five sets are not in sync, but each has a distinct pattern: on, off, on, longer off. Watch the pattern...
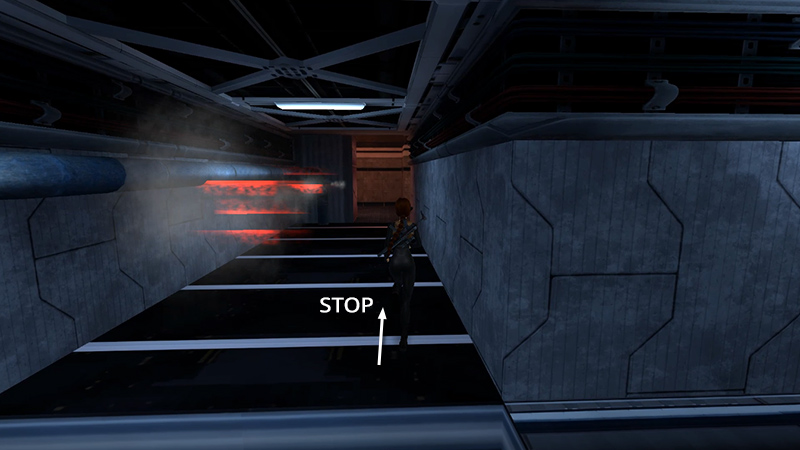
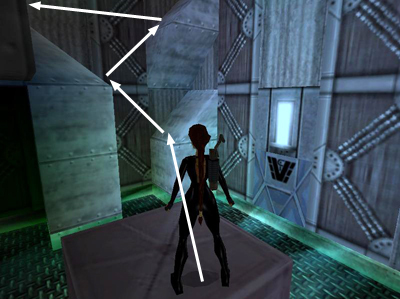
...wait for the longer off phase, and run past the first set of lasers. Stop before the white line on the floor indicating the next set.

Again, wait for the long off phase...
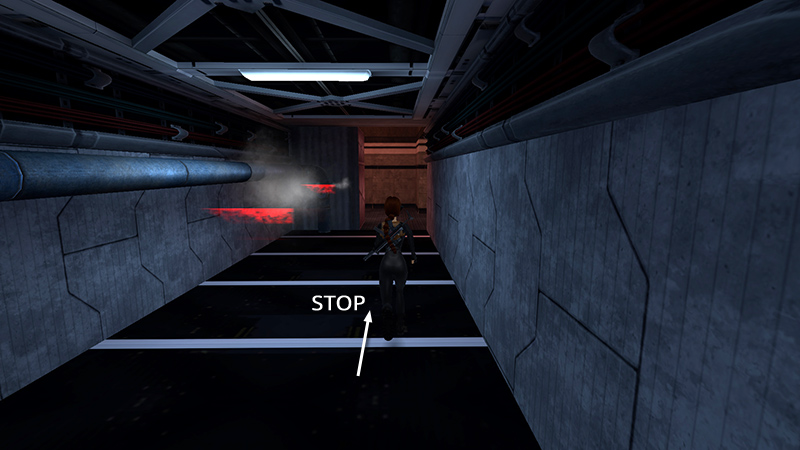
...run forward, and stop before the next white line.
Repeat to clear all five sets. For the last set of lasers, be sure to approach on the right side so you can run through the doorway when the laser goes off.
After navigating the laser trap, as shown in the previous section, climb onto the stacked crates to find a large medipack (4) (222/239).

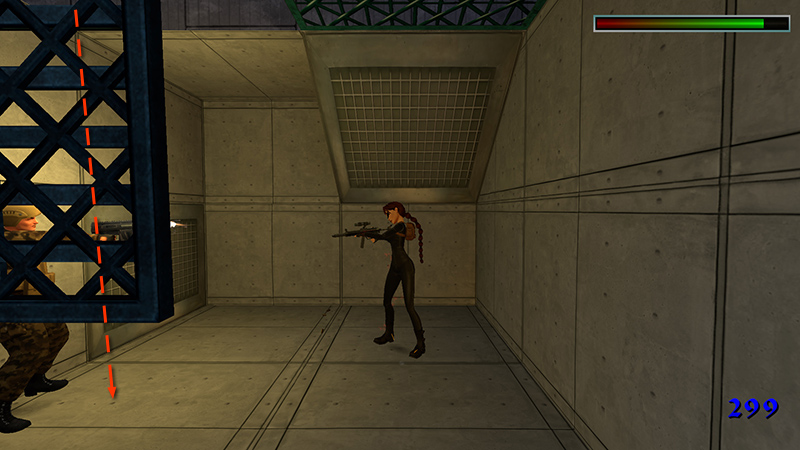
When you move toward the other end of the hall, the ELEVATOR doors open and a soldier (2) (52/62) comes out. Kill him using sniper or burst mode. (See the note below.)
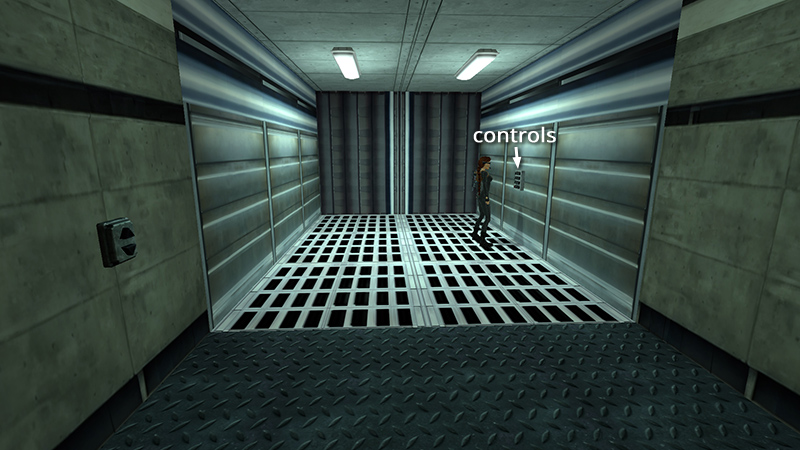
Go into the elevator and press the buttons to take a ride.
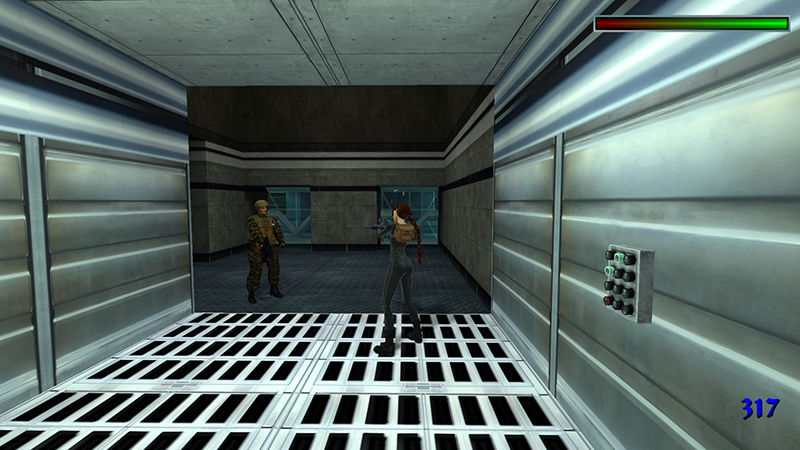
Ready your weapon and face the doors opposite the ones where you entered. Those doors open, and there's another soldier (3) (53/62) waiting just outside on the left.
NOTE: Burst mode is generally best for enemies who are firing back. But if you have more health than ammo stockpiled, you can use sniper mode on both of these guys. Don't use the scope at close range, though, since it makes Lara an easy target. Just auto-aim and hop away from each soldier while firing. Lara will take a little damage but nothing a small medipack won't fix.
DARK MODE: I plan to add optional dark mode for these pages, but my current priority is updating the walkthroughs. Meanwhile, may I suggest a reputable dark mode browser extension, such as Dark Reader? (Download only from trusted sites, like darkreader.org or your browser's web store.)
Walkthrough text and diagrams copyright © Stellalune (email ). Feel free to copy or print this walkthrough for personal use. By all means, share it with friends, but please include this credit line so people can send me their feedback. No part of this walkthrough may be reproduced on another site without permission.