Old Mill - Inside the Mill
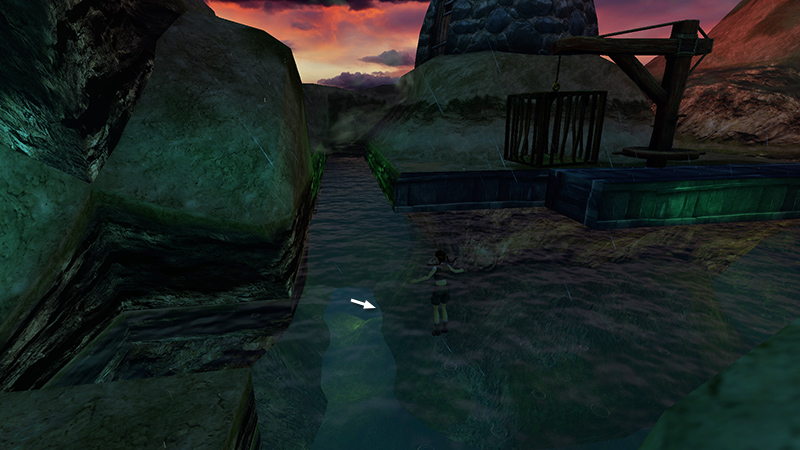
After dealing with the merrow, as shown in the previous section, surface to breathe. Then swim back down to her lair.
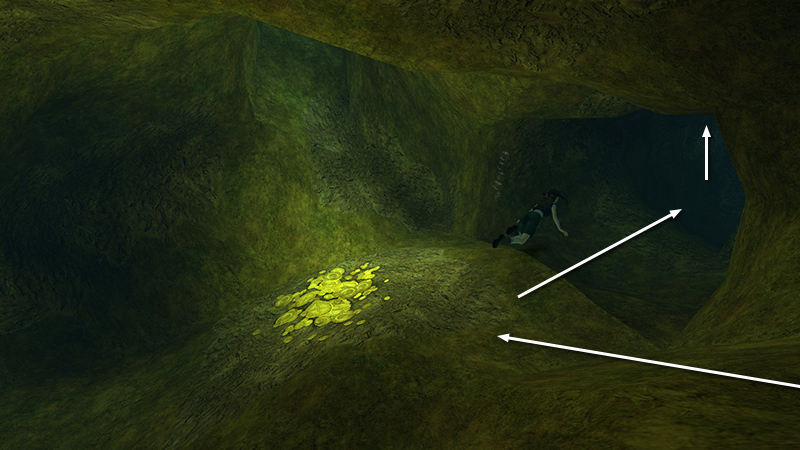
Swim into the tunnel to the right of the treasure pile, then straight upward until you can surface inside the MILL.
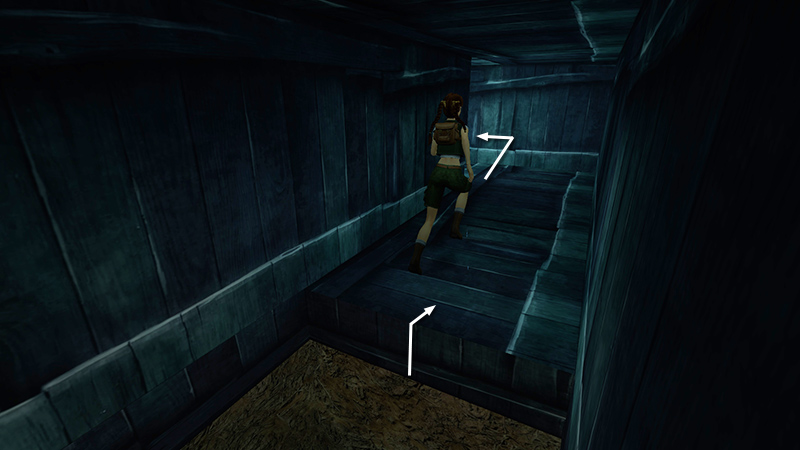
Climb out of the water. Follow the passageway inside.
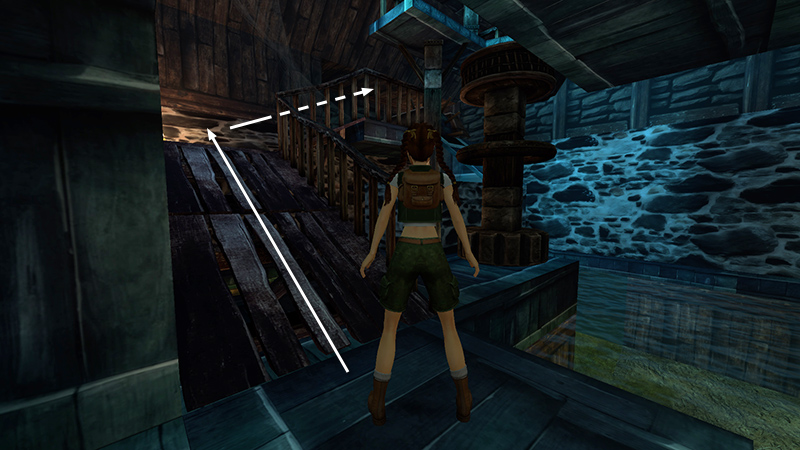
Go up the ramps to a landing near the gears.
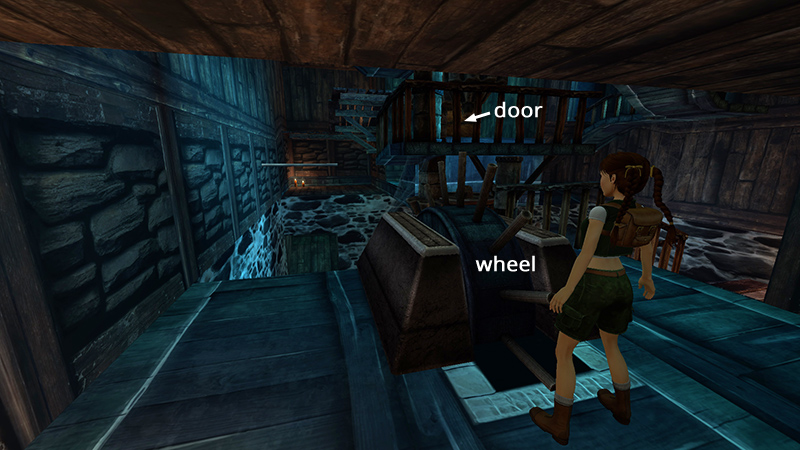
Now get ready for a timed run. You'll need to turn the wheel to open the door on the opposite wall and get through before it closes. Here's the sequence:
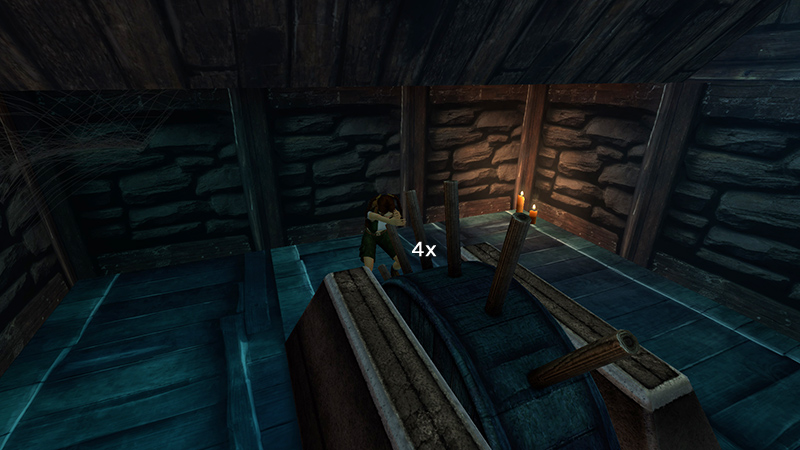
Face the wheel edge-on. Hold Action to pull on the wheel four times. (More than four won't help.)
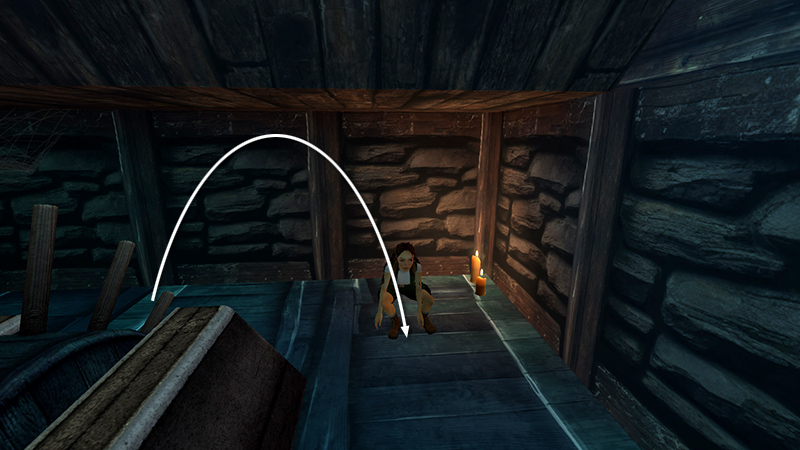
Flip to the left (i.e., Lara's left, right on the screen, since the camera is facing her).
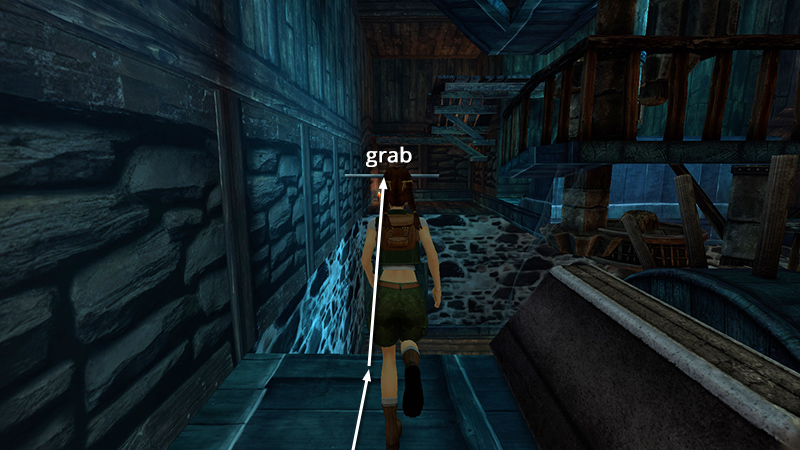
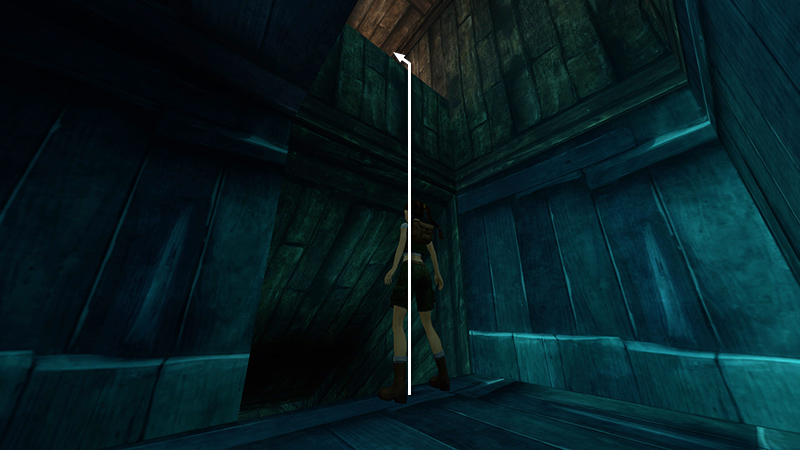
Run forward along the landing, jump at the edge, and press Action to grab the horizontal pole sticking out of the wall above the water.
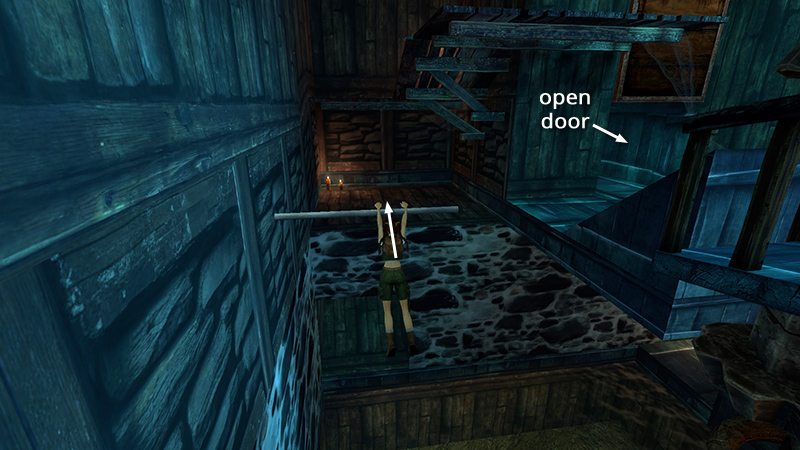
When Lara grabs this pole, she'll swing around it gymnast-style as long as you hold Action. When you release Action, she'll let go and land on the opposite ledge. Since you're in a hurry, hold Action only long enough to grab the pole and then immediately release it.
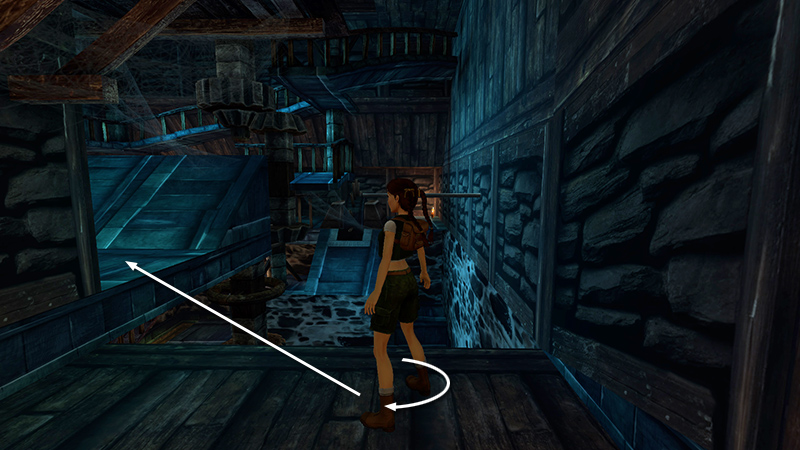
When Lara lands on the opposite ledge, turn about 120 degrees to the right and jump onto the ledge near the door.
Run to the door and crawl through before it closes.
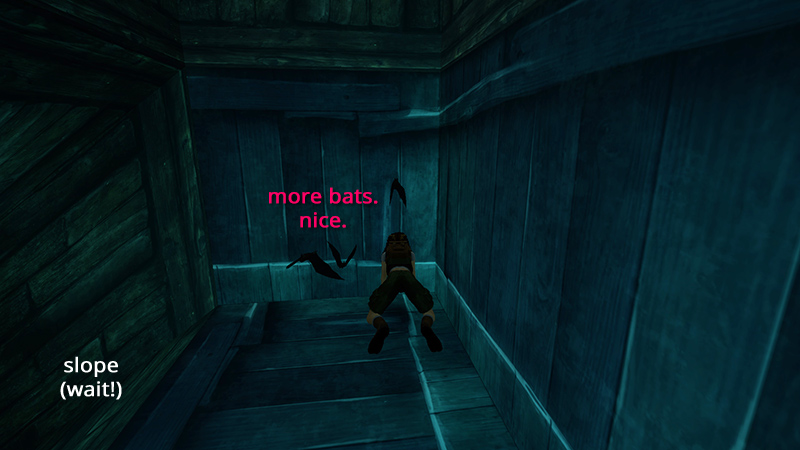
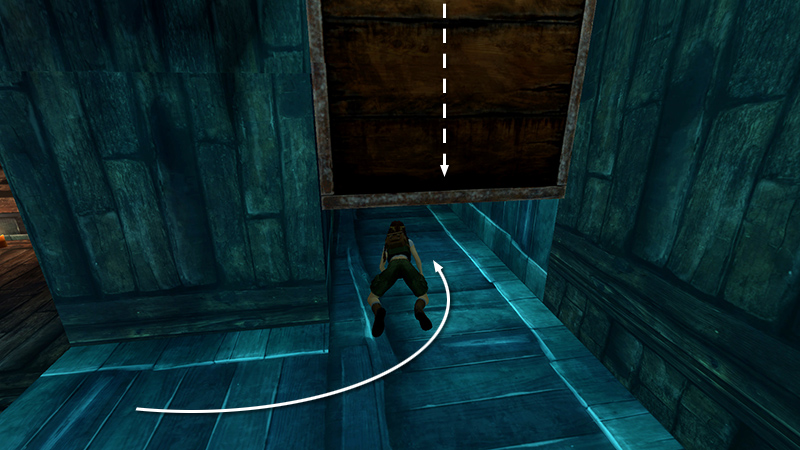
The reward for your efforts? A flock of bats! Take care not to slide down the ramp in your panic, or you'll have to redo the timed sequence.
When the bats disperse, walk to the edge of the slope and jump straight up to grab the ledge above. Pull up.
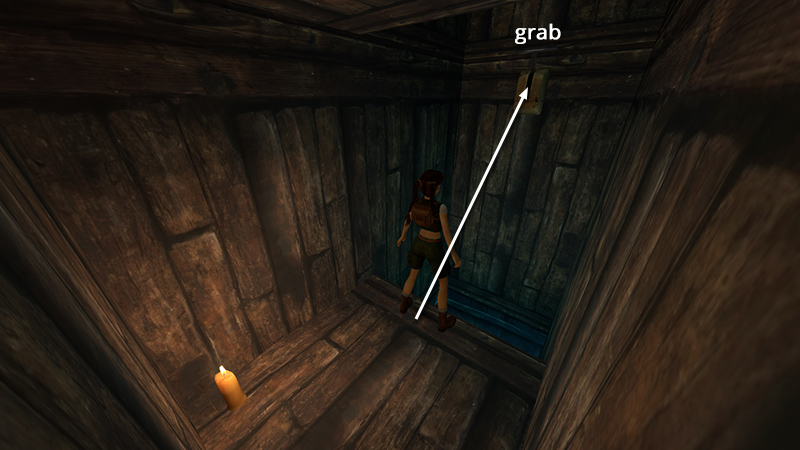
Turn around. Then take a standing jump and grab the high switch.
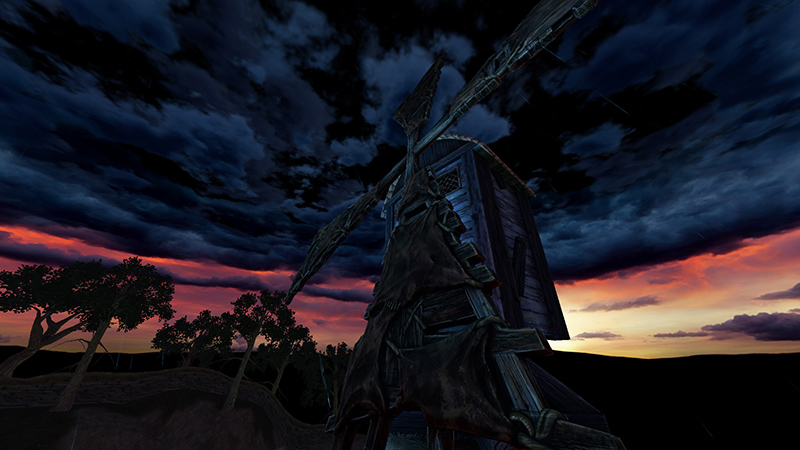
Cutscene: The wooden door in the underwater passage leading back to the mill pond opens, the windmill stops turning, and the flow of water in the nearby streams slows. (This is not shown, but shutting down the mill also deactivates the flame trap in the area with secret #2.)
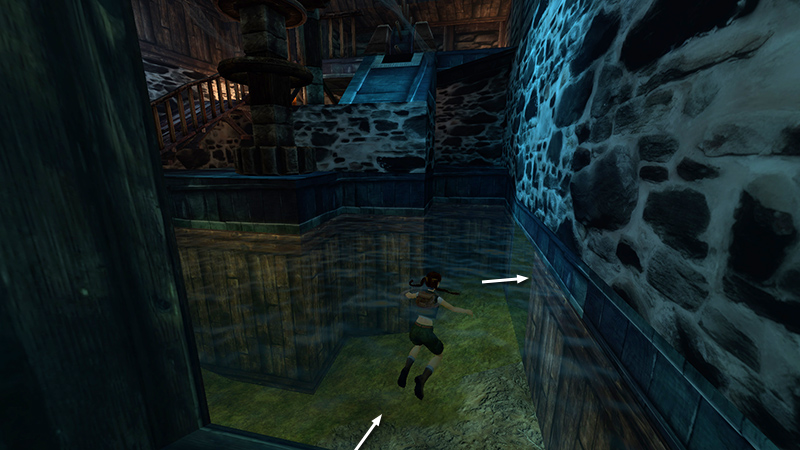
Follow the ramps down to the room with the gears. Drop into the water and swim through the passageway on the right to get back to the MILL POND.
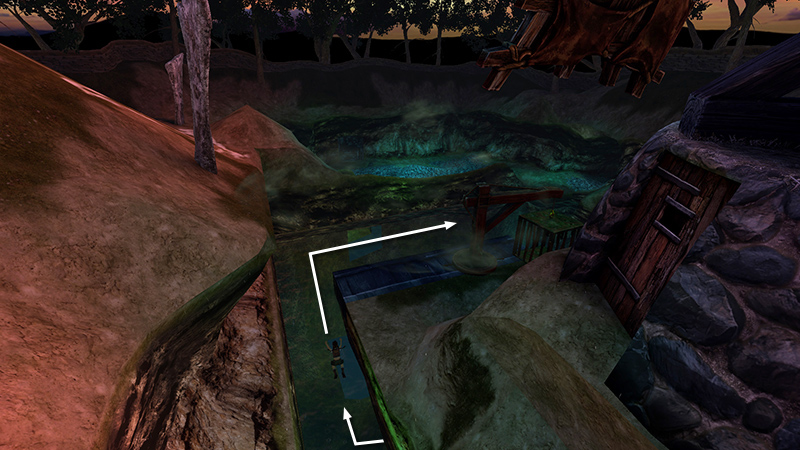
Swim around to the front of the mill...
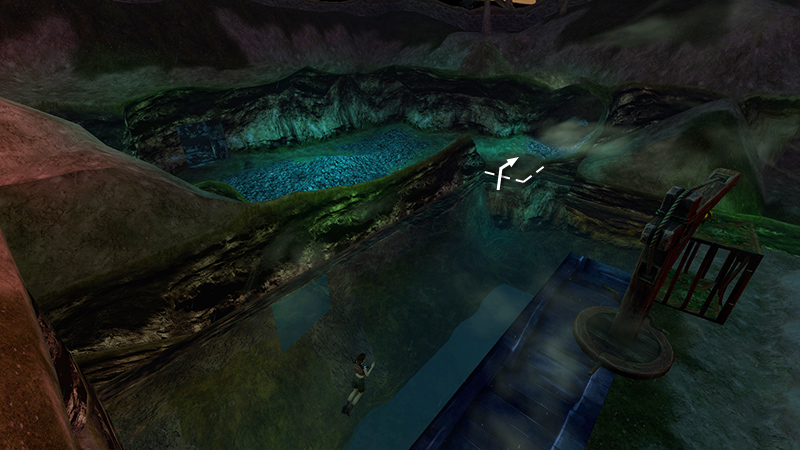
...and climb out of the water on the square corner ledge.
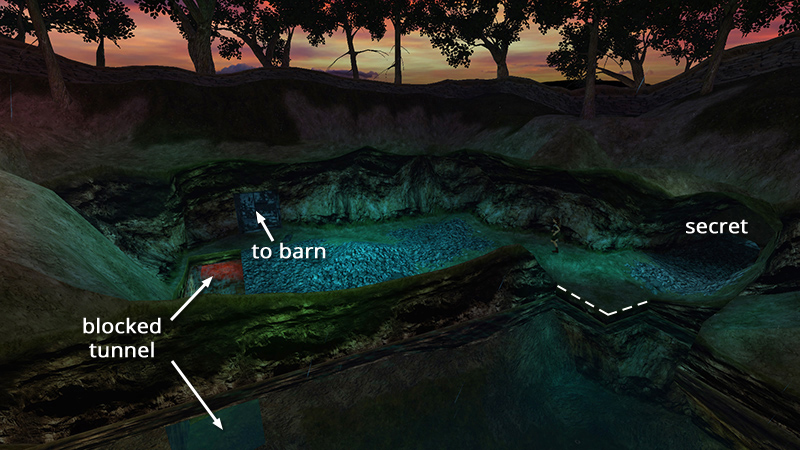
If you already have secret #2, you can leave this area now. Follow the whitewashed tunnel back to the area near the BARN. Continue with the next section.
If you didn't get secret #2 earlier, you can do so now. Details are in a footnote following the main walkthrough and on this page with screenshots.
NOTE: As the last cutscene showed, the flooded tunnel with the red lighting connects the MILL POND to the streams near the BARN, but a wooden barrier prevents you from swimming all the way through.
[Previous | Next | Old Mill Walkthrough]
DARK MODE: I plan to add optional dark mode for these pages, but my current priority is updating the walkthroughs. Meanwhile, may I suggest a reputable dark mode browser extension, such as Dark Reader? (Download only from trusted sites, like darkreader.org or your browser's web store.)
Walkthrough text and diagrams copyright © Stellalune (email ). Feel free to copy or print this walkthrough for personal use. By all means, share it with friends, but please include this credit line so people can send me their feedback. No part of this walkthrough may be reproduced on another site without permission.