Old Mill - "Fail Compilation" and "Sleepy Merrow" Achievements/Trophies
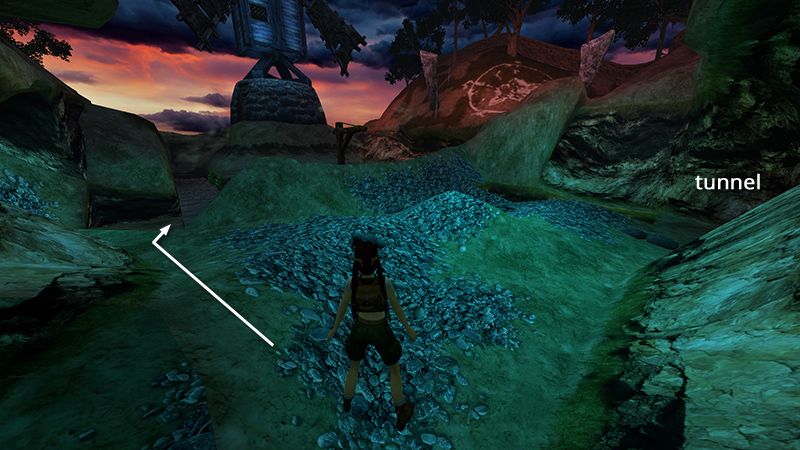
After obtaining the second secret (while ON FIRE!), as shown in the previous section, you return to the main area. Approach the pond surrounding the WINDMILL.
IMPORTANT: The main walkthrough includes a note on the two competing achievements/trophies here. If you want both, save the game before going into the water.
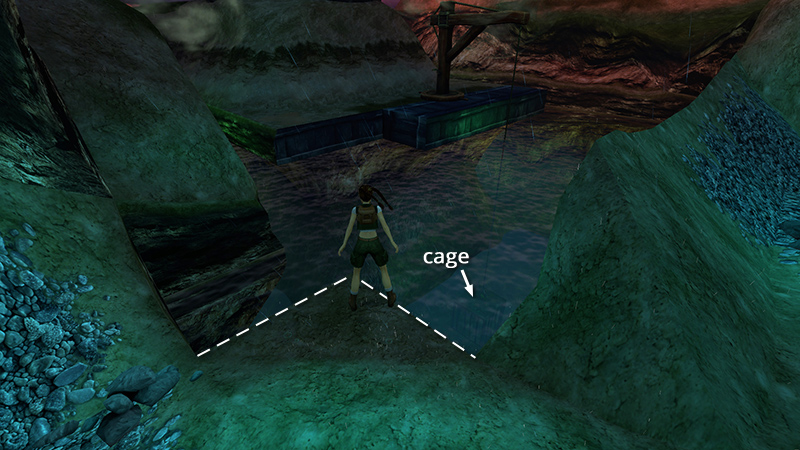
Make a mental note of the winch with the cage dangling in the water.
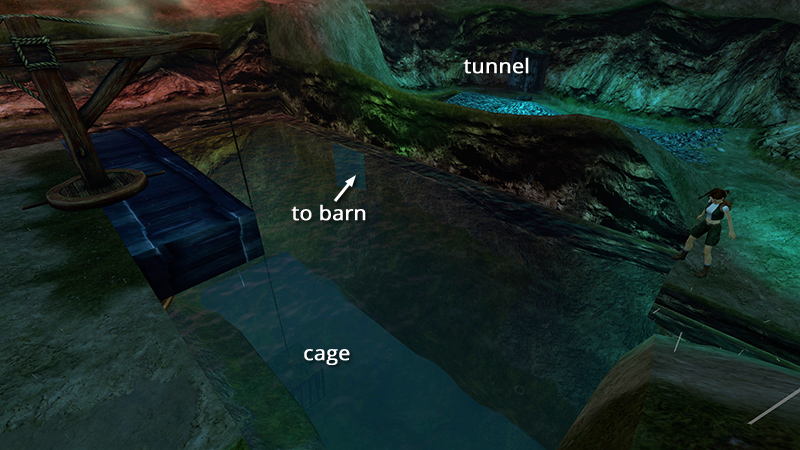
There are also two underwater tunnels, which you can scout using Photo Mode if you like. One, on the outer wall of the pond, near the cage, channels water back toward the BARN.
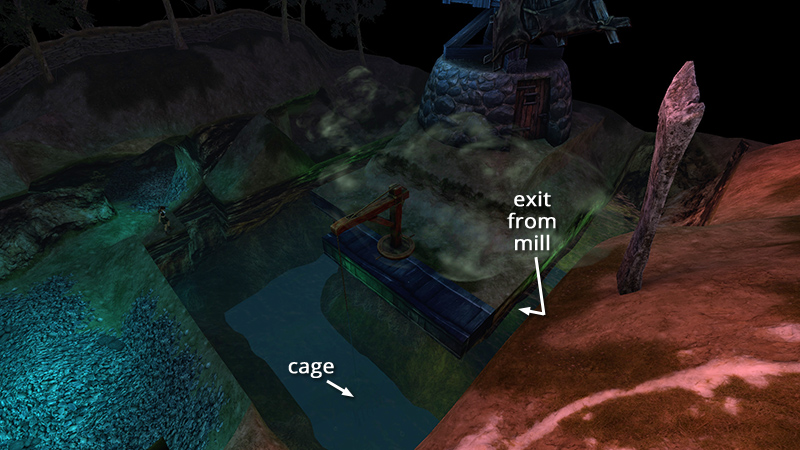
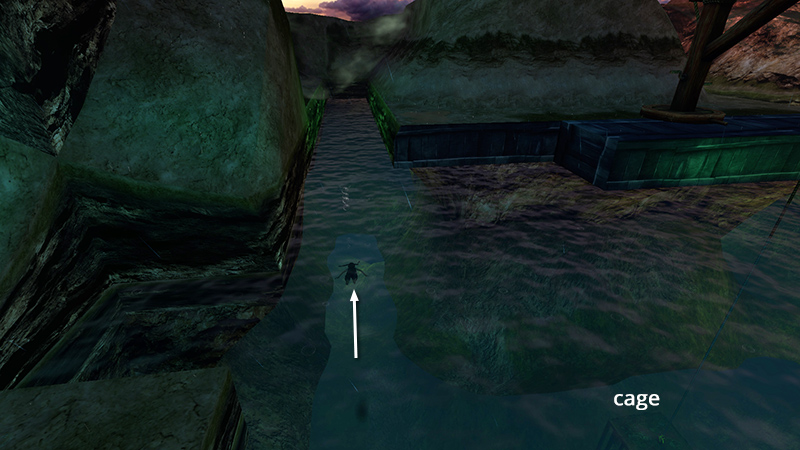
The other, on the right side of the pond, is where you will exit from the WINDMILL later.
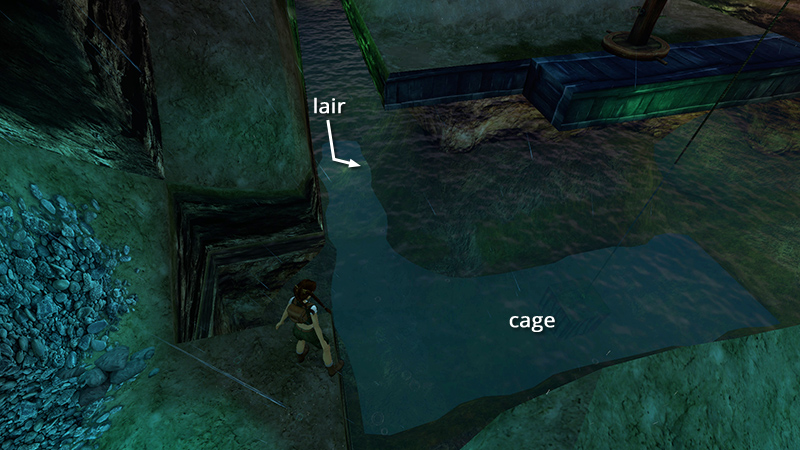
The mill pond is also home to a dangerous creature, a merrow (not killed). (Earlier versions of this guide referred to her as a "sea hag," but since she doesn't live in the sea, and she's clearly inspired by Irish folklore, let's give her proper context.) The MERROW'S LAIR is on the bottom of the pond, behind the WINDMILL.
Swim down along the left side of the mill. (A strong current makes it impossible to reach the lair from the right side.)
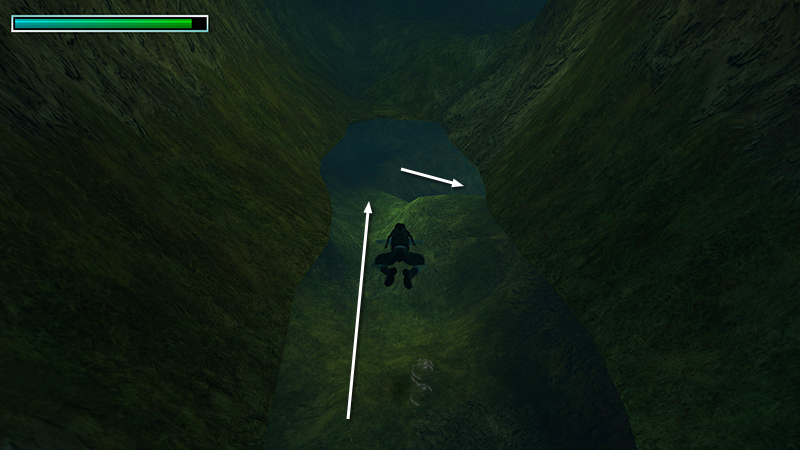
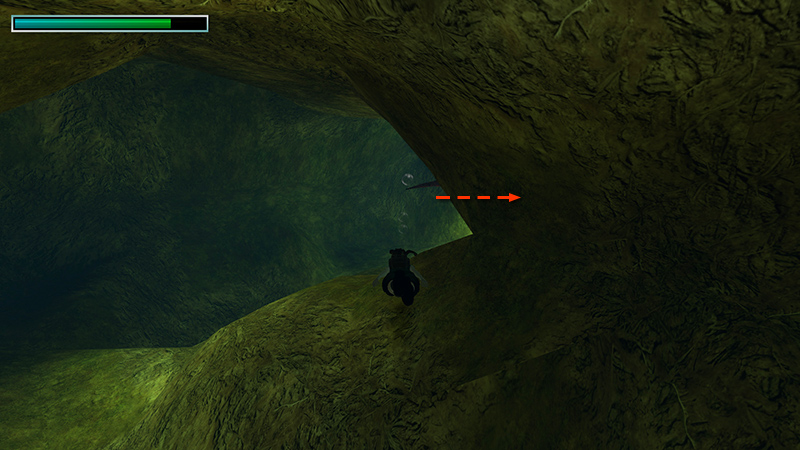
You'll notice a golden glow as you approach the far left corner. Swim down and to the right, into the MERROW'S LAIR.
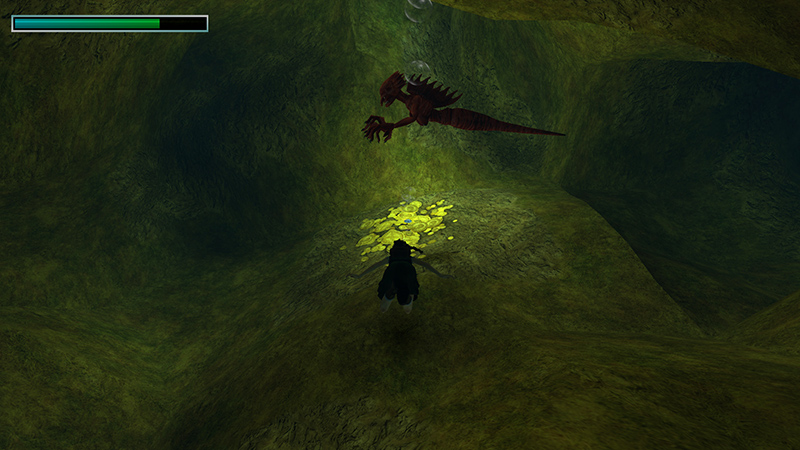
Approach the merrow's treasure hoard. Notice the small, silver object lying on top of it, but don't pick it up yet.

Cutscene: The merrow attacks Lara. They struggle, and Lara gets away. This cutscene repeats until you are able to grab the SILVER COIN. Let this happen at least once for the "Fail Compilation" achievement/trophy. It will pop here if you also watched the two earlier failure cutscenes.
Now, reload and we'll do that again without getting caught for the "Sleepy Merrow" achievement/trophy. You'll have to approach carefully this time to outwit the merrow and lure her to her demise within 25 seconds. The timer starts when Lara hits the water. Swim down toward the treasure pile again...
...but wait near the rocks just outside the lair until the merrow swims toward the tunnel on the right. (If this takes more than a few seconds, reload and try again.)
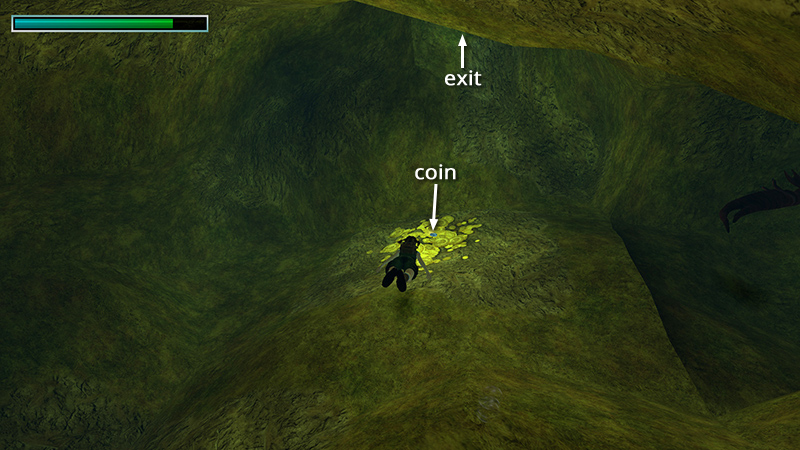
Now hurry to the treasure pile and pick up the SILVER COIN (9) (172/239). The merrow will not like this, so get away quickly. If you swim forward and up toward the small, square opening, the current will sweep Lara out of the lair.

Turn right and swim around to the front of the WINDMILL, with the merrow in pursuit.
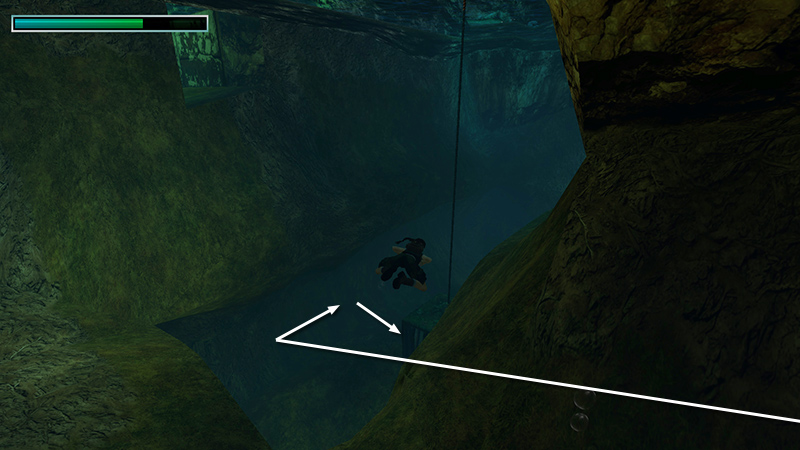
Approach the cage dangling from the winch and use the SILVER COIN here. If you made it in time, the achievement will register during the cutscene.
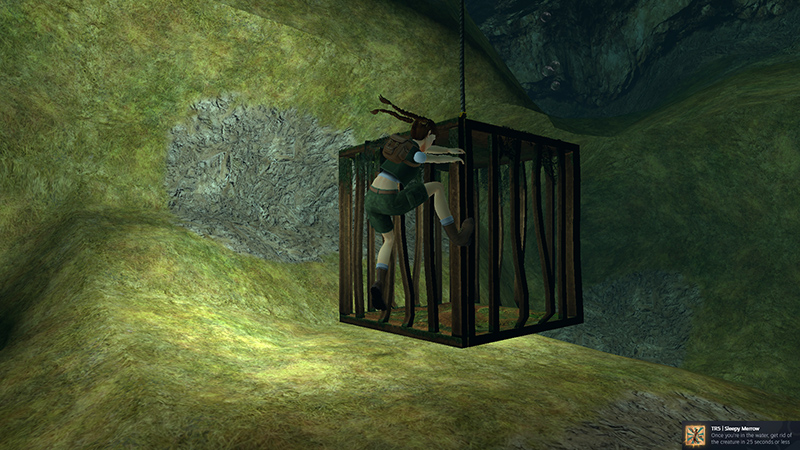
Cutscene: In arguably the most unsettling cinematic in a Tomb Raider game, Lara opens the cage and places the coin inside. The merrow goes after her treasure and Lara slams the cage door, trapping her inside. A squad of changelings winch the cage up to the surface then swarm over the merrow.
[Previous | Next | Old Mill Walkthrough]
DARK MODE: I plan to add optional dark mode for these pages, but my current priority is updating the walkthroughs. Meanwhile, may I suggest a reputable dark mode browser extension, such as Dark Reader? (Download only from trusted sites, like darkreader.org or your browser's web store.)
Walkthrough text and diagrams copyright © Stellalune (email ). Feel free to copy or print this walkthrough for personal use. By all means, share it with friends, but please include this credit line so people can send me their feedback. No part of this walkthrough may be reproduced on another site without permission.