Labyrinth - Tower Puzzle - Secret #2
IMPORTANT: The main walkthrough includes an introduction to this elaborate puzzle. The TL;DR version is: only pull the first switch then follow the guide.
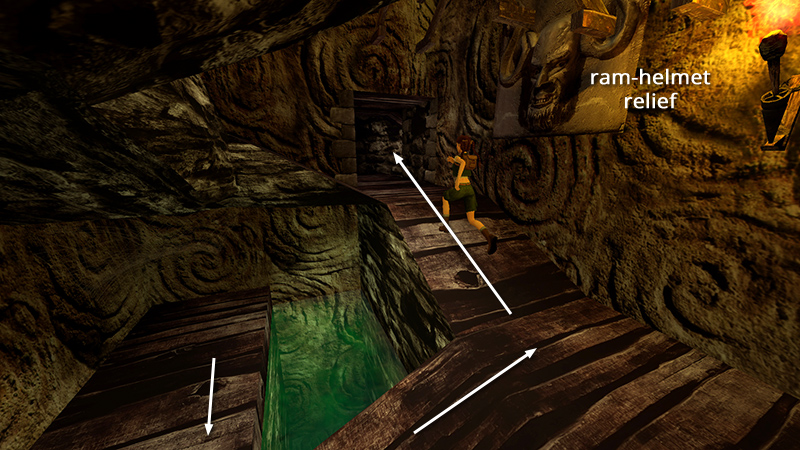
The pool of stagnant water, where Lara begins, is at the bottom of the RAM-HELMET STAIRWELL. Go up the spiraling wooden ramps to the first landing with an open doorway. Enter here.
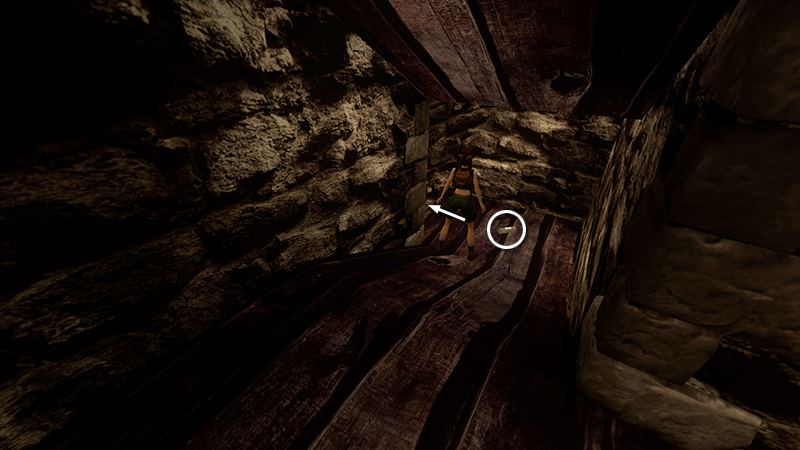
Pick up a small medipack (5) (157/239) in the passageway.
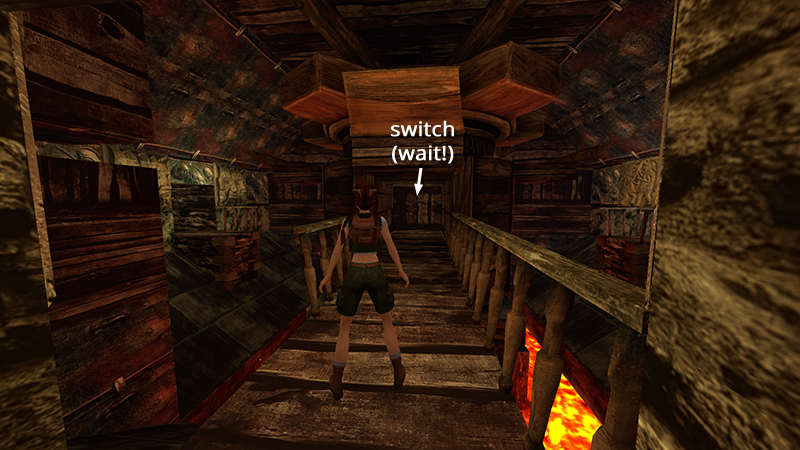
Continue to a LARGE ROOM WITH A LAVA POOL below. Before crossing the bridge to the central structure, go after a secret.
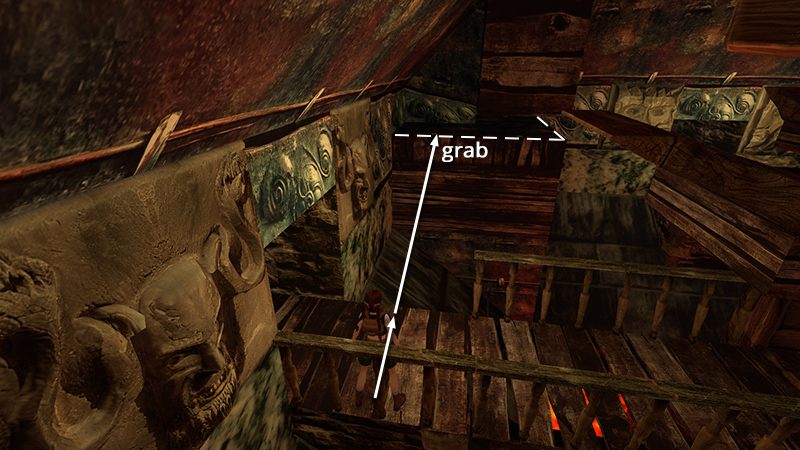
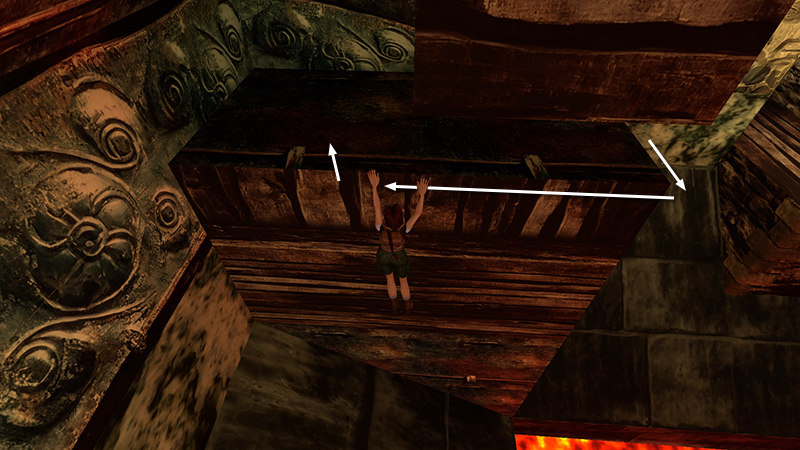
Turn left to face the break in the railing. Take a running jump across the lava pool to grab the corner ledge. Don't pull up into the alcove.
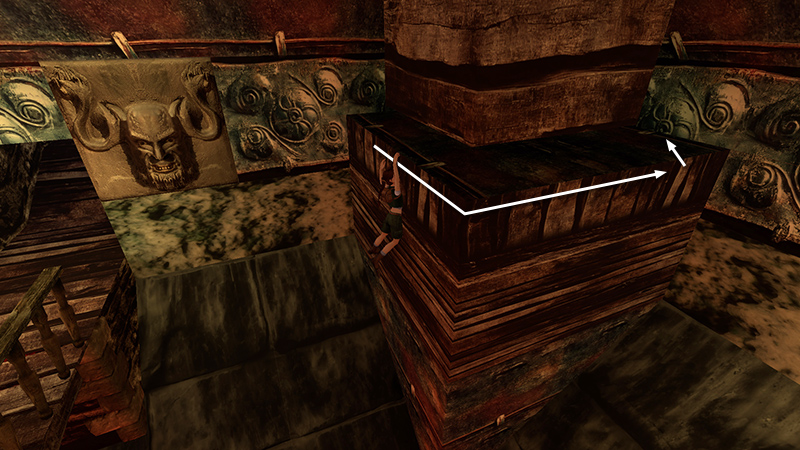
Instead, traverse around the corner to the right and pull up into the next alcove.
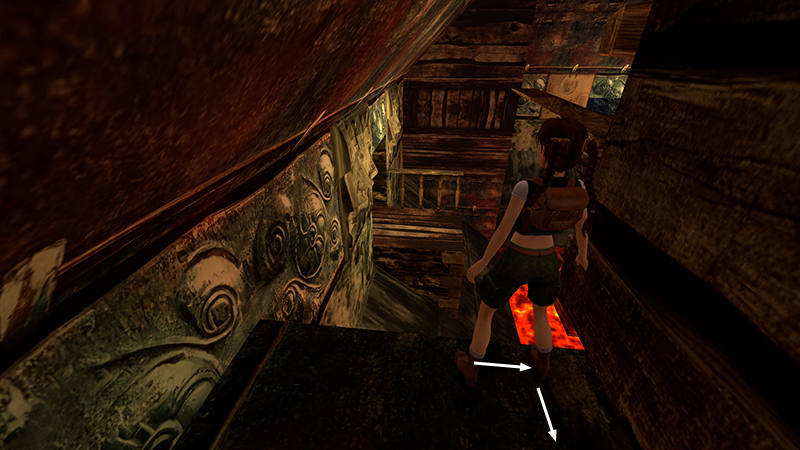
Turn around to face the ledge extending from the triple-face doorway. Position Lara at the right side of the alcove, where the ceiling is higher.
Then take a running jump down to that ledge.

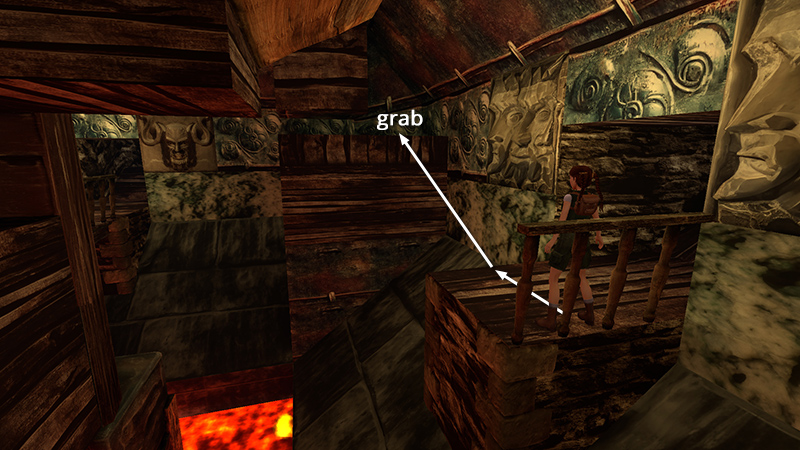
Follow the dark passageway to another golden rose (6) (158/239) (SECRET #2, 23/36).
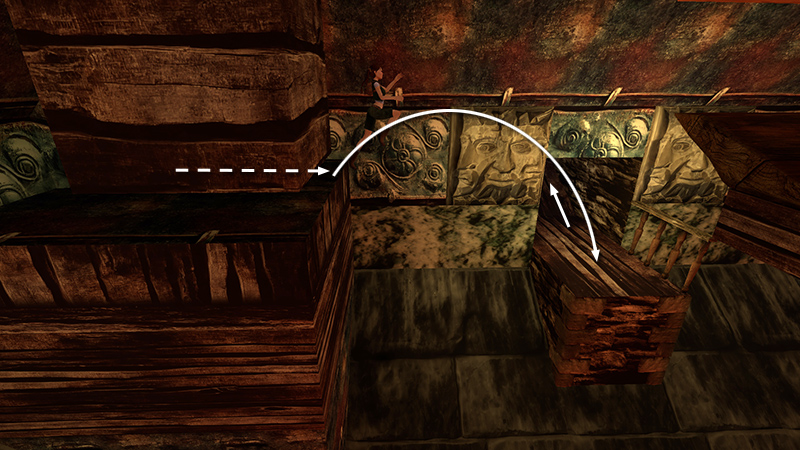
Return to the ledge overlooking the lava pool. Turn right take a running jump to grab the edge of the alcove.
Traverse back around the corner to the left, and pull up into the other alcove.
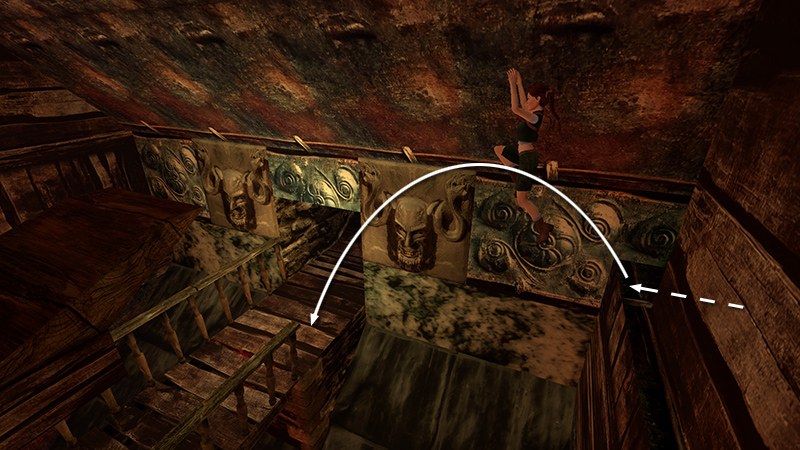
Turn around and take a running jump back down to the bridge.

Now follow the bridge to the central structure. Pull the switch once.
Cutscene: The central structure in the LAVA ROOM, where you are now, rotates one quarter turn counter-clockwise. Next, we see the central structure in the ROOM WITH GAS JETS rotate one quarter turn counter-clockwise.
NOTE: I'm deliberately not showing screenshots from these cutscenes because they don't match what actually happens when the switch is used. (See the footnote in the main walkthrough if you want to wrack your brains about this.) The upshot is you only need to use the first switch one time.
DARK MODE: I plan to add optional dark mode for these pages, but my current priority is updating the walkthroughs. Meanwhile, may I suggest a reputable dark mode browser extension, such as Dark Reader? (Download only from trusted sites, like darkreader.org or your browser's web store.)
Walkthrough text and diagrams copyright © Stellalune (email ). Feel free to copy or print this walkthrough for personal use. By all means, share it with friends, but please include this credit line so people can send me their feedback. No part of this walkthrough may be reproduced on another site without permission.