Labyrinth - Tower Puzzle (Continued) - Bestiary
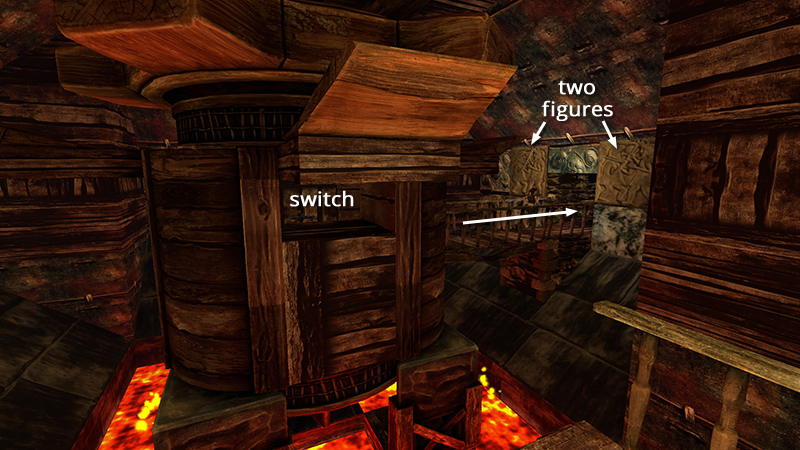
In the last section, we obtained the second secret and used the switch in the LAVA POOL ROOM to rotate the wooden walkway. Follow the bridge, now to the right of the switch, into the TWO-FIGURES STAIRWELL.
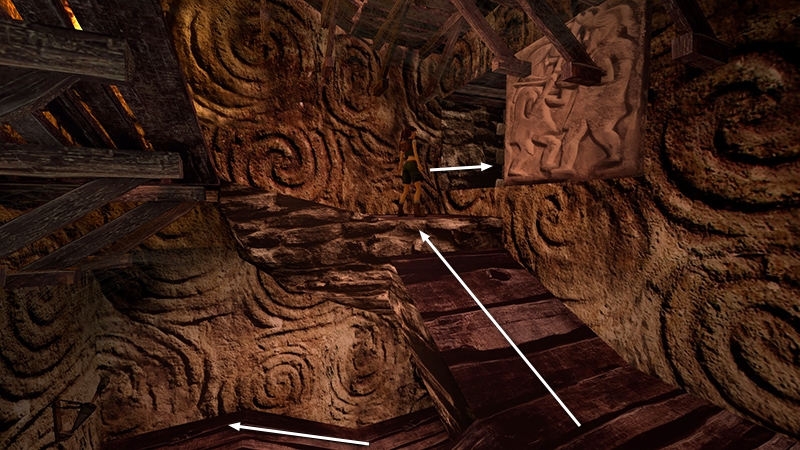
Go up the spiraling wooden ramps to the first landing with an open doorway. Enter here and follow the passage to a LARGE ROOM WITH GAS JETS (shown below).
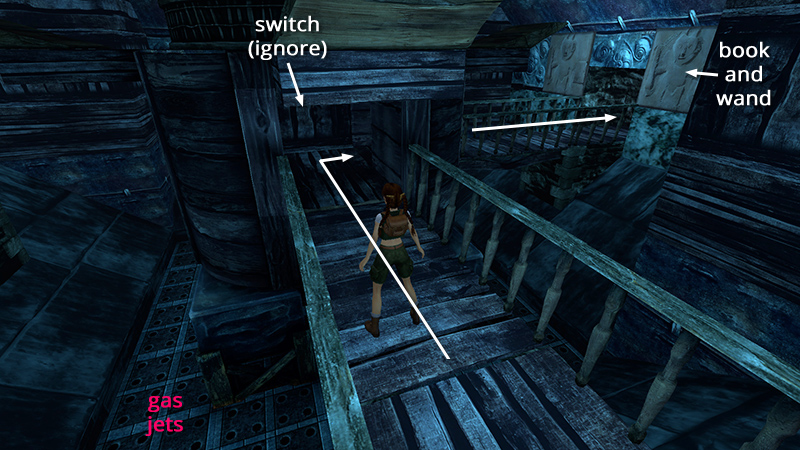
If Lara falls off the walkway here, she'll slide onto the gas jets, which will then ignite. Cross the bridge to the central structure but don't pull the switch. Instead, turn right, cross the other bridge and enter the BOOK-AND-WAND STAIRWELL.
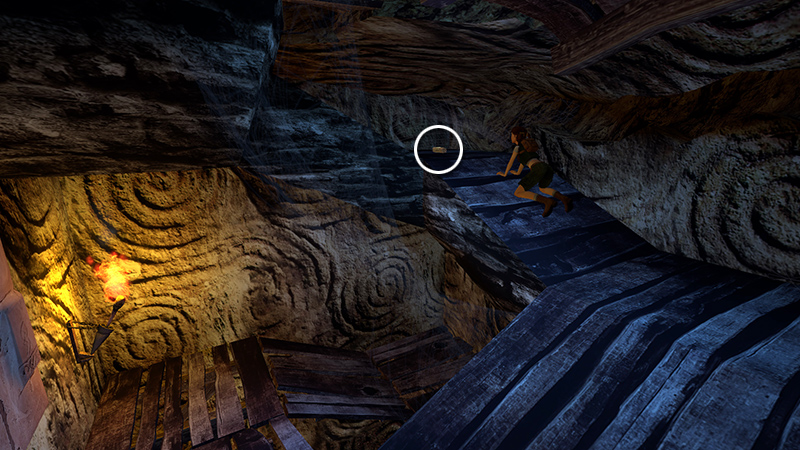
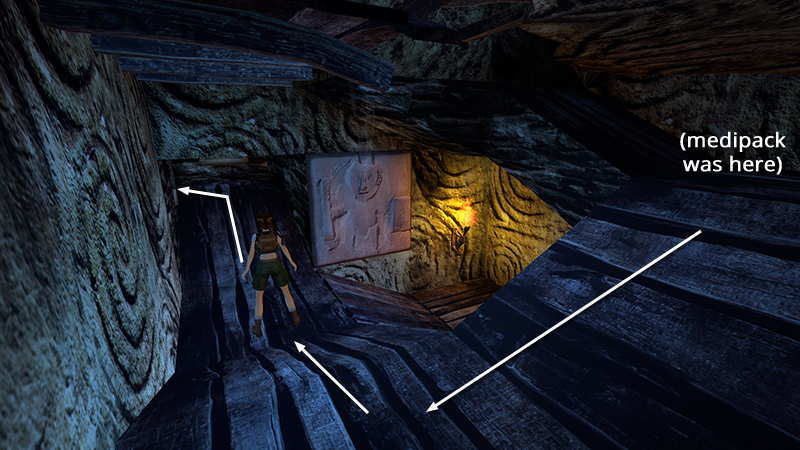
Go up the spiraling wooden ramps to the very top. Here you'll find a crawlspace with a small medipack (7) (159/239).
Move back down to the topmost landing with an open doorway.
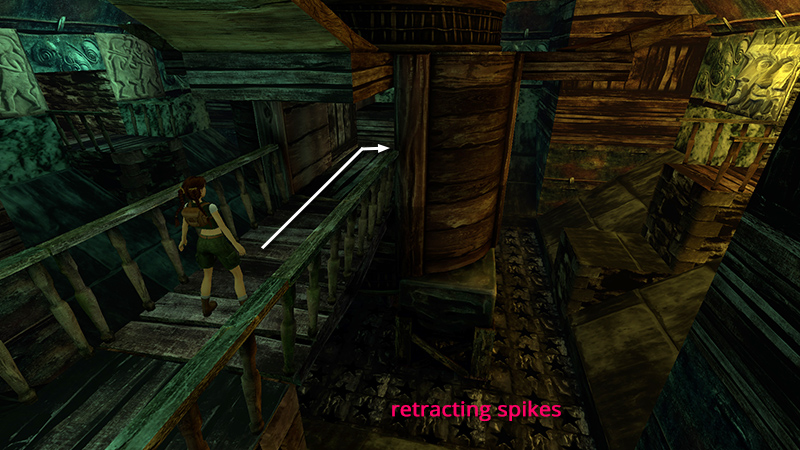
Go through to a LARGE ROOM WITH A SPIKED FLOOR. The spikes are retracted. All you see are star-shaped holes. But if Lara slides down, the spikes will pop up and kill her. The bridge should be in position so Lara can cross from the book-and-wand doorway to the central structure.
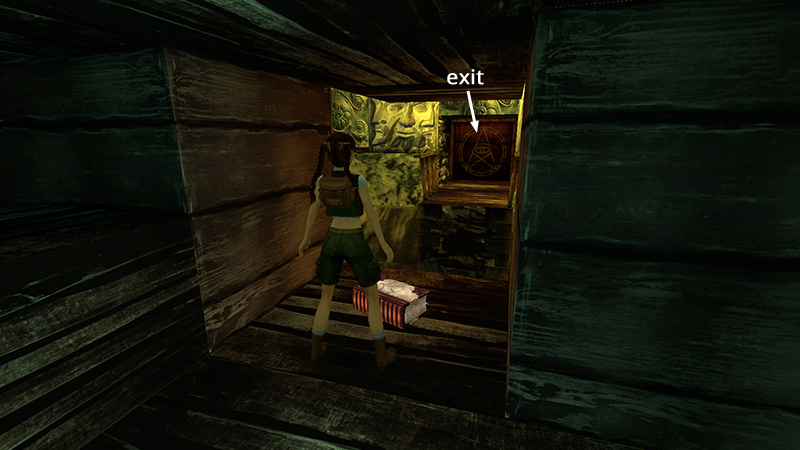
When you pick up the BESTIARY (8) (160/239), the exit opens, just across the way, between the TRIPLE-FACE plaques.
DARK MODE: I plan to add optional dark mode for these pages, but my current priority is updating the walkthroughs. Meanwhile, may I suggest a reputable dark mode browser extension, such as Dark Reader? (Download only from trusted sites, like darkreader.org or your browser's web store.)
Walkthrough text and diagrams copyright © Stellalune (email ). Feel free to copy or print this walkthrough for personal use. By all means, share it with friends, but please include this credit line so people can send me their feedback. No part of this walkthrough may be reproduced on another site without permission.