Labyrinth - Secret #1 and Tower Entrance
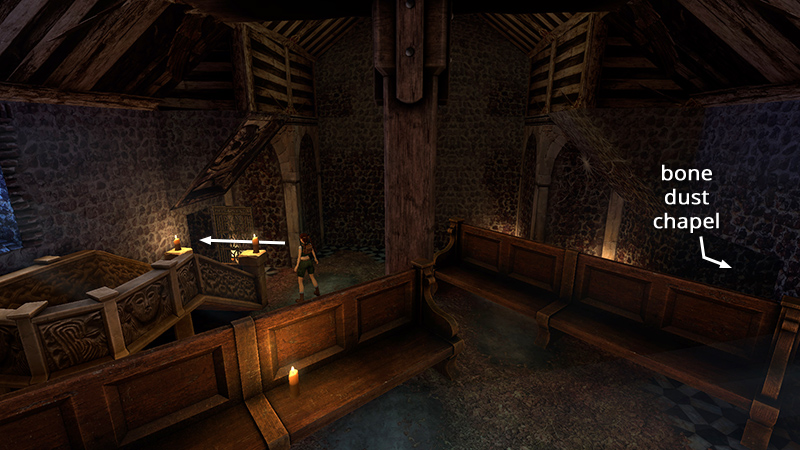
After obtaining and using the BONE DUST, as shown in the previous section, the wrought-iron gate in the back left corner of the chapel stands open. Go through...
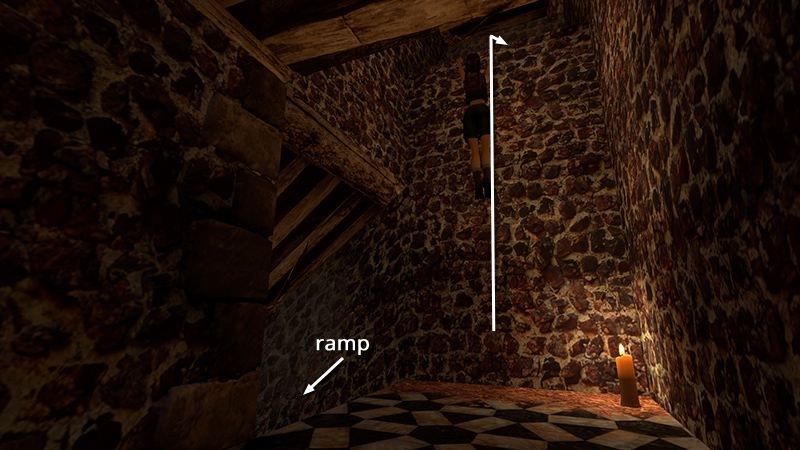
...but don't slide down the ramp yet. Instead, climb onto the ledge above. (It's just ahead if the ramp is on Lara's left.)
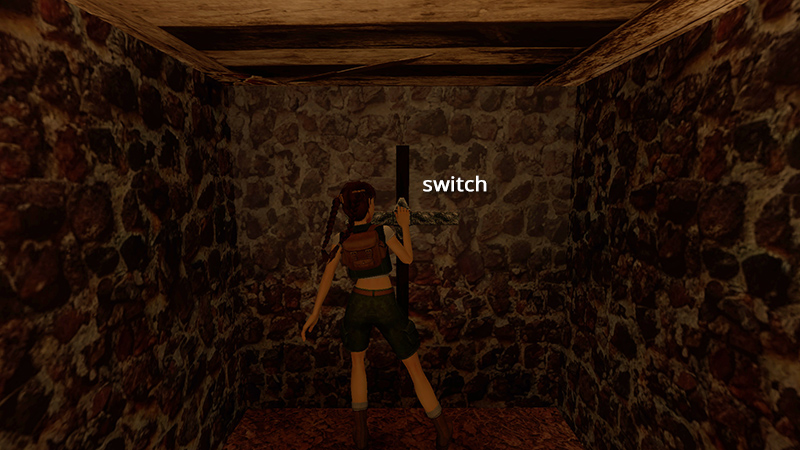
Pull the switch to open the wrought-iron gate in the side chapel where you found the BONE DUST.
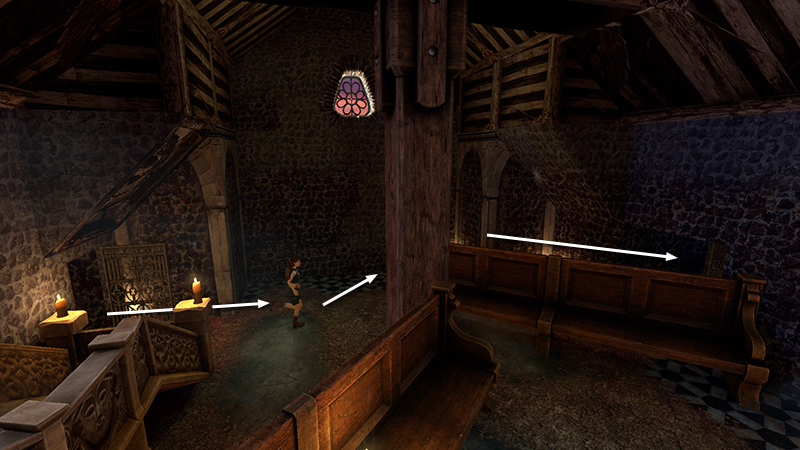
Drop down and return to the side chapel.

Behind that gate, pick up a large medipack (3) (155/239).
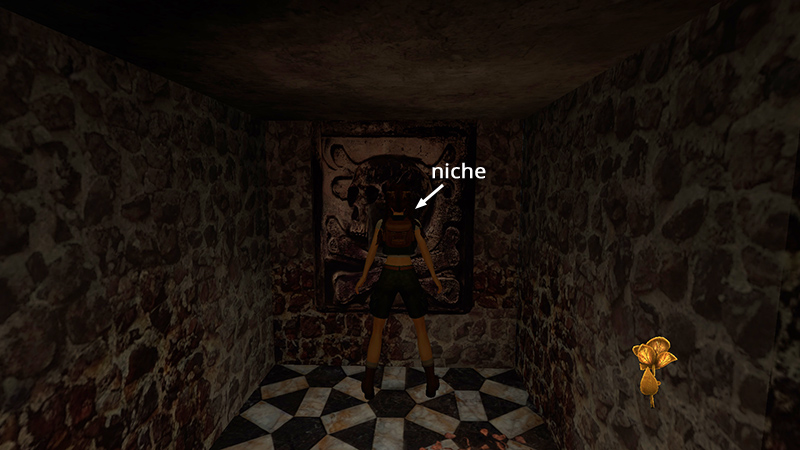
Then reach into the niche to find a golden rose (4) (156/239) (SECRET #1, 22/36).
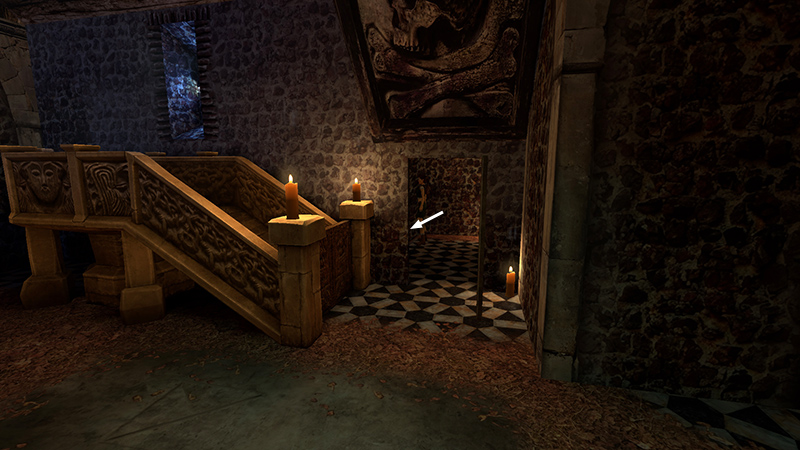
Return to the top of the ramp and slide down into a SMALL ROOM WITH SKELETON NICHES AND WOODEN BEAMS.
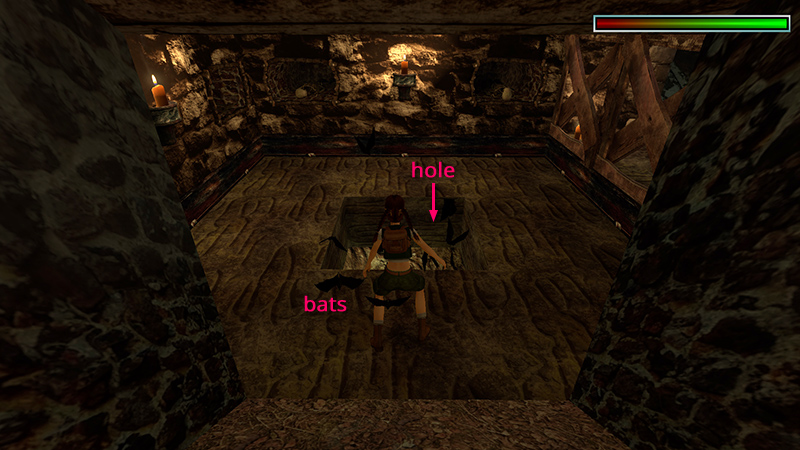
Watch out for the hole in the floor as you dodge another flock of bats.
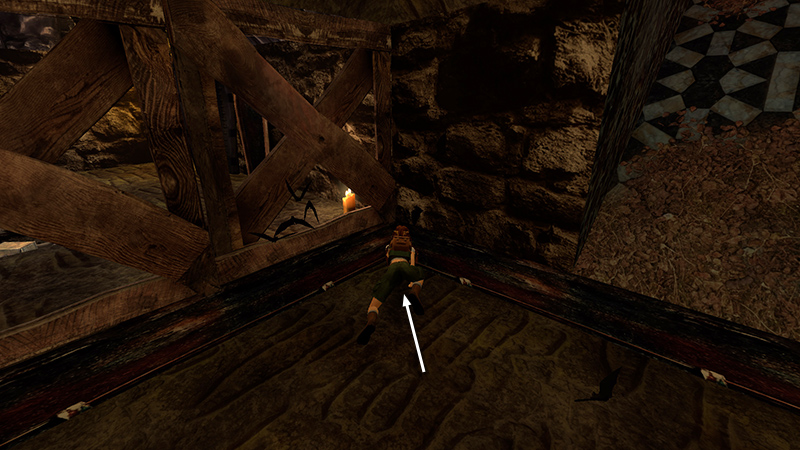
If you like you can crawl into a corner to minimize damage. Or, slide down and immediately roll and grab the edge of the hole. Then drop through into the room below.
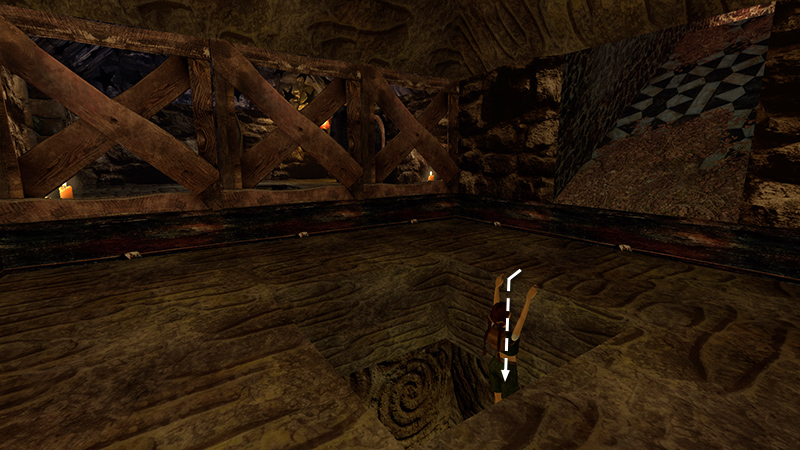
Through the wooden beams on one side of the room, you can see another SMALL ROOM WITH COFFINS AND STARS ON THE CEILING beyond. (We'll reach that area later.) Safety drop through the hole in the floor into a small pool of stagnant water far below. (That is, hang from the edge of the hole, then drop. Don't just step off the edge or Lara will take damage when she lands on one of the ledges below.)
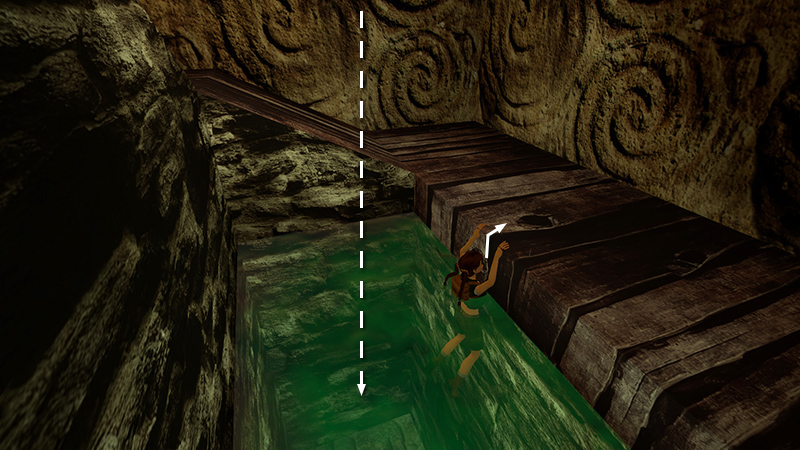
Climb out of the pool.
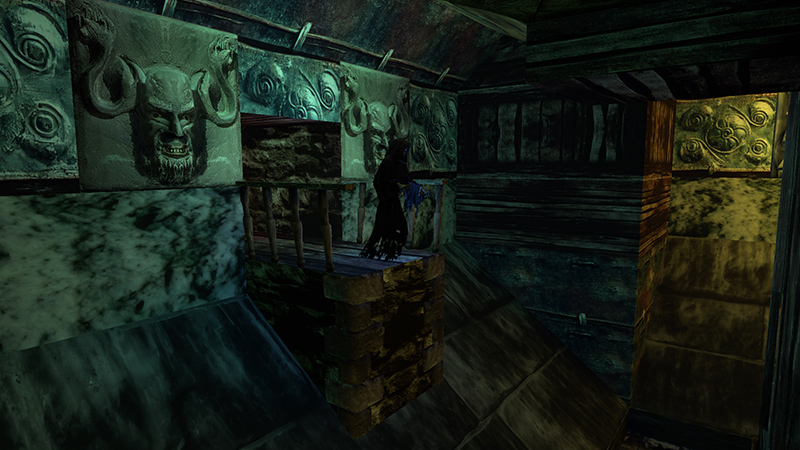
Cutscene: Lara looks up into the tower and gasps. The hooded skeleton moves through the area above. It is showing Lara the way out. Notice he's coming through a doorway flanked by carved faces wearing ram-horned helmets, crossing a platform with a book on it...
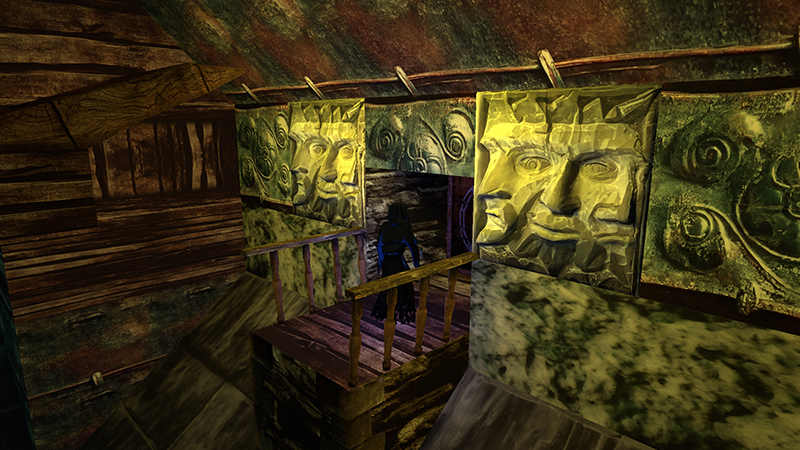
...and floating out through a doorway flanked by a triple-face symbol. (This all comes into play in the following sections.)
DARK MODE: I plan to add optional dark mode for these pages, but my current priority is updating the walkthroughs. Meanwhile, may I suggest a reputable dark mode browser extension, such as Dark Reader? (Download only from trusted sites, like darkreader.org or your browser's web store.)
Walkthrough text and diagrams copyright © Stellalune (email ). Feel free to copy or print this walkthrough for personal use. By all means, share it with friends, but please include this credit line so people can send me their feedback. No part of this walkthrough may be reproduced on another site without permission.