Deepsea Dive - From the Wreck to Back to the Submarine
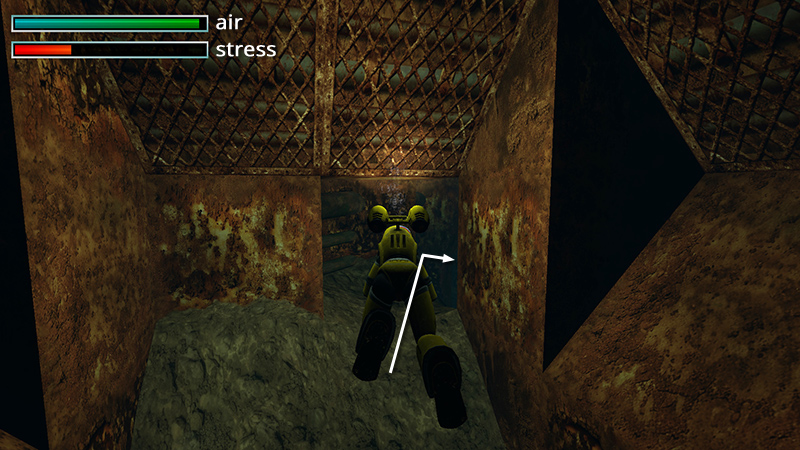
After retrieving the SPEAR OF DESTINY, as shown in the previous section, Lara's suit is punctured and she's running out of air. (Even the coolest of cucumbers has to be feeling a little stress right now.) Lara is facing the exit after the cutscene, so quick-save and swim through and to the right.
The next opening is up to the left.
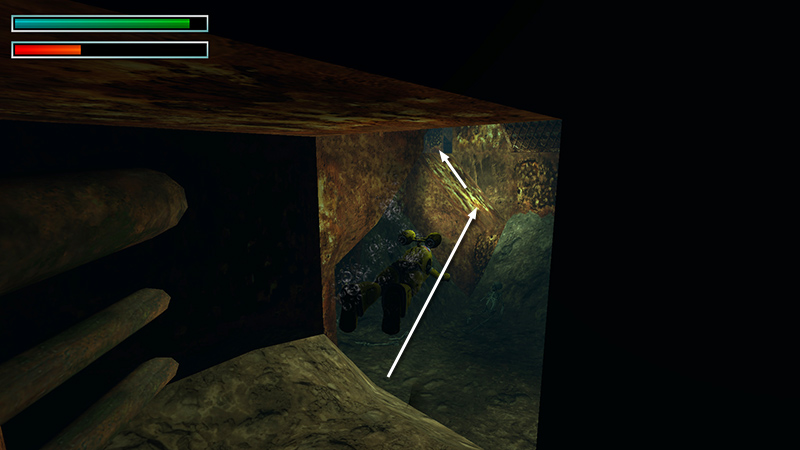
The one after that is on the opposite side of the chamber near the top.
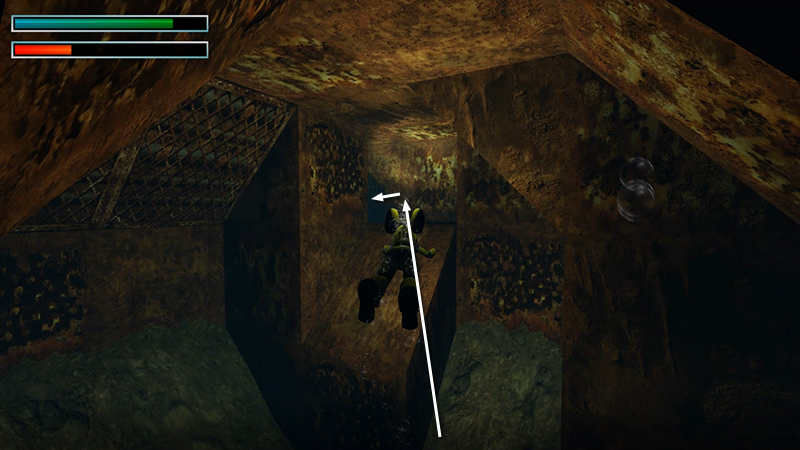
The last is near the bottom.
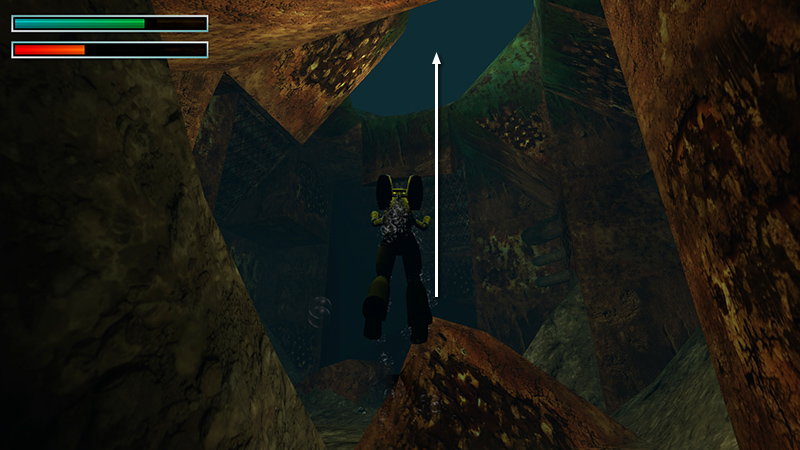
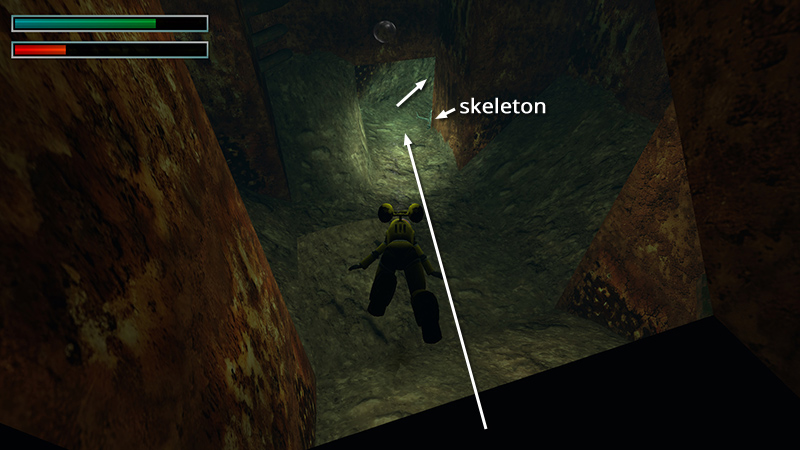
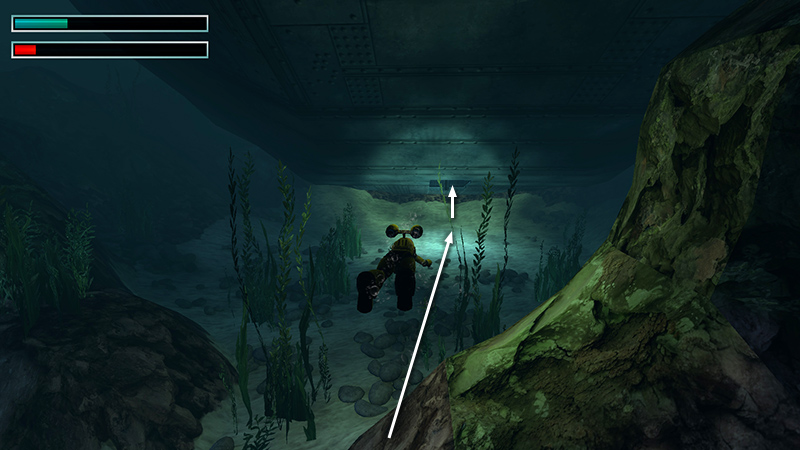
Once inside the larger hollow in the wreckage, head straight up through the wide opening.
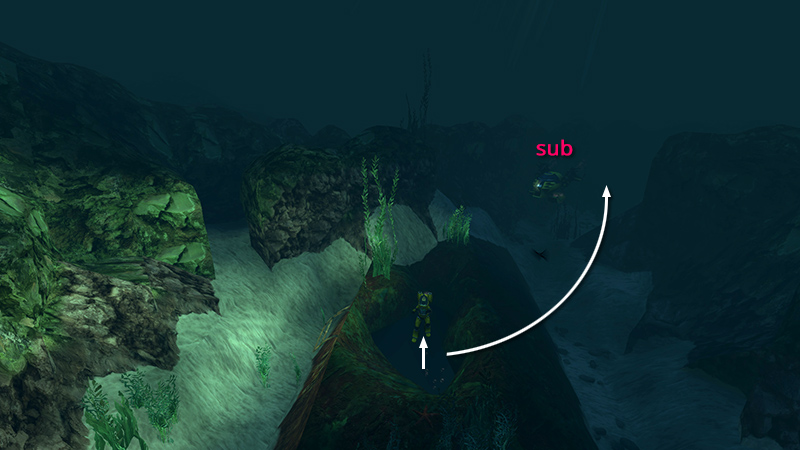
The submersible is waiting outside. As you exit the hole, if you haven't gotten turned around, the sub will be behind and to Lara's left. Turn around and swim toward it...
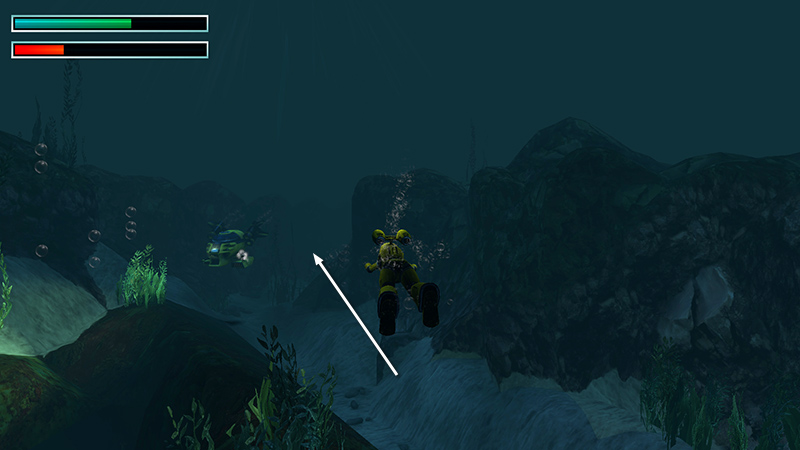
...dropping a chaff flare or two as you go. Behind the little sub is a break in the rocks that leads back toward the big submarine.
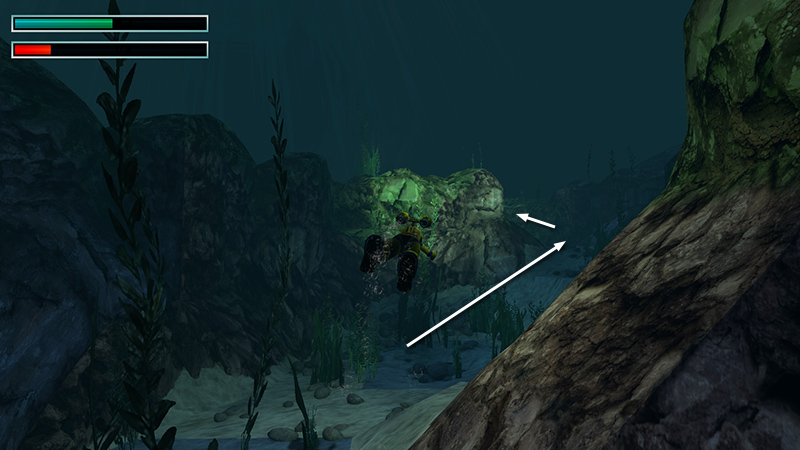
Follow this path forward and around to the left, between the rocks. The current will carry Lara the way she needs to go. Swim with it. (This is the channel you couldn't enter earlier because of the current.)
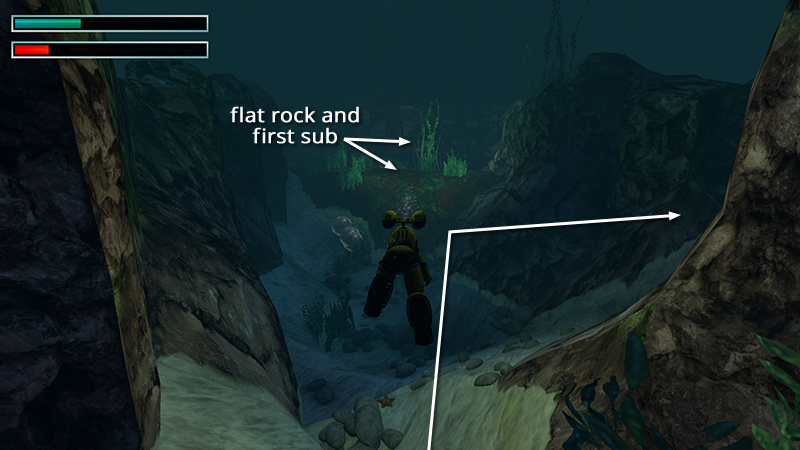
When you see a flat rock shelf ahead (and possibly the first mini-sub off in the distance), don't swim toward it. Instead, turn right between the rock outcroppings.
The big sub is now directly ahead. Swim under it and up through the open hatch.
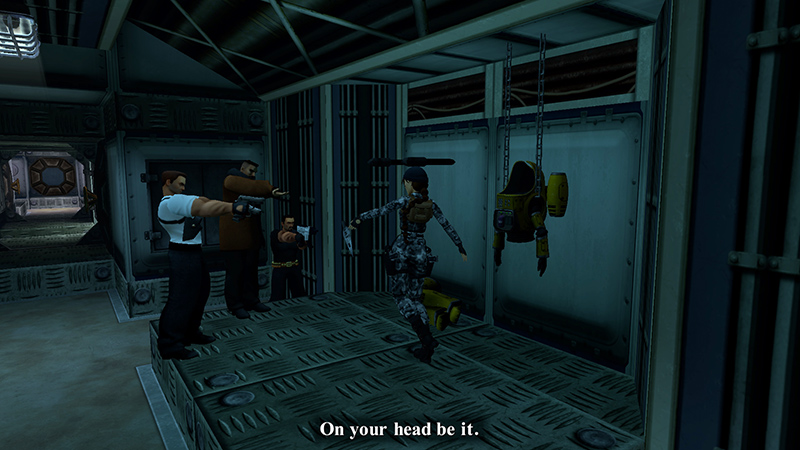
Cutscene: Lara re-enters the sub and takes off the diving suit. As she stops to examine the spearhead, she's interrupted by Mikhailov and his goons. She reluctantly gives up the artifact, but apparently it doesn't like the gangster very much. As the henchmen drag Lara away, the spear gives Mikhailov a nasty shock, which also damages the submarine. Alarms blare as the boat begins to sink.
DARK MODE: I plan to add optional dark mode for these pages, but my current priority is updating the walkthroughs. Meanwhile, may I suggest a reputable dark mode browser extension, such as Dark Reader? (Download only from trusted sites, like darkreader.org or your browser's web store.)
Walkthrough text and diagrams copyright © Stellalune (email ). Feel free to copy or print this walkthrough for personal use. By all means, share it with friends, but please include this credit line so people can send me their feedback. No part of this walkthrough may be reproduced on another site without permission.