Deepsea Dive - The Spear of Destiny
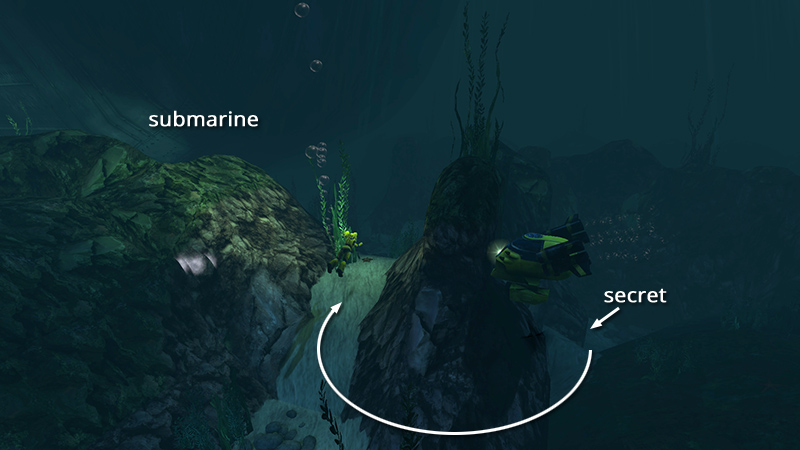
After obtaining the level's only secret, as shown in the previous section, swim back out of the area with the first hostile submersible. Beyond the waving clump of seaweed (and the big sub off to Lara's left)...
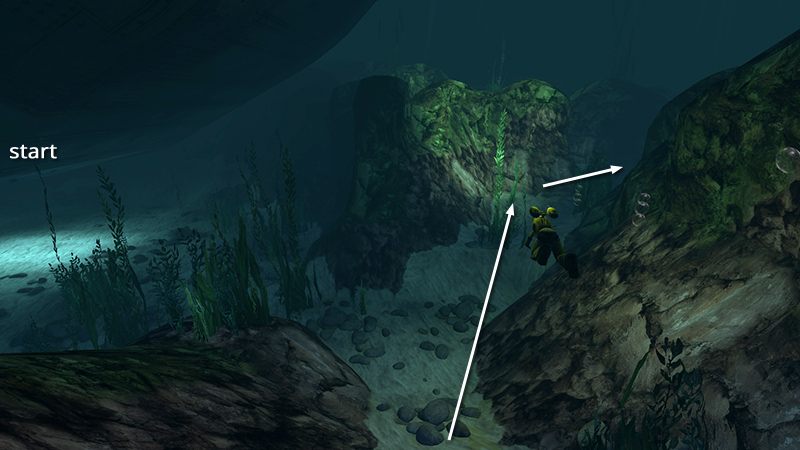
...continue forward then to the right, along the other path between the rocks.
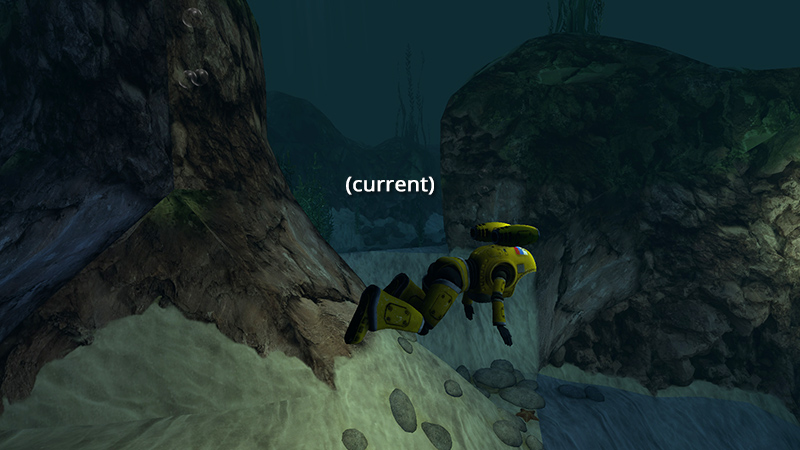
Just around the corner, the rock formations again force you to turn left or right. A strong water current prevents you from following the path to the left.
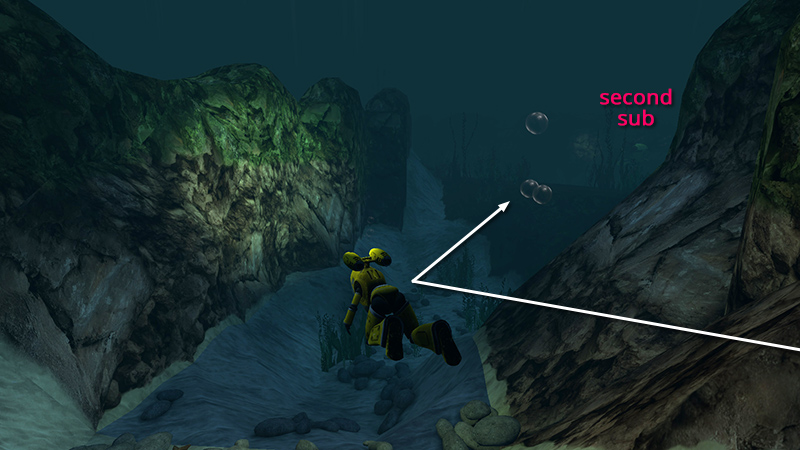
So head to the right, into another open area with a second hostile mini-sub. If you already have the "Silent Raider" achievement/trophy, skip the next two screenshots and pick up the walkthrough below. Otherwise, swim toward the sub to get its attention.

Then turn around and return to the gap in the rocks. If you lurk in the gap, where you can see the big sub just ahead, the small sub should begin firing torpedoes at Lara.
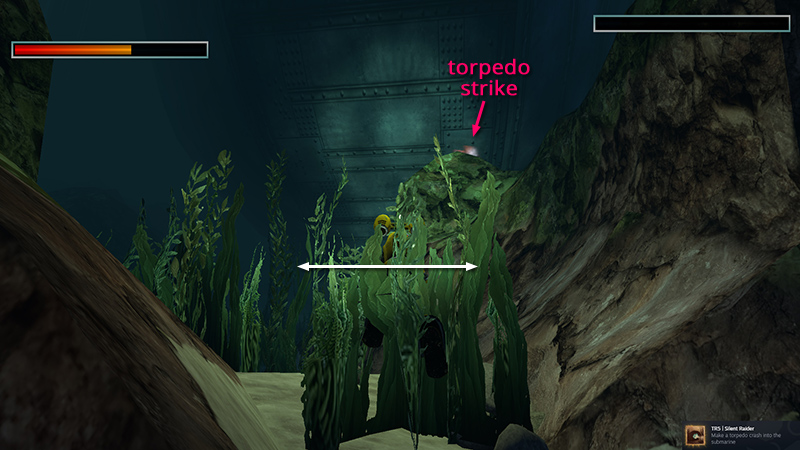
If you swim back and forth in this opening, you may take a hit or two, but one of the torpedoes should eventually strike the big sub, unlocking the achievement.
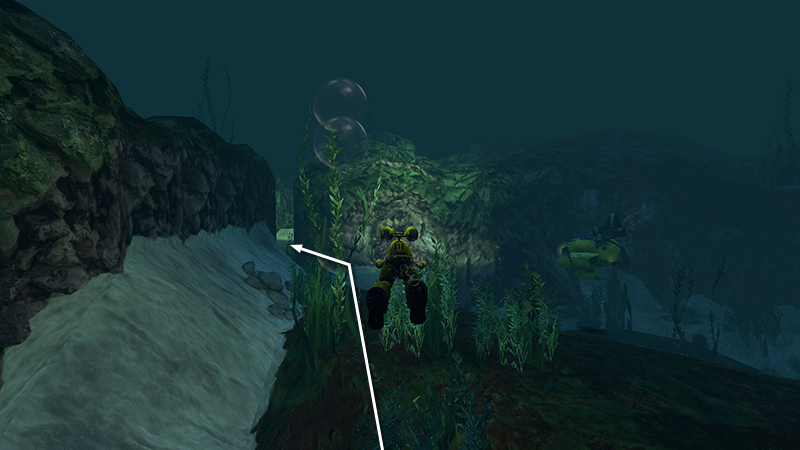
When you're ready to move on, swim into the area the second sub is guarding. (If you still have chaff flares, drop one to distract the sub.) Head for the gap in the wall on the left.
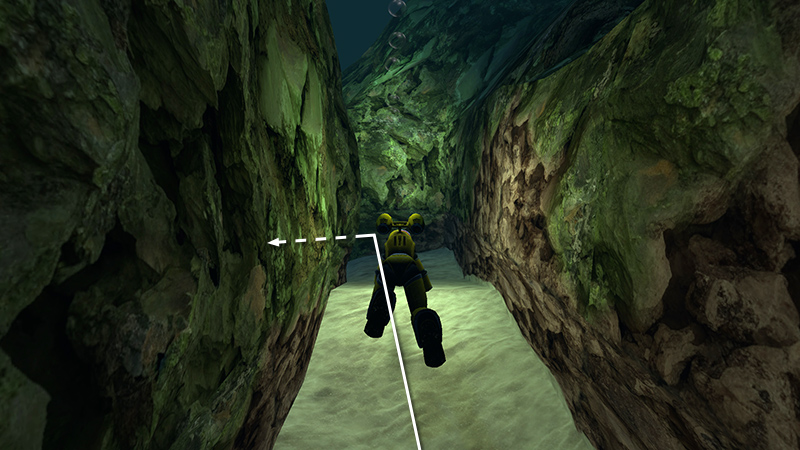
Swim through this narrow channel, forward then left...
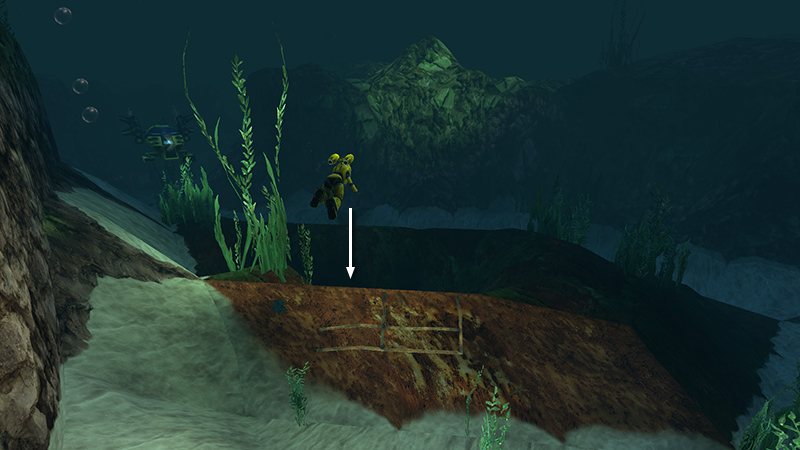
...into an open area with another hostile sub guarding an entrance to the wreckage. Quickly swim down through the hole in the rusted U-boat hull.

Inside, swim down then forward through the passageway behind the skeleton.
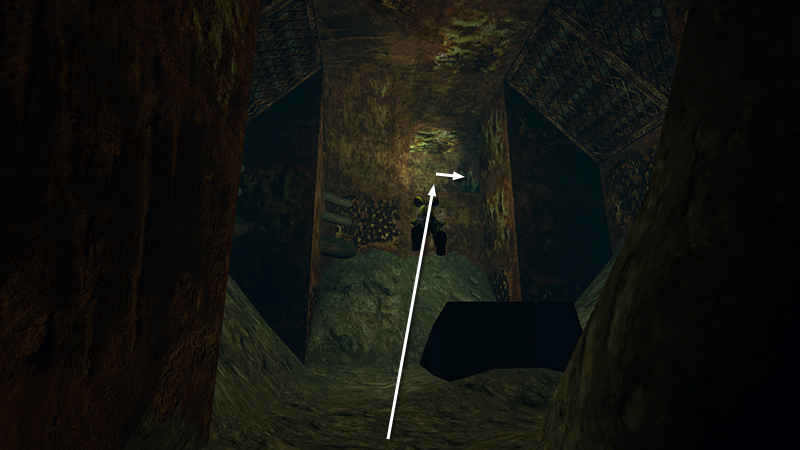
Swim through this second chamber and into the raised opening on the other side.
Swim across a third chamber and out the other side.
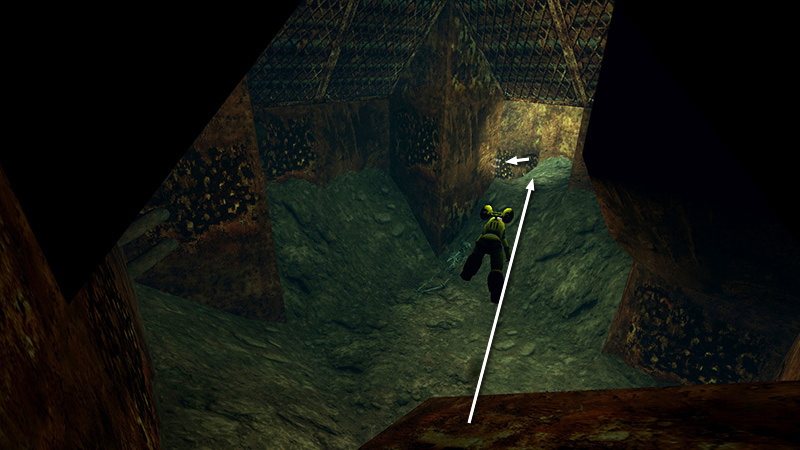
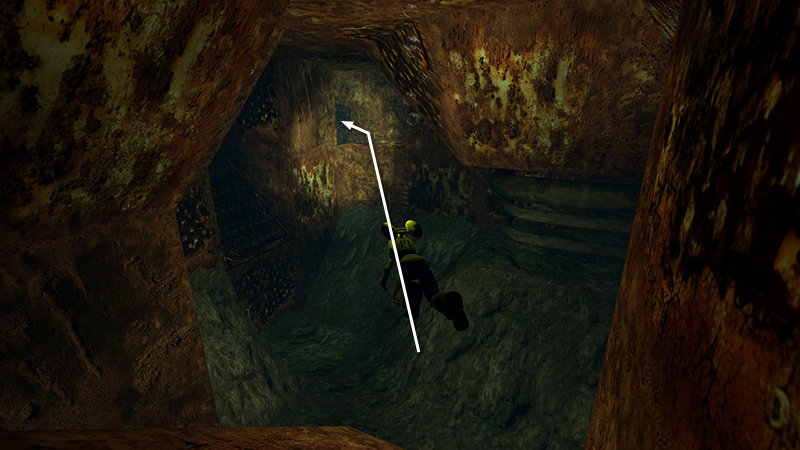
The fourth connecting chamber has metal lattice panels on the ceiling. Swim across the chamber and into the next opening to trigger a cinematic.
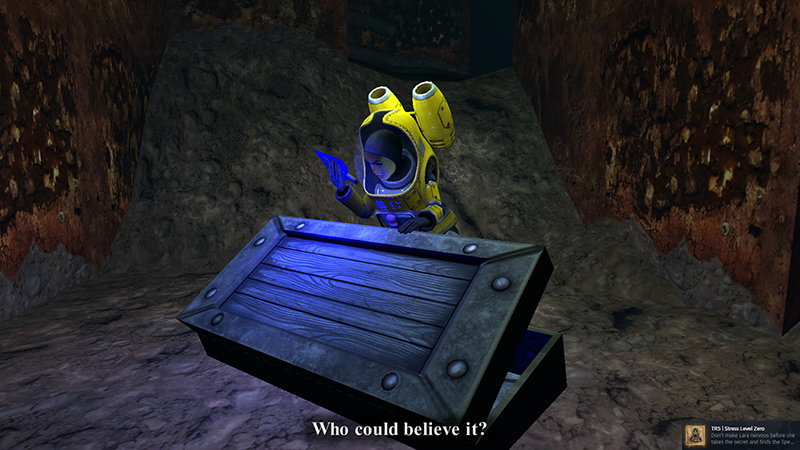
Cutscene: Lara discovers a well-preserved wooden crate. She pries it open and lifts out the SPEAR OF DESTINY (2). "Ah, who could believe it," she remarks. But her elation is short-lived. The ceiling begins to collapse, damaging her suit. "Puncture. Time to leave."
When the cutscene ends, Lara's aqualung no longer works. You'll need to return to the big sub in a hurry.
NOTE: If you haven't already unlocked the "Stress Level Zero" achievement/trophy, reload your level-start save and repeat the sequence—from the big sub, to the secret, to the spear—without taking damage or scraping the diving suit against the rocks. Quick-save if things are going well, but don't overwrite your original save. If you see the stress meter at the top left, you've failed and need to start again. (Again, the note at the beginning of the main walkthrough covers this.)
DARK MODE: I plan to add optional dark mode for these pages, but my current priority is updating the walkthroughs. Meanwhile, may I suggest a reputable dark mode browser extension, such as Dark Reader? (Download only from trusted sites, like darkreader.org or your browser's web store.)
Walkthrough text and diagrams copyright © Stellalune (email ). Feel free to copy or print this walkthrough for personal use. By all means, share it with friends, but please include this credit line so people can send me their feedback. No part of this walkthrough may be reproduced on another site without permission.