Tomb of Semerkhet - Ba Cartouche Door -
Obtaining the Ra Cartouche (part 2)
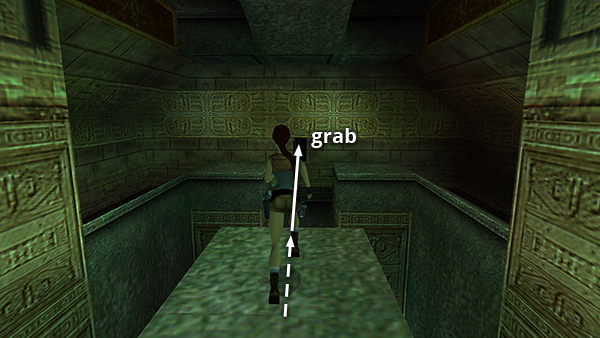
Now for phase 2: Once again take a running jump from the walkway to grab the switch. Drop, slide down the short slope, roll, and run/jump to either of the climbing poles (as shown in part 1).
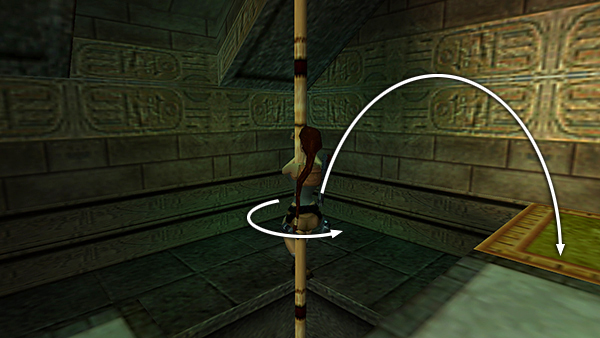
This time you may want to turn on the pole until the green tile where the senet piece started is behind Lara before jumping off the pole.
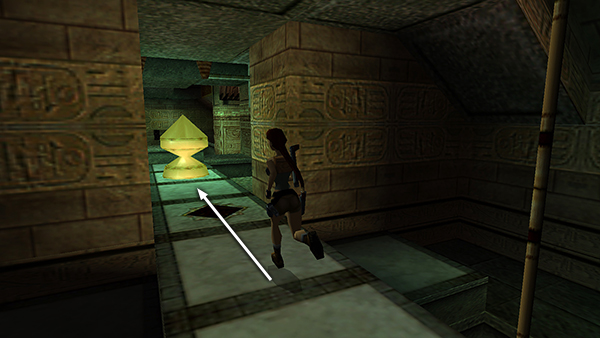
Now run to the senet piece...
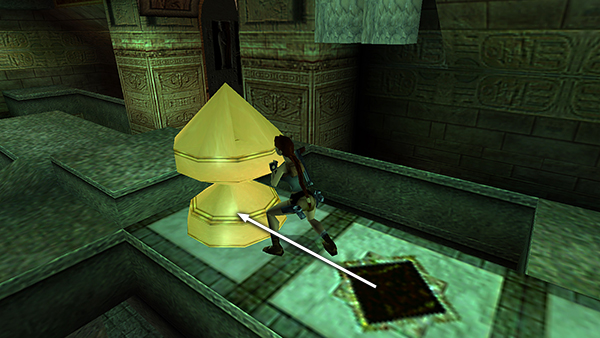
...and push it forward between the giant hammers at the end of the walkway.
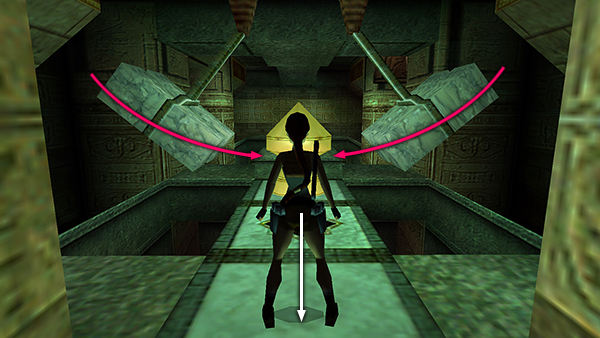
Immediately hop back from the hammers and the burner. The hammers then smash the senet piece revealing an artifact inside.
As long as the burners have not yet reignited, you can step forward to pick up the RA CARTOUCHE. If the burners are lit, follow the sloping walkway around to either side to reach the cartouche. Once you have the artifact, exit to the main room.
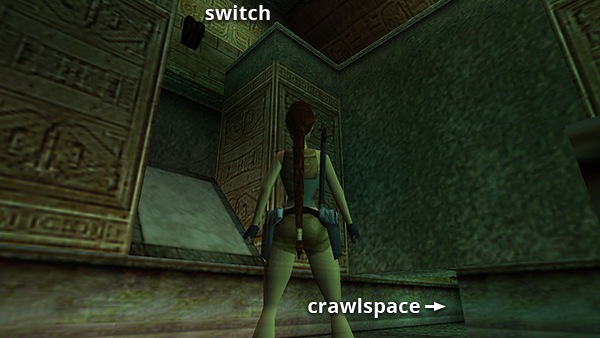
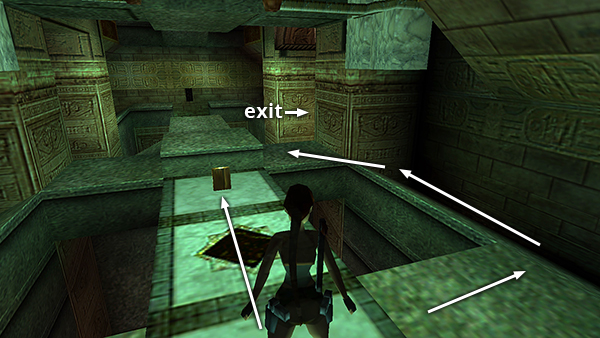
NOTE: If you accidentally become trapped on the walkway near the climbing poles while the burners are lit, it's no problem. Just safety drop to the floor and head for the south end of the room. In the right corner below the switch is a crawlspace. Crawl in there. A trapdoor opens above, enabling you to climb the ladder to the ROOM WITH TWO DANGLING ROPES. From there, go back through the BA CARTOUCHE DOOR to the walkway.
Copyright © 1999- - Stellalune ( ). All rights reserved. Feel free to copy or print this walkthrough for personal use. By all means, share it with friends, but please include this credit line so people can send me their feedback. No part of this walkthrough may be reproduced on another site without permission. Follow this link for details about this site's advertising and privacy policy.