The Great Wall - "Crane Dive," "10/10," and "20/10" Achievements/Trophies
"Crane Dive" requires you to "dive into a lake from the top of the guardhouse." The others, "10/10" and "20/10," involve doing a somersault dive and double somersault dive, respectively, into water. We can unlock all three at once if we find the right starting point.
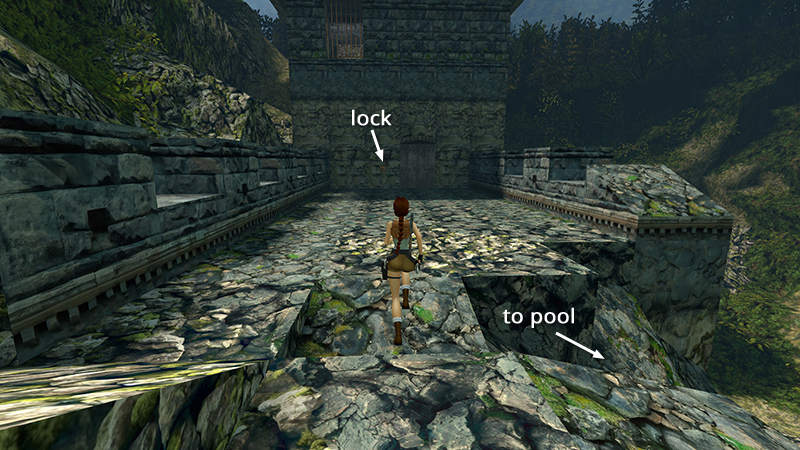
Begin by approaching the SECOND GATEHOUSE.
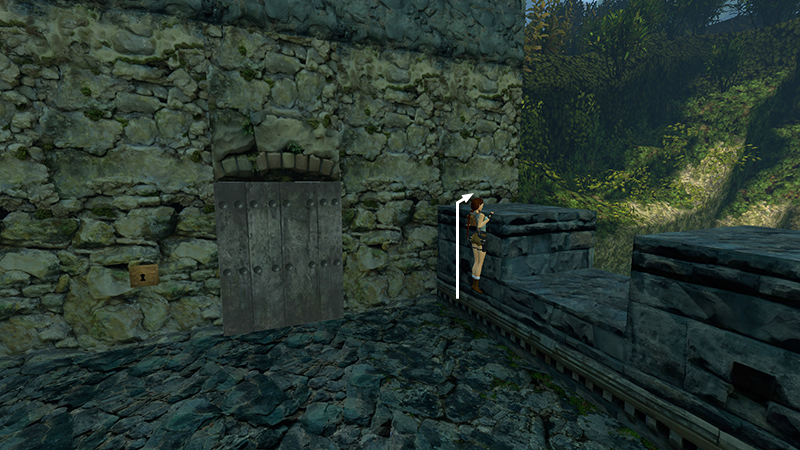
Climb onto the wall to the right of the locked door.
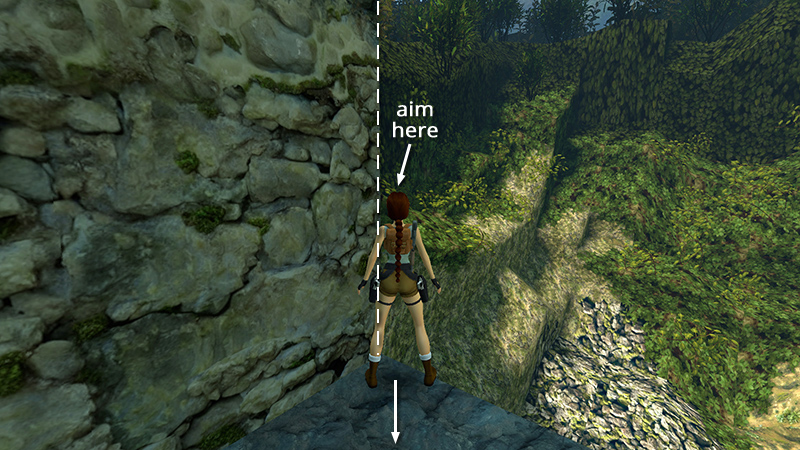
Stand just to the right of the corner of the building, facing the greenery-covered ledge beyond, as shown above. Hop back.
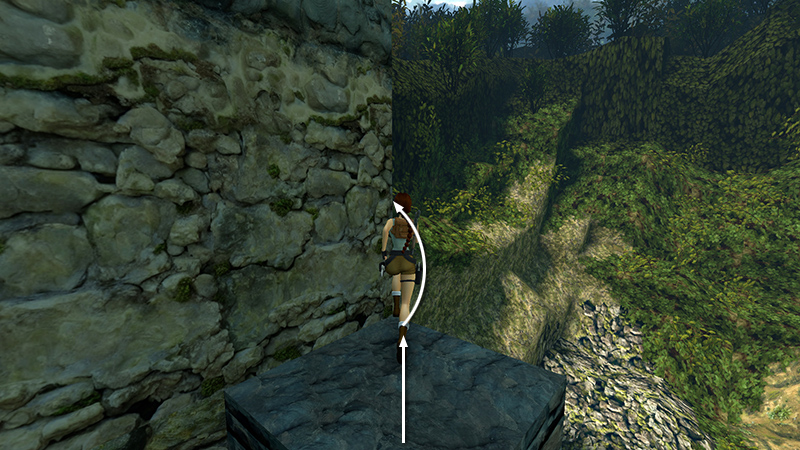
Then take a running jump, briefly pressing Left while Lara is in the air to curve the jump slightly in that direction...
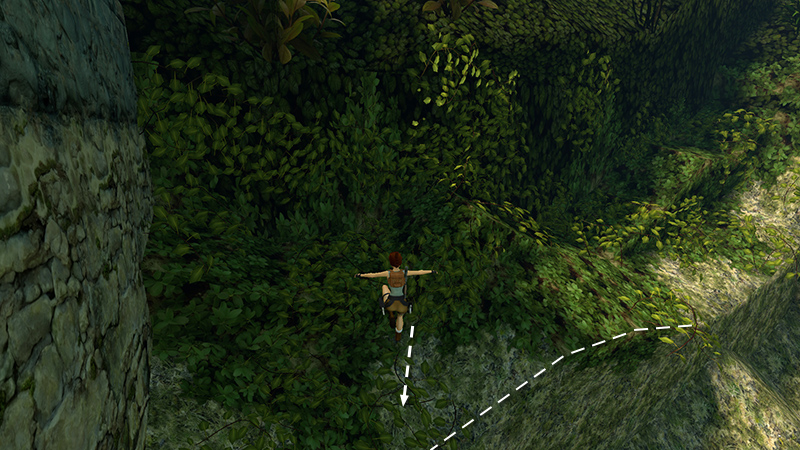
...ensuring that she sticks the landing.
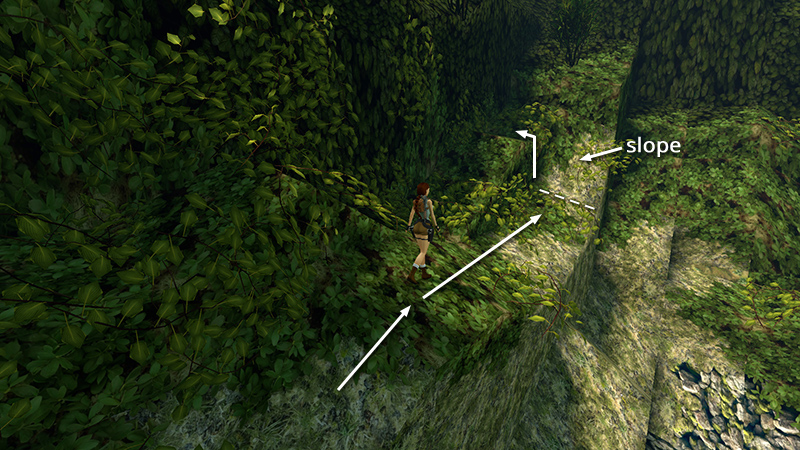
Now make your way around the perimeter of this open area, back to the FIRST GUARDHOUSE. Start by following this ledge nearly to the end. When you can't go any farther, due to the steep slope ahead, climb onto the block on the left.
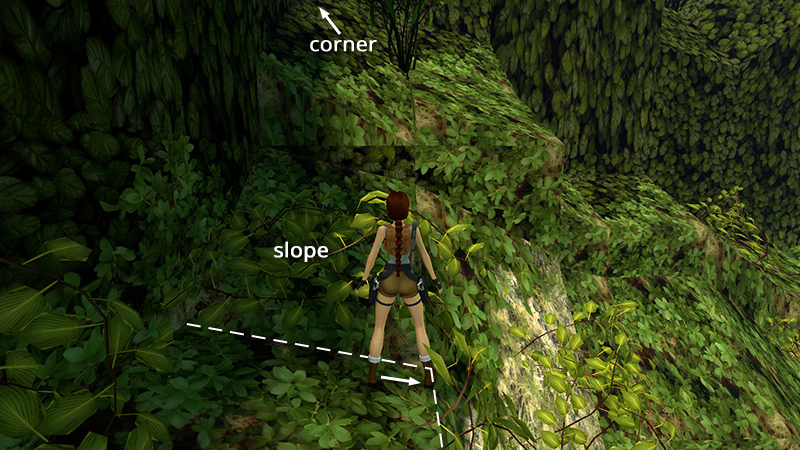
Turn so the corner of the outer wall is ahead and to the left. Then walk forward to the base of the next slope. Sidestep right (i.e., hold Walk+ Right) as far as you can.
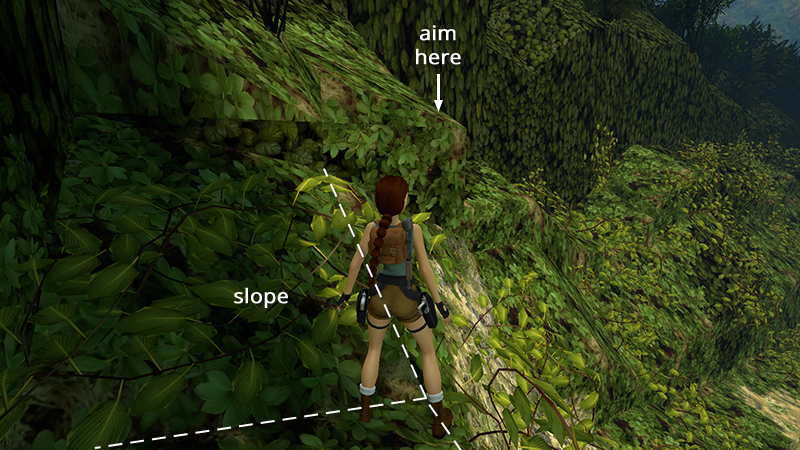
Pivot to face the higher, slightly sloped ledge ahead on the right. Aim for the lowest corner of that ledge.
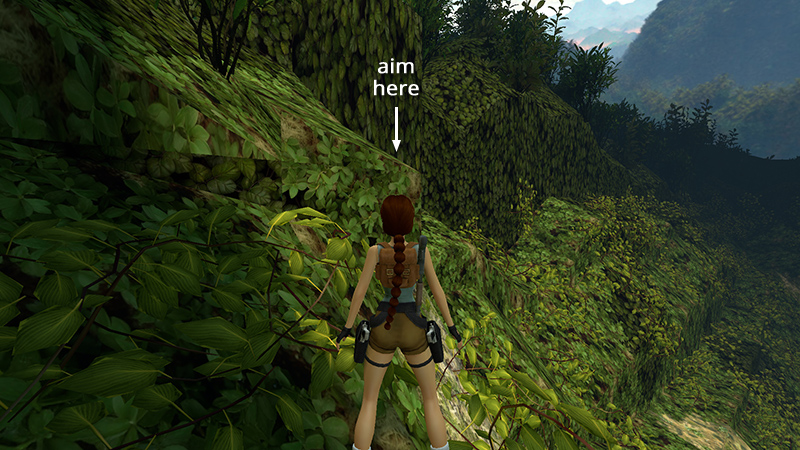
Press Look to move the camera behind Lara and check your angle. Adjust if necessary.
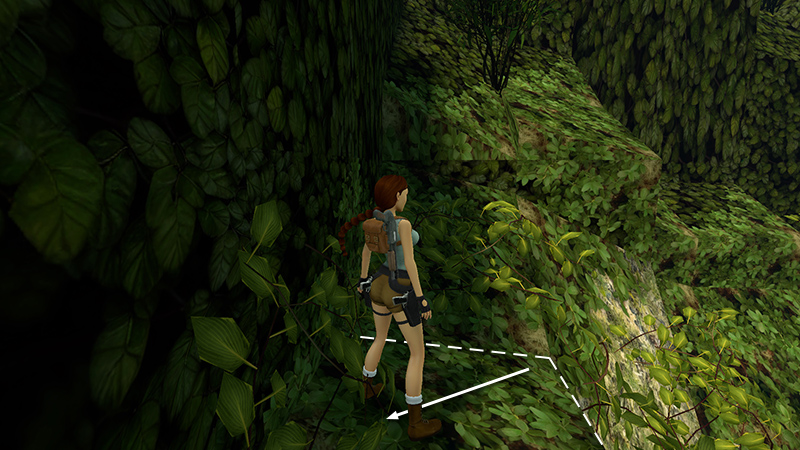
Hop back once.
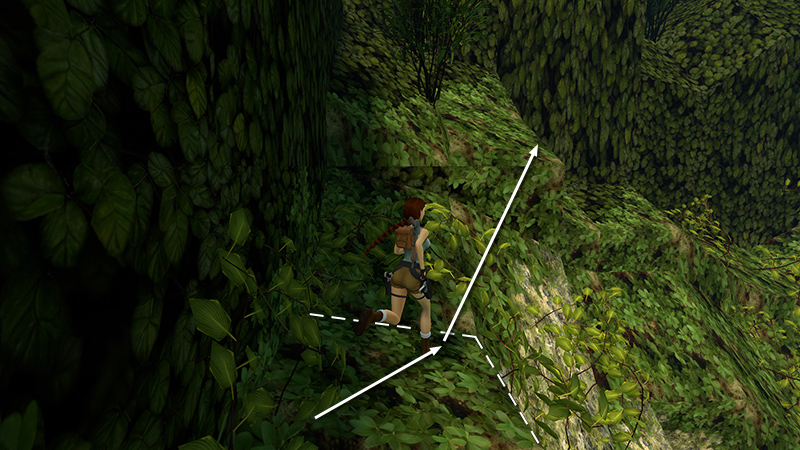
Then, take a running jump (without grabbing) to land on the higher block.
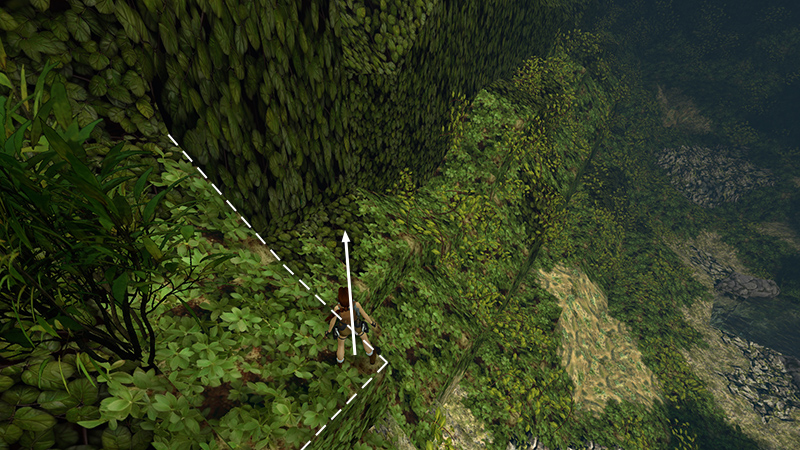
Take a standing jump forward onto the ledge that runs along the long, outer wall.
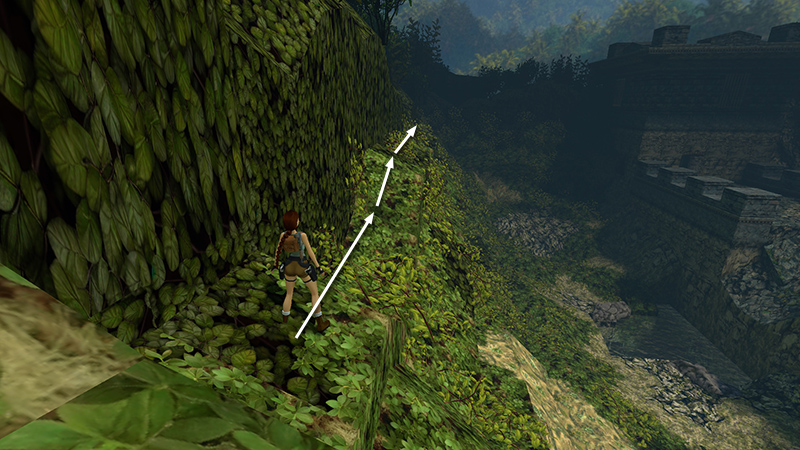
Carefully follow this ledge to the next corner. You'll need to jump up a few slopes and slide down others. None of them angle down toward the pool, so as long as you go carefully, you shouldn't fall off.
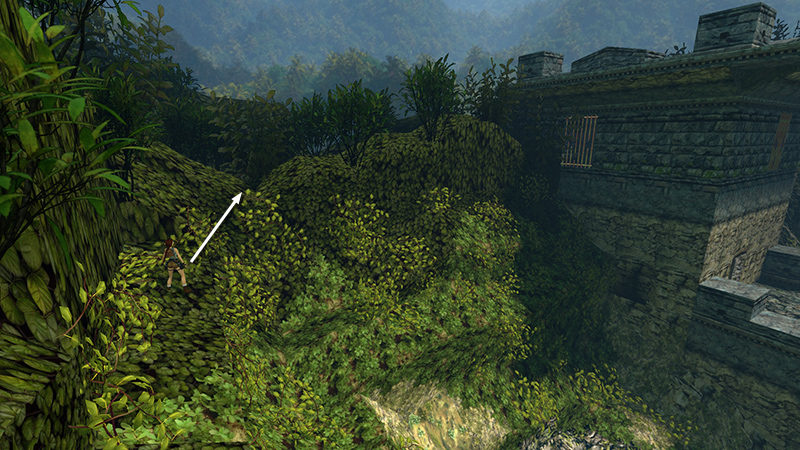
When you reach the corner and can't go any farther, you'll need to make a tricky jump onto the perpendicular wall ahead on the right. This is especially challenging thanks to the lovely vines covering the ledges. So you may want to save the game here and switch to classic graphics briefly. (F1 on keyboard, Options button on PS4/5, Menu button on Xbox, Plus [+] on Switch.)
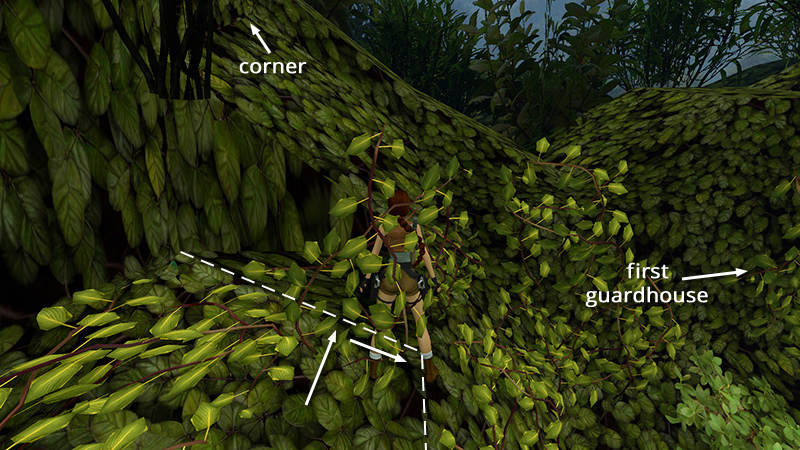
With the long outer wall on Lara's left, walk forward until her chest is against the sloping, vine covered block. Then sidestep right as far as you can. (Her right foot may appear to float in midair.)
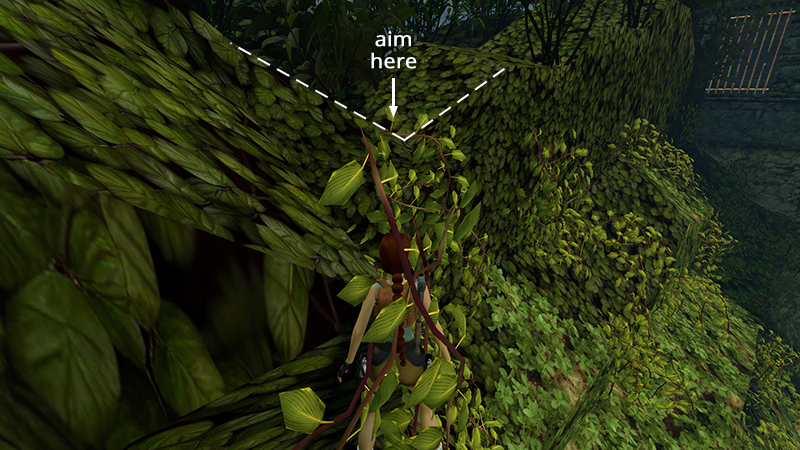
Pivot to face the 'V' where the ledge you're aiming for slopes downward.
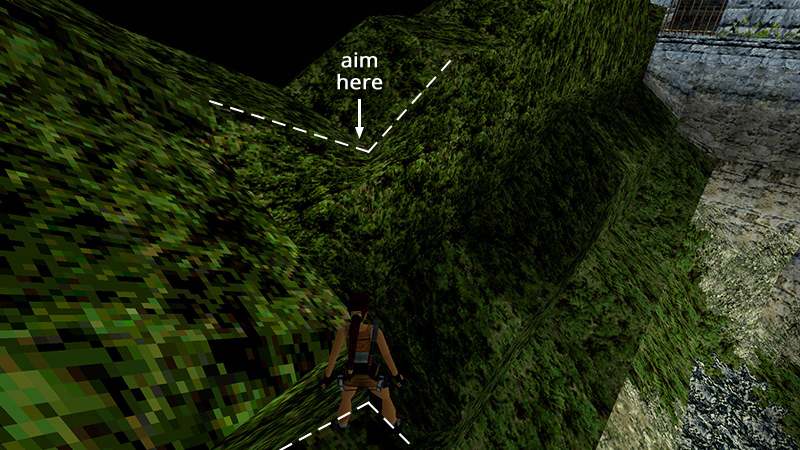
Here's the same view with classic graphics. It's a little easier to see what's what.
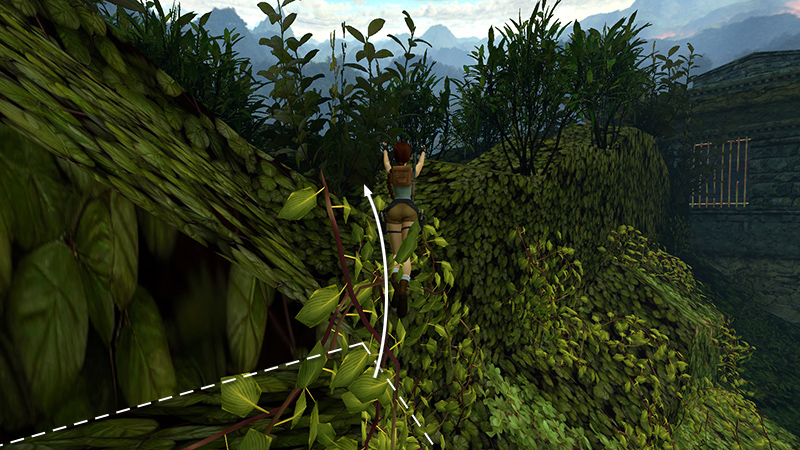
Now, take a standing jump forward, with a slight curve to the left, to land in that 'V'.
- OR -
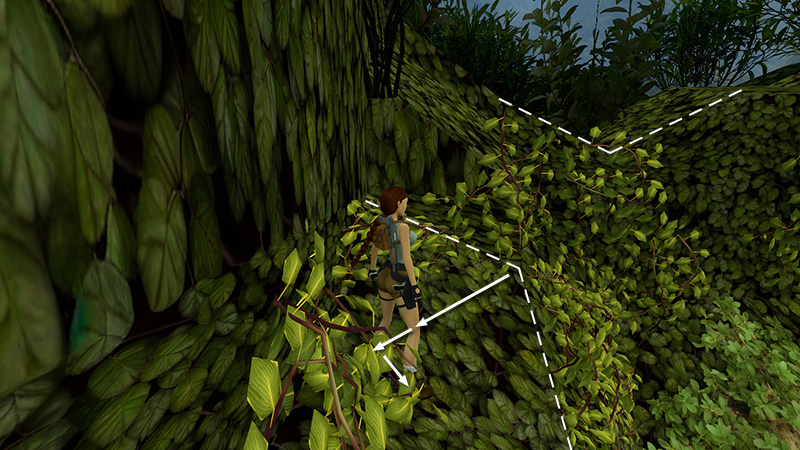
Alternatively, if the standing jump is not working for you, instead use a running jump. Maneuver Lara into the same starting position as the standing jump described above. Then take one hop back, one walking step back, and one sidestep to the right.
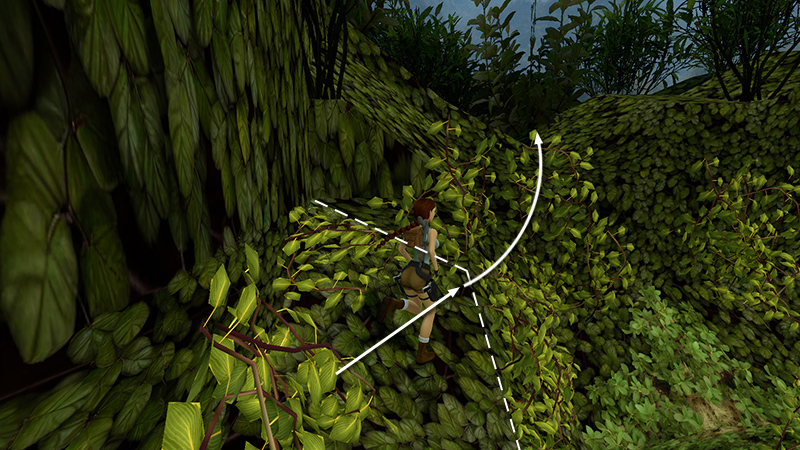
With that setup, a running jump with a slight curve to the left should land Lara in the 'V' on the higher ledge.
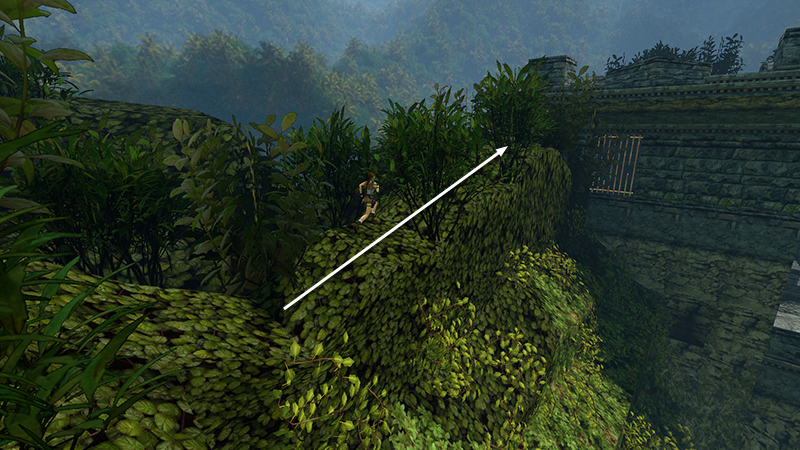
Follow this ledge toward the FIRST GUARDHOUSE.
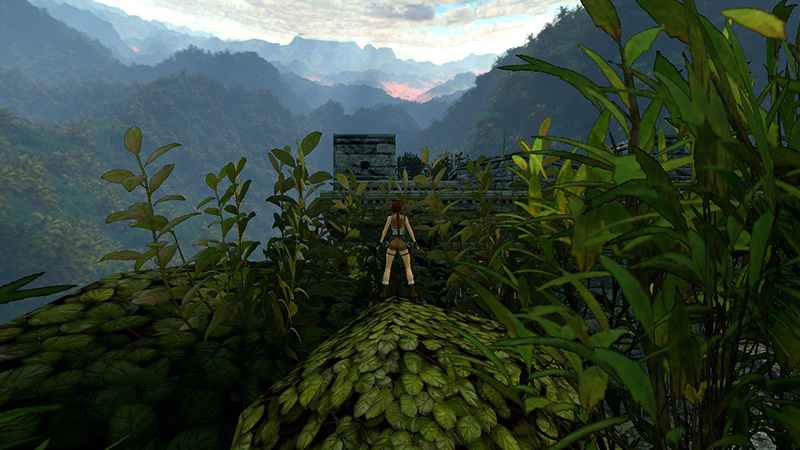
When you reach the highest point along this path, stop.
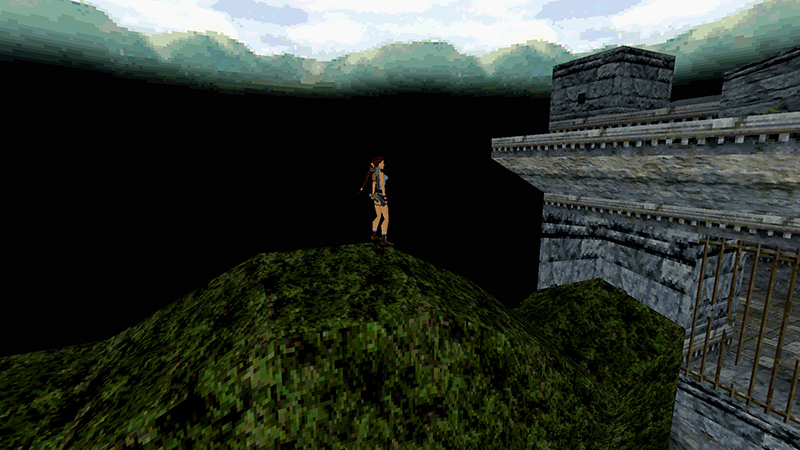
Again, it's a little easier to navigate using classic graphics without the lush greenery. This is where you want to be.
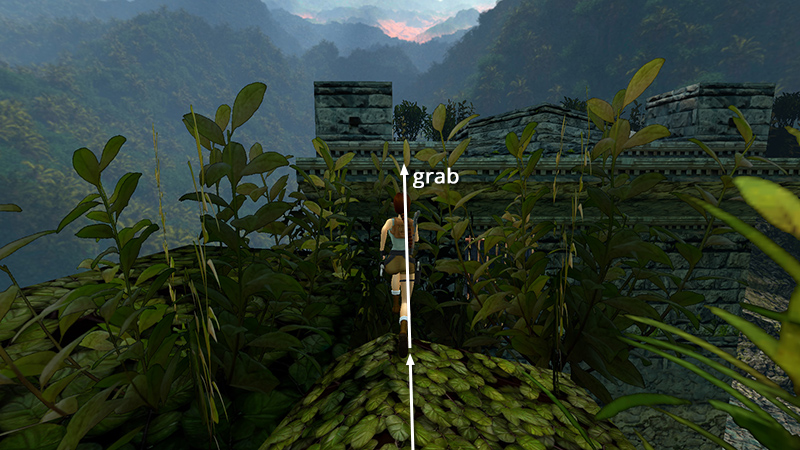
Hop back once. Then take a running jump and grab the edge of the guardhouse roof.
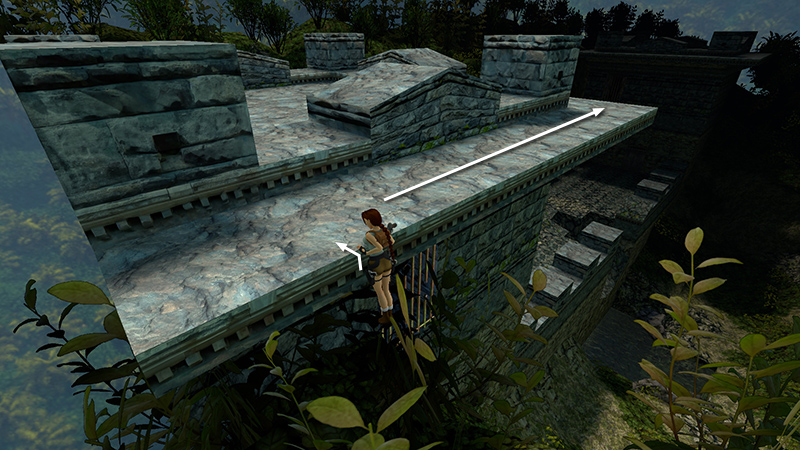
Pull up, turn right, and move out to the corner of the roof.
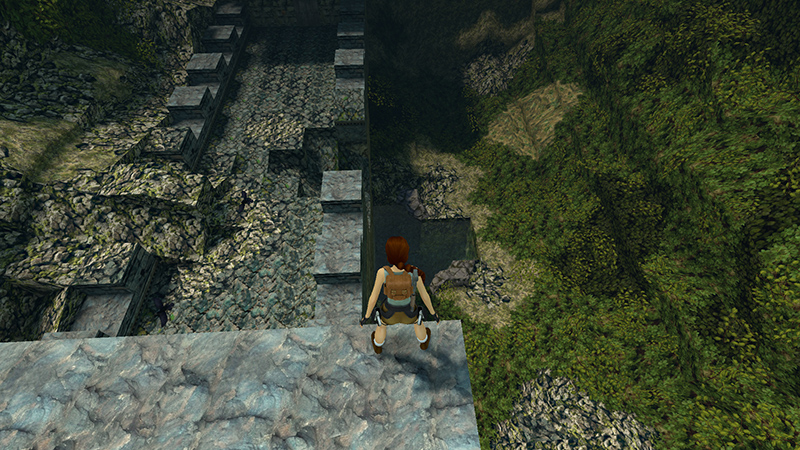
If you walk carefully to the edge, hold Look, and tilt the camera, you can get a good view of the pool below.
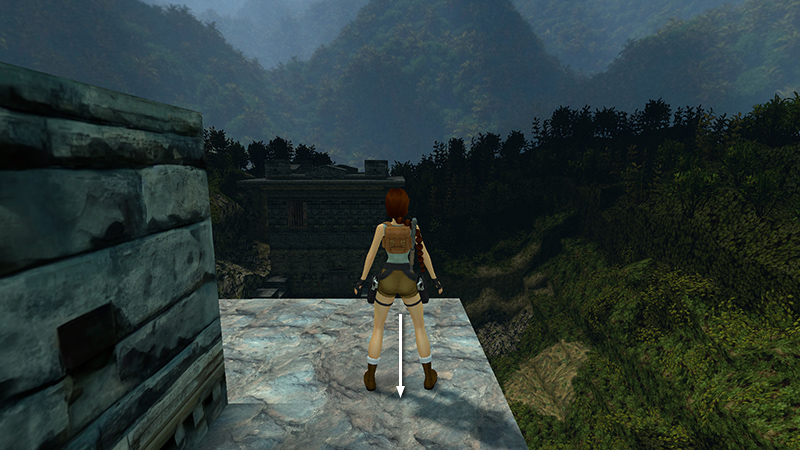
Hop back once. Then save the game, just in case. (If you mess up the dive and survive, it's possible to climb back up, but it takes a while.)
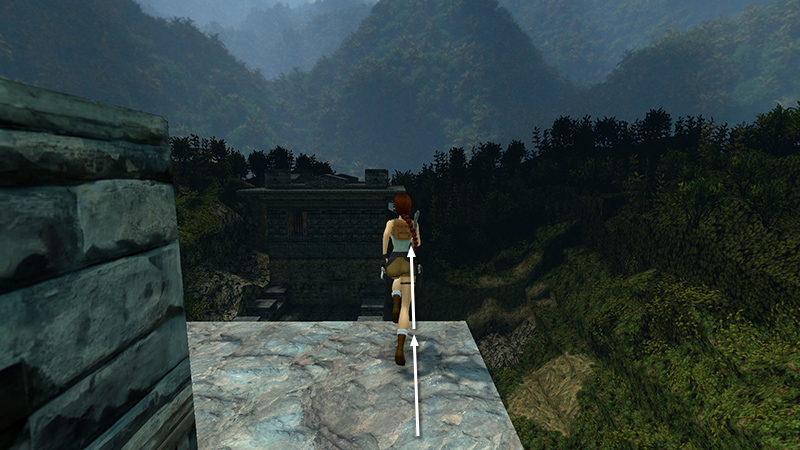
Now, we're going to do a running jump into a swan dive, followed by two somersaults. Press and hold Forward. Then almost immediately press Walk + Jump together. Lara will run forward and take off as in a regular running jump...
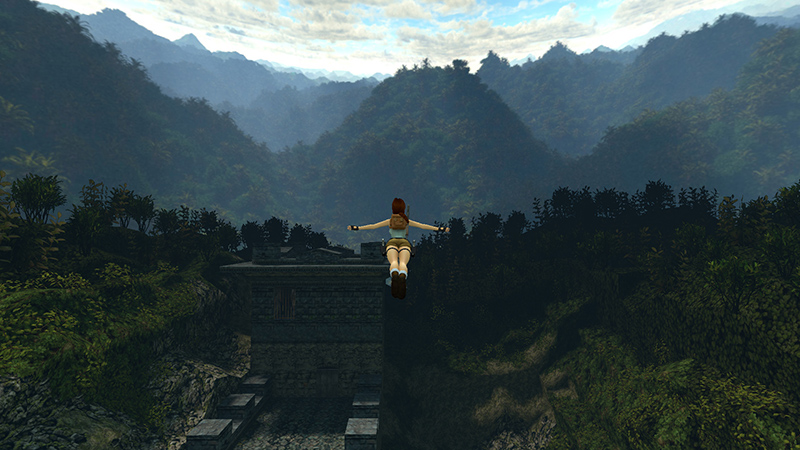
...but by adding Walk, she'll turn that jump into a swan dive, arms outstretched. As soon as she's airborne...
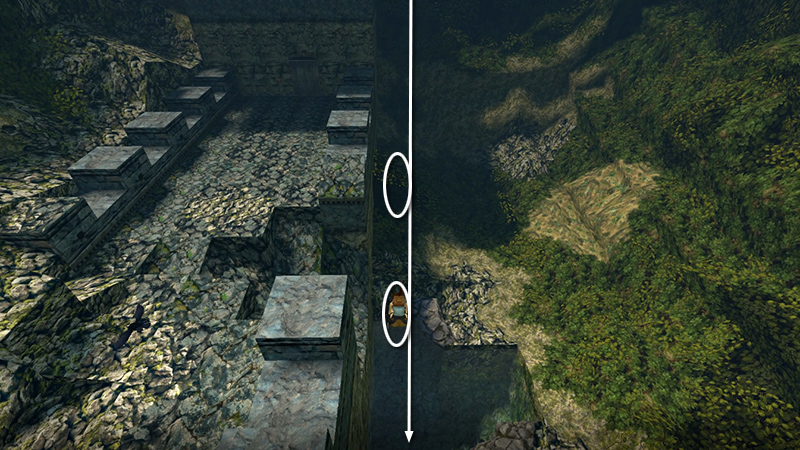
...press and hold Roll. (You can release all the other controls at this point.) If you press Roll soon enough, she'll have time to do two somersaults before splashing down in the pool.
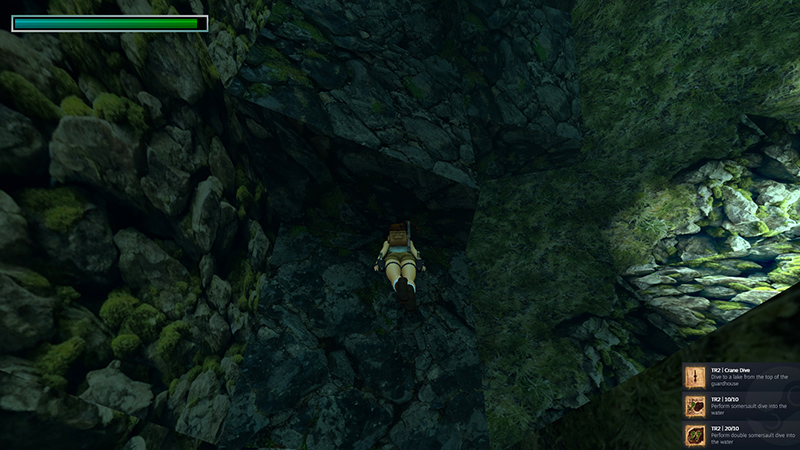
All three achievements/trophies—"Crane Dive," (for the swan dive into the pool), "10/10" (for a swan dive with one somersault), and "20/10" (for a swan dive with two somersaults)—should unlock simultaneously. Bravo!
DARK MODE: I plan to add optional dark mode for these pages, but my current priority is updating the walkthroughs. Meanwhile, may I suggest a reputable dark mode browser extension, such as Dark Reader? (Download only from trusted sites, like darkreader.org or your browser's official add-on/extension site.)
Walkthrough text and diagrams copyright © Stellalune (email ). Feel free to copy or print this walkthrough for personal use. By all means, share it with friends, but please include this credit line so people can send me their feedback. No part of this walkthrough may be reproduced on another site without permission.