Mission of San Juan – Thirsty Gods Challenge Tomb (part 3)
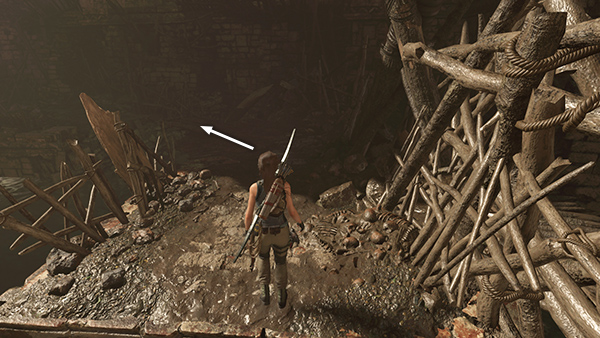
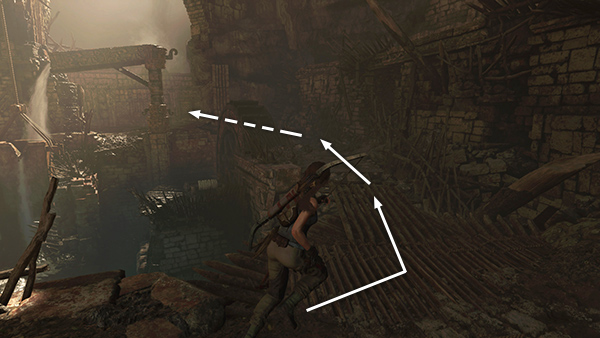
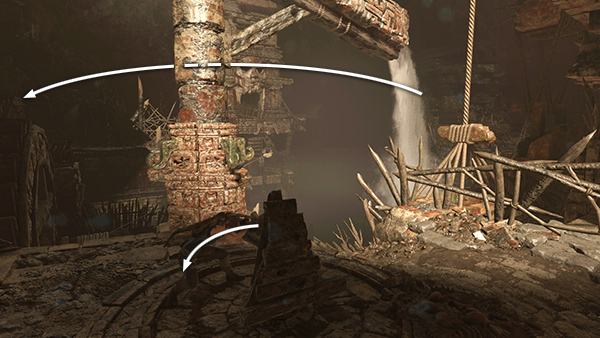
Follow the ledge around to the left, picking up a few minor items on the way.
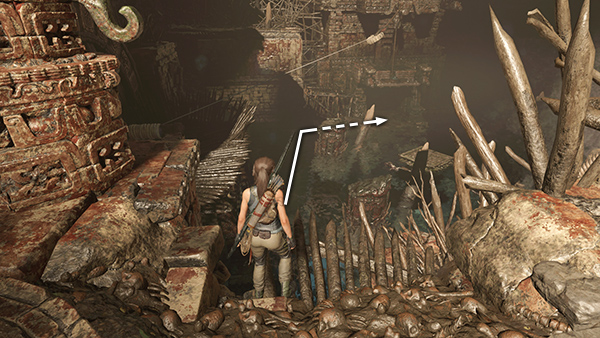
Jump across the gap and continue past the spinning water wheel.

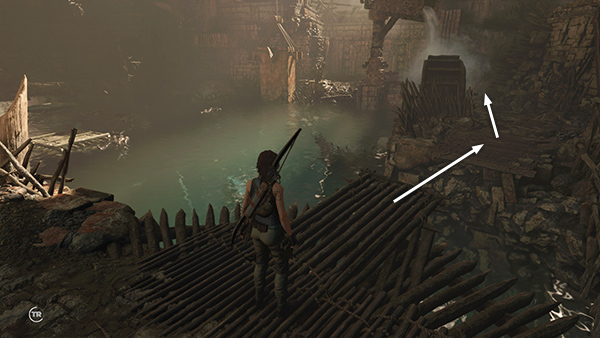
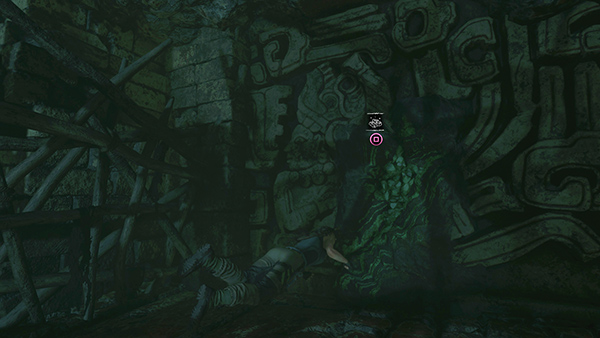
Walk across the log bridge to reach the ledge in the south corner...
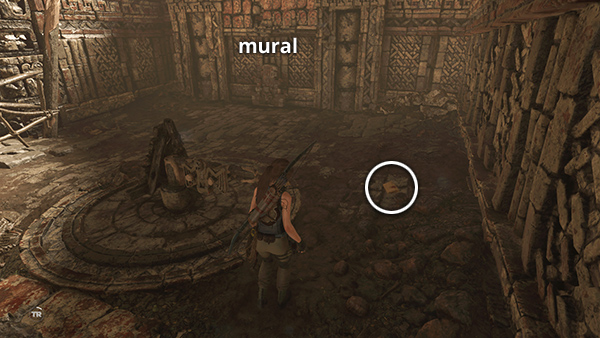
...where you'll find a document (18/27), Testament of T. Serrano (Cult of de la Cruz); a mural (4/4), Thirsty Gods (Mam/Trials of the Gods); a few resources; and a handle.
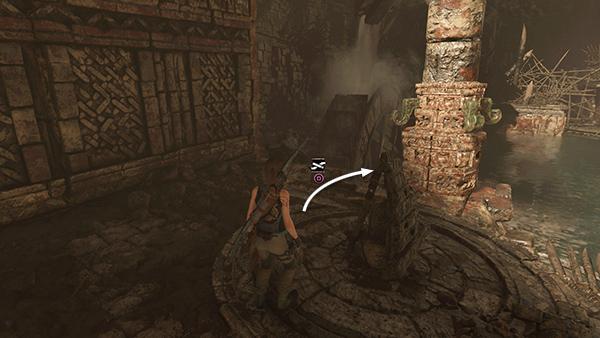
Push the handle clockwise...
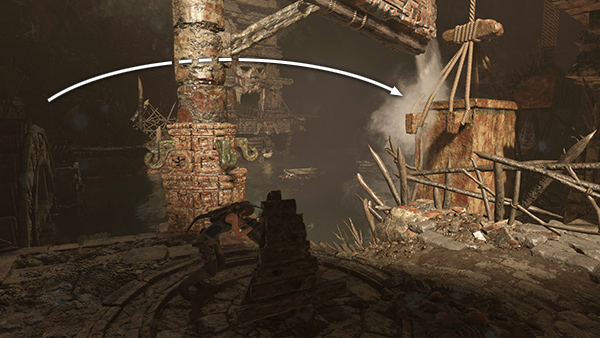
...to swing the spigot around to the right as far as it will go. Now instead of turning the wheel, the water fills the large bucket, which opens a sluice gate and lowers the water level in the big pool.
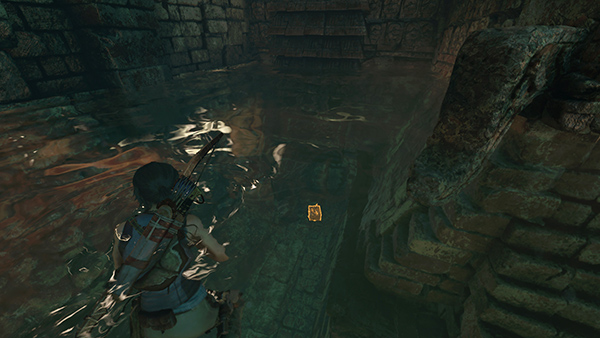
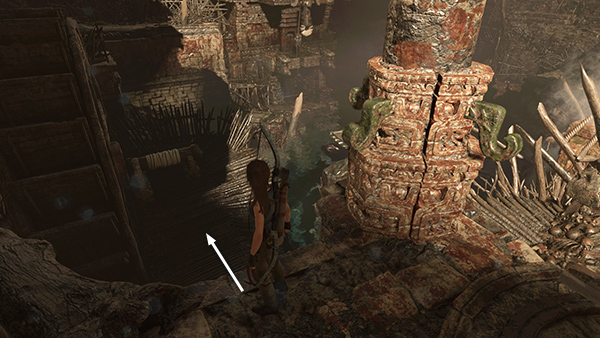
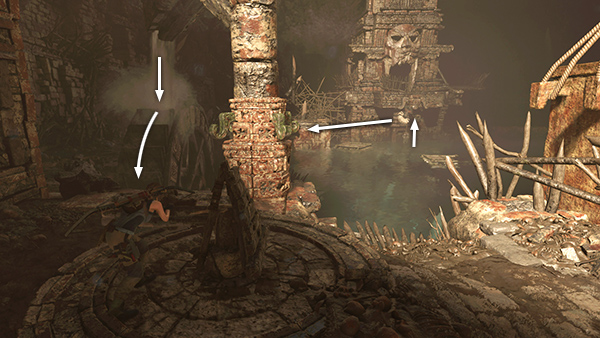
As the water recedes, move to the edge between the bucket and the pillar supporting the spigot.
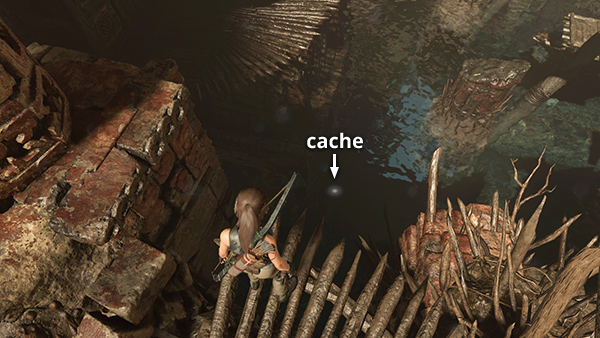
Look over the edge to spot another survival cache (8/8) below the surface.
Swim down and dig it up. As long as you stay away from the middle of the pool, the piranhas shouldn't bother you. Surface for air if necessary, then swim through the doorway just west of the cache.
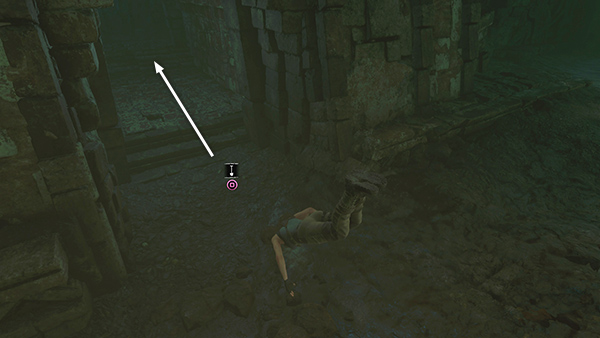
Inside you'll find a relic (9/9), another Primitive Doll (Mam/Handmade Dolls), on the left...
...and some jade ore embedded in the wall on the right.
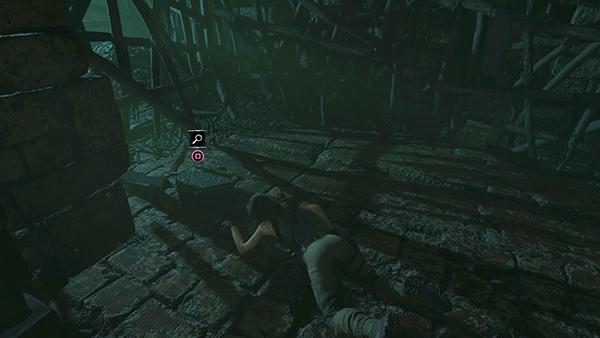
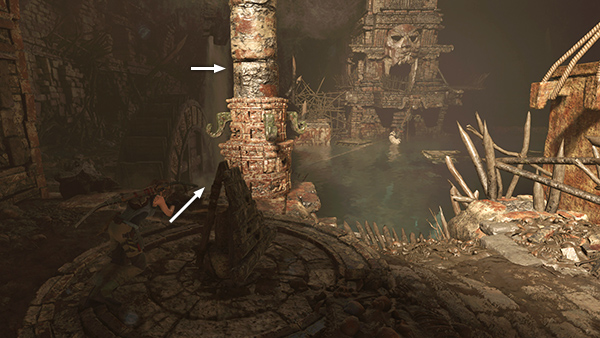
Swim back out and get air. Then swim down into the south corner—below the log bridge connecting the ledge with the water wheel and the one with the handle—to find some more salvage.
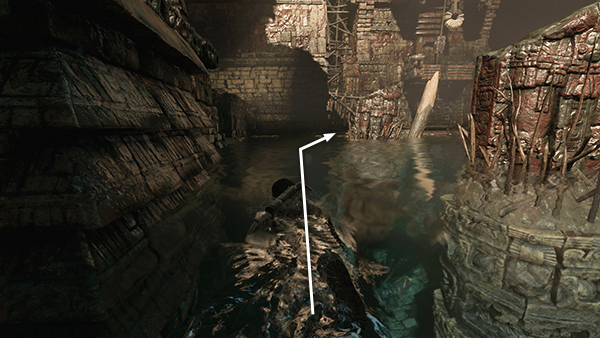
Surface and swim back to the last wooden raft, to the left of the closed gate and rope-wrapped ring.
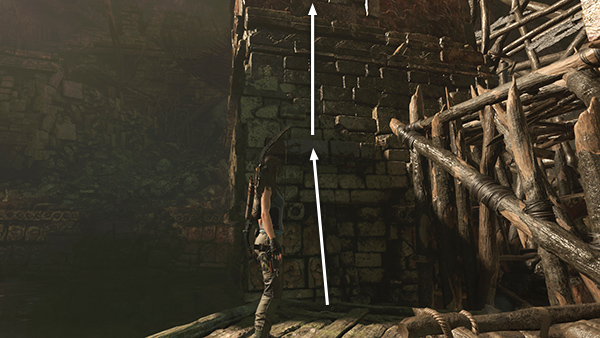
Jump from the raft to the wall on the left and climb to the top.
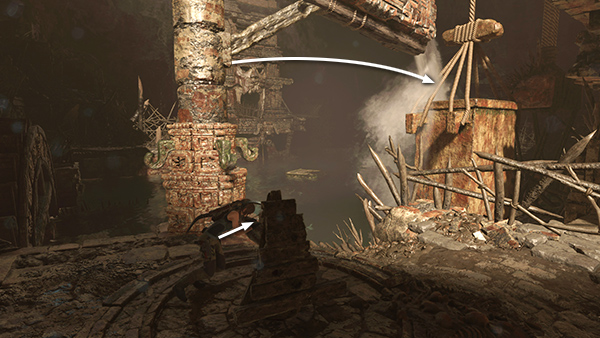
Follow the ledges back around to the handle and spigot.
Jump down onto the wooden ledge near the water wheel's rope-wrapped axle.
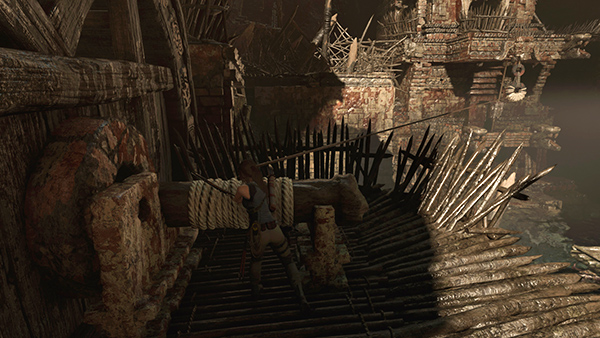
Stand near the axle and fire a rope arrow into the rope-wrapped metal ring near the gate to tether the ring to the axle.
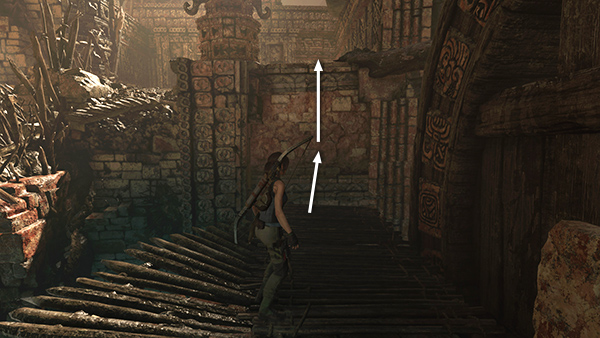
Turn around and scramble back onto the ledge with the handle.
Now pull the handle back to its original position to swing the spigot around to the left...
...so it once again spills onto the water wheel. Don't let go of the handle yet. As the wheel turns, the rope line winds around the axle, pulling the metal ring and opening the gate. If you let the wheel continue to turn, the rope will snap and the gate will close. So, just before the gate opens fully...
...push the handle back to the right, so the wheel stops turning. The gate should then stay open. (If the rope snaps, just turn the spigot all the way to the right to lower the water level once more. Jump down to the axle and tether it to the ring. Then return to the handle and try again.)
Once the gate is open, you can follow the ledges back around to the gate, then swim down through it without lowering the water level (not shown). Or, push the handle all the way to the right to refill the bucket and lower the water level (as shown above).
Then swim along the left side of the pool (to avoid the piranhas) and walk through the gate.
NOTE: If you missed survival cache #7 and the other items on the right side of the tower earlier, you can do that now. (See here.) Just watch out for the piranhas. When I attempted to retrieve the cache after lowering the water level, the piranhas on this side of the pool seemed more aggressive.
[Previous | Next | Tomb Walkthrough | Main Walkthrough]
Copyright © - Stellalune ( ). All rights reserved. Feel free to copy or print this walkthrough for personal use. By all means, share it with friends, but please include this credit line so people can send me their feedback. No part of this walkthrough may be reproduced on another site without permission. Follow this link for details about this site's advertising and privacy policy.