Hidden City – The Pillar DLC – The Age Makers Mission
Path of Huracan Challenge Tomb (part 5)
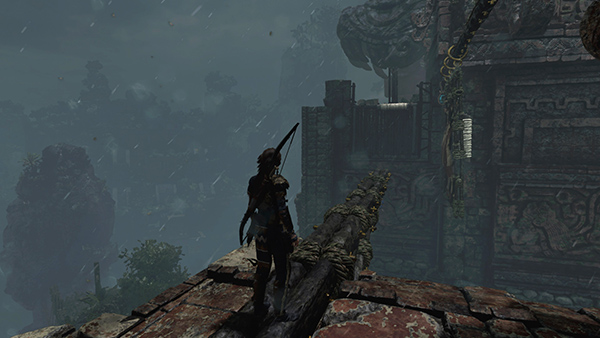
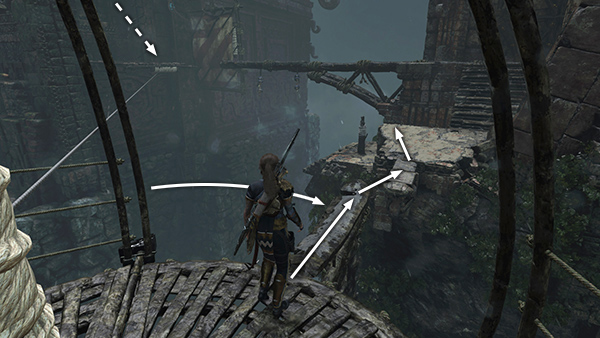
You're headed for the ornately carved building on the northwest side of the canyon. A wooden beam juts out in that direction. There's a drawbridge just beyond the beam and another sail-like panel ahead on the right.
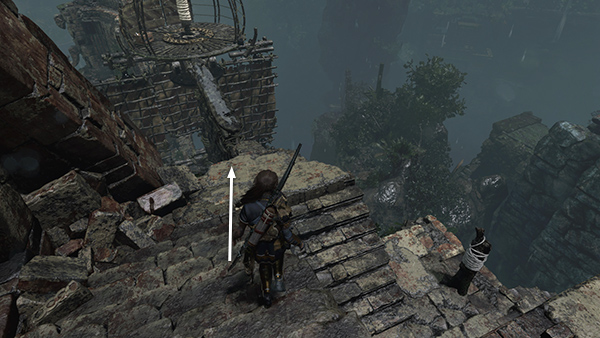
Below on the left is another rope-wrapped post and the upper level of the whirling contraption. The goal is to open the drawbridge, keep it open, and cross over to it without being blown away. Start by moving down the stairs onto the landing near the contraption.
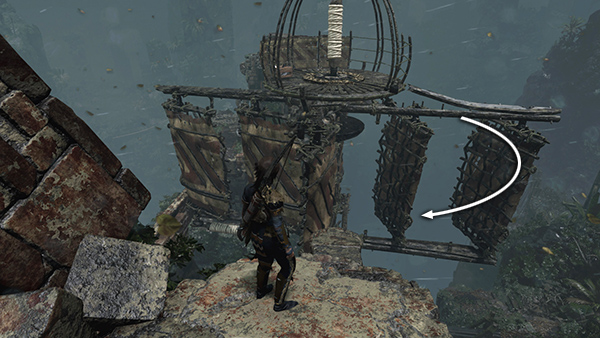
Wait for it to stop spinning momentarily.

Then jump out onto the arm that nearly meets the walkway and hurry forward to the center platform. Crack open the salvage crate.
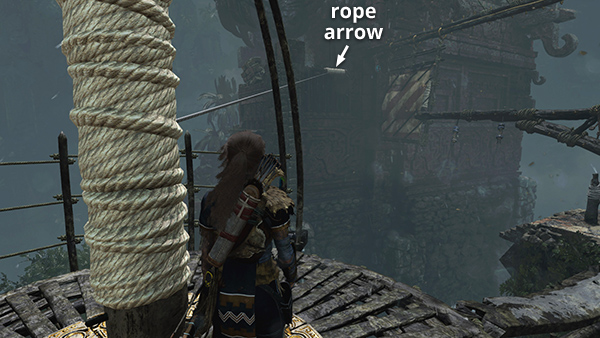
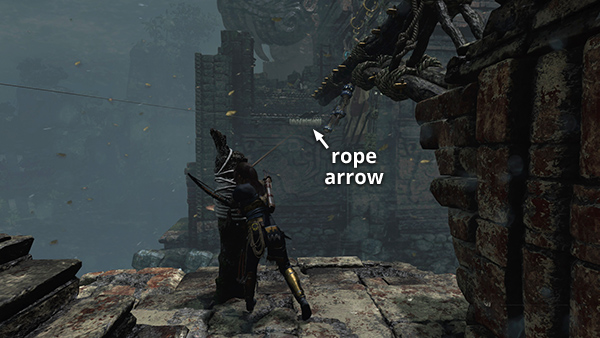
Then stand near the rope-wrapped axle, turn to face the drawbridge, and shoot a rope arrow into the rope coil at the top of the bridge.
Now you need to move quickly. When the wind gusts, the contraption spins, winding your rope around the axle and lowering the drawbridge. It will only hold for two of the contraption's spinning cycles, though. So as soon as the contraption stops spinning, jump out onto the beam, scamper across, and jump onto the stone landing.
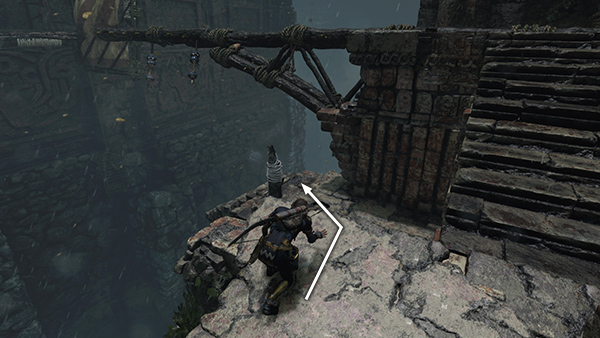
Immediately run down to the lower left...
...stand near the rope-wrapped post, and shoot another rope arrow into the extended drawbridge. The first line falls away, but this second rope will hold the bridge open so you can take your time crossing.
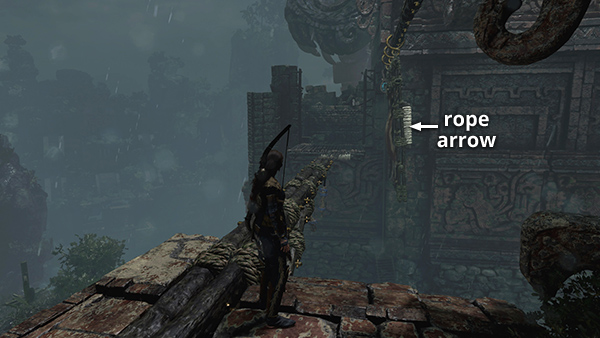
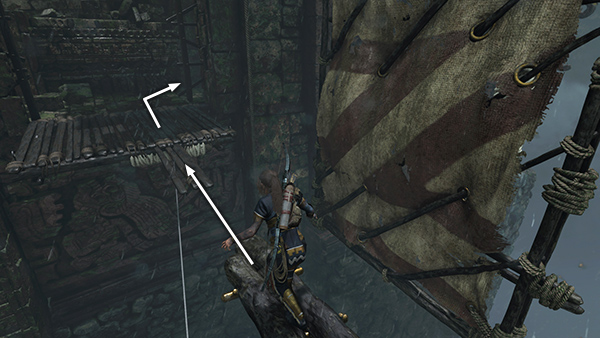
Climb the stairs. Then shoot another rope arrow into the rope coil on the wood-and-cloth panel to drag it toward you. There's nothing to hold it in place, so it immediately starts to move back to the other side of the canyon.
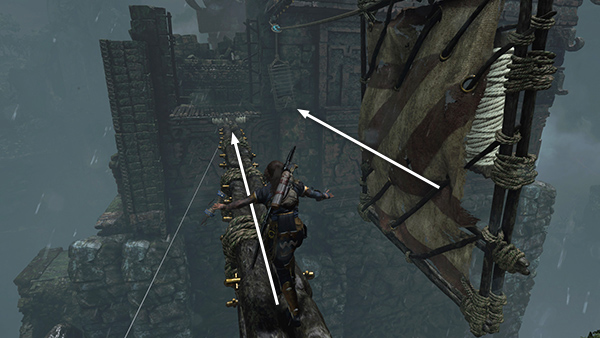
Follow the wooden beam toward the drawbridge, keeping the panel on Lara's right to shield her from the wind.
When you reach the end of the beam, jump across the gap onto the extended drawbridge and enter the ruins.
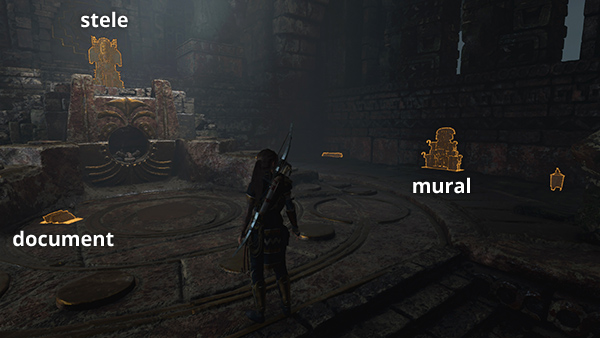
If you're playing the stand-alone tomb, climb up and activate the tomb stele to finish.
If you're playing The Age Maker Mission, Lara contacts Q'orianka by walkie-talkie to tell her the shield has already been taken. Q'orianka suspects Amaru, and your goal is updated: Chase after the Shield. Before you leave this area, examine a document (2/4), Ritual Book (Mam/The Age Maker), on the floor near the empty receptacle where the shield was, a mural (2/2), The Shield's Cradle, (Mam/The Age Maker), on the right wall, and of course the stele itself. Doing so unlocks a new ---- Skill: A Thousand Eyes, which allows Survival Instinct to remain active longer while Lara is on the move.
[Previous | Next | Tomb Walkthrough| Hidden City Walkthrough]
Copyright © - Stellalune ( ). All rights reserved. Feel free to copy or print this walkthrough for personal use. By all means, share it with friends, but please include this credit line so people can send me their feedback. No part of this walkthrough may be reproduced on another site without permission. Follow this link for details about this site's advertising and privacy policy.