Kuwaq Yaku – Howling Caves Challenge Tomb (part 2)

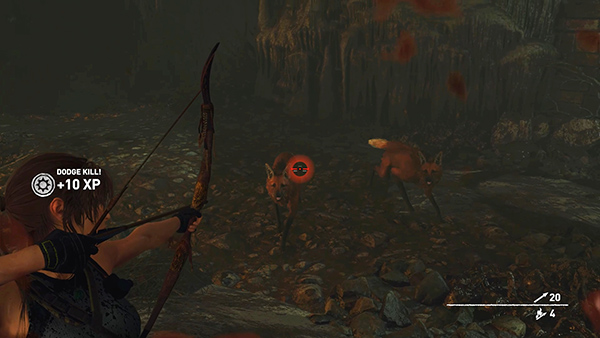
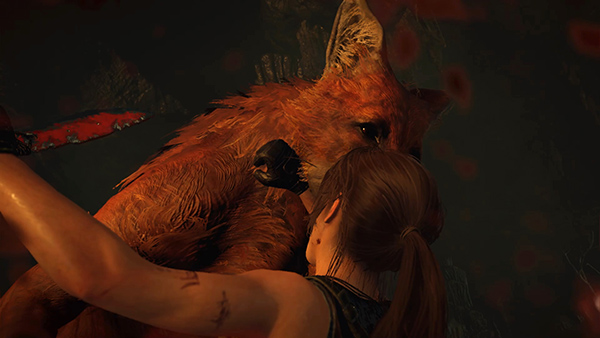
Lara immediately goes into a defensive crouch as 4 wolves emerge from the edges of the cave. Try and take out one or two of them before they get close. You can use any weapon. I just happened to choose the bow.
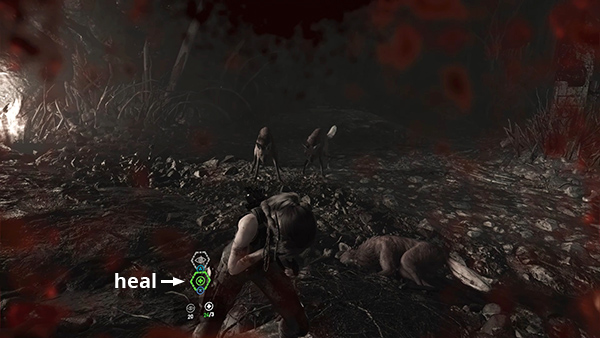
As with the previous fights with the jaguars, keep moving, and don't forget to heal during combat if necessary. (Press F1 on the keyboard or hold L1/LB on the controller and press X/A.)
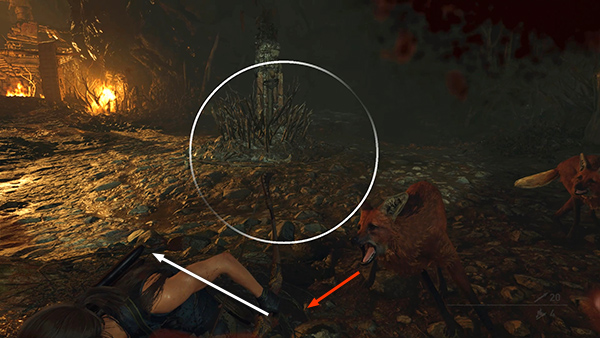
Try to evade their attacks by pressing Drop/Roll (C/Circle/B), like you did with the jaguars earlier. If you have unlocked the Puma's Feint skill, dodging will now bring up a QTE interface.
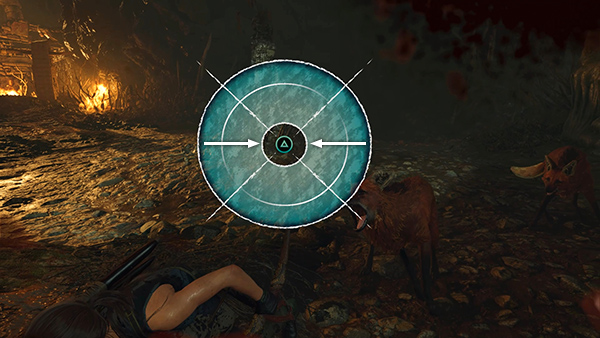
When you see the Melee icon (which looks a little different depending on whether you're using a controller or keyboard), you'll have a brief window of opportunity for a counterattack as the white circle contracts inward toward the center ring. If you press too soon or too late, it won't work. But if you press Melee while the white ring is within the colored area of the disk...
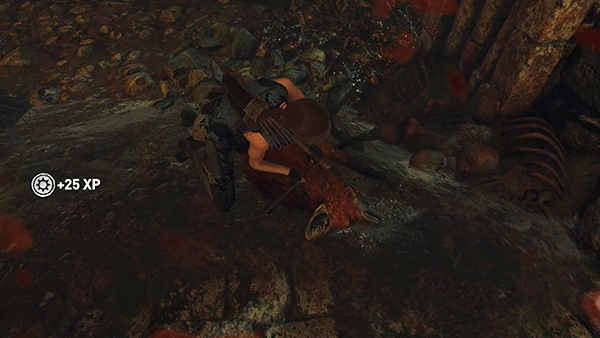
...Lara will kill the wolf by stabbing it with an arrow...
...and you'll receive an XP bonus for a Dodge Kill.
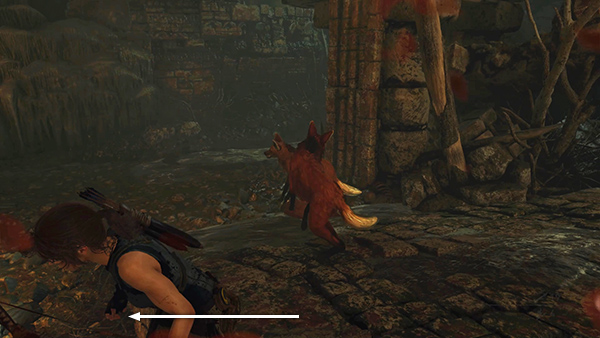
Don't worry if you haven't unlocked this skill yet. You can still evade by pressing C/Circle/B when a wolf lunges...

...then turn and fire back.
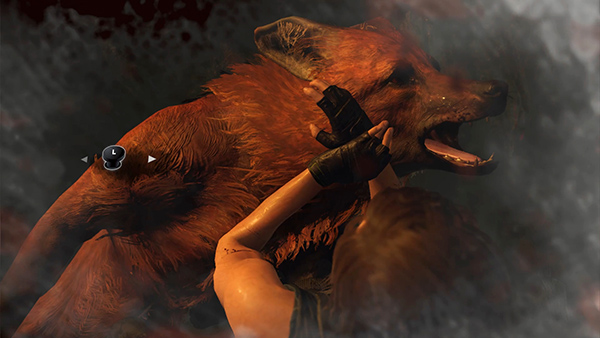
If one of the wolves manages to pin Lara down, you will get a slightly different QTE. First you'll be prompted to wiggle the left stick back and forth or alternate pressing A and D on the keyboard. You'll need to do this fairly quickly, but not frantically.
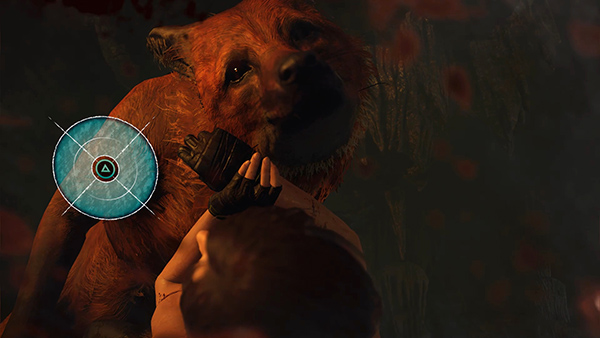
Then you'll see a Melee prompt similar to the one shown above. Press the button indicated before the white ring contracts all the way to the center of the colored circle...
...and Lara will stab the wolf with her knife.
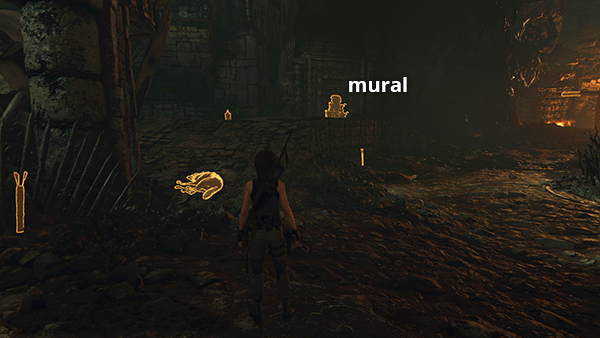
When you've killed all 4 wolves, loot them for hides, and pick up some arrows and other resources scattered around the cavern. Also be sure to examine the mural (8/10), Howling Caves (Mam/Trials of the Gods) on the west ledge before moving on.
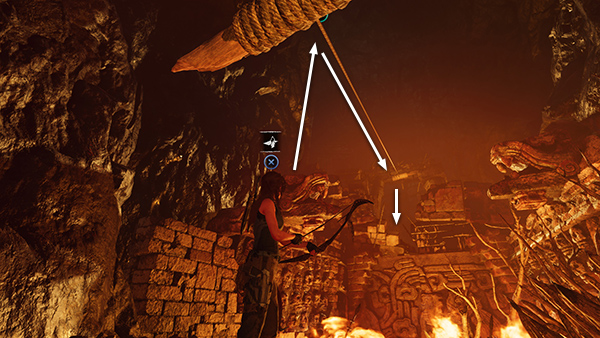
Approach the ledge with the flames below. Stand under the rope-wrapped beam and shoot a rope arrow into the rope-wrapped beam on the other side of the gap. Climb along the rope and drop down on the opposite ledge.
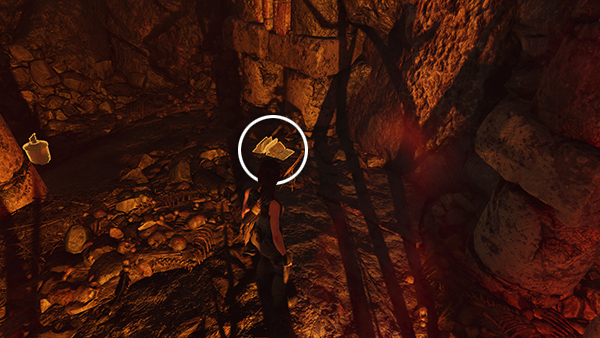
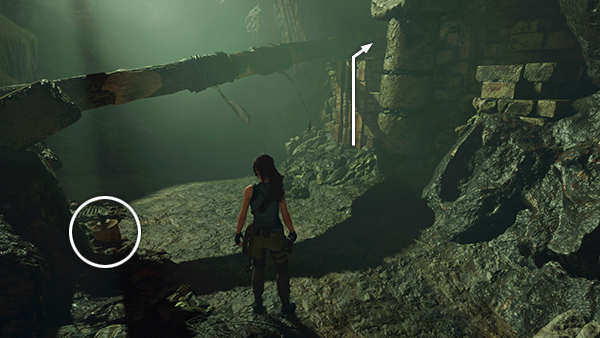
There's a resource container and a document (16/18), Secret Winds (Mam/Metamorphosis), lying on the ground to the left. Collect them.

Then climb the craggy wall to the ledge above.
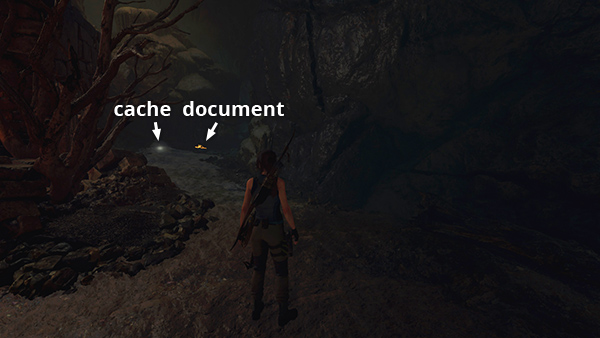
At the top, head to the left to find a survival cache (12/14) and another document (17/18), Votan (Mam/Legends of the Maya).
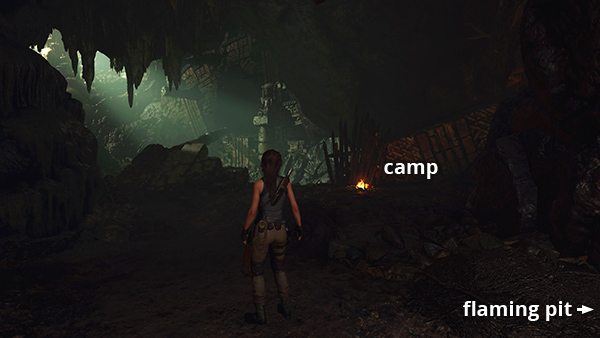
Then return to the right (north) to find the Petroleum Deposit Base Camp. (I've lit the fire to make it easier to see.)
When you're ready, approach the well-lit area beyond the campsite. The strong wind prevents Lara from walking across the toppled column, but you can loot the resource container underneath it, then scramble up into the doorway.
[Previous | Next | Howling Caves Walkthrough]
Copyright © - Stellalune ( ). All rights reserved. Feel free to copy or print this walkthrough for personal use. By all means, share it with friends, but please include this credit line so people can send me their feedback. No part of this walkthrough may be reproduced on another site without permission. Follow this link for details about this site's advertising and privacy policy.