The Hidden City – Path of Battle Challenge Tomb (part 4)
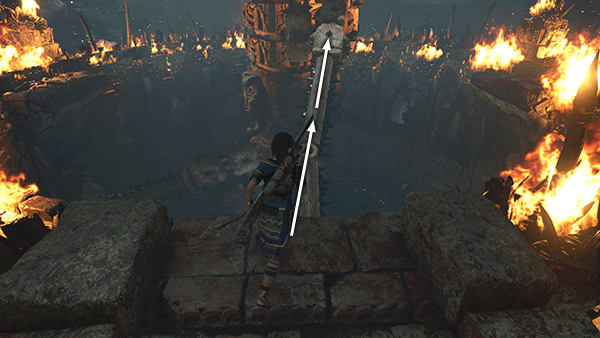
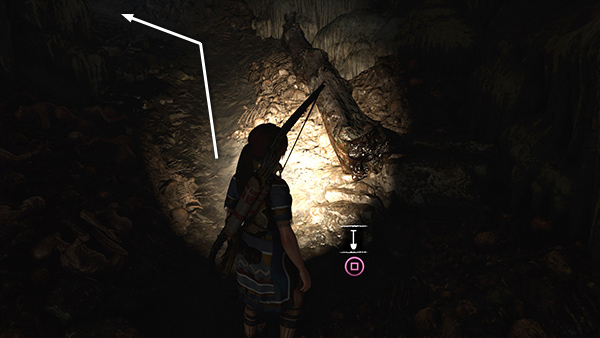
Now that you've stopped the tower, you can climb it to reach the stele. Start by jumping onto the broken arm that slants down toward the walkway between the switches.
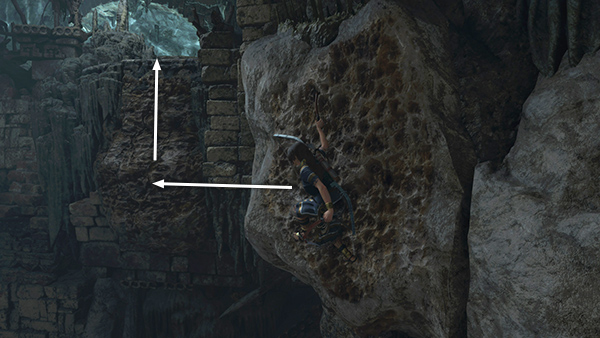
Walk to the top of the arm and jump to grab the top of the smaller of the two spiked stone blocks attached tot he tower. (This jump is a little buggy, at least in the PC version. It may help to double-jump as though scrambling up the block, even though Lara doesn't actually appear to scramble.)
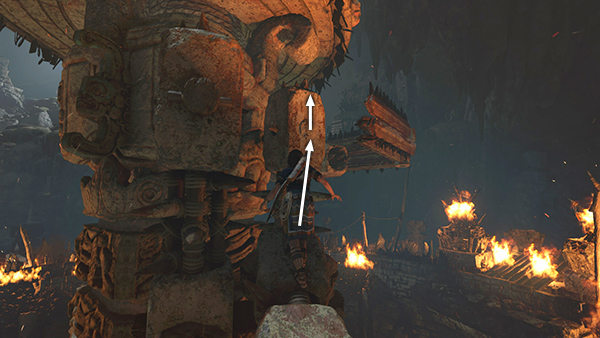
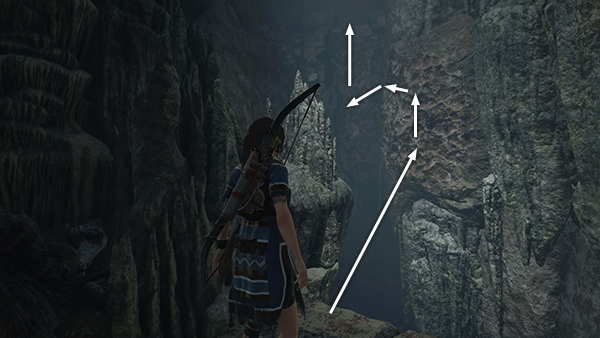
 Once Lara is hanging from the block, jump to the right to grab the folded arm.
Climb around the corner and on to the right
until you can pull up onto the arm.
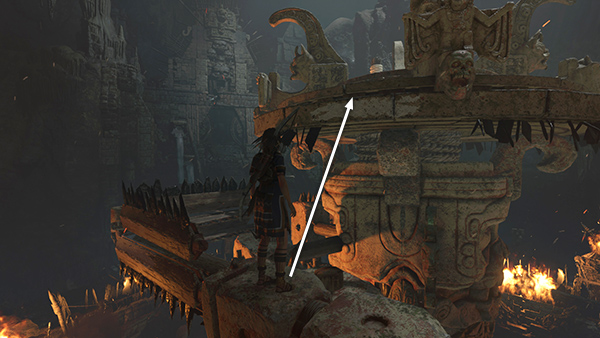
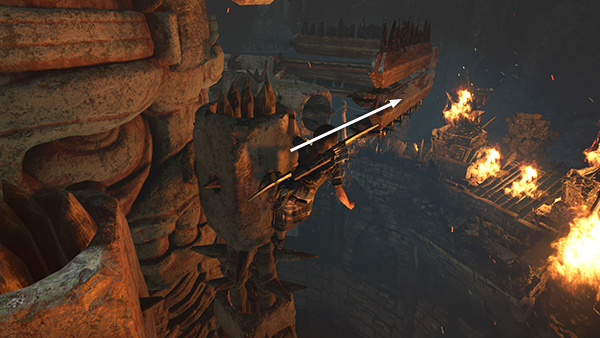
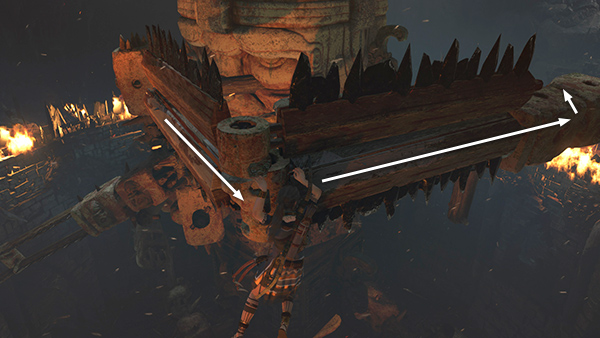
Jump to grab the edge of the high, round platform and pull up.
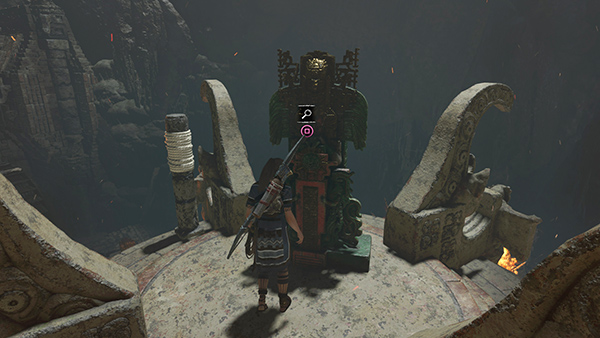
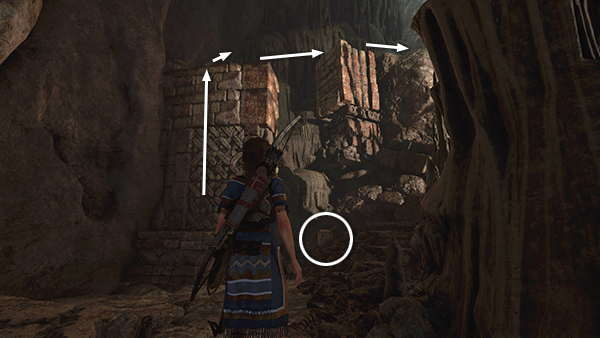
Examine the tomb stele to unlock the Seeker Skill Sip's Quiver, which allows Lara to loose up to three arrows without pulling from the quiver, making her rapid-fire bow shots even faster. To use it, just aim with the bow and rapidly tap the Fire button 3 times. You'll notice that after the third tap, Lara will have to reach for more arrows.
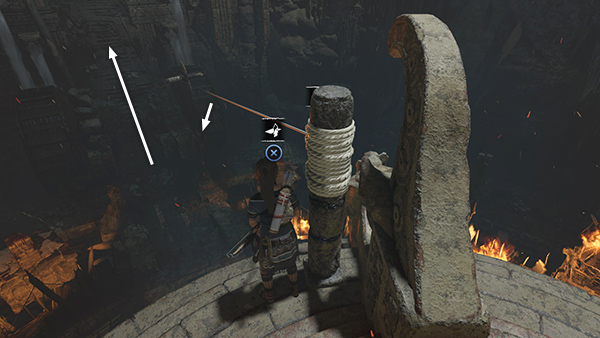
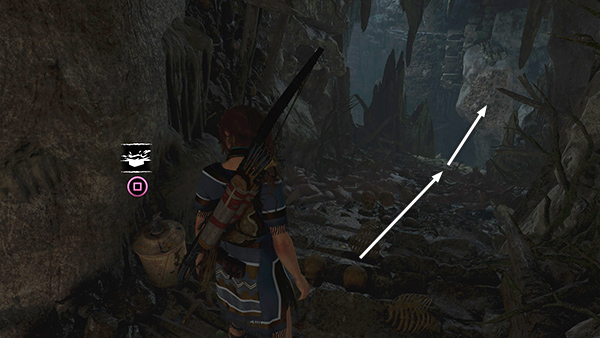
To exit the tomb, use a rope arrow to run a zip line down to the outer walkway and slide down. Then follow the stairs up to the exit.
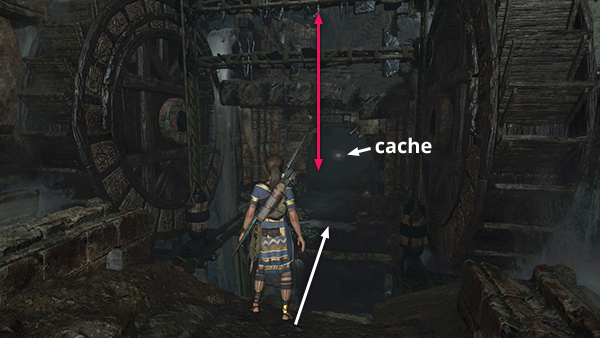 In the next room, move to the edge of the pit and watch the blade-encrusted bars move up and down. (You'll probably notice that last survival cache flashing away in the dark passageway ahead.) Wait for the bars to rise then quickly jump across the pit to grab the far edge.
Pull up and continue forward. Dig up the survival cache (34/34). Follow the passageway as it slopes upward and curves around to the north.
When you reach the ledge above the deep chasm, jump across to the rough climbing wall, axe-climb up and left, jump and latch onto the next climbable area, then continue climbing to the ledge above.
Move up the steps, loot the resource container, then scramble up the square column on the left. Jump to grab the next square column, then continue into the tunnel beyond.

Scramble up the damp stone wall into the tunnel above.

Proceed through this low passageway lined with limestone formations.
At the top, grab some more supplies from the container on the left. Then slide down the slippery slope, jump at the end, and latch onto the climbable wall on the other side of the chasm.
Climb then jump and latch onto the next climbable area to the left. Continue axe-climbing to the ledge above.
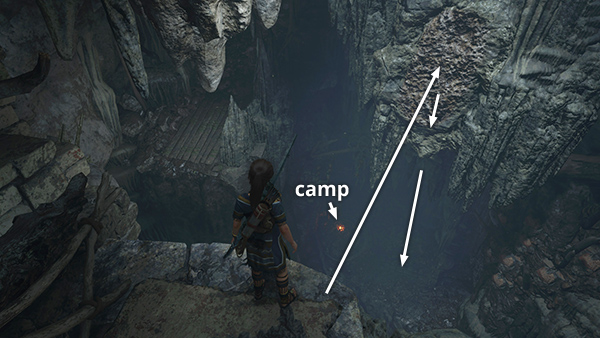
At this point, you can turn around and try to get back to the Ossuary Base Camp below. This is a little tricky, though. You'll need to jump out and grapple the rough wall like you did before, but you won't be able to rappel down as far as you did the first time. But you can swing back and forth then jump down. Lara will lose a little health in the process, but as long as you land on the ledge, she should be OK. You can then Fast Travel out to wherever you left off.
- OR -
If you'd rather play it safe, continue up the steps, drop into the pool on the left...
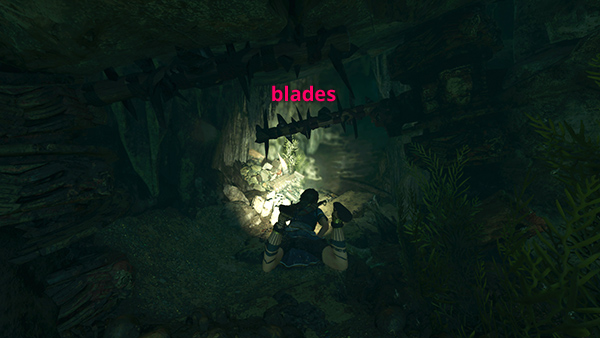
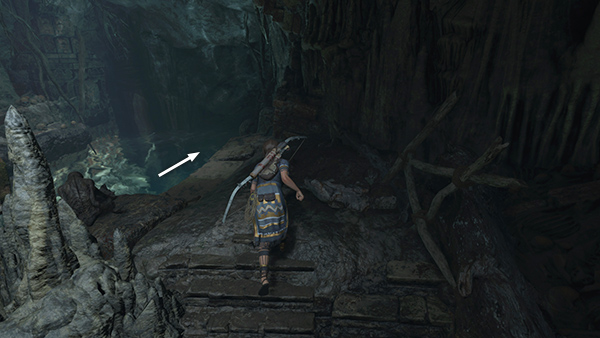
...and swim through the flooded passageway back to the northeast. The only danger is the obsidian blades a little way in. Just stay low as you pass them and Lara will be fine.
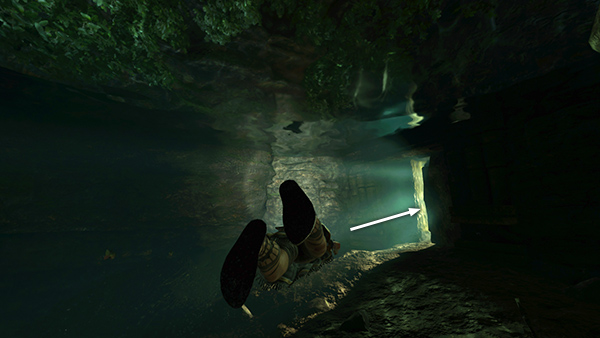
At the end of the tunnel, swim up for air if necessary. Then squeeze through the narrow opening on the right...
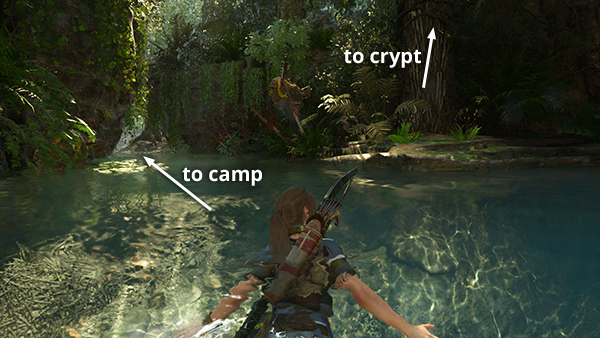
...to emerge in the pool with the waterfall. The Wild Jungle Base Camp is just downstream...
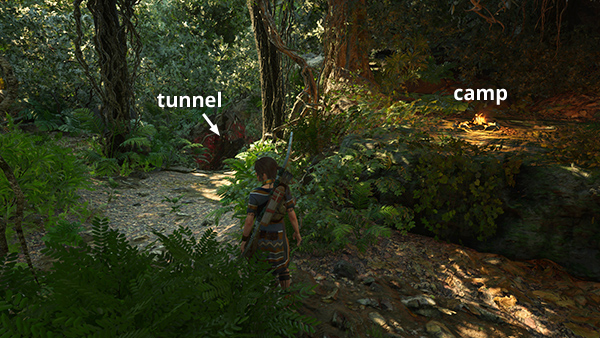
...and the painted tunnel leading back to the city, is just beyond the camp, at the end of the path that slopes down to the right.
[Previous | Tomb Walkthrough | Main Walkthrough]
Copyright © - Stellalune ( ). All rights reserved. Feel free to copy or print this walkthrough for personal use. By all means, share it with friends, but please include this credit line so people can send me their feedback. No part of this walkthrough may be reproduced on another site without permission. Follow this link for details about this site's advertising and privacy policy.