The Hidden City – Temple of the Sun Challenge Tomb (part 4)
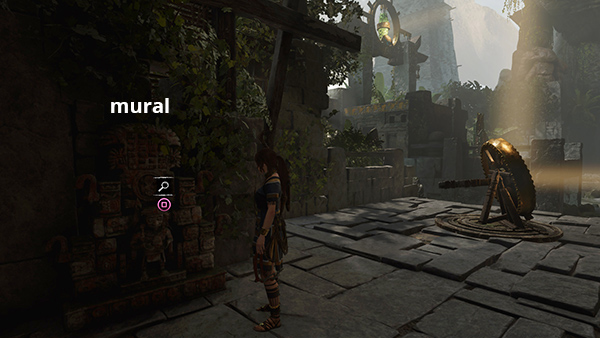
Examine the mural (13/23), Fertility God (Mam/Pantheon of Gods 3) in the dark, corner near mirror 4.

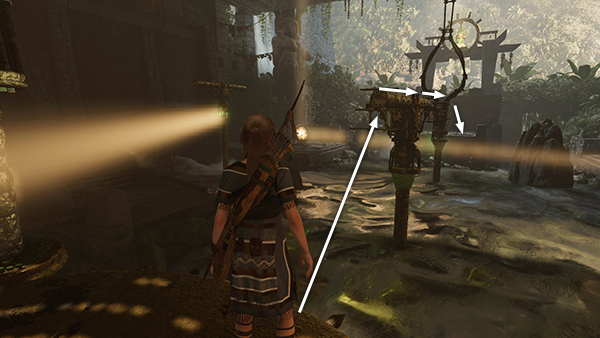
Now rotate mirror 4 so the beam of light activates the armature on the left...
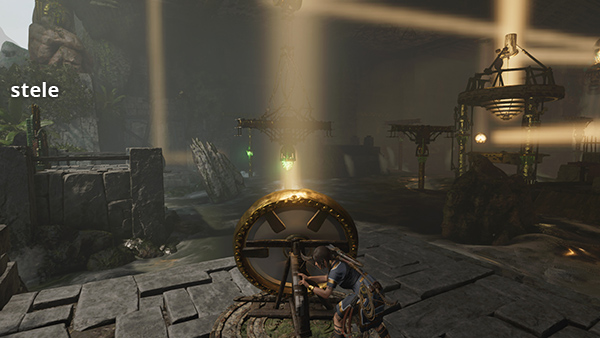
...orienting it and the armature near the pavilion toward the tomb stele at the south end of the room.
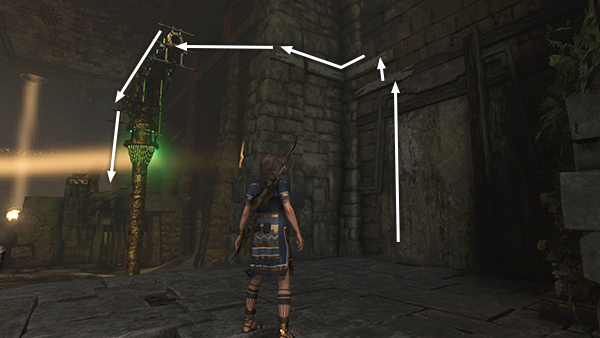
To get there, start by scrambling up the east wall and climbing around to the left until you can jump and grab the armature you used to reach this area. Cross over it and jump down.
Follow the wooden walkway toward the central
pavilion and jump onto it.
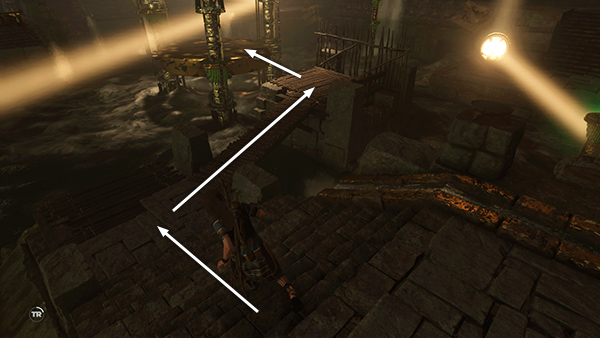
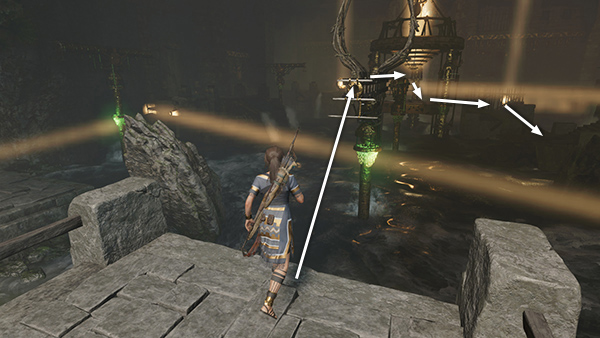
Jump from the pavilion
to the first of the rotating armatures. Cross over it, jump to the second armature, cross over it, and jump down down to the altar.
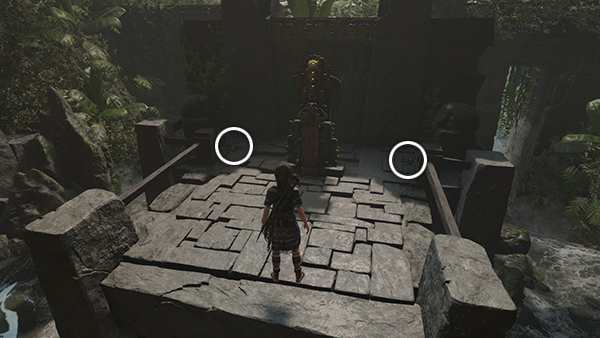
Pick up 2 piles of gold ore. Then examine the stele to unlock the Seeker Skill Hoatzin's Hunger, which automatically increases the amount of natural crafting resources Lara obtains from each source.
Return across the 2 rotating armatures to the pavilion. Jump over to the wooden walkway on the right.
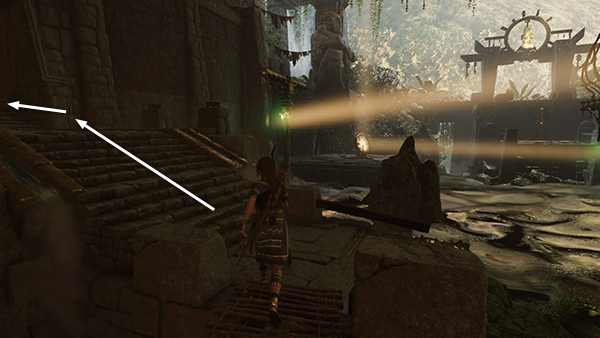
Then head up the stairs into the hallway to the east.
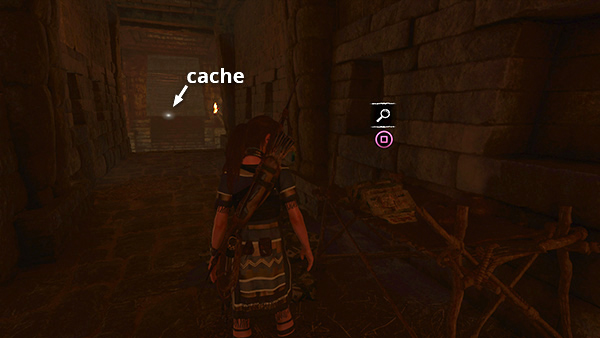
Here you'll find a document (17/42), The Paddler Gods (Mam/Legends of the Maya) and a survival cache (17/34) buried at the north end of the hallway.
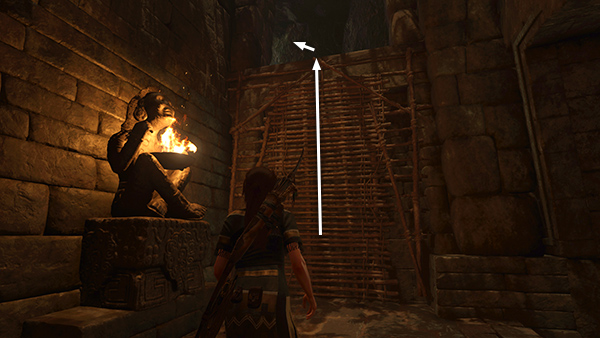
Return to the south end of the hallway and climb into the opening above.

Follow the passageway outside. Continue along the path, jumping across a misty pit full of spikes.
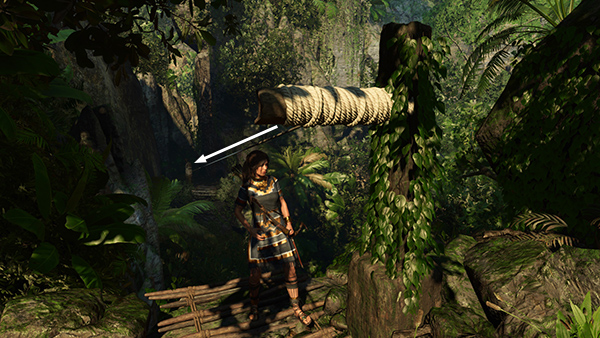
When you reach the next gap, shoot a rope arrow into the post on the other side of the gorge and slide down the rope line.

Scale the climbable wall near the post then scramble up to grab the handhold directly above.
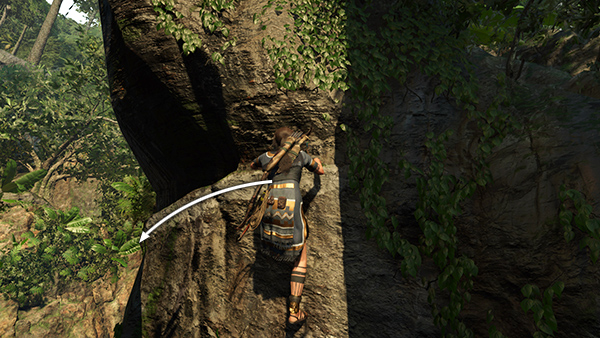
Climb around to the left...
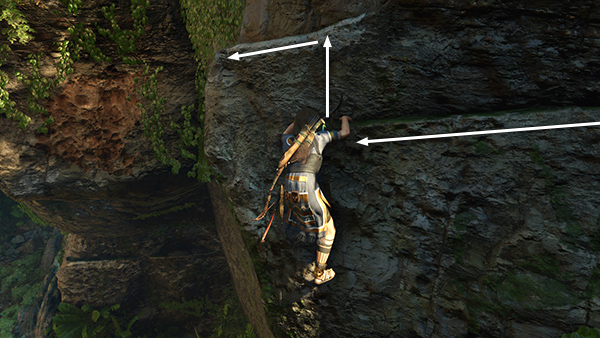
...as far as you can. Then climb to a slightly higher handhold and on to the left a bit more.
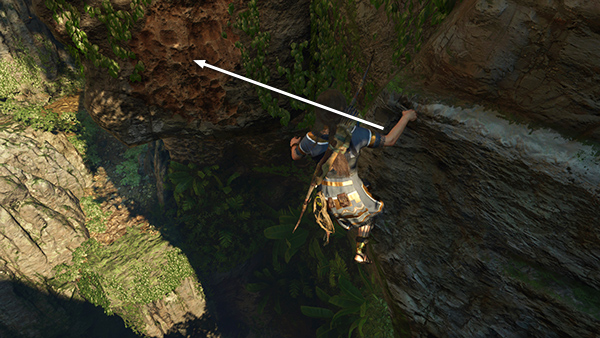
Jump to the left and latch onto a small, brownish area of climbable wall.
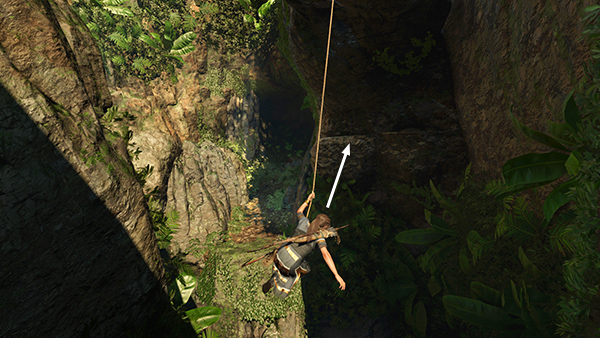
Rappel down until Lara is hanging roughly level with the handhold on the cliff wall ahead. Swing back and forth to gather momentum. Then as she swings toward the wall, jump and grab the handhold.
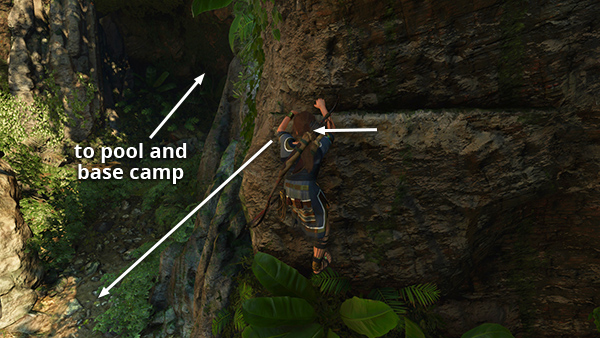
Climb then jump to the left to land on the path below. Head up the hill and squeeze through the narrow gap to get back to the ledge above the pool and the Temple Path Base Camp, where you found the archivist map and document #15 earlier.
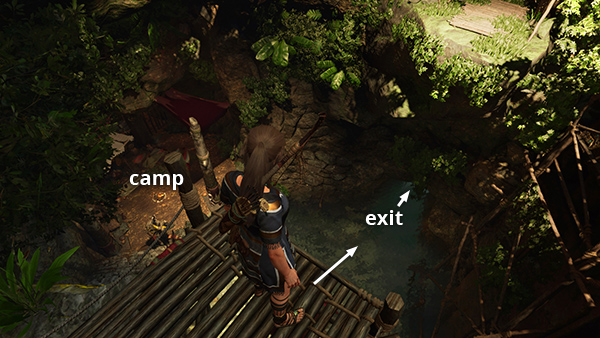
If you're still working on the High Diving Challenge, you can make one of those dives here. Then stop at the camp if you like before returning through the flooded passageway to the main area.
[Previous | Challenge Tomb Walkthrough | Hidden City Walkthrough]
Copyright © - Stellalune ( ). All rights reserved. Feel free to copy or print this walkthrough for personal use. By all means, share it with friends, but please include this credit line so people can send me their feedback. No part of this walkthrough may be reproduced on another site without permission. Follow this link for details about this site's advertising and privacy policy.