Shadow of the Tomb Raider - Cenote Challenges
Updated: 9/17/21(†)
This guide focuses on revisiting the level after completing it. If you are playing through for the first time, you may want to follow the main walkthrough instead to avoid possible spoilers. Documents, relics, and other collectibles are covered in the Cenote Collectibles guide.
Challenge: Sunken Treasure
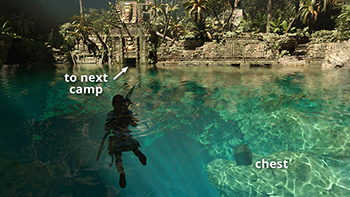
This challenge is confined to the piranha-infested pool near the beginning of the level. The goal is to loot jade from 5 treasure chests scattered around the bottom of the pool. If you missed any of them, fast travel to the Cenote Vista Base Camp. Go through the doorway to the north, follow the path down to the ledge overlooking the pool, and jump in. This page with screenshots shows the locations of all 5 chests. They're also marked with yellow dots on the annotated level map.
It's not possible to climb back up to the Cenote Vista camp, so once you have what you need, swim through the doorway to the west and follow the flooded passageway to its end. Continue on foot through the cavern to the Cenote Temple Ruins Base Camp. From there, you can fast travel away. If you need a refresher for navigating this area, check the walkthrough. (Click screenshots to enlarge.)
Challenge: Respected
This challenge involves using rope arrows to pull down 5 tattered effigies. If you have the Owl's Wisdom skill, the effigies will glow in Survival Instinct, making them easier to spot. They're also noted in red type in the main walkthrough and marked with red dots on the annotated level map.
EFFIGY 1
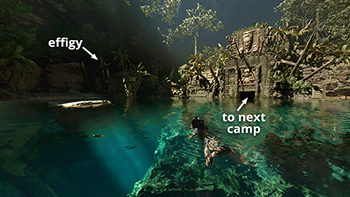
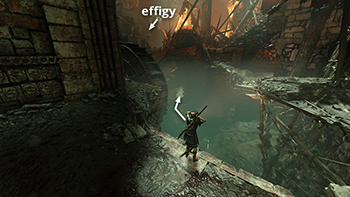
The first effigy is on the south side of the piranha-infested pool near the beginning of the level. If you missed it, fast travel to the Cenote Vista Base Camp. Go through the doorway to the north, follow the path down to the ledge overlooking the pool, and jump in. Swim to the south side of the pool (where you dug up survival cache #2. The effigy is hanging from a wooden structure near the crumbling archway sheltering the Explorer Backpack.
It's not possible to climb back up to the Cenote Vista camp, so once you have what you need, swim through the doorway to the west and follow the flooded passageway to its end. Continue on foot through the cavern to the Cenote Temple Ruins Base Camp. From there, you can fast travel away. If you need a refresher for navigating this area, check the walkthrough. (Click image for more and larger screenshots.)
EFFIGY 2
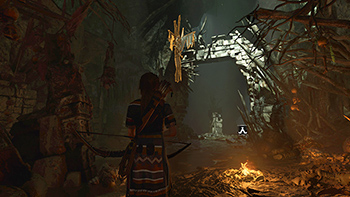
The next effigy is in the caverns near the Cenote Temple Ruins Base Camp. Fast travel there and look for the effigy to the east, just before the crumbling stone archway. (Click screenshot to enlarge.)
EFFIGY 3
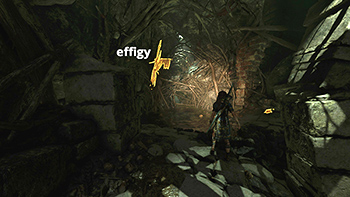
The next effigy is in the tunnel beyond the room with the green explosive jars, where you fought a squad of Yaaxil. If you missed it, fast travel to the Cenote Temple Ruins Base Camp. Squeeze through the narrow opening to the west and follow the passageway into the Yaaxil warren. (So far, I have not encountered any enemies when revisiting this area.) When you reach the drop-off, grapple the climbing wall ahead and rappel down. Continue to the room with the green explosive jars. Climb out on the right (southwest) side and follow the tunnel. You'll find the effigy just before the flooded section. (Click first image for more and larger screenshots.)
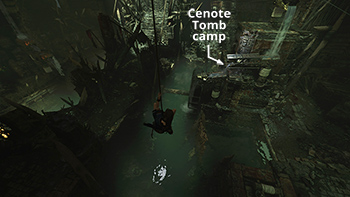
It's not possible to get back to the Cenote Temple Ruins camp from here, so continue along the passageway to the southwest, swim down through the waterwheel and continue to the huge cavern with the round stone gate. Follow the main walkthrough if you need help navigating. Head for the southwest corner of this area to find the Cenote Tomb Base Camp, which only appears after completing this area in the story. Fast travel to wherever you left off. (Click second image for more.)
EFFIGY 4
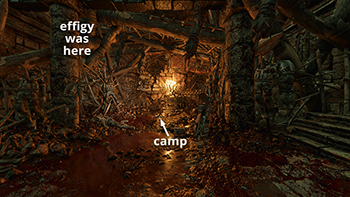
This challenge item is in the southwest corner of the huge cavern with the circular stone gate. If you missed it, fast travel to the Cenote Tomb Base Camp, which appears after completing this area in the story. (So far, I have not encountered any enemies when revisiting this area.) The effigy is hanging right next to the campfire. (Click image for more and larger screenshots.)
I had already completed the challenge by the time I was able to revisit this area, so these screenshots show the area both before and after the camp appears. If this is all you need, just use the campfire again to fast travel away.
EFFIGY 5
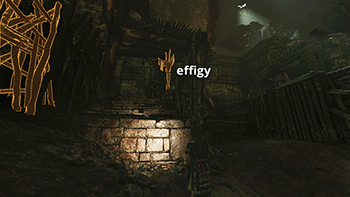
This effigy is also in the huge cavern with the circular stone gate. If you missed it, fast travel to the Cenote Tomb Base Camp, which appears after you clear this area in the story. From the campfire, jump into the pool to the northeast. Swim down through the water wheel on the opposite side of the pool and surface in the smaller pool beyond. Turn left (north) and climb out of the water. The effigy is hanging at the top of the steps just ahead. (Click first image for more and larger screenshots.)
I had already completed the challenge when I revisited this area. The last screenshot shows the effigy in its original place during my first play-through. (Click image to enlarge.) Like the others, it's also marked with a red dot on the annotated map. If that's all you need here, return to the campfire and fast travel away.
Cenote Collectibles | Walkthrough | Collectibles Guides | Main SOTTR Page
†UPDATE HISTORY: 9/17/21 - Page first posted online.
WAS THIS WALKTHROUGH HELPFUL? If not, I apologize and invite you to contact me with any questions. If you need help right away, I recommend the r/TombRaider subreddit. Other fan-run forums are listed at tombraiders.net/stella/community.html. If this site was useful, please consider supporting it financially or in other ways. For details, visit tombraiders.net/stella/support.html. As always, I welcome your corrections/suggestions. Thank you!
Copyright © Stellalune (). All rights reserved. Feel free to copy or print this walkthrough for personal use. By all means, share it with friends, but please include this credit line so people can send me their feedback. No part of this walkthrough may be reproduced on another site without permission. Follow this link for details about this site's advertising and privacy policy.
Stella's Tomb Raider Site: tombraiders.net.
