Shadow of the Tomb Raider - Kuwaq Yaku Challenges
Updated: 6/2/19(†)
This guide focuses on revisiting the level after completing it. If you are playing through for the first time, you may want to follow the main walkthrough instead to avoid possible spoilers. Documents, relics, and other collectibles are covered in the main Kuwaq Yaku Collectibles section.
Bottom Feeder · Crude Awakenings · Nam Deus
Challenge: Bottom Feeder
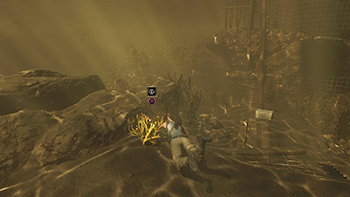
The goal is to collect 5 aquatic plants growing on the river bottom. There are more than enough plants in the area near the docks at the south end of the village, so I haven't bothered marking them on the map. There are even more aquatic plants elsewhere in the level, in case you discover the challenge later. Just be sure to pick any plants you notice as you search for other resources and collectibles on the river bottom. They will also come in handy later when you unlock the skills to use various herbal mixtures.
Challenge: Crude Awakenings
This challenge is confined to the area north of the village, more or less between the Kuwaq Yaku Ruins and Hunting Grounds Base Camps. The goal is to blow up 5 red oil barrels by shooting them with a bow or gun. In the main walkthrough, this is covered after Lara returns from the Temple of Life, but you can do the challenge sooner if you like. The barrels are marked with red dots on the annotated level map.
OIL BARREL 1
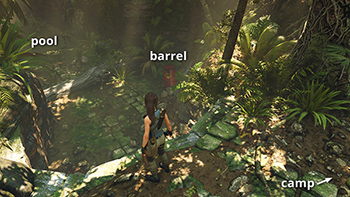
If you're coming from the Temple of Life, north of the village, the first barrel is just after you climb out of the pool and before you reach the Kuwaq Yaku Ruins Base Camp. (screenshots) If you're coming from the camp, head up the steps to the north. At the top, instead of turning right into the Hunting Grounds, turn left, and follow the path until you see the pool and the oil barrel. (Click screenshot to enlarge.)
OIL BARREL 2
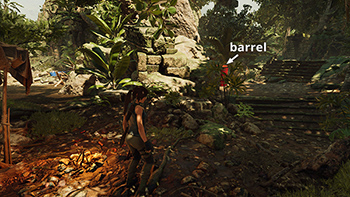
This barrel is just north of the Kuwaq Yaku Ruins Base Camp. If you're coming from the north, it's on the right side of the path on the way down the stone steps. (screenshot) If you're standing near the campsite, facing north, the barrel is just ahead on the left. (Click screenshot to enlarge.)
OIL BARREL 3
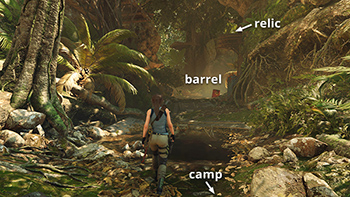
The remaining barrels are nearer to the Hunting Grounds Base Camp. This one is sitting on the ground below the elevated wooden platform with relic #4. If you missed it on your first pass, fast travel to the Hunting Grounds camp and follow the path to the north. The barrel will be on the right. (Click screenshot to enlarge.)
OIL BARREL 4
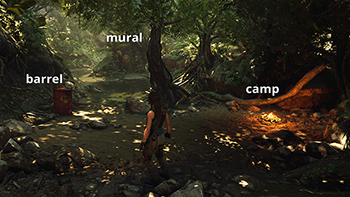
This one is just north of the Hunting Grounds Base Camp. In this screenshot, Lara is facing northeast and mural #9 is visible a little farther to the east. (Click screenshot to enlarge.)
OIL BARREL 5
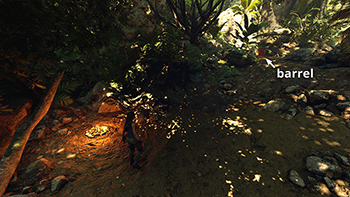
The last barrel is just up the hill to the northwest of the Hunting Grounds camp, where the path comes to a T. (Click screenshot to enlarge.)
Challenge: Nam Deus
This morally ambiguous challenge, in which you must shoot down 5 feathered totems, "For God," is also centered around the Hunting Grounds north of the village. If you have the Owl's Wisdom skill, the totems will glow in Survival Instinct, making them easier to spot. They're also noted in red type in the main walkthrough and marked with yellow dots on the annotated level map.
TOTEM 1
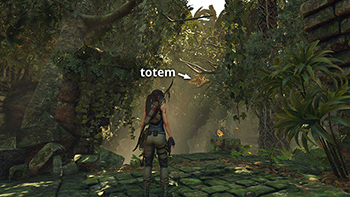
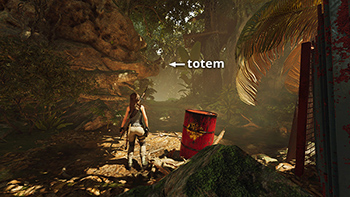
In the main walkthrough, this challenge is introduced on the way back from the Temple of Life, so the "first" totem is hanging just above the western entrance to the Hunting Grounds. If you're coming from the Kuwaq Yaku Ruins Base Camp instead, climb the steps to the northeast and you'll see the totem directly ahead before dropping down off the ledge into the valley. (Click screenshot to enlarge.)
TOTEM 2
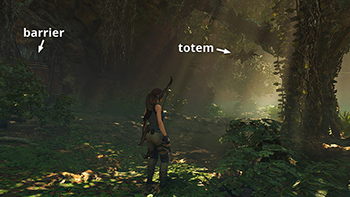
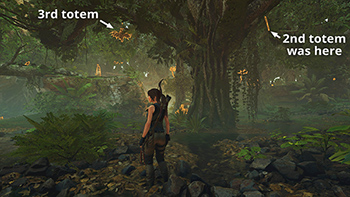
The next totem is a little farther along the valley to the northeast. It's dangling from a tree just beyond the metal barrier on the north valley wall, where document #18 is hidden. (Click screenshot to enlarge.)
TOTEM 3
The next totem is hanging from the other side of the same tree as totem #2. (Click screenshot to enlarge.)
TOTEM 4
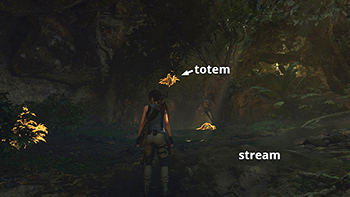
The next three totems are at the northeast end of the Hunting Grounds, on the way to the Howling Caves Challenge Tomb. Totem #4 is just beyond the little stream, where the game notifies you there's a challenge tomb nearby. (Click screenshot to enlarge.)
TOTEM 5
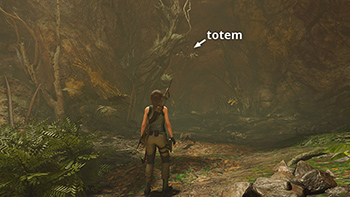
This totem is just east of totem #4, near the 'head' of the peccary/javelina icon on the in-game map. If you've found the others, this will complete the challenge, but there are several more in case you missed any of the first five. (Click screenshot to enlarge.)
TOTEM 6
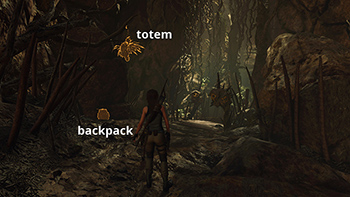
This totem is a little farther northeast of totems #4 and #5. It's hanging above explorer backpack #2, on the left side of the path before the sinkhole leading down into the caverns and the Howling Caves Challenge Tomb. (Click screenshot to enlarge.)
TOTEM 7
This totem is dangling above the south-central entrance to the Hunting Grounds. If you're coming from the Hunting Grounds Base Camp, look for it just as you enter the valley from the south. If you're already in the valley, look for the totem just to the right of the first elevated wooden platform. (screenshot) (Click screenshot to enlarge.)
Kuwaq Yaku Collectibles | Walkthrough | Collectibles Guides | Main SOTTR Page
†UPDATE HISTORY: 6/2/19 - Page first posted online.
WAS THIS WALKTHROUGH HELPFUL? If not, I apologize and invite you to contact me with any questions. If you need help right away, I recommend the r/TombRaider subreddit. Other fan-run forums are listed at tombraiders.net/stella/community.html. If this site was useful, please consider supporting it financially or in other ways. For details, visit tombraiders.net/stella/support.html. As always, I welcome your corrections/suggestions. Thank you!
Copyright © Stellalune (). All rights reserved. Feel free to copy or print this walkthrough for personal use. By all means, share it with friends, but please include this credit line so people can send me their feedback. No part of this walkthrough may be reproduced on another site without permission. Follow this link for details about this site's advertising and privacy policy.
Stella's Tomb Raider Site: tombraiders.net.
