Rise of the Tomb Raider - Abandoned Mines Collectibles
Updated: 4/25/16(†)
This guide, along with the annotated level map, should help when revisiting this level. If you are playing through for the first time, you may want to follow the main walkthrough instead. Weapons, Equipment, and Outfits are covered separately.
When revisiting this level later in the game, everything on the north side of the canyon is still accessible from the Pantheon Corridor Base Camp. There are no major collectibles on the south side of the canyon, so the most you might miss are a few coins and some salvage near the giant statue. The section in the main walkthrough on REVISITING THE MINES includes more detail on how to get back to each part of the level.
Relic · Documents · Explorer Satchel · Survival Caches · Monolith & Coin Caches · Strongboxes · Archivist Map
RELIC
The only relic in this level is in the dark tunnels below the main area. To get back there, carefully climb down the ice wall inside the circular spike pit (marked on the map and described in the last section of the walkthrough). Follow the passage to the southwest, jump across the pillars in the spike pit, and continue straight ahead to the relic. (Click screenshot to enlarge.)


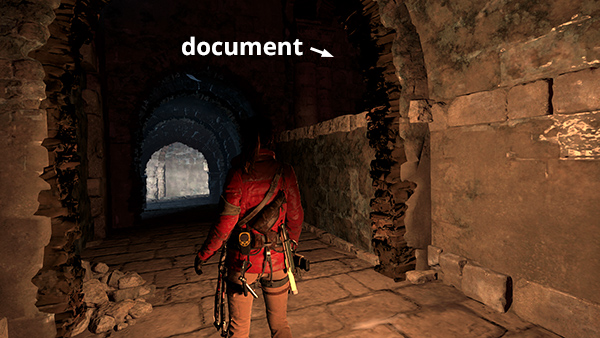
DOCUMENT 1
The first document is sitting on a wooden crate in the passage at the top of the cave with the broken elevator. If you missed it, follow the passageway north from the base camp. (See the walkthrough for details.) The document will be on the right just before the elevator. (Click screenshot to enlarge.)
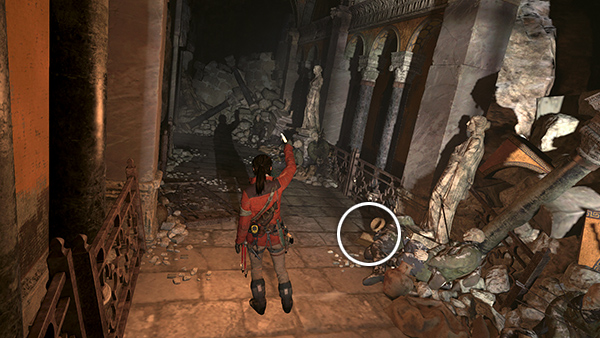
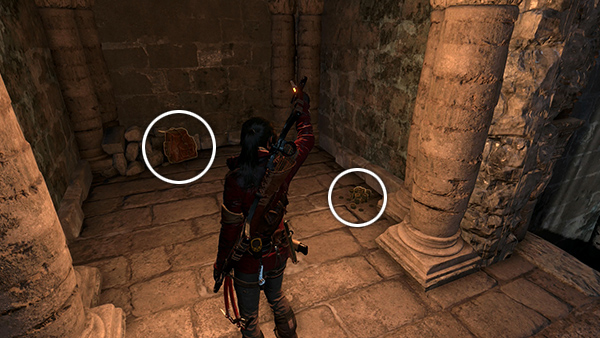
DOCUMENT 2
This document is between the base camp and the cave with the broken elevator. Head north from the base camp, jump across the spike pit, and look for the document behind some desiccated bodies on the right side of the hallway. (Click screenshot to enlarge.)
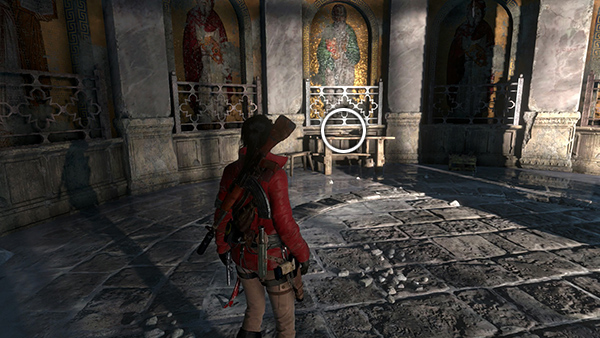
DOCUMENT 3
This document is sitting on a table near the curved wall of the ruined chancel with the shallow pools where you fought the Trinity soldiers. To get back there from the base camp, go up the stairs to the south and around the corner. The document is on the far left beyond the circular opening in the floor. (Click screenshot to enlarge.)
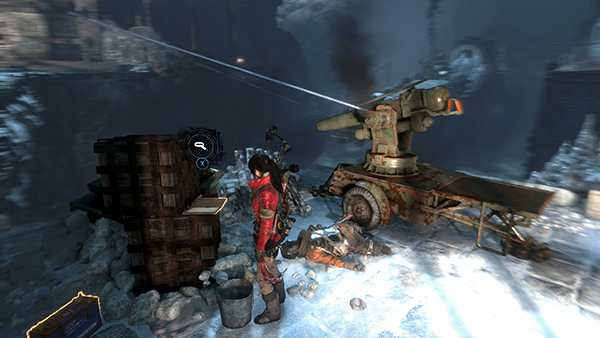
DOCUMENT 4
This document is in the same area as the previous one. Move out onto the southern ledge overlooking the canyon and you'll see the document sitting on some boxes near the big gun on wheels. (Click screenshot to enlarge.)
DOCUMENT 5
This document is in the dark tunnels beneath the main area. To get back there from the base camp, head south then around the corner to the room with the shallow pools. Climb down the ice wall inside the circular pit (marked on the map and described in the walkthrough) and jump off to the right. The document is in a raised alcove just ahead on the right. (Click screenshot to enlarge.)
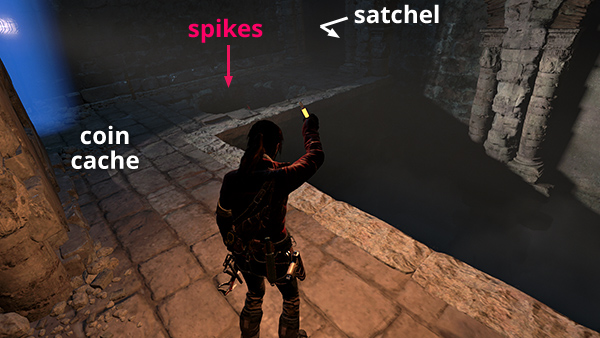
EXPLORER SATCHEL
The satchel is also in the dark tunnels below the main area. Follow the tunnel past the alcove with document #5 (above). Then go around the left side of the large spike pit, jump across a concealed spike pit in the floor, and you'll find the satchel in a dead-end alcove along with some gold coins. See the map and walkthrough for details. (Click screenshot to enlarge.)
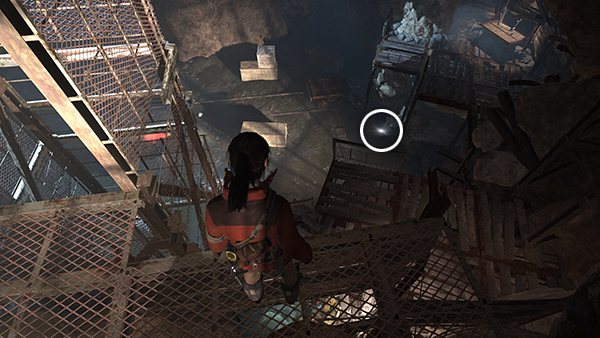
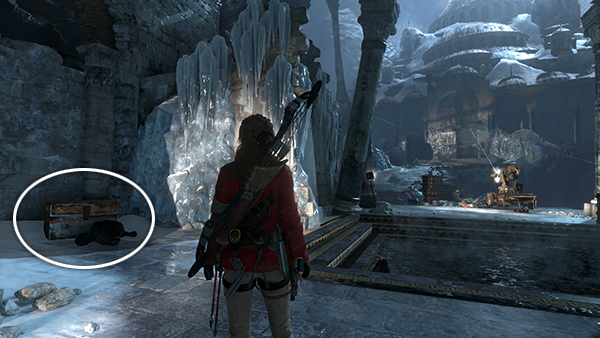
SURVIVAL CACHE 1
The explorer satchel (above) reveals all 3 caches on your in-game map. The first cache is buried on the northeast side of the cave with the broken elevator. If you missed it, return to the base camp, follow the passageway to the north, and climb down into the elevator room. The cache is just below the ledge where you found the COMBAT KNIFE. (Click screenshot to enlarge.)
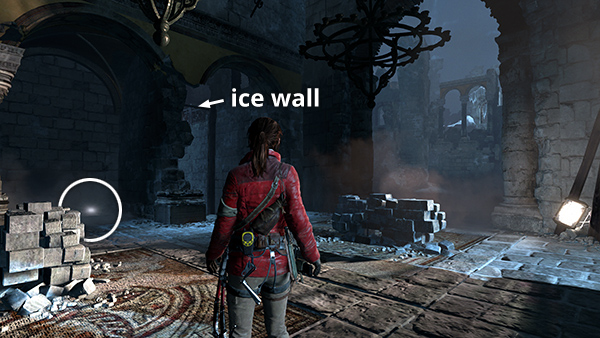
SURVIVAL CACHE 2
The next cache is in the room with the chandeliers where you fought a bunch of Trinity soldiers. To get back there, carefully climb down the ice wall inside the circular spike pit (marked on the map and described in the last section of the walkthrough). The cache is buried on the north side of this room, just around the corner from the ice wall you'll climb to get back to the base camp. (Click screenshot to enlarge.)
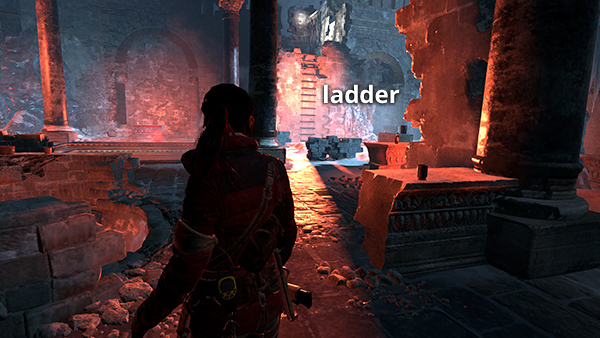
SURVIVAL CACHE 3
This cache is on the ledge at the top of the ladder on the east side of the ruined chancel with the shallow pools. It is only accessible after the second combat sequence in this area. Climb the ladder and you'll find the cache buried on the right, opposite strongbox #2. (Click screenshot to enlarge.)
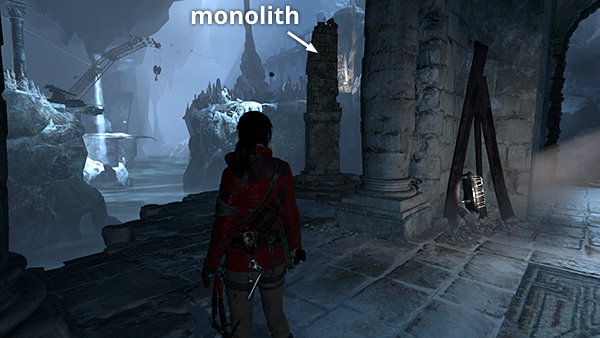
MONOLITH
The monolith is near the room with the chandeliers, where you fought the second large group of Trinity soldiers. To get back there, carefully climb down the ice wall inside the circular spike pit (marked on the map and described in the last section of the walkthrough). Step out onto the ledge overlooking the canyon and you'll see the monolith on the right. (Click screenshot to enlarge.)
COIN CACHE 1
After deciphering the monolith (above), all the coin caches will become accessible and will be marked on your in-game map. The first one is in the room near the monolith. It's on the right side of the rounded section toward the back. Check the map and walkthrough for details. (Click screenshot to enlarge.)
COIN CACHE 2
This cache is in the dark tunnels below the main area. To reach it from the base camp, climb the stairs to the south and go around the corner to the room with the shallow pools. Climb down the ice wall inside the circular pit (marked on the map and described in the walkthrough) and jump off to the right. Follow the passage forward to the large spike pit. The coin cache is in the near left corner. (Click screenshot to enlarge.)

COIN CACHE 3
The last coin cache is between the base camp and the ruined chancel with the shallow pools where you fought the Trinity soldiers. To get back there from the base camp, go up the stairs to the south and around the corner. The cache is buried in the corner to the right of the first low wall. (Click screenshot to enlarge.)
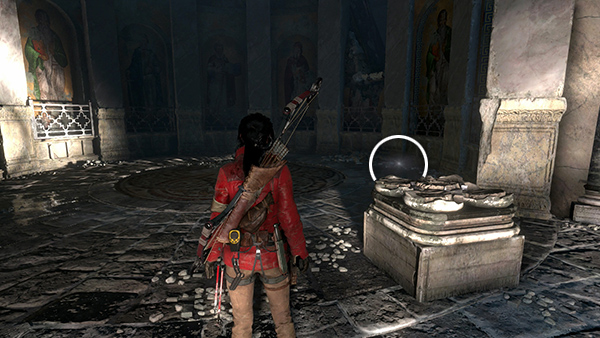
STRONGBOX 1
Both strongboxes in this level are in the ruined chancel with the shallow pools where you fought the Trinity soldiers. From the base camp, go up the stairs to the south and around the corner. The first strongbox is in an alcove on the east side of the room between the two shallow pools. (Click screenshot to enlarge.)
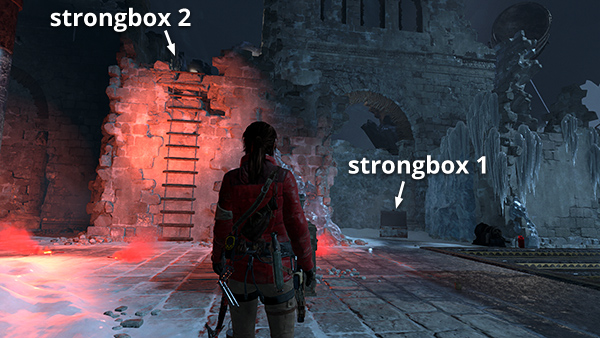
STRONGBOX 2
The second strongbox is in the same area. It is only accessible after the second combat sequence in this area. Climb the ladder on the east wall and you'll find the box on the ledge above. Check the map and walkthrough for details. (Click screenshot to enlarge.)
ARCHIVIST MAP
The map for this level is near the second strongbox (above). After climbing the ladder shown in the previous screenshot, scramble up the wooden wall onto the ledge on the right, and you'll find the map sitting on a crate. See the map and walkthrough if necessary. (Click screenshot to enlarge.)

Top of Page | Walkthrough | Collectible Guides | Main ROTTR Page
†UPDATE HISTORY: 4/25/16 - Page first posted online.
WAS THIS WALKTHROUGH HELPFUL? If not, I apologize and invite you to contact me with any questions. If you need help right away, I recommend the r/TombRaider subreddit. Other fan-run forums are listed at tombraiders.net/stella/community.html. If this site was useful, please consider supporting it financially or in other ways. For details, visit tombraiders.net/stella/support.html. As always, I welcome your corrections/suggestions. Thank you!
Copyright © 2015 - Stellalune (). All rights reserved. Feel free to copy or print this walkthrough for personal use. By all means, share it with friends, but please include this credit line so people can send me their feedback. No part of this walkthrough may be reproduced on another site without permission. Follow this link for details about this site's advertising and privacy policy.
Stella's Tomb Raider Site: tombraiders.net.