Tomb of the Architect - More Rotating Gears, Fire, and Arrow Traps (Part 2)
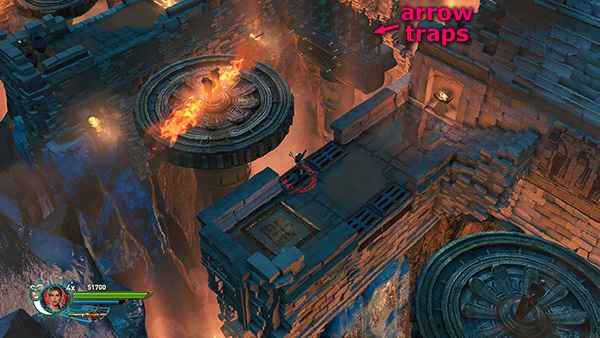
There's another rotating gear to the upper left. This one has a flame trap on top. Before jumping onto it, use the rocket launcher to destroy the arrow traps (18-24/24) off to the right of the big gear.
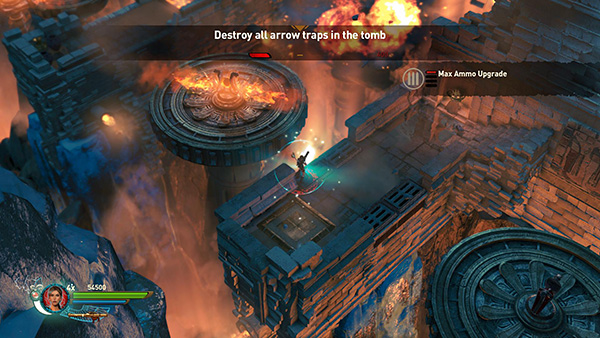
This will mean one less hazard to deal with and if you've destroyed all the others, finishes the arrow trap challenge, earning you a MAX AMMO UPGRADE.
NOTE: If you're out of ammunition and can't use the rocket launcher, see the alternate methods for destroying the arrow traps and obtaining the red skull, in the next section.
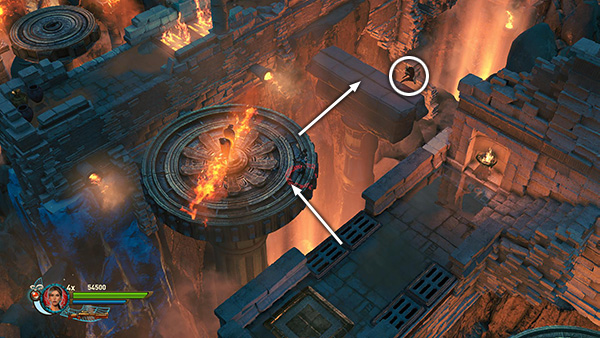
After destroying all the traps, jump onto the moving gear and from there to the narrow ledge where the arrow traps were. There you'll find a red skull (2/5).
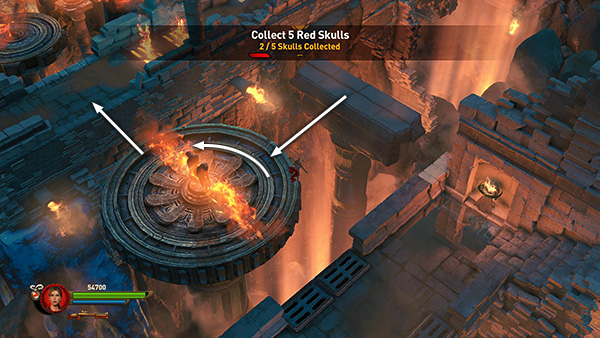
Once you have the skull, jump back to the gear, and then carefully move counterclockwise around the gear, avoiding the flames, and then jump onto the ledge ahead.
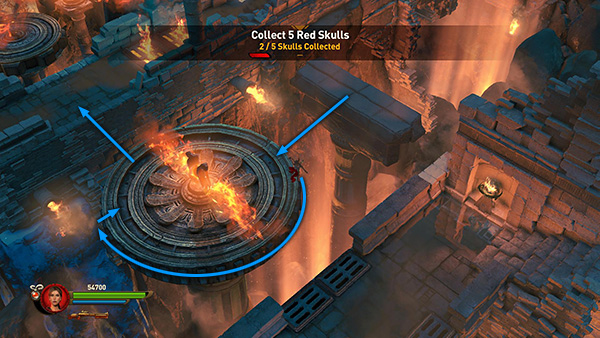
Or, jump from the ledge where you found the skull onto the gear, hang from the edge and ride around to the left, as the flames pass above you, climb onto the gear and jump onto the ledge.
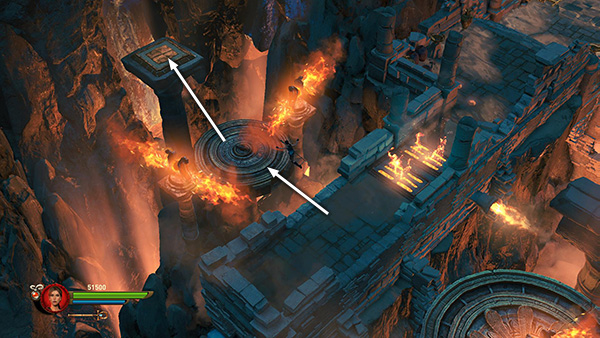
The walkway to the right is blocked by flame vents. To deactivate them in the single-player game, jump onto the rotating gear to the upper left, timing your jump to avoid the rotating flame jets if possible. Run across the gear and jump onto the tall pedestal with the pressure pad on top. Run across the gear and jump onto the tall pedestal with the pressure pad. Stepping on the pad turns off the vents but not the flame jets.
NOTE: It is especially important to have fire resistance here. If your character catches fire, she will not be able to make the jump onto the pressure pad in her injured state. So either make sure you have a fire-resistance item equipped or take extra care not to let the flame jets touch you.
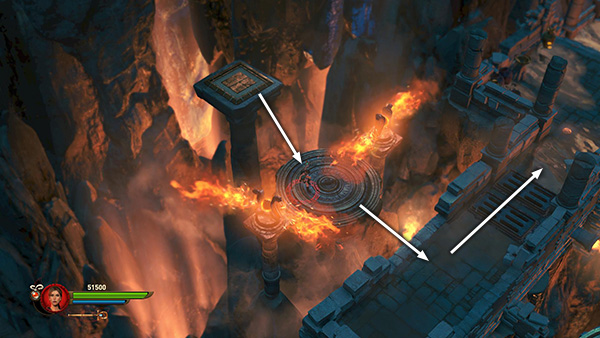
Carefully jump back down onto the gear, then to the walkway, and continue on.
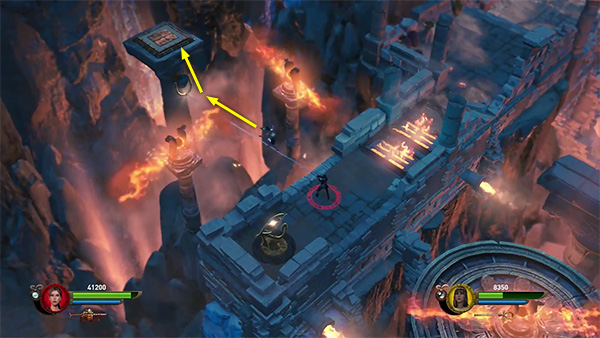
In the co-op game there's a grapple ring here instead of the moving gear. There is also an Eye of Horus switch that reverses the rotation of the flame jets. Have Lara or Carter grapple the ring so one of the others can tightrope walk across and jump onto the pressure pad. Either go carefully or plant a remote bomb near the switch and detonate it to reverse the direction of the flame jets if necessary.
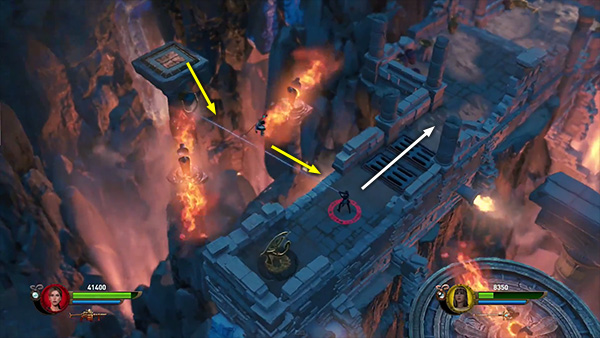
After stepping on the pressure pad, jump back down to the cable, return past the flames, and continue to
the upper right.
Copyright © - Stellalune (
). All rights reserved. The screenshots and videos included here were made using Fraps. Feel free to copy or print this walkthrough for personal use. By all means, share it with friends, but please include this credit line so people can send me their feedback. No part of this walkthrough may be reproduced on another site without permission. Follow this link for details about this site's advertising and privacy policy.