STELLA'S LARA CROFT GO WALKTHROUGH - Android, iOS, PS4 and Vita, Steam, and Windows Phone/PC/Tablet
THE MIRROR OF SPIRITS - PART 8: THE BALLROOM
Updated: 4/1/17(†)
Relic Fragments: 1
Gems: 2
Follow this link for my video walkthrough.
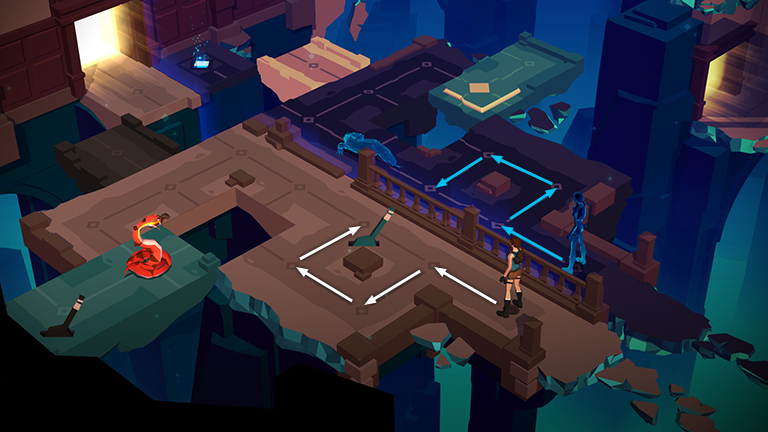
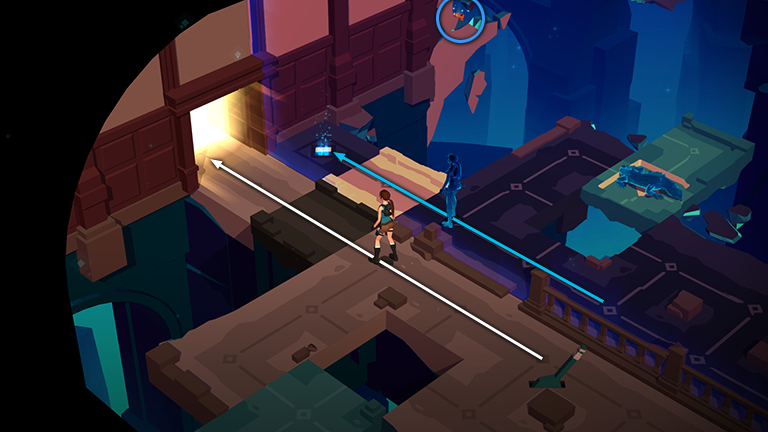
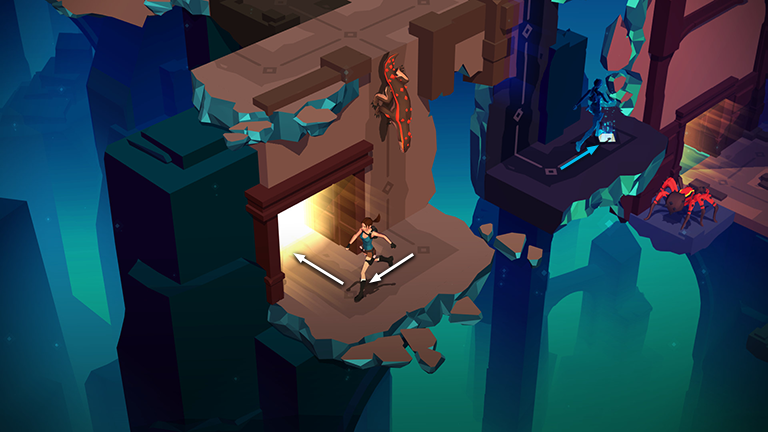
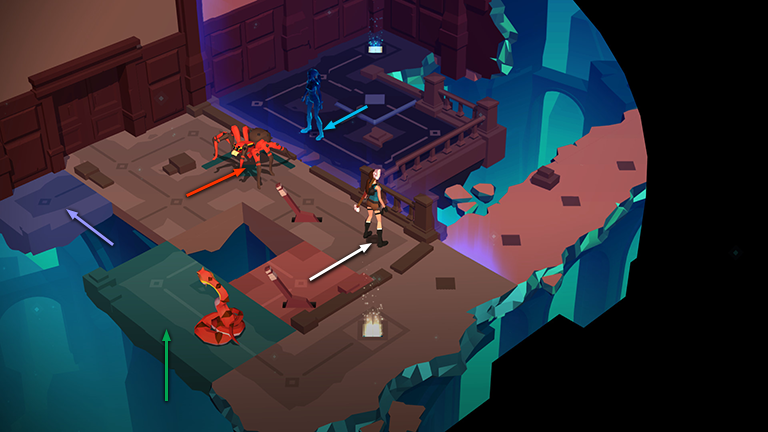
Step forward, left, forward, then right to make your way around to the first lever. In the mirror world, Spirit Lara moves forward, right, forward, then left, attracting the spirit lizard's attention but avoiding being attacked.
Pull the first lever to slide the 2 gray blocks toward the center.
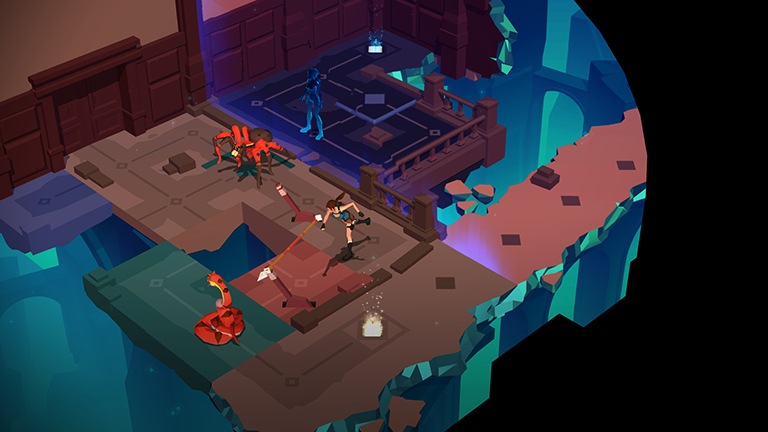
Step to the lower right, lower left, then twice to the upper right to shoot the snake sitting on the gray block. Meanwhile, Spirit Lara moves around to the tan pressure pad with the spirit lizard following two spaces behind her. When she steps on the pad, the tan block slides to the left toward the mirror world's exit point.

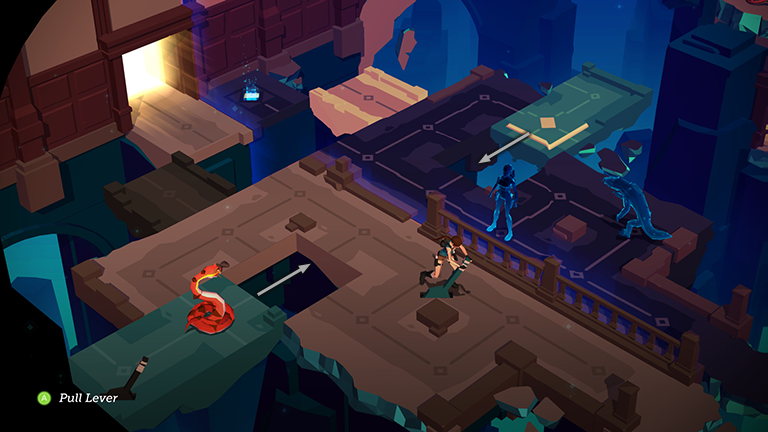
Move to the lower left and pull the second lever to shift the dark gray block to the right, toward your exit. Meanwhile, Spirit Lara moves to the right, off the tan pressure pad, so the tan block slides back to the right. The spirit lizard continues to follow her.

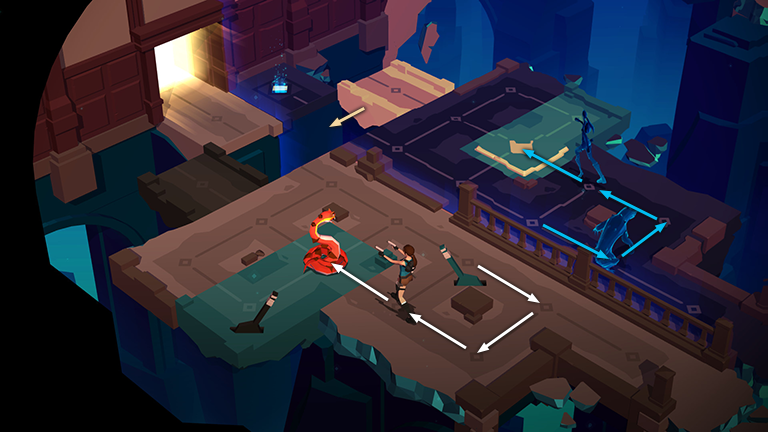
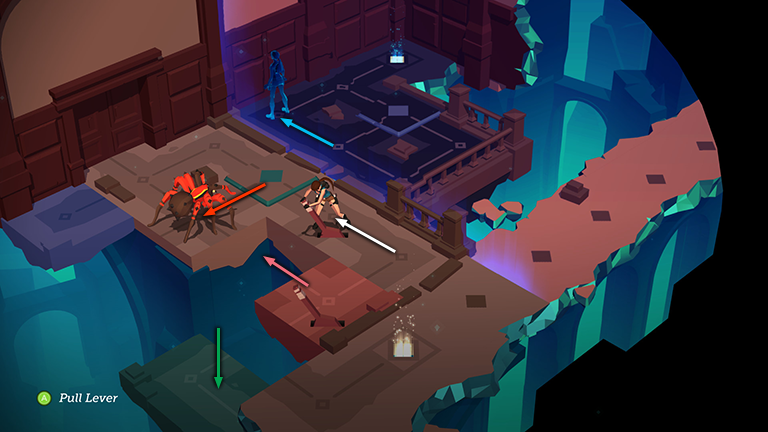
Move to the upper left, upper right, twice to the lower right, then once to the upper right to get back to the first lever. Meanwhile, Spirit Lara mirrors your movements on the other side of the room, and the spirit lizard continues to follow two spaces behind her. It should end up on the tan pressure pad, moving the tan block to the left.

Pull the first lever again, to shift the 2 gray blocks back to their original positions.
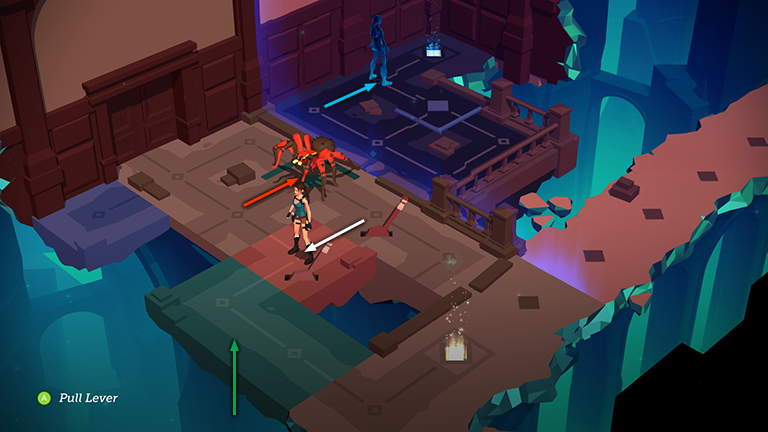
The spirit lizard should now be out of Spirit Lara's way, but it will remain on the tan pad, keeping the tan block lined up with the mirror world's exit.
Move toward the exit, but before leaving be sure to smash the vase sitting on the uneven ledge in the background to get a CRYSTAL (10/14).
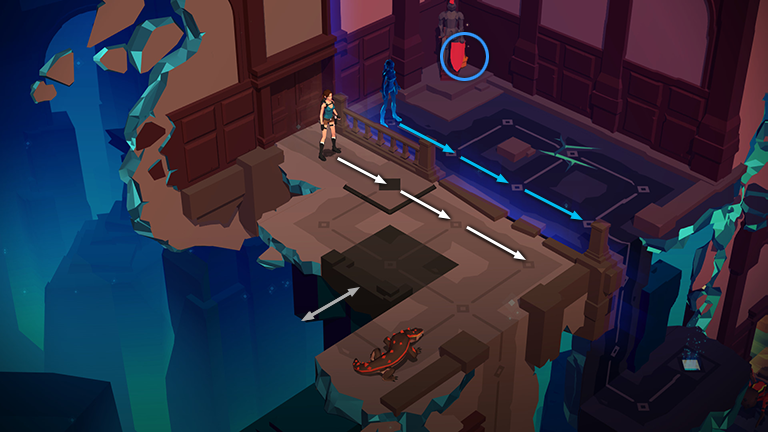
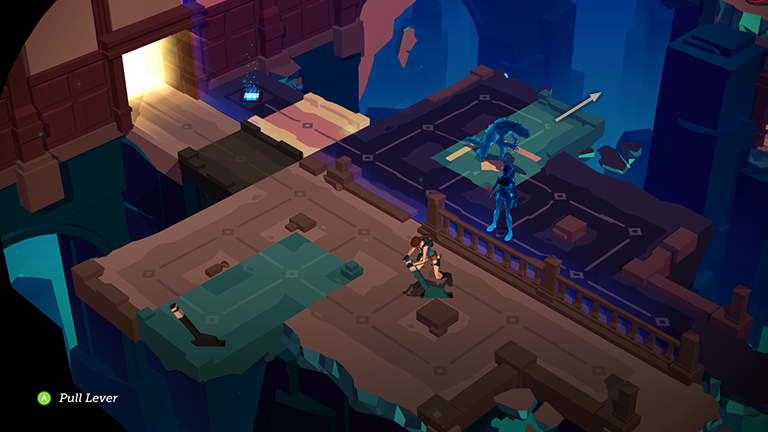
In the next area, break the vase tucked away behind the suit of armor for another CRYSTAL (11/14). Then step forward three times. As Lara moves over the pressure pad, the gray block shifts to the left then back to the right. Meanwhile, Spirit Lara also moves forward three times.
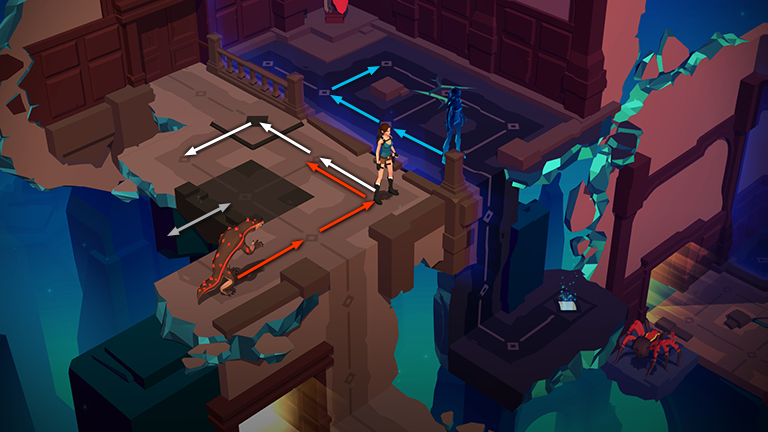
Now that you have the lizard's attention, move back to the upper left twice, onto the pressure pad, then to the lower left. As Lara moves on and off the pad, the gray block moves to the left and then back to the right. Meanwhile the lizard follows, two spaces behind, and Spirit Lara mirrors your movements on the other side of the room.
Step onto the gray block. The lizard moves onto the pressure pad, causing the gray block—with Lara standing on top—to slide to the left. Spirit Lara also moves forward onto the cracked floor.

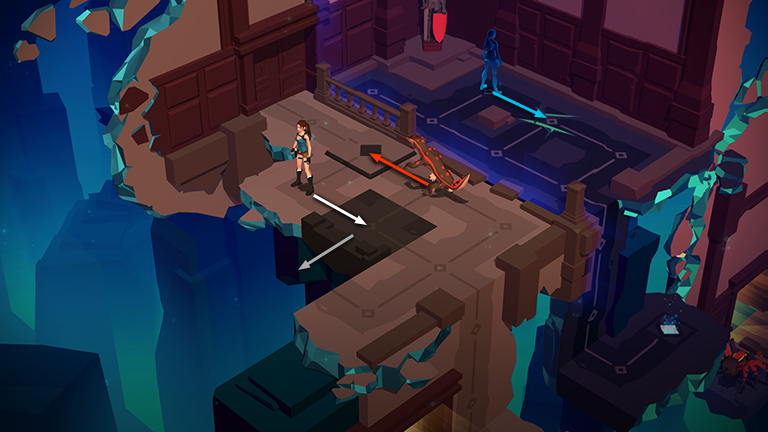
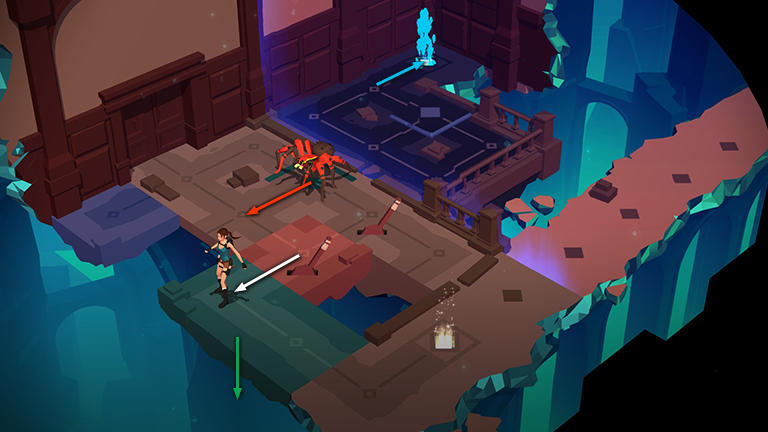
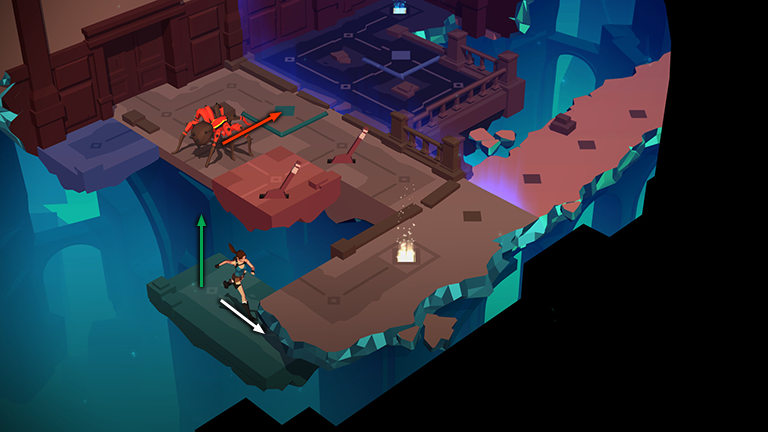
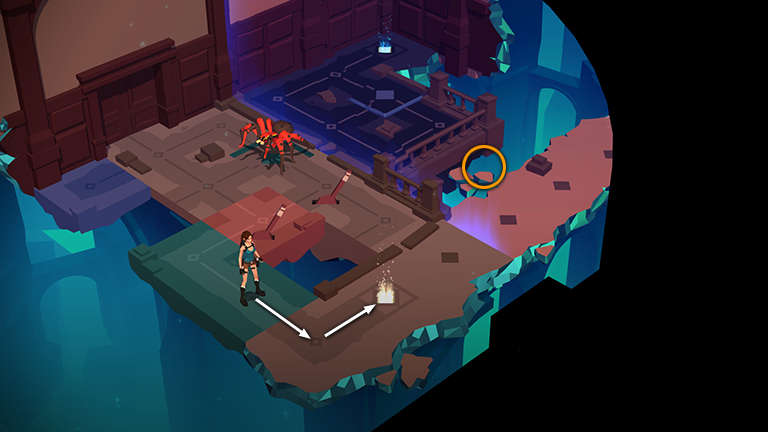
Step off the gray block. Then move to the right and climb down the wall to the exit. Spirit Lara does the same on the other side of the room. The gray block slides back to the right as soon as lizard steps off the pad, and the creature continues to follow two spaces behind Lara...
...but as long as you go directly to the exit, the lizard won't catch up.
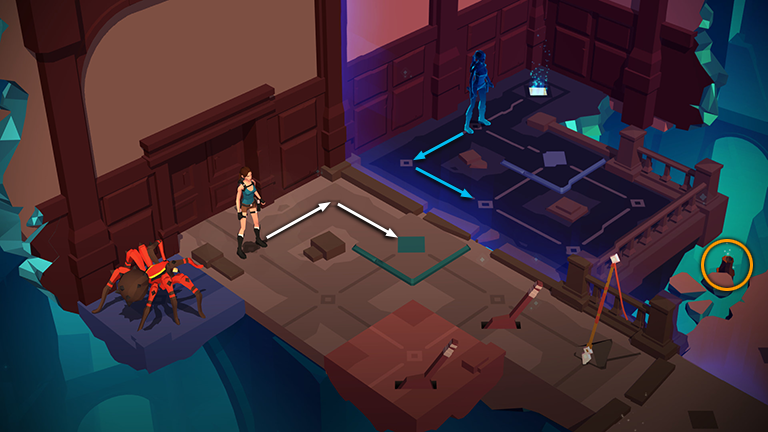
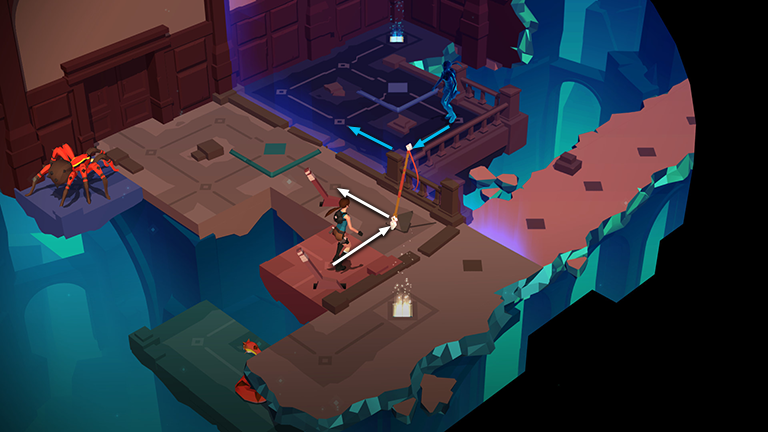
In the next area, smash the vase floating amid the rubble at the lower right to get another piece of the EYE OF THE ABYSS (7/10). Then move to the upper right, then the lower right to stand on the green pressure pad. Meanwhile, Spirit Lara mirrors your movements on the other side of the shimmering barrier.
When Lara steps on the green pad, the green block with the snake on it rises. Now step forward off the pad and move to the left onto the pink block. As you do this, the green block sinks back down. Meanwhile, Spirit Lara moves forward then to the right.
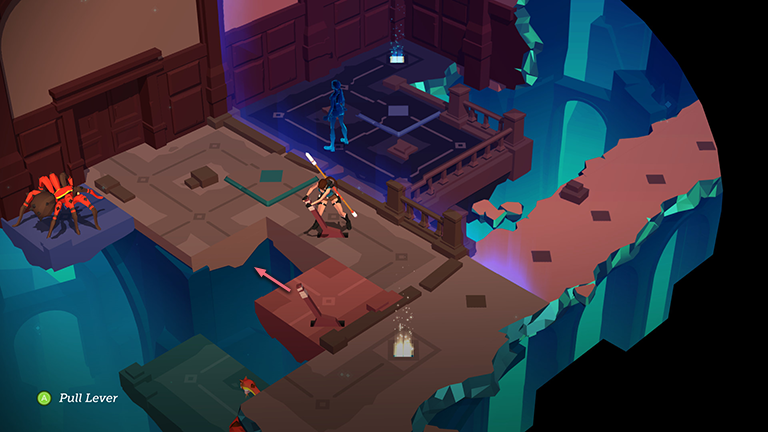
Pull the lever on the pink block to slide the block, with Lara standing on top, to the lower right. There is no corresponding movable block on Spirit Lara's side of the room, so she stays where she is for now.
Step off the pink block and grab the SPEAR. Then move to the upper right to the second lever.
Pull this lever to shift the pink block back to the left.
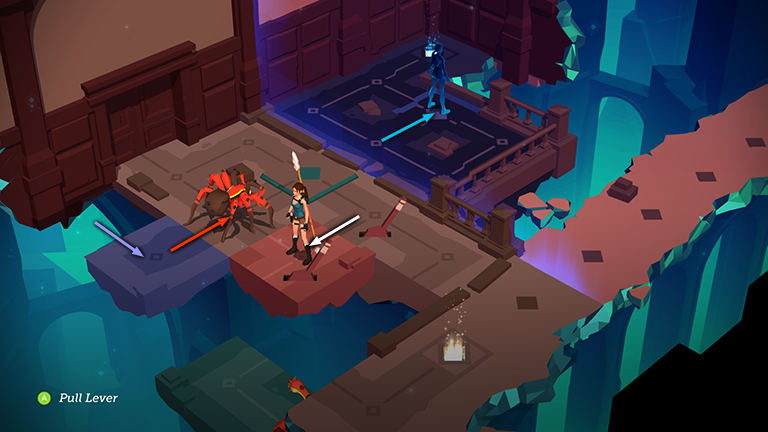
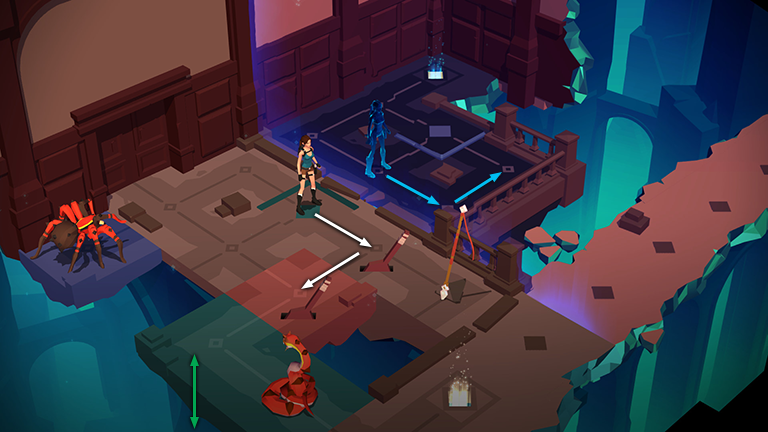
Step onto the pink block. This causes Spirit Lara to move in the opposite direction, onto the purple pressure pad. The purple block with the spider on it slides to the right, and the spider moves forward one space.
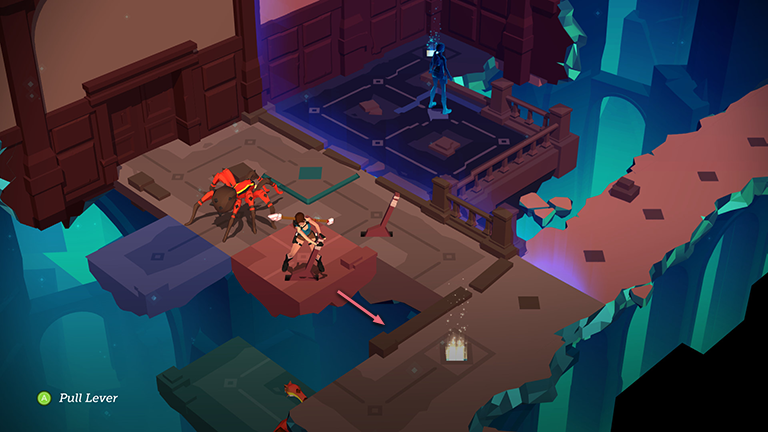
Use the lever on the pink block to shift the block to the right once more.
Now step off the pink block. As you do this, the spider moves forward onto the green pressure pad, raising the green block with the snake on it. Spirit Lara steps off the purple pressure pad, causing the purple block to move back to the left
Throw the spear to kill the snake.
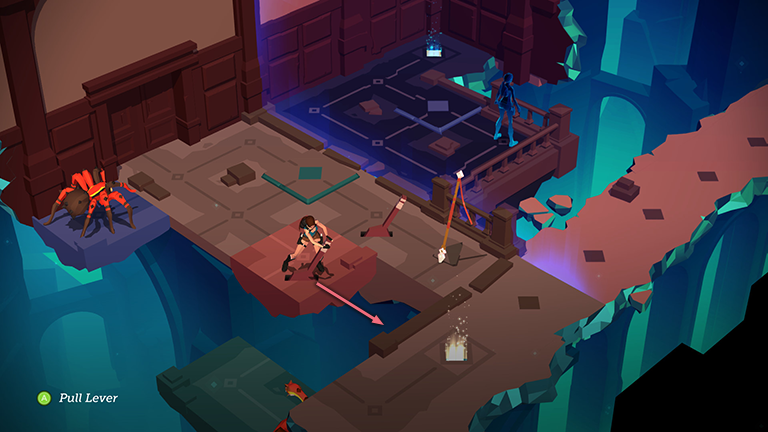
Move to the upper left and pull the second lever to shift the pink block back to the left. Meanwhile, the spider steps off the green pad, causing the green block to sink again. Spirit Lara also moves to the upper left.
Step onto the pink block. The spider moves back onto the green pad, raising the green block again. Spirit Lara moves once toward her exit.
Now step onto the green block. As you do this, the spider moves off the green pad, and the green block sinks, with Lara standing on top. Meanwhile, Spirit Lara reaches her exit and disappears.
Move to the other side of the green block. The spider then skittle forward onto the green pad, raising the green block once more.
Smash the vase to get the RELIC piece if you didn't do so before. Then head for the exit.
†UPDATE HISTORY: 4/1/17 - Walkthrough first posted.
WAS THIS WALKTHROUGH HELPFUL? If not, I apologize and invite you to contact me with any questions. If you need help right away, I recommend the r/TombRaider subreddit. Other fan-run forums are listed at tombraiders.net/stella/community.html. If this site was useful, please consider supporting it financially or in other ways. For details, visit tombraiders.net/stella/support.html. As always, I welcome your corrections/suggestions. Thank you!
Copyright © - Stellalune ( ). Screenshots for the Shard of Life expansion levels were made using the Steam version of Lara Croft GO. Feel free to copy or print this walkthrough for personal use. Share it with friends if you like, but please include this credit line so people can send me their feedback. No part of this walkthrough may be reproduced on another site without permission. Follow this link for details about this site's advertising and privacy policy.
Stella's Tomb Raider Site: tombraiders.net.