STELLA'S LARA CROFT GO WALKTHROUGH - Android, iOS, PS4 and Vita, Steam, and Windows Phone/PC/Tablet
MAZE OF SPIRITS - PART 7: THE THRONE OF THE ANCIENTS (part 1)
Updated: 9/13/15(†)
Relic Fragments: 1*
Gems: 2*
Follow this link for my video walkthrough.
This level is a bit longer than the previous ones, requiring two pages for all 60 screenshots. Part 1, below, covers the first two areas. Part 2 covers the third and final areas.
*There are a total of 3 collectibles in this entire level. The third item is shown in part 2.
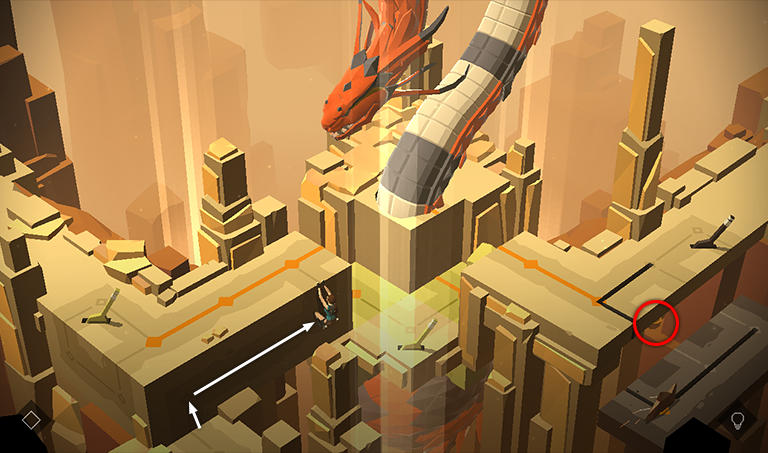
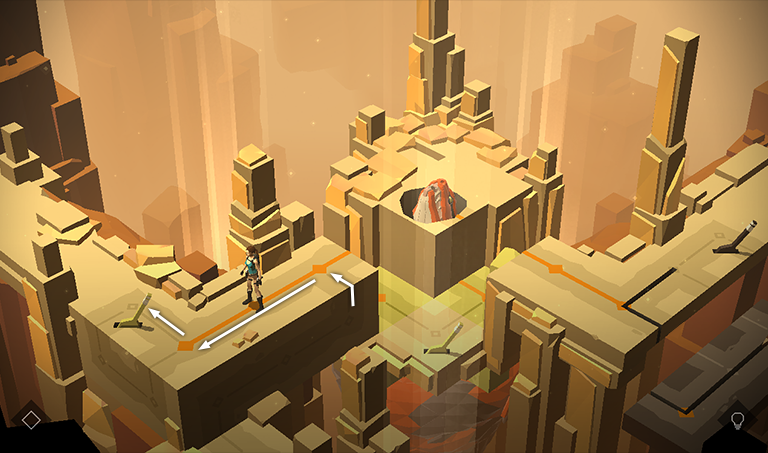
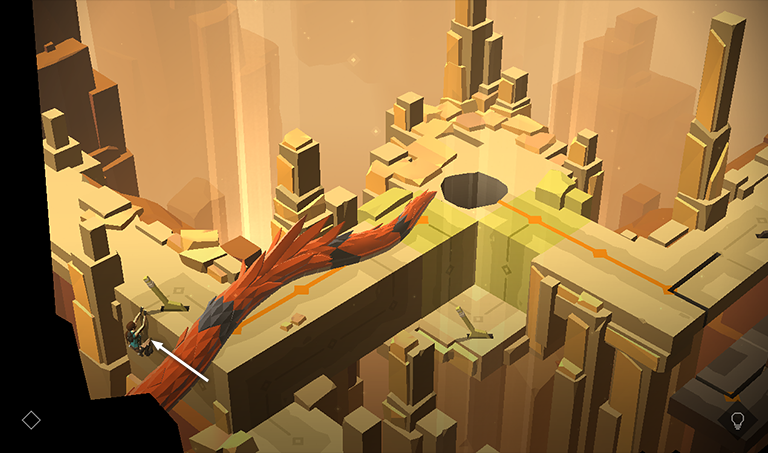
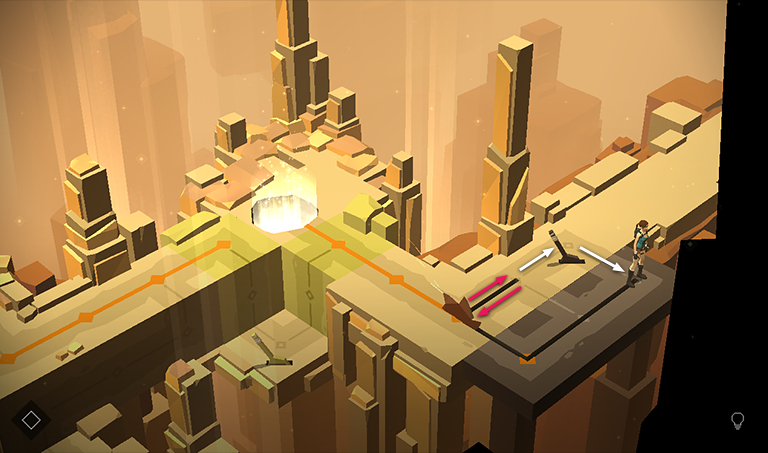
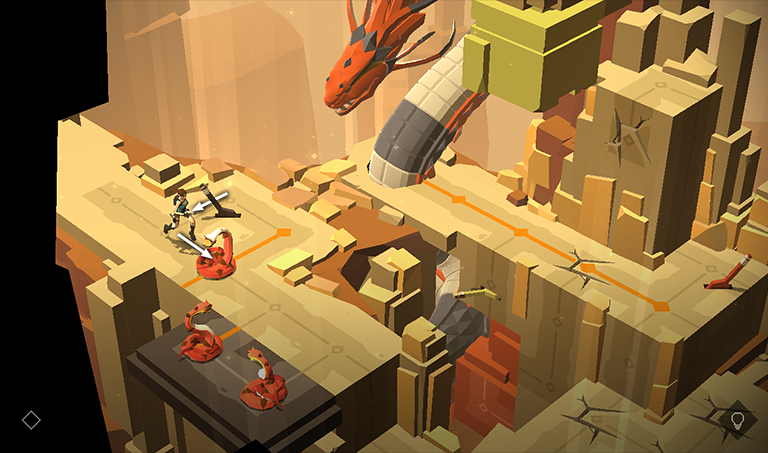
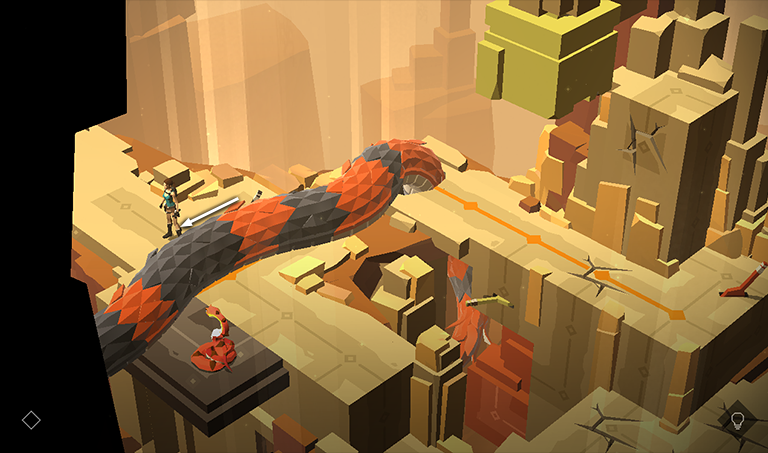
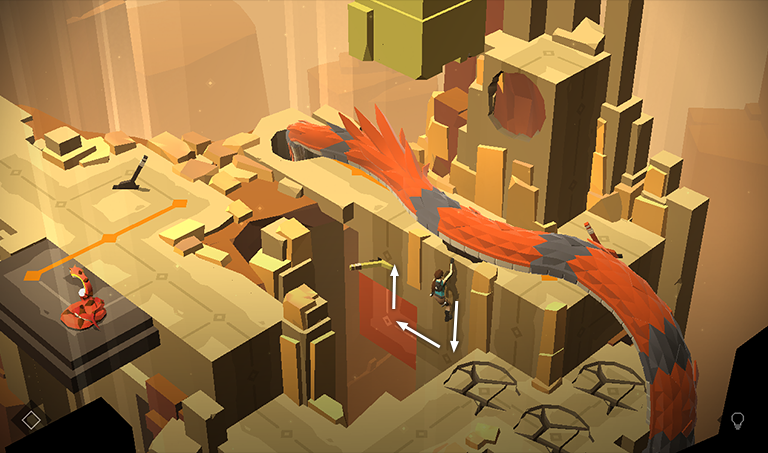
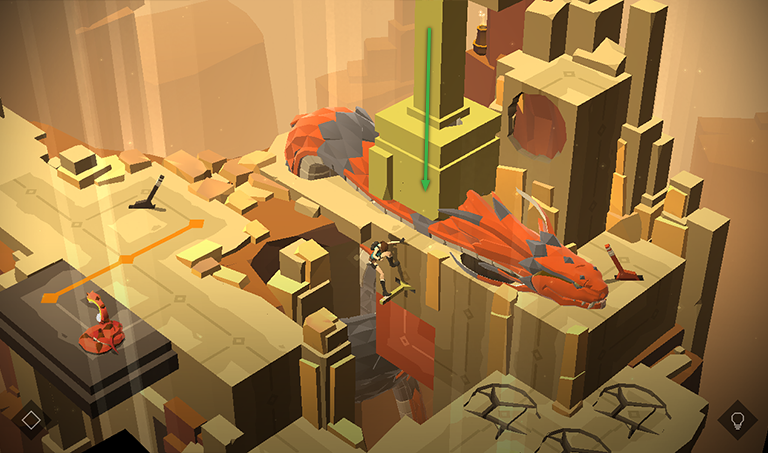
At last we finally meet the QUEEN OF VENOM up close and personal! Pay attention to the timing of her attack mechanics. This will be crucial in this level and the next. Start by grabbing onto the wall and climbing to the right. As you do this, the QUEEN breaks through the floor and rears up above.
If you have the presence of mind to do so, break the vase below the ledge on the right to get a RUBY (14/17).
NOTE: If you find you can't break this vase from the starting position, don't worry. You'll be able to try again later when you get a little closer to it.
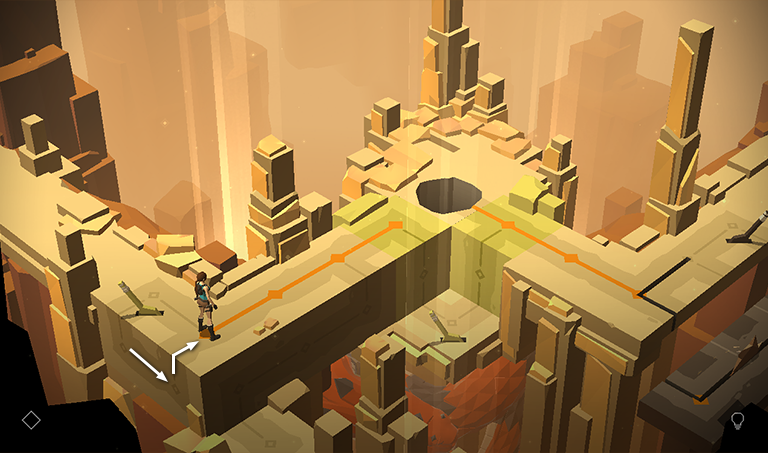
Now pull up onto the ledge and notice how the QUEEN rears up with her mouth open. This posture indicates that she will strike on the next turn. The orange line on the floor shows the path her attack will take. You don't want to be anywhere on that line when it happens.
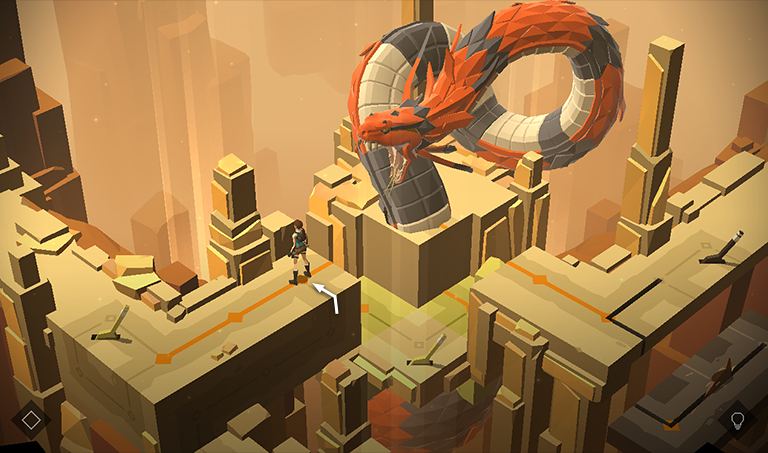
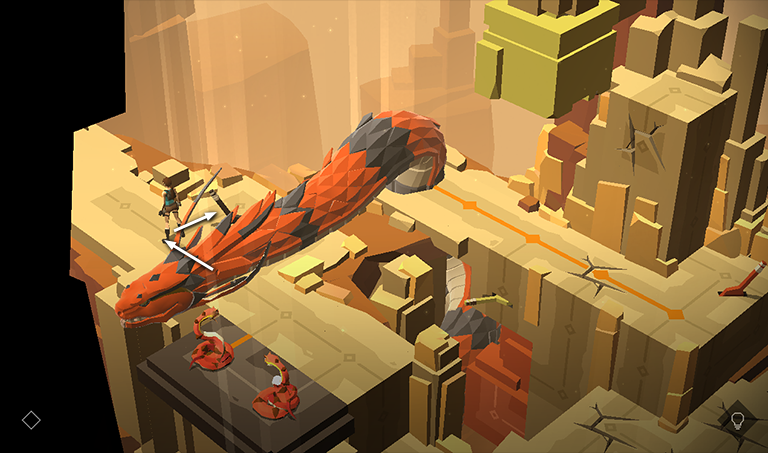
Drop back and hang from the ledge as the QUEEN lunges forward, her body sprawling out along the ledge with the orange line.
Climb to the left, giving the QUEEN a turn to slither forward off the ledge. Then climb back to the right.
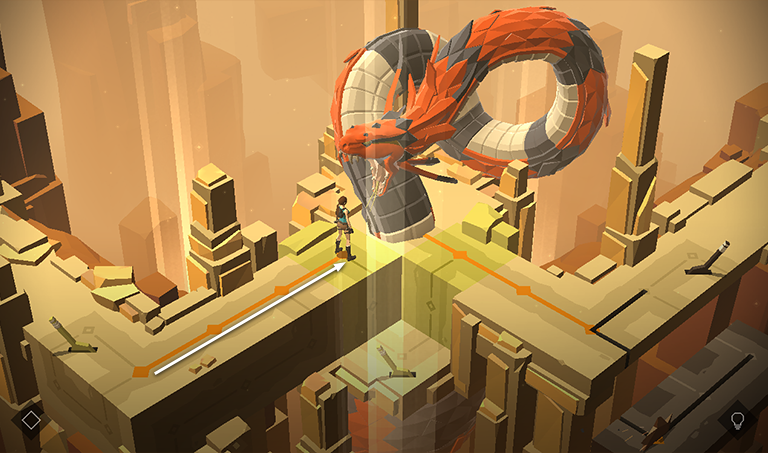
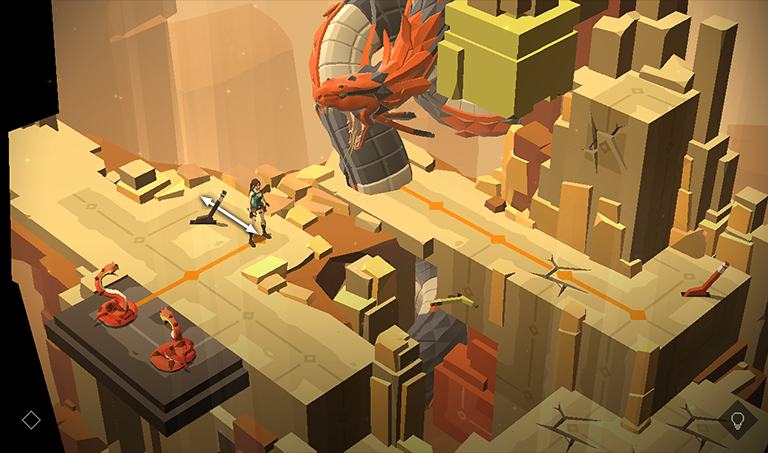
Pull up and move to the left along the orange line to the yellow lever. Meanwhile, the QUEEN circles around below and pops up through the same hole she made earlier.
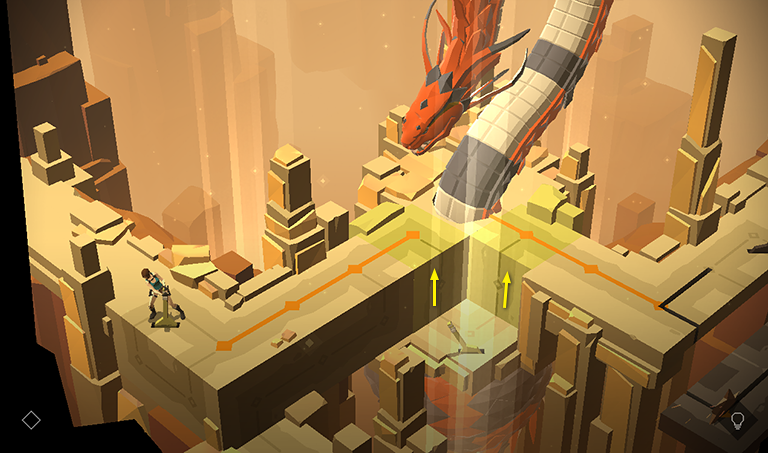
Pull the lever to raise the yellow blocks on either side of the QUEEN.
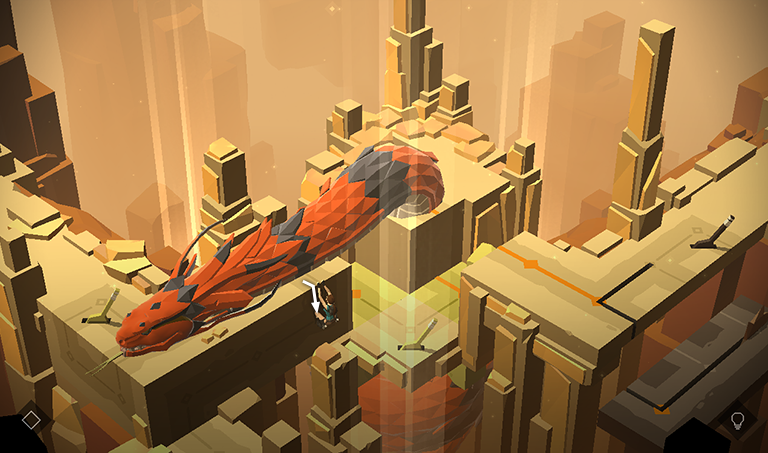
Step to the right, onto the end of the orange line. As you do this, the QUEEN rears up, getting ready to strike on the next turn.
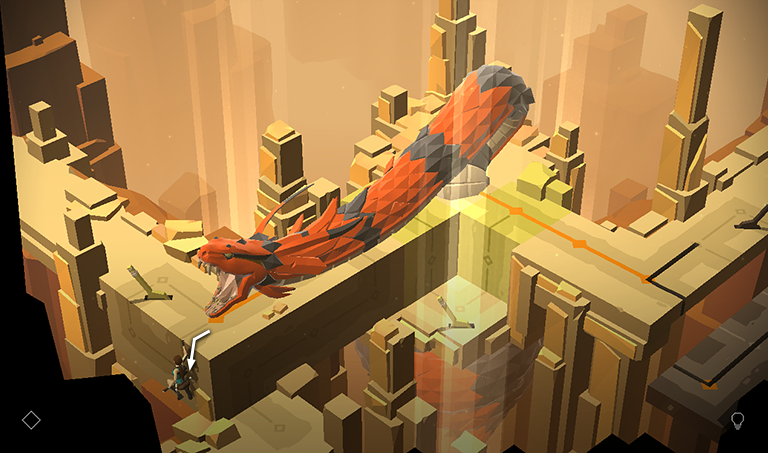
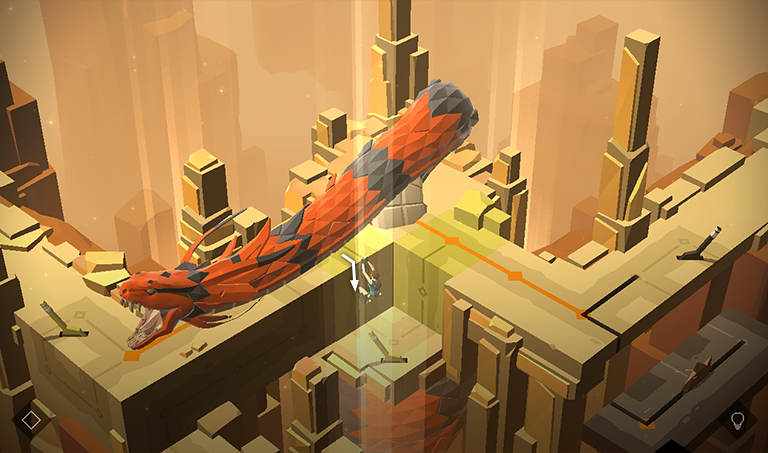
Drop and hang from the end of the ledge as the huge reptile lunges toward you.
Climb to the left to give the QUEEN a turn to move away.
Then climb back to the right and pull up onto the ledge.
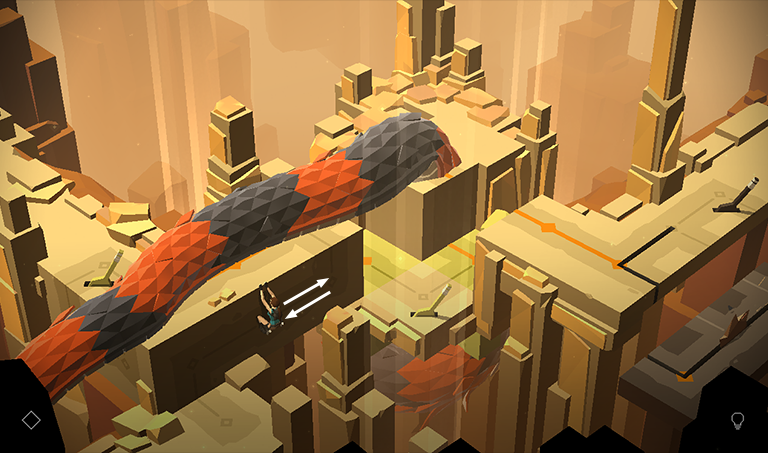
As you move forward along the orange line, the QUEEN comes up through the same hole again and prepares to strike.
Hang from the right side of the first yellow block to get out of the way.
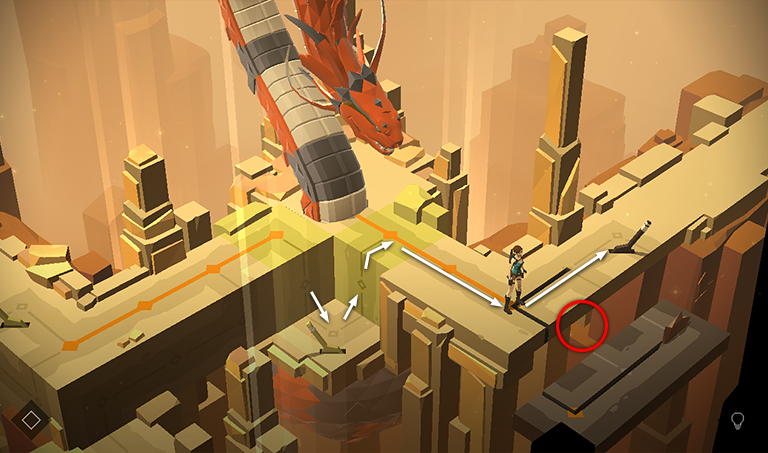
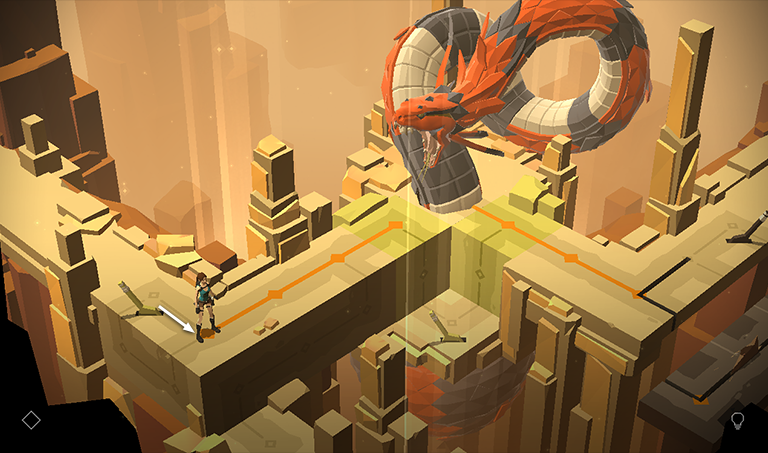
Climb down next to the second yellow lever but don't use it. Instead climb up on the right and follow the second orange line to its right end. Then move forward to the gray lever. Meanwhile, the QUEEN re-emerges from the hole, but when Lara moves off the orange line, the QUEEN waits for a better opportunity to strike.
If you missed the first RUBY (14/17) because you were distracted by the MASSIVE SNAKE, smash the vase under the ledge with the lever now to get it.
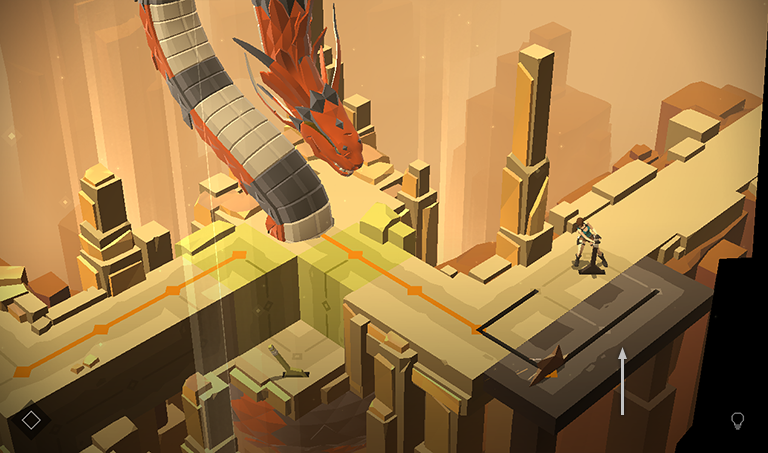
Use the lever to raise the gray platform with the spinning blade.
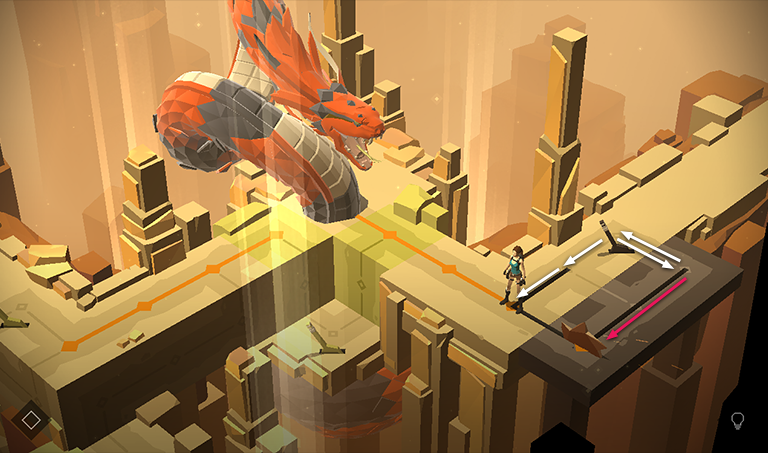
Move away from the lever to the lower right, then back to the lever (or move left then back to the right). Then move to the left twice until Lara is standing on the orange line. The point is to spend four turns so the blade ends up on the left side of the gray platform. When the QUEEN sees Lara standing on the line, she rears back, ready to strike.
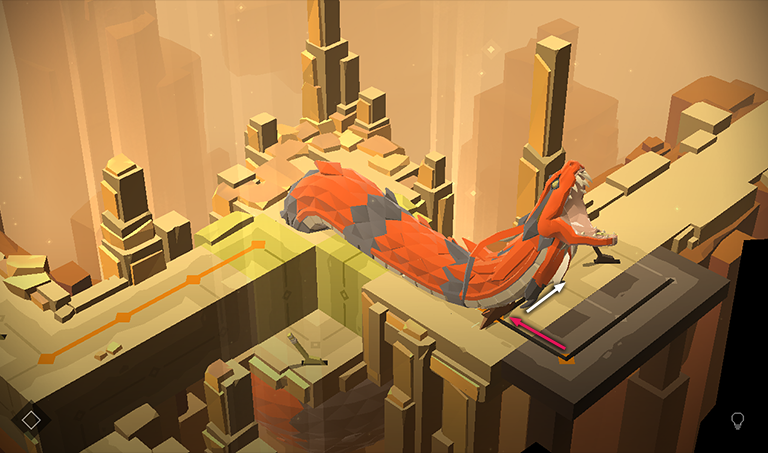
Step back to the right, off the orange line, as the QUEEN lunges. Her attack takes her directly into the path of the blade. Ouch! She retreats into the hole, which now becomes the exit.
To escape without running into the blade, move back toward the lever, then to the lower right. As you do, the blade moves to the right then back to the left.
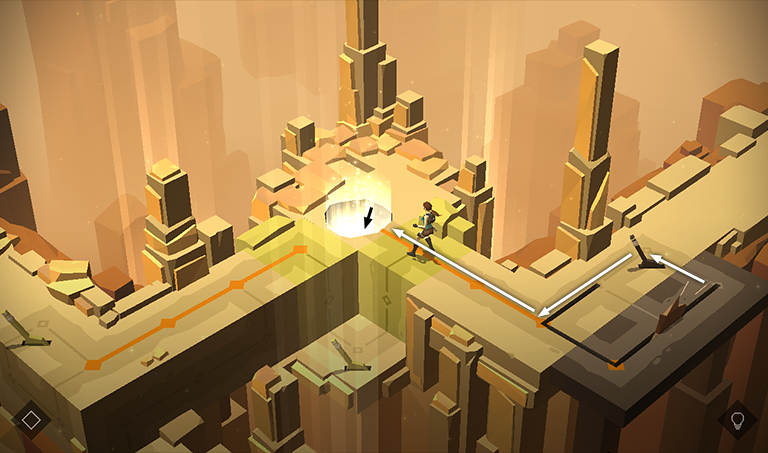
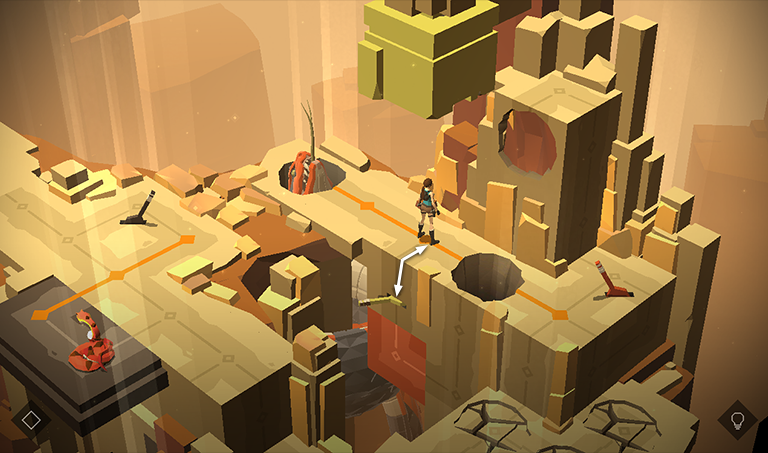
Now move back to the lever, then left twice to the orange line. Proceed to the left and drop into the hole.
NOTE: If Lara dies during the queen's second appearance, the timing for this section is a little different. The game reloads with Lara near the middle lever with the yellow blocks retracted. Pull the lever to extend the blocks. Climb up on the right, then immediately drop back to avoid the QUEEN's attack. Climb down near the lever. Then climb back up and follow the orange line to the right as the QUEEN moves back around for another go. Use the gray lever to raise the platform with the blade, which this time is positioned in the middle of the gray platform. Then move to the lower right, then back to the lever, to the lower right again, then back to the lever, to the lower right a third time, then back to the lever. As you spend these turns, the blade blade moves back to the middle of the gray platform heading to the left. Step forward onto the orange line to make the QUEEN rear up. Meanwhile the blade moves to the left side of the gray platform. Then move back toward the lever as the QUEEN lunges into the spinning blade.
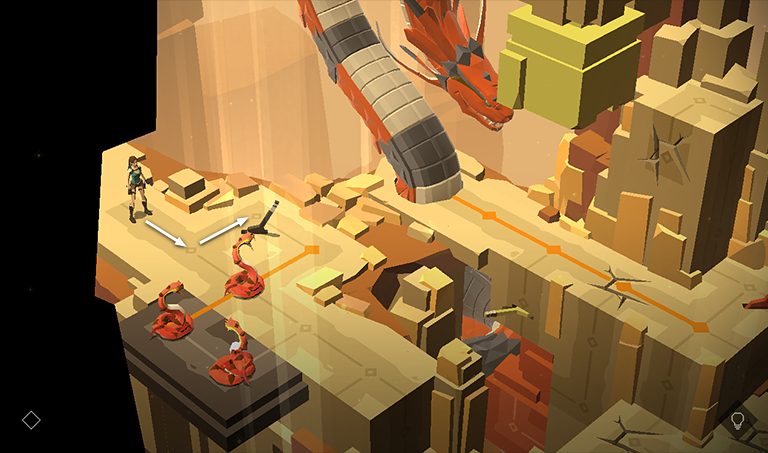
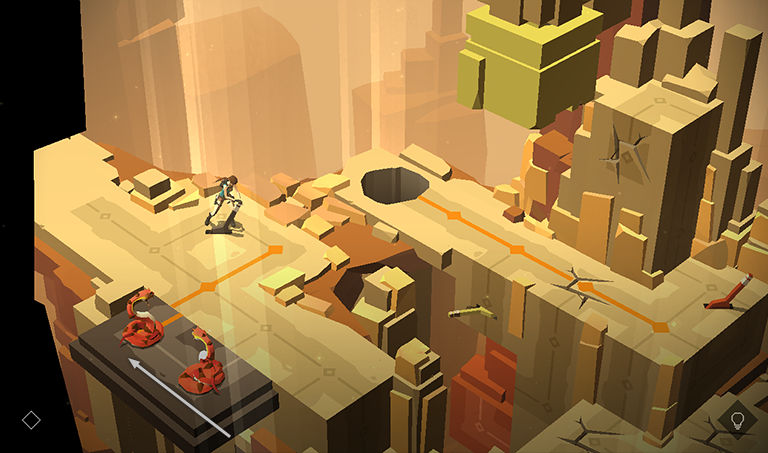
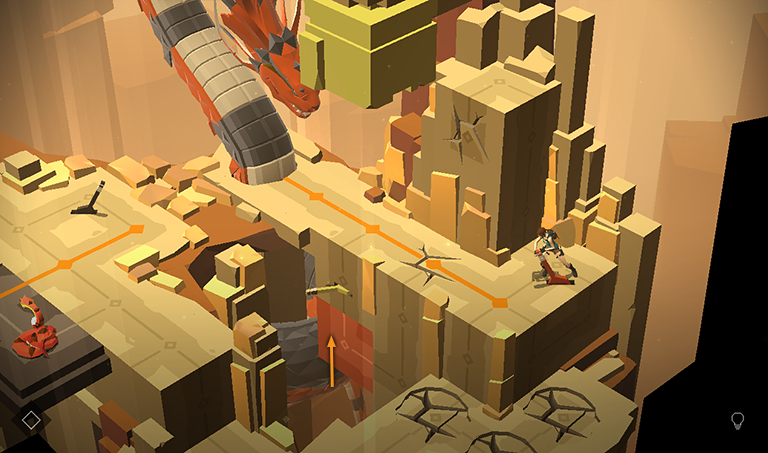
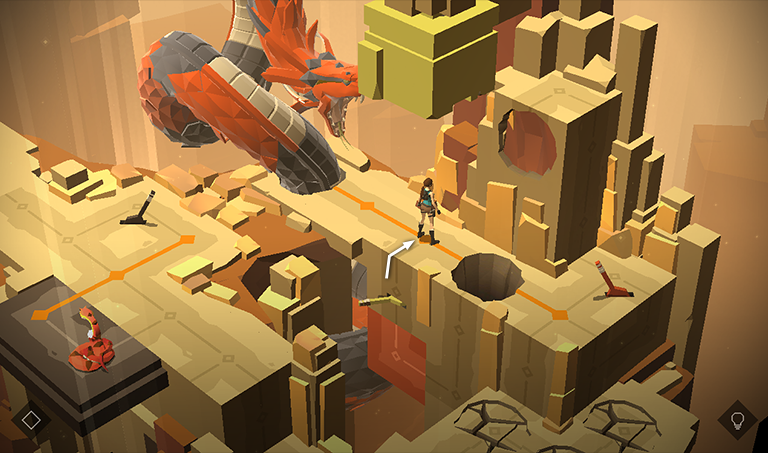
In the next area, step forward, then right toward the lever.
Pull the lever to shift the gray platform with the 2 snakes on it to the right.
Move back to the left and step forward to kill the snake on the tan walkway.
In dispatching the snake, Lara moves onto the orange line and the QUEEN notices her. Move back to the left to avoid her strike. Then move back to the lever as she slithers away.
Use the lever again to move the gray platform back to the left.
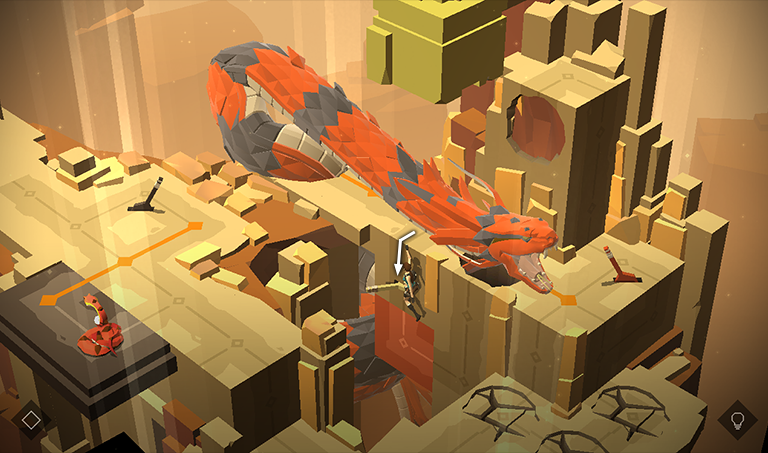
Now move back and forth from the lever to the orange line several times until the QUEEN reappears in the hole and rears back, mouth open and ready to strike. Move back to the lever once more...

...as the QUEEN attacks, gobbling up the snake on the left.
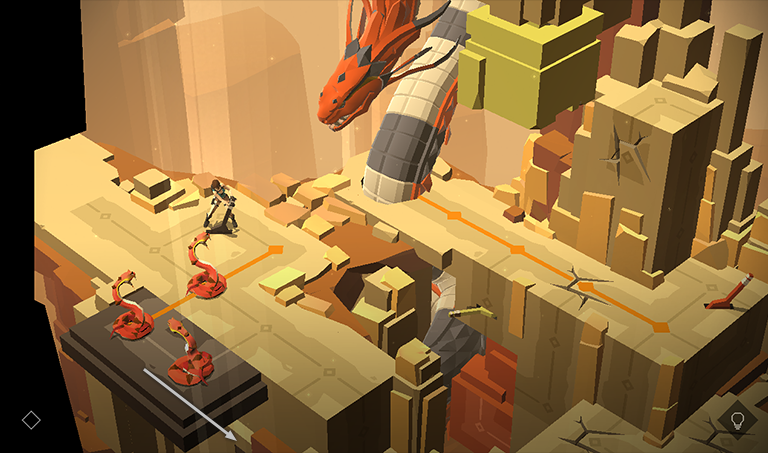
Take a step to the left to give the QUEEN a turn to slither away.
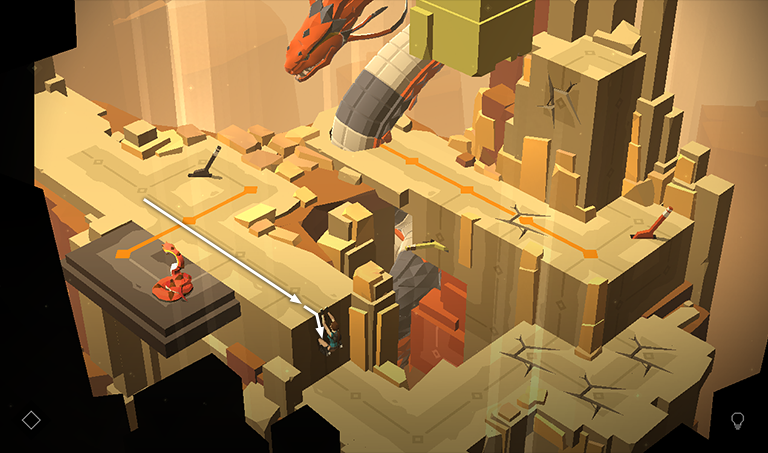
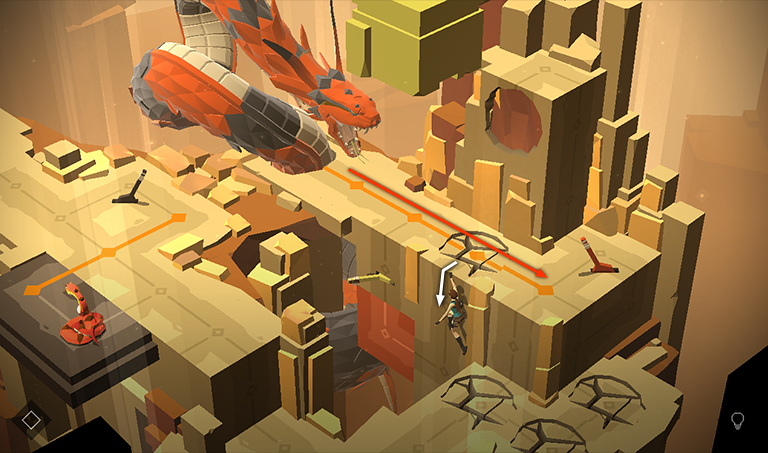
Head to the lower right, past the remaining snake, and drop down onto the lower ledge.
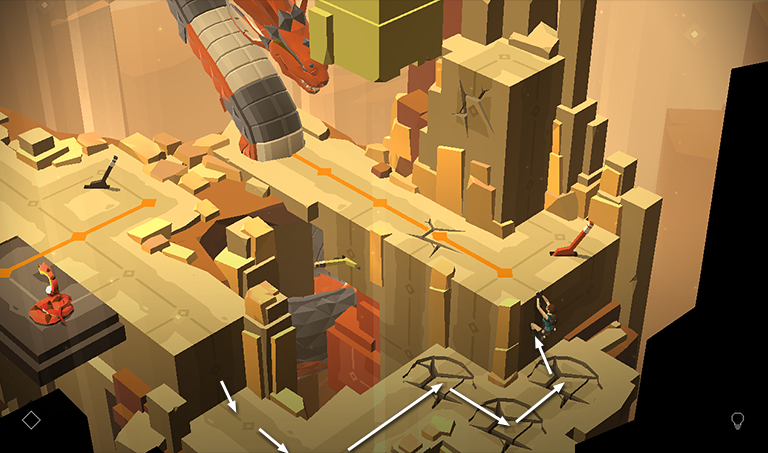
Follow the lower ledge around to the right, stepping on all 3 cracked floor tiles. When you reach the third crack, grab onto the ledge with the long orange line but don't pull up yet.
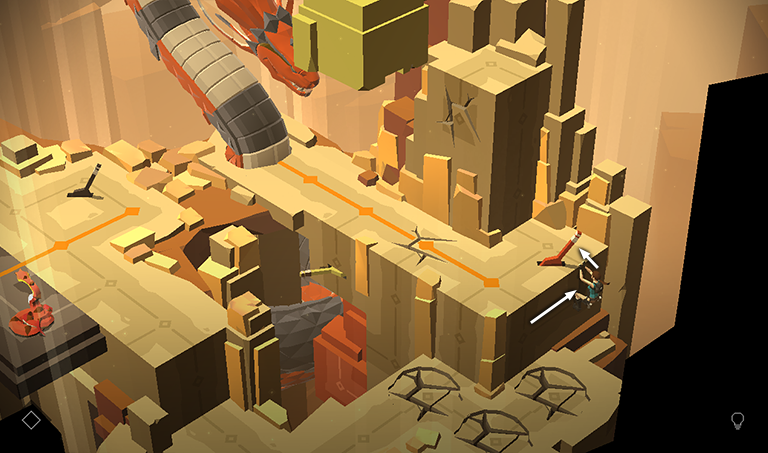
Climb along the ledge to the right so the QUEEN doesn't see Lara. Then pull up next to the orange lever.
Use the orange lever to slide the orange panel below the walkway up toward the green lever.
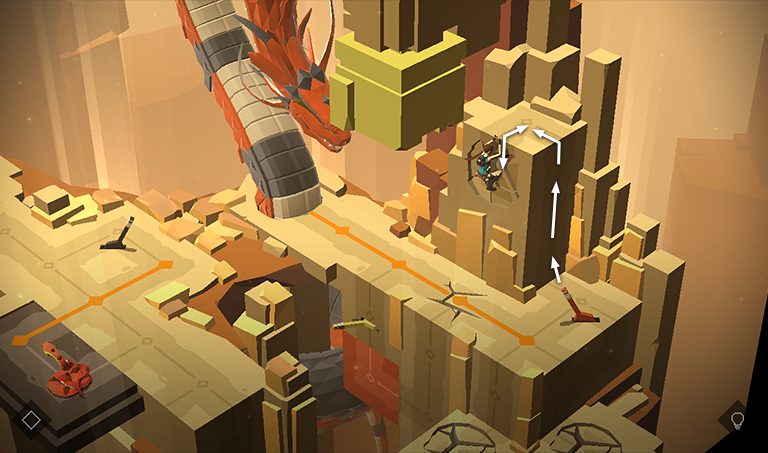
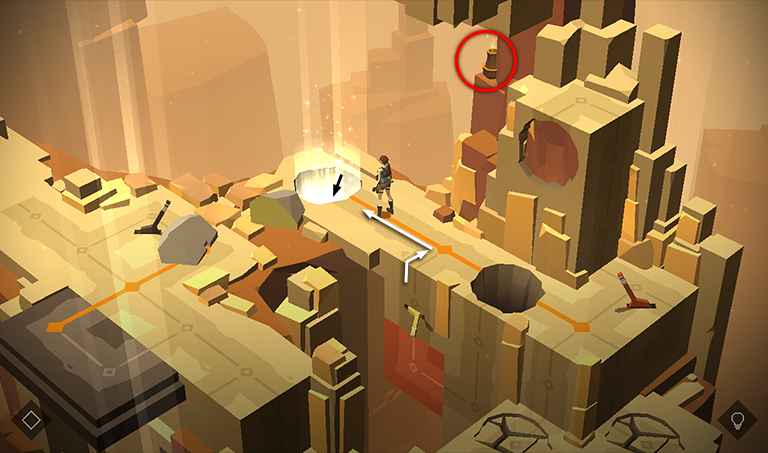
Climb the wall next to the orange lever. Then hang from the edge in front of the cracked wall and pull up.
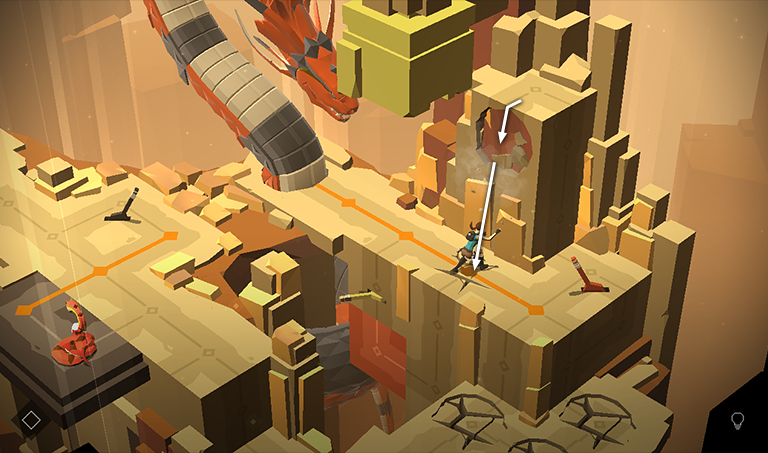
Hang from the edge again, causing the cracked wall to break so Lara falls onto the cracked floor below.
As soon as Lara lands on the walkway, the QUEEN notices her and gets ready to strike. Drop back and hang from the edge to avoid the attack.
Climb down, then left, then up toward the green lever as her majesty slithers away. Don't use the lever yet. (If you do, just kick it again to return it to its original position.)
Pull up onto the ledge and drop back, giving the QUEEN time to return to her hole.
Pull up again to get her attention.
Then drop back once more as she strikes.
Now kick the lever to drop the green block, squashing the QUEEN and chasing her away again.
Pull up and break the vase that was previously hidden by the green block to obtain another RUBY (15/17). Then drop through the glowing hole.
†UPDATE HISTORY: 9/13/15 - Walkthrough first posted, along with video.
WAS THIS WALKTHROUGH HELPFUL? If not, I apologize and invite you to contact me with any questions. If you need help right away, I recommend the r/TombRaider subreddit. Other fan-run forums are listed at tombraiders.net/stella/community.html. If this site was useful, please consider supporting it financially or in other ways. For details, visit tombraiders.net/stella/support.html. As always, I welcome your corrections/suggestions. Thank you!
Copyright © - Stellalune ( ). Screenshots were made using the Andy Android emulator. Feel free to copy or print this walkthrough for personal use. Share it with friends if you like, but please include this credit line so people can send me their feedback. No part of this walkthrough may be reproduced on another site without permission. Follow this link for details about this site's advertising and privacy policy.
Stella's Tomb Raider Site: tombraiders.net.