STELLA'S LARA CROFT GO WALKTHROUGH - Android, iOS, PS4 and Vita, Steam, and Windows Phone/PC/Tablet
MAZE OF STONES - PART 6: THE DAM'S EDGE
Updated: 9/7/15(†)
Relic Fragments: 1
Gems: 3
Follow this link for my video walkthrough.
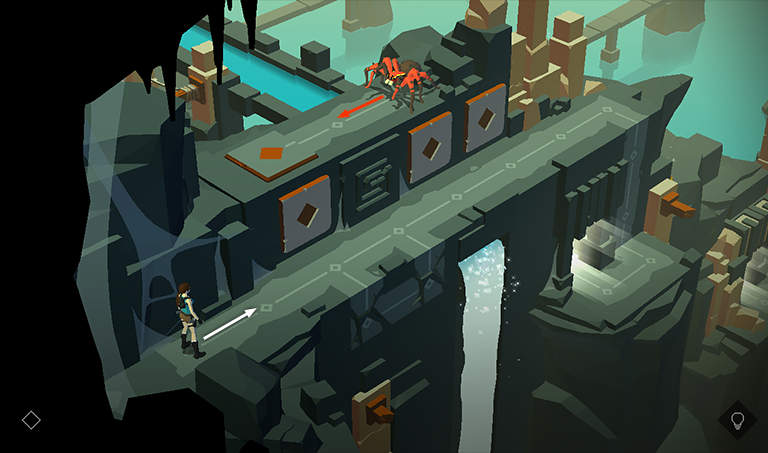
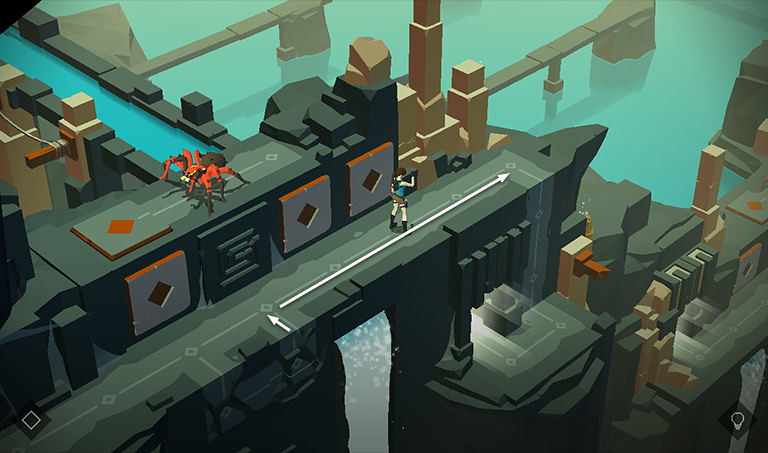
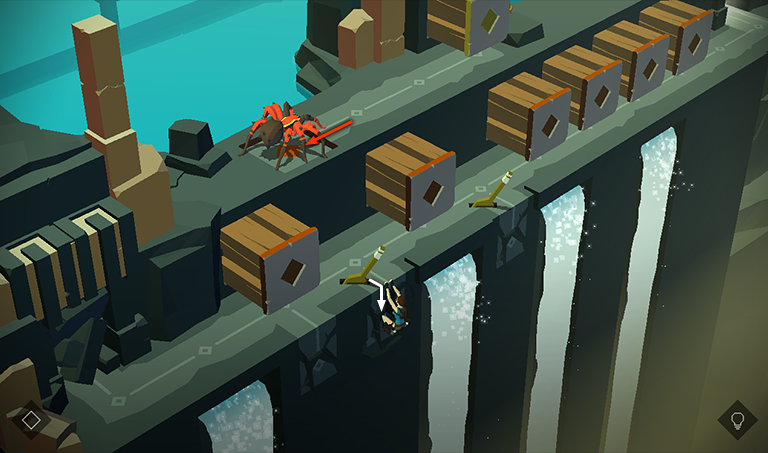
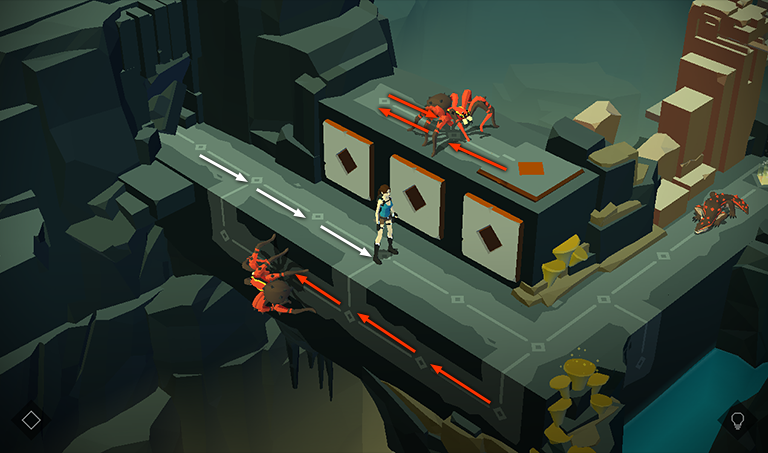
The pressure pad on the ledge with the spider controls all 3 block traps on the ledge where Lara is standing. To cross safely, move to the right one space. As you do, the spider moves to the left once.
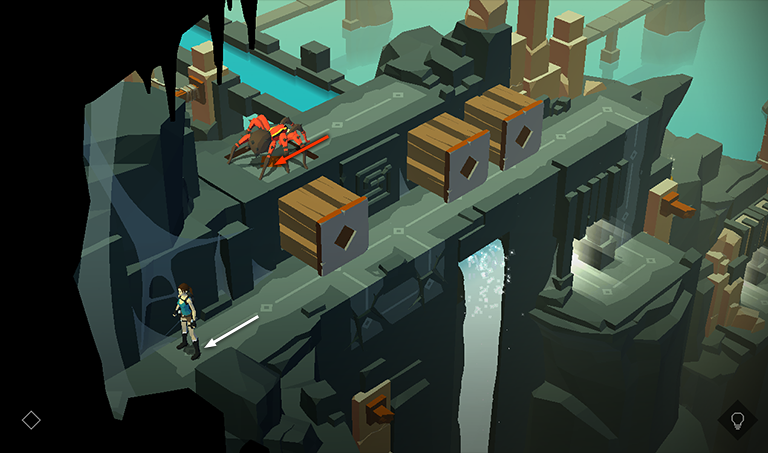
Then move back to the left one space, as the spider moves onto the pressure pad, triggering the 3 blocks.
Move to the right three spaces. Up on its ledge, the spider moves right twice, then back to the left once.
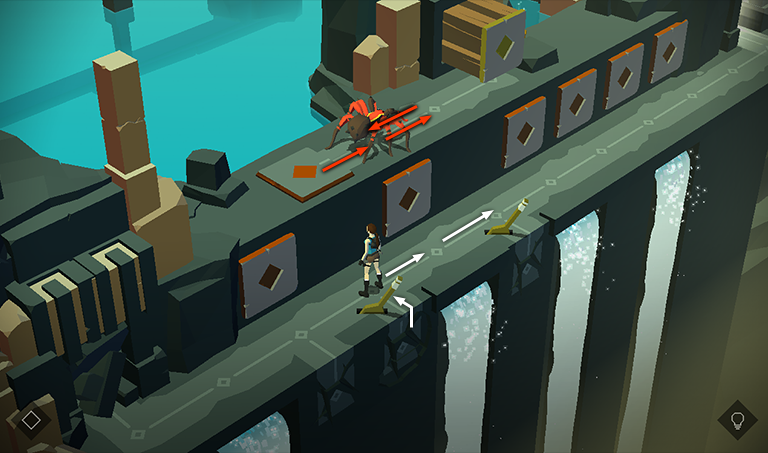
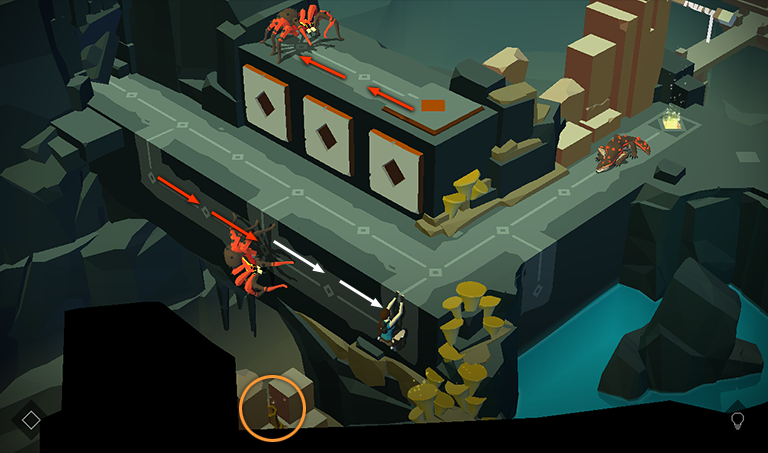
Drop and hang from the ledge above the second section of cracked wall as the spider moves to the left, triggering the block traps.
Now pull up and move to the right. By the time the spider moves back onto the pressure pad, Lara should be clear of the block traps.
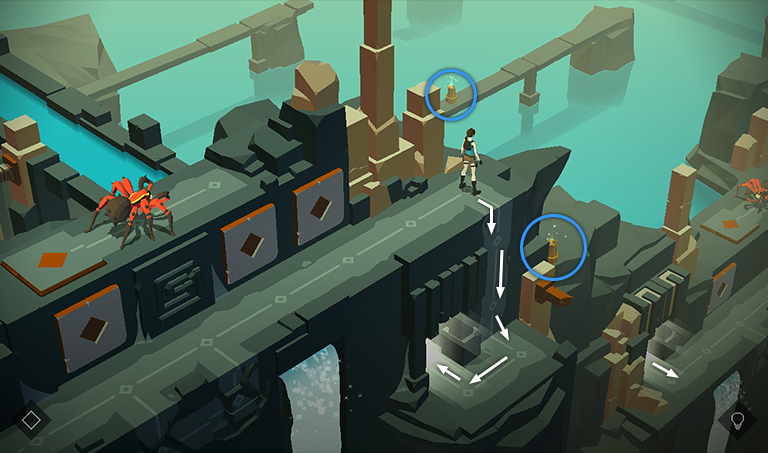
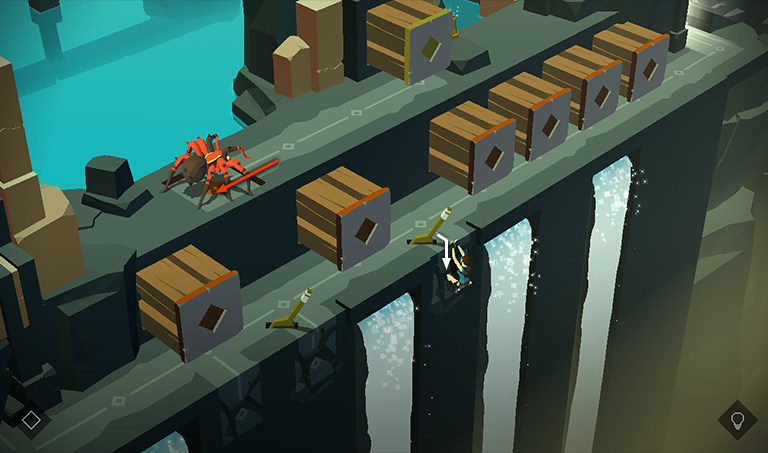
Break 2 vases below—one is on the narrow bridge in the background just above Lara's head; the other is below on the right—to collect 2 SAPPHIRES (14 and 15/32). Then climb down and go through the doorway to emerge on the ledge far below on the right.
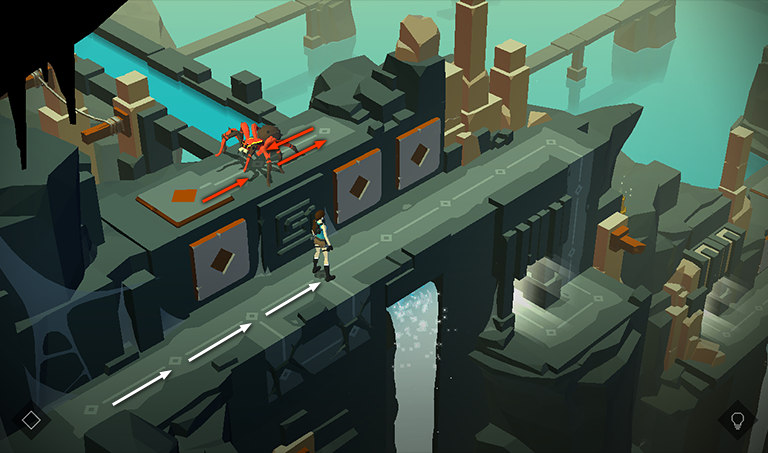
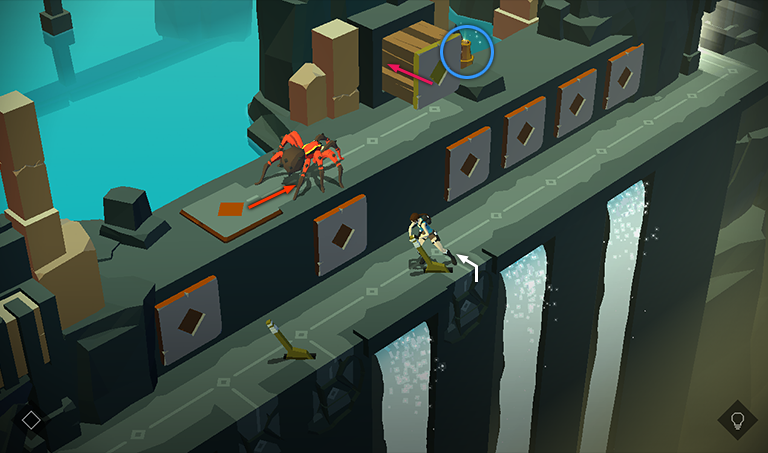
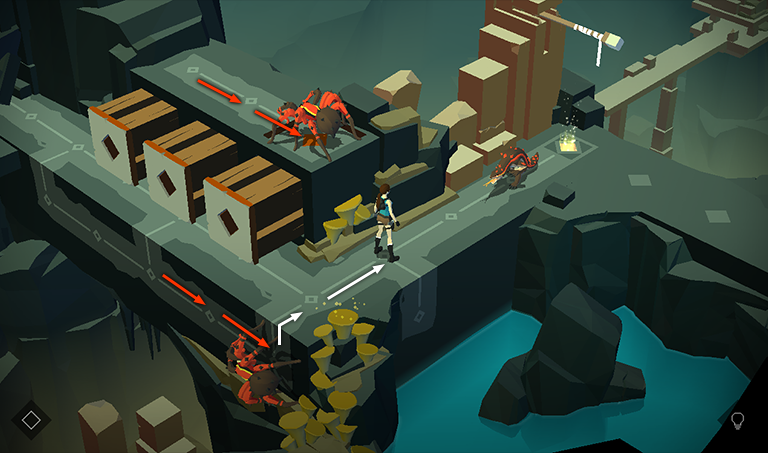
When you arrive, the spider on the upper ledge is standing on the pressure pad that activates the 6 block traps ahead. The single block on the upper level is extended.
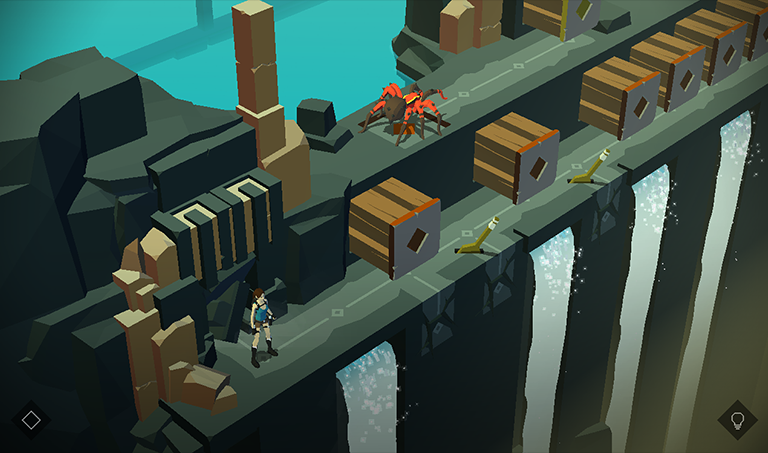
Move three spaces to the right, until Lara is standing next to the first lever, but don't pull it. (The lever retracts the block on the upper ledge. If you pull it by mistake, just pull it again to extend the block again. You need the block where it is to limit the spider's movement.) As you just moved to the right, the spider moved to the right twice, then back to the left once.
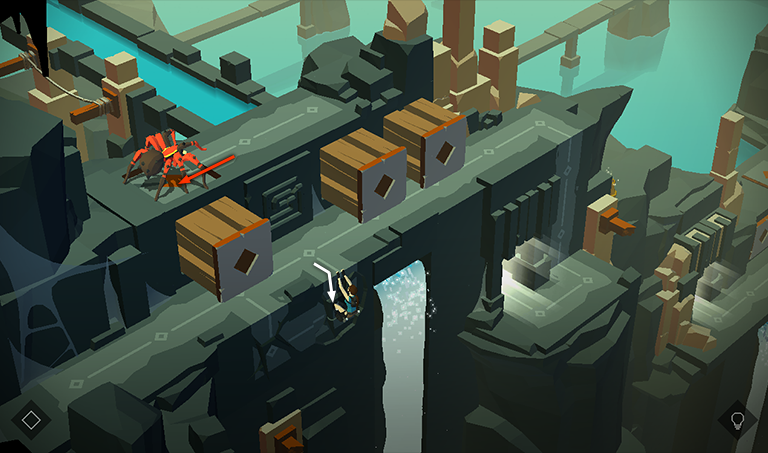
Hang from the edge near the lever, breaking the cracked wall below. As you do this, the spider moves onto the pressure pad, triggering the block traps.
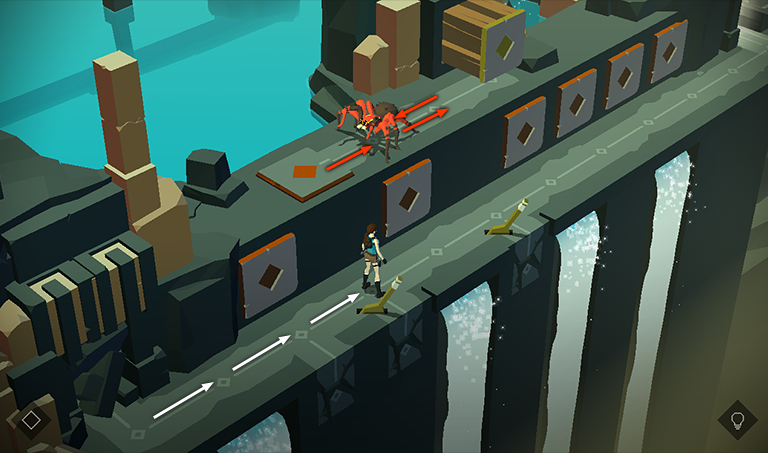
Pull up and move to the right twice until Lara is standing next to the second lever. Meanwhile, the spider moves two spaces to the right, then one to the left.
Hang from the edge near the second lever, breaking the cracked wall below. As you do this, the spider moves onto the pressure pad, triggering the block traps again.
Climb back onto the ledge and pull the second lever to retract the block on the ledge above, revealing an vase, which you can then smash to get a SAPPHIRE (16/32).
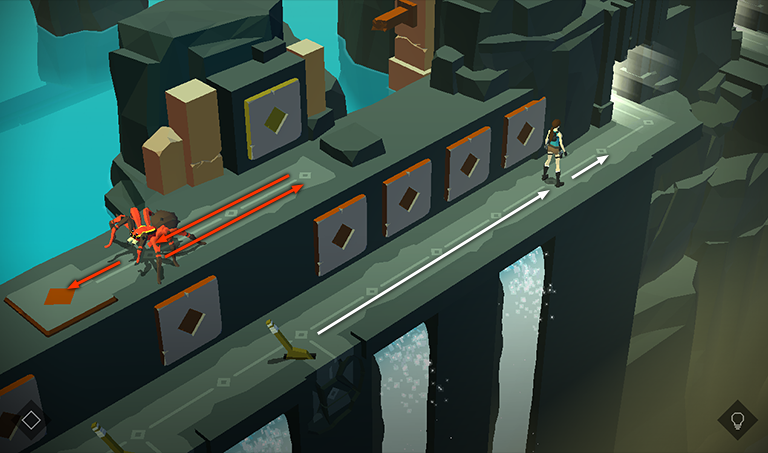
With the upper block out of the way, the spider's path is one space longer. So as you move to the right, past the 4 block traps, the spider moves right, then left. By the time it reaches the pressure pad, Lara will have cleared the traps.
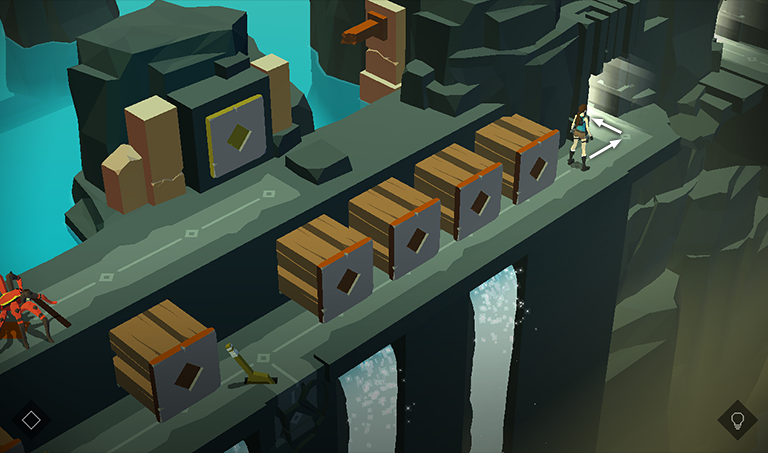
You can then proceed safely through the doorway ahead.
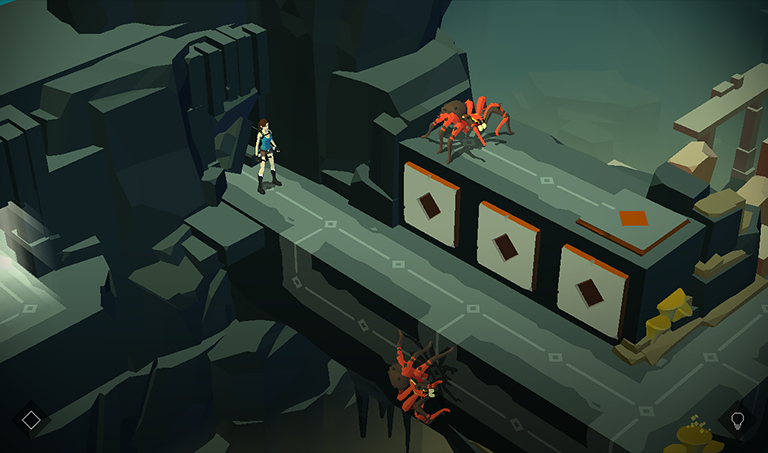
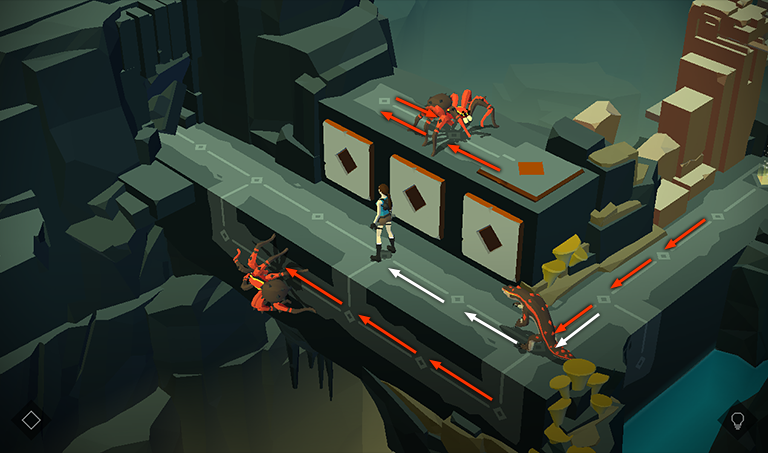
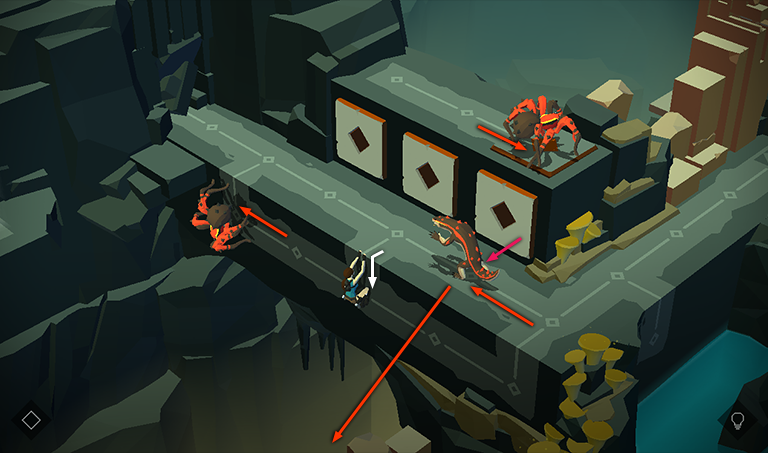
Lara emerges on a ledge with spiders above and below. As in the previous area, the pressure pad on the upper ledge activates the 3 block traps on the ledge where Lara is standing.
Step forward then back. As you do this, the 2 spiders each move one space to the right, so the spider on the upper ledge steps on the pressure pad, triggering the blocks.
Now move three spaces to the right so Lara ends up standing in front of the middle block trap. As you do this, the spider above moves twice to the left then once to the right. The spider below moves three spaces to the left.

Drop and hang from the edge below
the middle block trap as the spider above moves onto the pad triggering the traps. Meanwhile, the spider below, moves to the left end of its path and turns around.
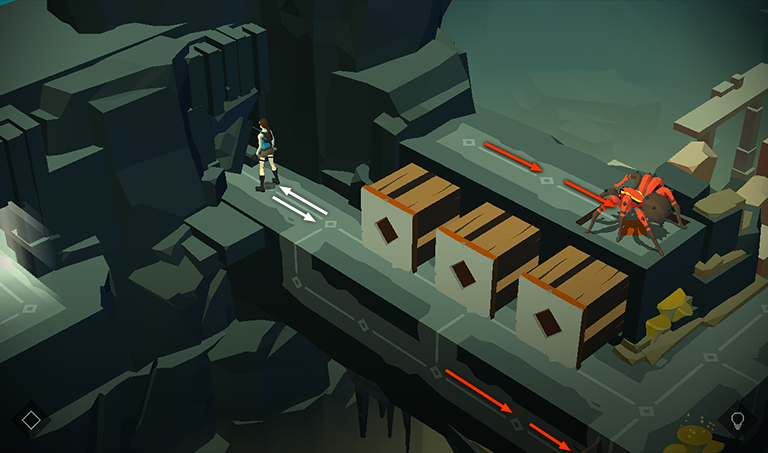
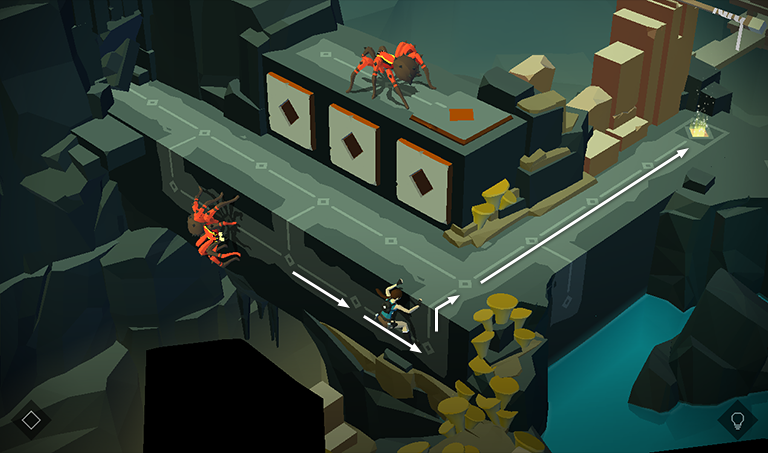
Climb twice to the right. As you do this, the spider above moves two spaces to the left, and the other spider moves two spaces to the right. Before pulling up, break the vase in the low area behind Lara to get a fragment of THE FROZEN SPIDER relic (6/12).
Climb onto the ledge and step forward once to get the attention of the lizard blocking the path to the level exit. Meanwhile, the spiders have both moved two spaces to the left, causing the one above to trigger the block traps again.
To deal with the lizard without getting Lara killed, step back to the corner. Then move twice to the left, along the ledge in front of the block traps, so Lara ends up standing in front of the middle block. Meanwhile, the lizard moves three spaces forward, to the corner. The spider above moves twice to the left, then once to the right. The spider below moves three spaces to the left.
Now hang from the ledge once more. As you do this, the lizard moves to the right, stepping in front of the first block trap. The spider above moves to the right, triggering the traps and knocking the lizard off the edge. The spider below moves to the left and turns around.
From here on, it's clear sailing. Climb twice to the right, pull up onto the ledge, and proceed to the exit.
†UPDATE HISTORY: 9/1/15 - Walkthrough first posted.
9/7/15 - Added video walkthrough.
WAS THIS WALKTHROUGH HELPFUL? If not, I apologize and invite you to contact me with any questions. If you need help right away, I recommend the r/TombRaider subreddit. Other fan-run forums are listed at tombraiders.net/stella/community.html. If this site was useful, please consider supporting it financially or in other ways. For details, visit tombraiders.net/stella/support.html. As always, I welcome your corrections/suggestions. Thank you!
Copyright © - Stellalune ( ). Screenshots were made using the Andy Android emulator. Feel free to copy or print this walkthrough for personal use. Share it with friends if you like, but please include this credit line so people can send me their feedback. No part of this walkthrough may be reproduced on another site without permission. Follow this link for details about this site's advertising and privacy policy.
Stella's Tomb Raider Site: tombraiders.net.