STELLA'S LARA CROFT GO WALKTHROUGH - Android, iOS, PS4 and Vita, Steam, and Windows Phone/PC/Tablet
THE ENTRANCE - PART 3: A RUINED ROUTE
Updated: 9/6/15(†)
Relic Fragments: 1
Gems: 2
Follow this link for my video walkthrough.

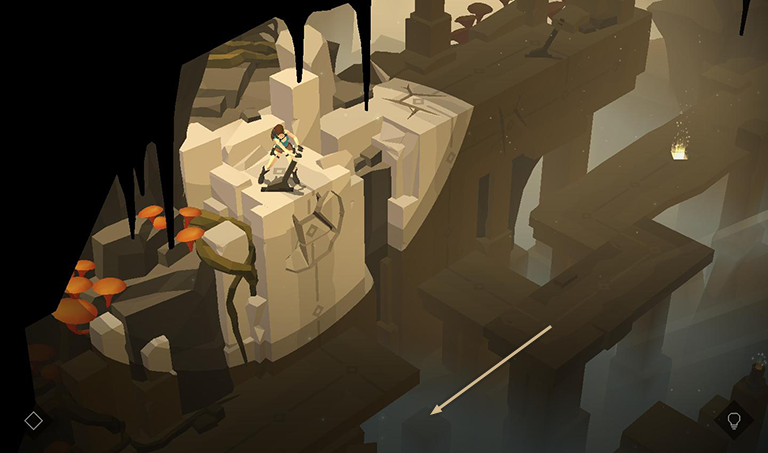
Move forward onto the cracked floor. You'll soon encounter more of these cracked tiles. Lara can only pass over each cracked tile once. There's a breakable vase in the background on the right that contains a QUARTZ gem (3/6). If you miss it at first, don't worry. You'll get closer soon.
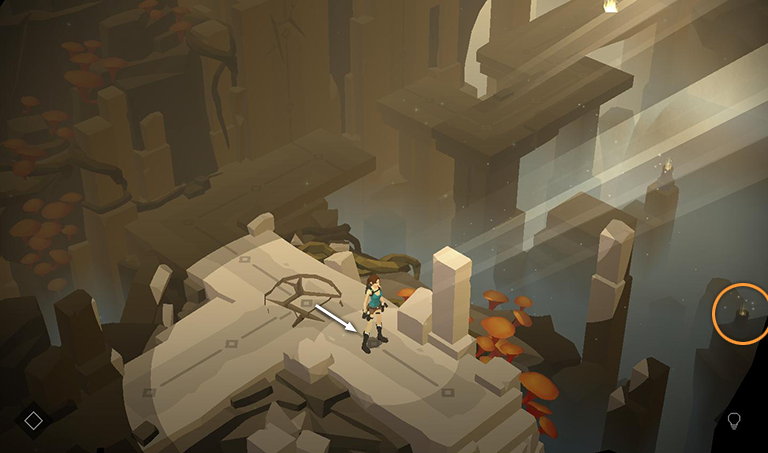
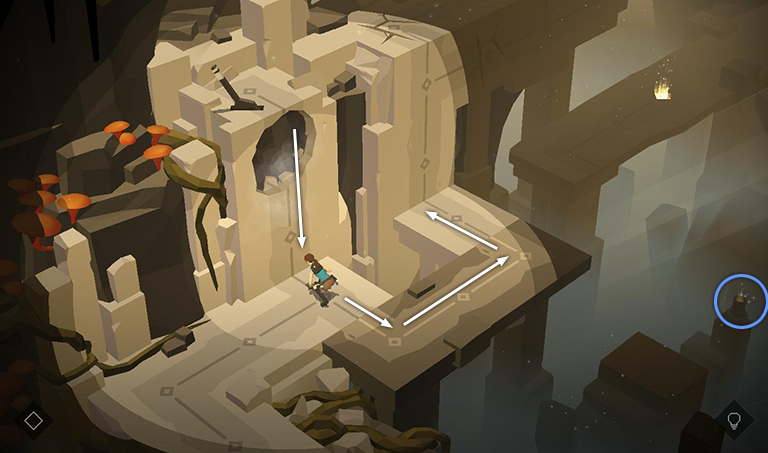
If she tries to pass a cracked section more than once, the floor will collapse, killing Lara and forcing you to restart the level. You may want to try crossing this tile and heading to the right so you can catch a glimpse of a hidden vase. Smash it to recover another piece of THE GILDED SKULL (3/4).
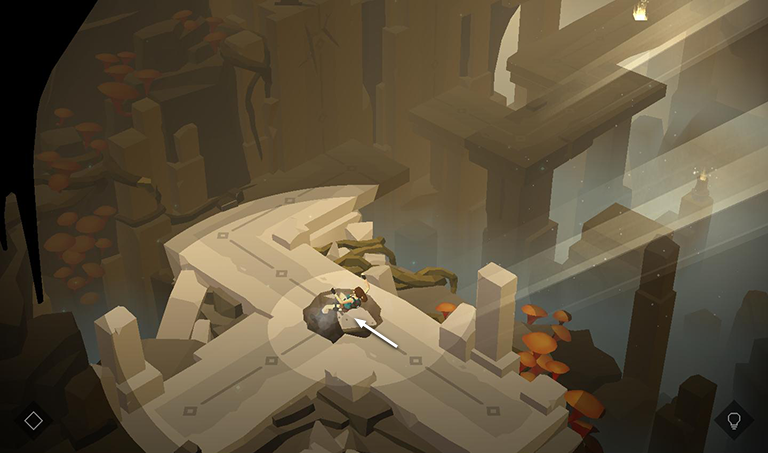
You'll then have to sacrifice Lara by stepping back onto the cracked floor. The level will then reload and you can start over. Once you have the relic fragment, there's no need to get it again.
Alternatively, once you know approximately where the vase is, you can advance onto the cracked floor and then tap/click on the edge of the screen near the vase in order to break it, even though you can't see the entire thing.
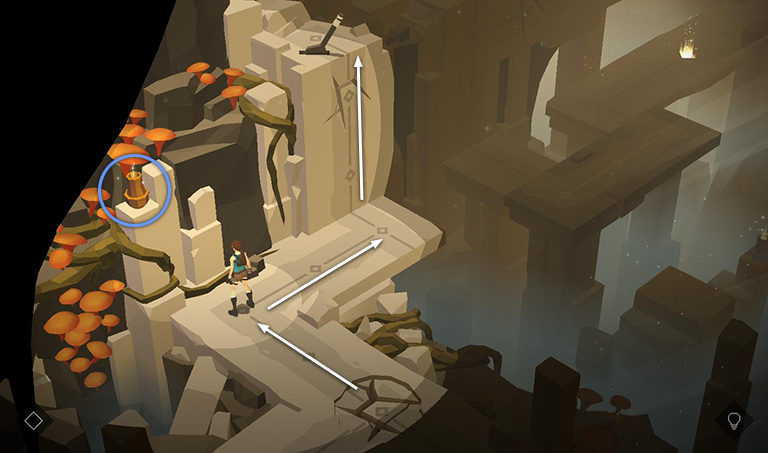
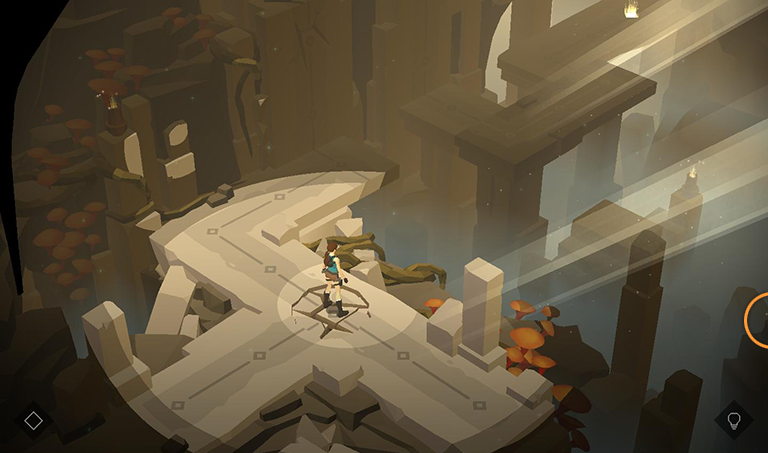
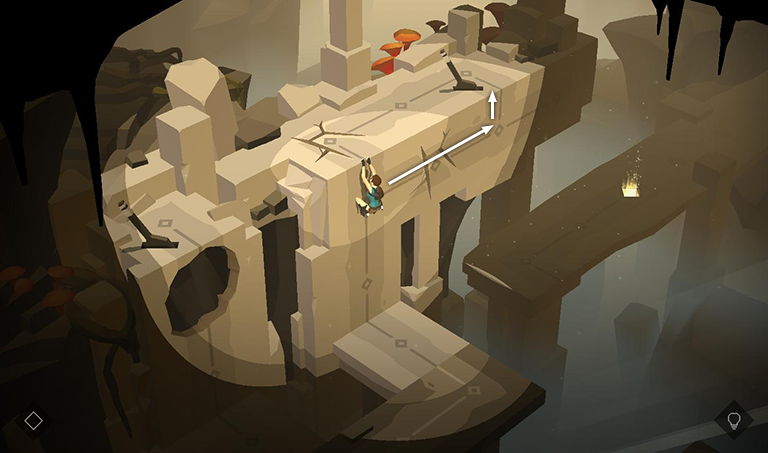
Now continue to the left. Smash the vase on the shelf to collect another piece of QUARTZ (4/6). Then climb the wall to reach the lever. As you climb, you pass a section of cracked wall.
Pull the lever to shift the walkway below toward you.
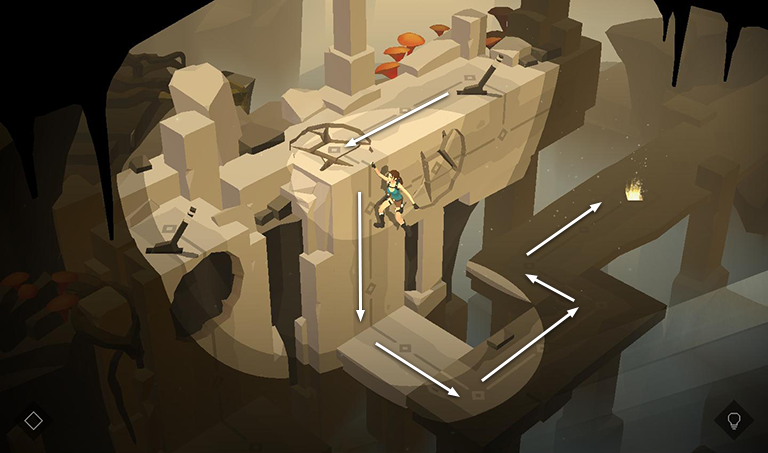
Climb back down the way you came. The cracked wall collapses, but it's OK. As long as you pulled the lever, you won't need to climb onto this ledge again. Continue to the right, across the walkway you just moved. Also, if you didn't do so before, smash the vase in the darkness off to the right to get another QUARTZ. (This is gem 3/6, the same one noted in the first screenshot for this level.)
Now climb the wall until Lara is clinging onto the ledge above. Swipe right to shimmy along the ledge past a section of cracked wall. Then pull up next to a second lever.

Use the lever to shift the movable walkway back to its original position.
You can't go back the way you came, due to the cracked wall, so walk to the left along the top of the wall. When you reach the cracked floor, swipe down to drop to the walkway below. Continue to the right to exit the level.
NOTE: You could also do this sequence in reverse. Climb up onto the walkway first, pull the lever, drop and hang from the edge, shimmy left and then drop to the walkway. Either way, you'll only have to pass over each cracked tile once.
†UPDATE HISTORY: 8/28/15 - Walkthrough first posted.
9/6/15 - Added video walkthrough.
WAS THIS WALKTHROUGH HELPFUL? If not, I apologize and invite you to contact me with any questions. If you need help right away, I recommend the r/TombRaider subreddit. Other fan-run forums are listed at tombraiders.net/stella/community.html. If this site was useful, please consider supporting it financially or in other ways. For details, visit tombraiders.net/stella/support.html. As always, I welcome your corrections/suggestions. Thank you!
Copyright © - Stellalune ( ). Screenshots were made using the Andy Android emulator. Feel free to copy or print this walkthrough for personal use. Share it with friends if you like, but please include this credit line so people can send me their feedback. No part of this walkthrough may be reproduced on another site without permission. Follow this link for details about this site's advertising and privacy policy.
Stella's Tomb Raider Site: tombraiders.net.