Temple of the Cat - Outside Near the Step Pyramid
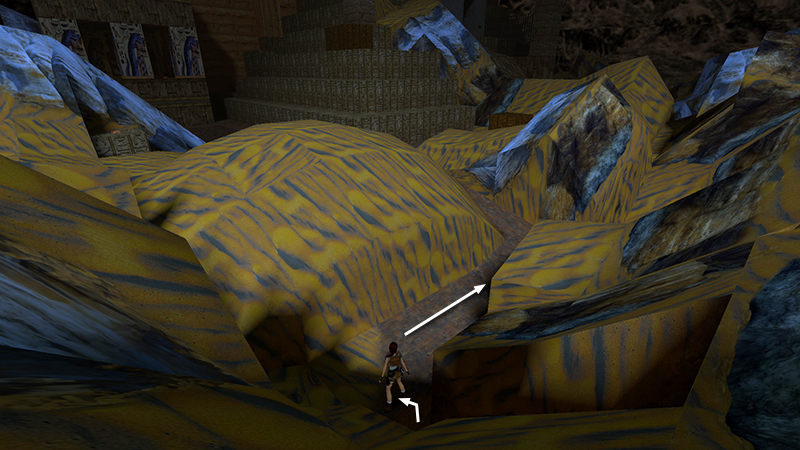
After obtaining secret #1 and climbing up into the desert, as shown in the previous section, follow the path to the right.
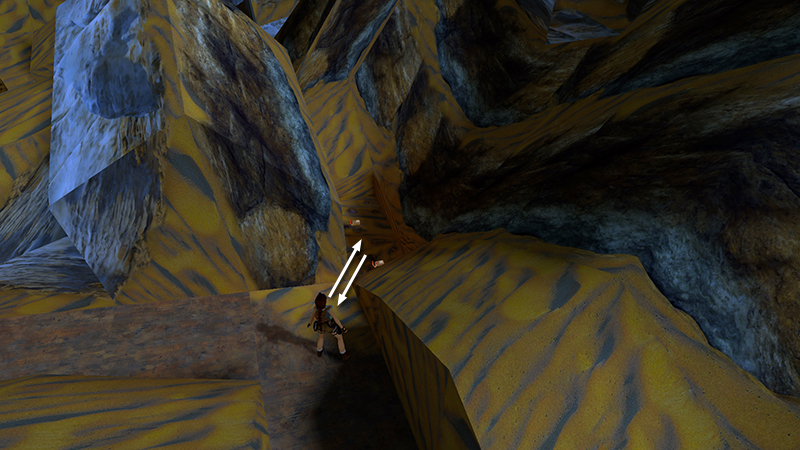
At the bend, jump through the gap between the rocks on the right into a small hollow, where you'll find 2 boxes of shells (9-10). Jump back through the gap...
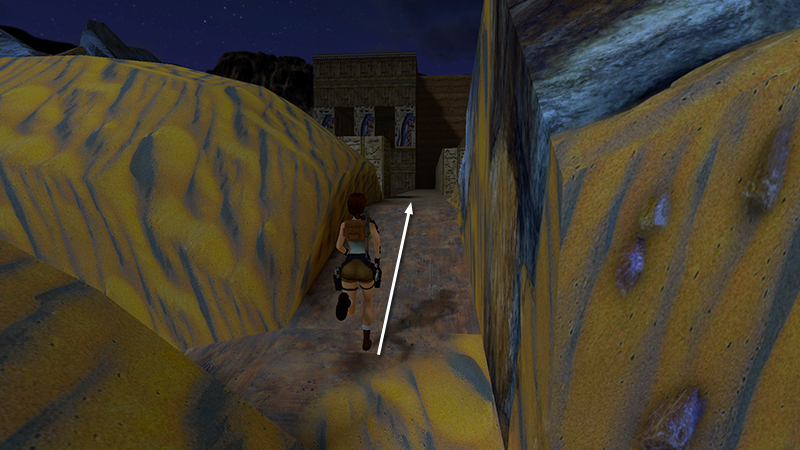
...and continue along the path. When you reach the carved block on the left side of the path...
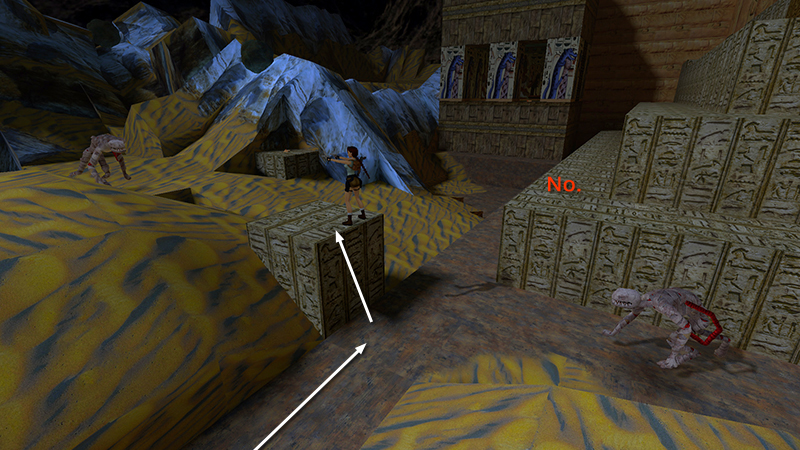
...2 mummies (5-6) spawn on either side of the pyramid. Climb onto the carved block to kill them from safety. If you jump up on the pyramid, you may run into a panther (7) as well. (See below.)
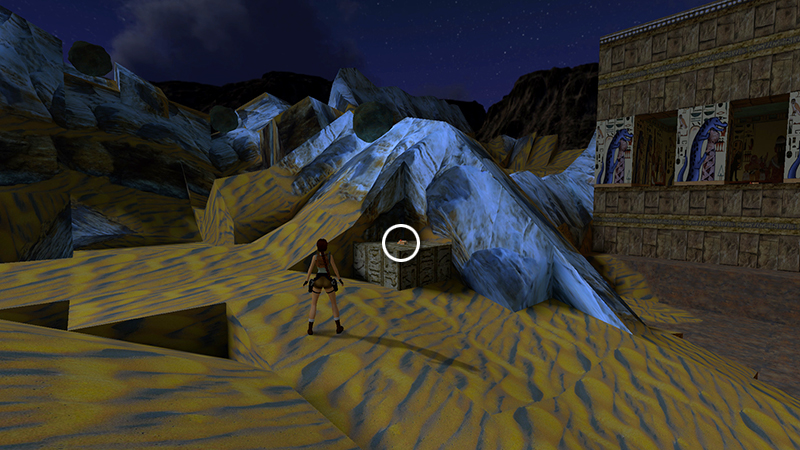
Pick up more shotgun shells (11) on the low block near the whitish rock outcropping.
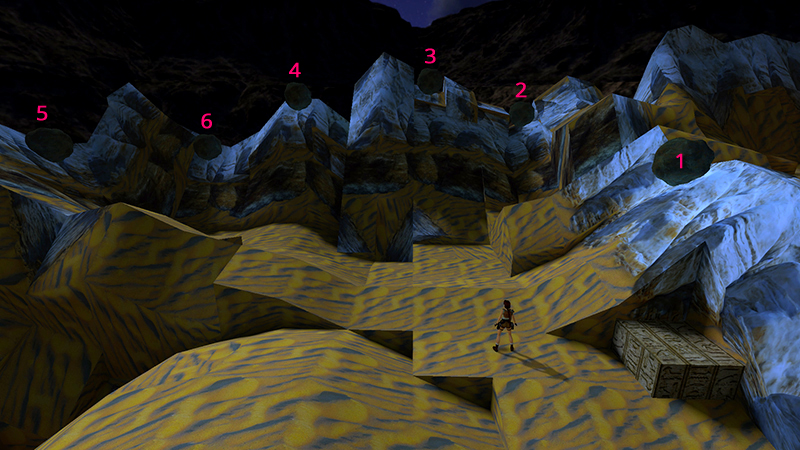
Off to the left (north), you'll notice 6 boulder traps ready to be sprung.
NOTE: There are 9 boulder traps in this level—6 in this area, 4 more later on—and 47 boulders across all 4 Unfinished Business levels. You must trigger them all for the "Roll, Action!" achievement/trophy.
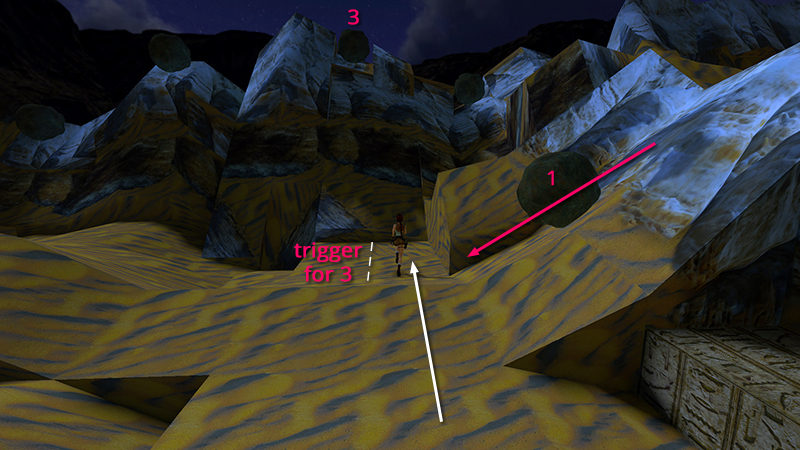
As you run forward to the far right (northeast) corner, the first boulder (1/9), perched on the eastern slope, rolls down behind you. (Be careful not to stray too far to the left as you go, or you'll risk triggering the third boulder prematurely.)
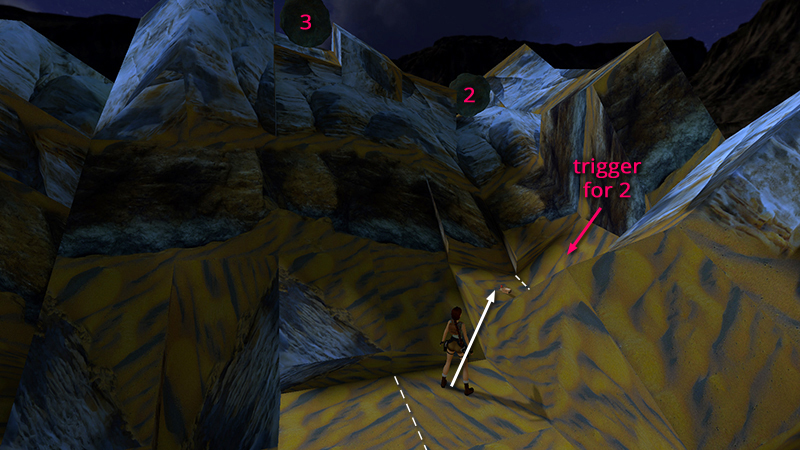
Jump up onto the corner ledge and pick up a box of shotgun shells (12). The second boulder (2/9), above this corner, only rolls when you jump onto the slope next to the shells (i.e., ahead when the boulder is on Lara's left), so you can avoid it if you like.
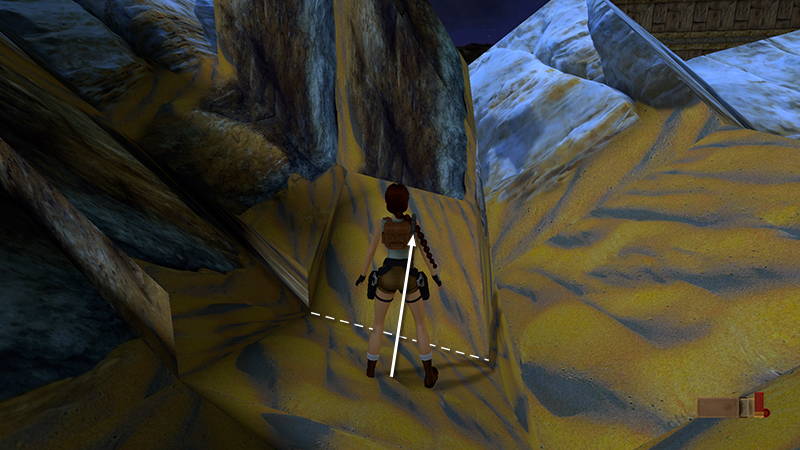
But if you're trying to trip every boulder for the achievement/trophy, jump forward onto the slope...
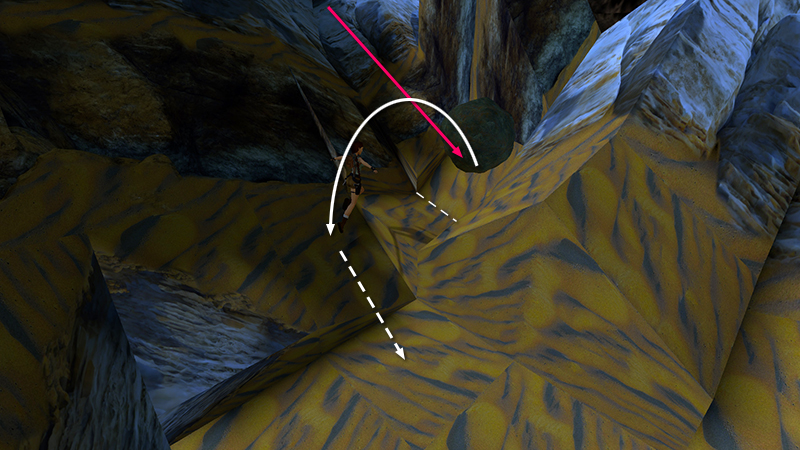
...then immediately backflip once to get out of the way.
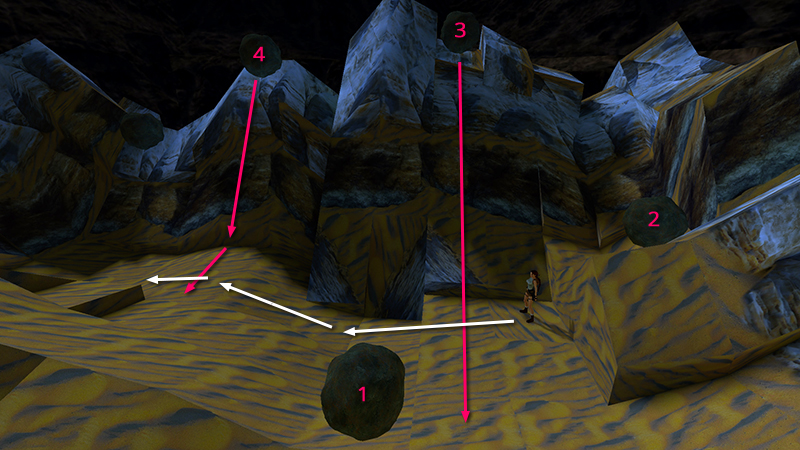
The next 2 boulders (3-4/9), high on the north slope, roll as you run past them. As long as you run straight ahead...
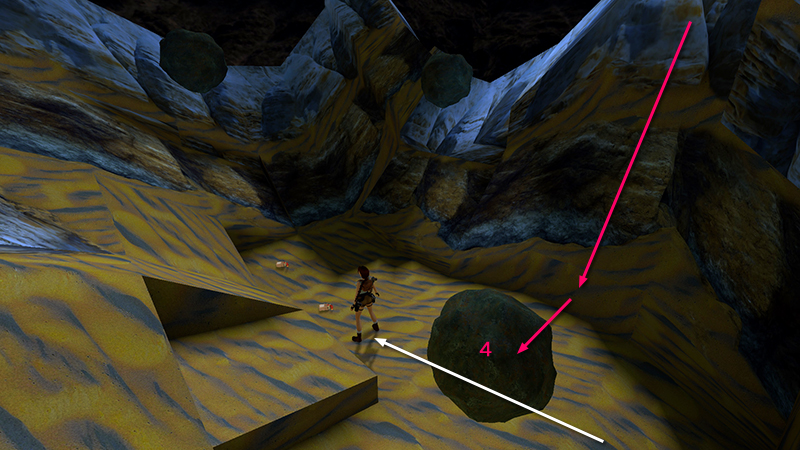
...to the 2 boxes of shotgun shells (13-14) in the northwest corner, the boulders won't do any harm.
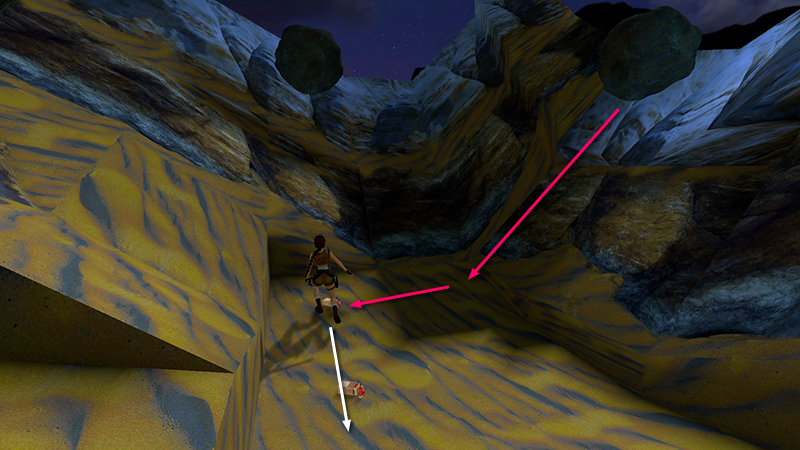
The last 2 boulders (5-6/9) are triggered one at a time when you pick up each box of ammo. It's probably safest to pick up the second box (i.e., the one in the corner) first. This trips the boulder on the right. Hop back to get out of the way.
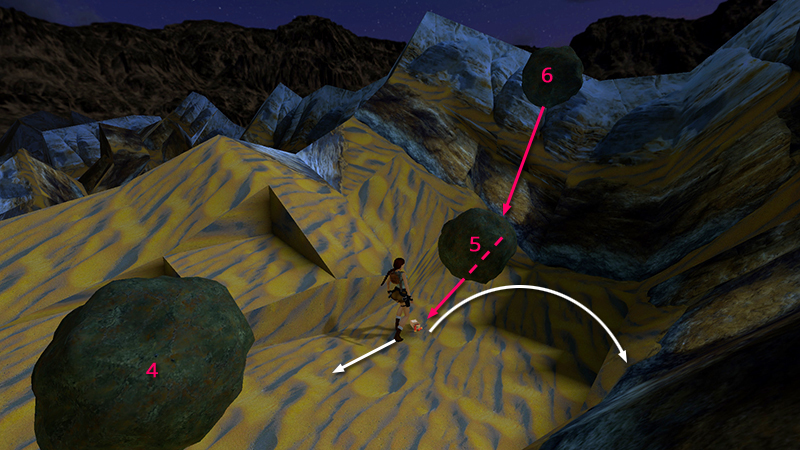
Then pick up the other box of shells, triggering the boulder ahead, and quickly hop back or side flip to the right.
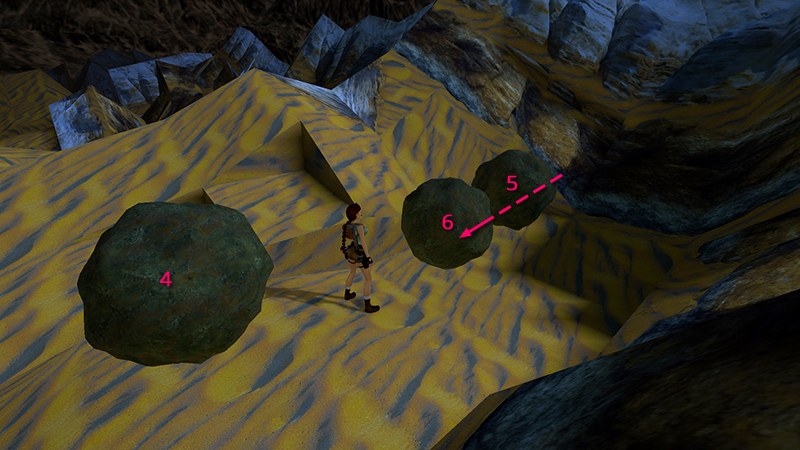
Note that the last boulder will roll through the previous one, so even if you triggered that boulder first, you still need to jump out of the way.
DARK MODE: I plan to add optional dark mode for these pages, but my current priority is updating the walkthroughs. Meanwhile, may I suggest a reputable dark mode browser extension, such as Dark Reader? (Download only from trusted sites, like darkreader.org or your browser's official add-on/extension site.)
Walkthrough text and diagrams copyright © Stellalune (email ). Feel free to copy or print this walkthrough for personal use. By all means, share it with friends, but please include this credit line so people can send me their feedback. No part of this walkthrough may be reproduced on another site without permission.